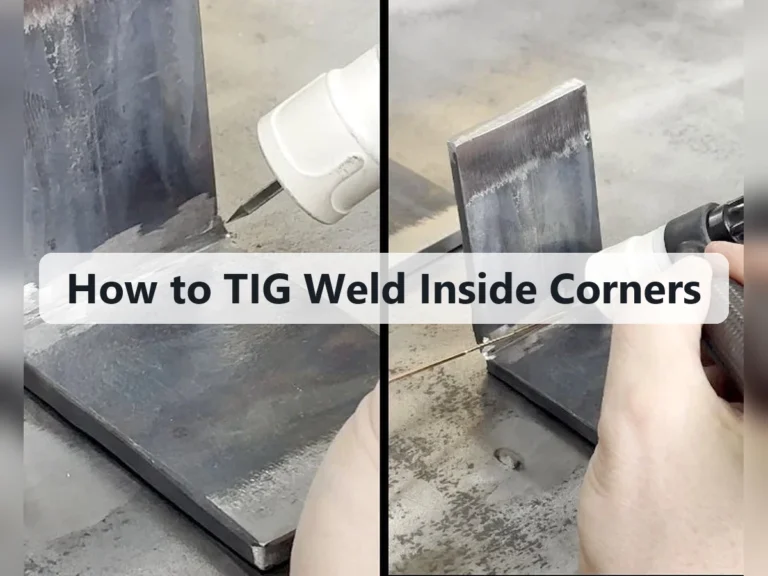
How to Tack Weld With a TIG Welder: Safe, Precise Beginner Steps
A tack weld is a small weld that holds two pieces in the correct position before you make the final weld. With a TIG welder, tacks can be clean, accurately placed, and easy to control, but the process exposes mistakes in fit-up or cleanliness immediately. A loose joint, contaminated tungsten, or excessive heat can make a simple tack frustrating for a beginner.
To how to tack weld with a TIG welder safely and consistently, prepare the joint, choose the correct polarity and shielding gas, establish a stable arc, and place short tacks without letting the parts move. The goal is not to create a finished weld in one pass. It is to make several sound holding points while keeping distortion and contamination under control.
This guide explains the equipment, joint preparation, machine setup, torch technique, and inspection checks in a practical order. It focuses on common steel and stainless-steel work, with notes for aluminum where the process differs. If the joint is structural, pressure-retaining, safety-critical, or made from an unknown alloy, stop at the preparation stage and use qualified welding guidance rather than relying on a beginner procedure.
At a glance
- Clean metal and tight, stable fit-up matter as much as amperage.
- Use short tacks placed in a balanced pattern to limit movement and heat buildup.
- Inspect every tack for full fusion, cracks, porosity, and unwanted tungsten contamination before final welding.
How to tack weld with a TIG welder
The method below assumes a TIG machine suitable for the metal, a properly prepared joint, and a work area where welding fumes and ultraviolet light can be controlled. For ordinary mild steel or stainless steel, TIG normally uses direct current electrode negative, often abbreviated DCEN, with pure argon shielding gas. Aluminum generally requires an AC-capable machine because its oxide layer behaves differently.
Tools you will need
- TIG welder with the correct torch, power lead, and work clamp
- Argon cylinder, regulator, flowmeter, and suitable gas hose
- Properly ground tungsten electrode and collet setup
- Clean stainless-steel wire brush, degreaser, and lint-free cloths
- Welding helmet with the correct shade, TIG gloves, flame-resistant clothing, and closed-toe leather footwear
- Clamps, magnets, or a fixture to hold the parts in alignment
- Filler rod matched to the base metal, if the joint design or fit-up requires filler
- Optional: foot pedal or fingertip amperage control for easier heat adjustment
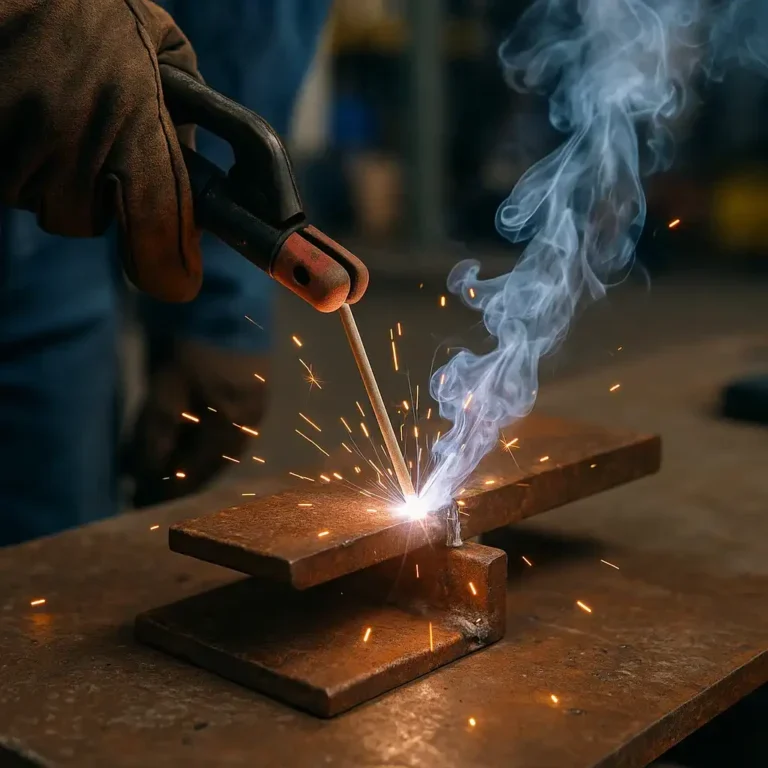
Step 1 Identify the metal and joint before powering the machine
Confirm what you are welding and how the pieces meet. A butt joint joins two edges, a lap joint overlaps two surfaces, and a fillet joint joins surfaces at an angle. The joint type affects access, torch angle, the amount of heat needed, and whether a fusion tack is appropriate.
For mild steel and stainless steel, use a DCEN process with argon. Aluminum usually needs AC and an aluminum-compatible filler rod; it also needs especially careful removal of surface oxide. Do not guess when the alloy is unknown, plated, painted, galvanized, or previously exposed to chemicals.
Coatings and residues can create dangerous fumes, and some materials require controlled procedures.
Check that the parts are thick enough to tolerate the selected process. Very thin sheet can burn through before a tack forms, while a heavy joint may draw heat away so quickly that the tack sits on top without bonding. A tack is successful only when it fuses to both pieces, not merely when it looks like a bead on the surface.
Step 2 Prepare a stable, clean work area
Remove flammable materials from the area and make sure the workpiece is supported on a suitable welding table or other fire-resistant surface. Welding produces sparks, hot metal, ultraviolet radiation, and fumes even when the weld is small. Position ventilation so smoke is carried away from your breathing zone without blowing shielding gas off the weld.
Wear a properly fitted welding helmet, TIG gloves, flame-resistant clothing that covers exposed skin, and leather footwear. Use hearing and respiratory protection when the work environment or material calls for it. A welding helmet protects your eyes from the arc, but it does not make an unsafe workspace safe.
Inspect the torch, cables, gas hose, and work clamp for damage. Secure the argon cylinder upright, keep its valve protected when not connected, and open the valve gradually. A damaged hose, loose fitting, or unstable cylinder should be corrected before welding.
Important
Never TIG weld dirty, painted, oily, or galvanized metal without first identifying and safely removing the contamination. Zinc coatings, solvents, and unknown residues can produce hazardous fumes. Do not weld a closed or sealed container, even if it appears empty.
Step 3 Fit and clamp the joint in its final position
Bring the parts together as they should be for the finished weld. Align edges, corners, and surfaces, then use clamps or a fixture to prevent the joint from opening or sliding. Do not depend on the first tack to correct a poor fit; the tack will usually lock that error in place.
Use the smallest practical root gap for the material and joint design, while leaving enough access for the arc and filler if filler will be added. The correct gap depends on thickness, joint preparation, welding position, and the final weld requirement. A gap that varies along the joint will make the tacks behave differently from one location to another.
For a long seam, plan several tack locations rather than starting at one end and working continuously. Opposing or alternating locations usually reduce the tendency for the metal to pull out of alignment. Leave enough room between tacks for the final weld to flow smoothly, and avoid placing tacks where they will interfere with torch access.
Step 4 Clean the joint and choose the filler approach
Remove oil, marker residue, rust, oxide, and fingerprints from both sides of the joint near the tack locations. Wipe first with a suitable solvent on a clean cloth, allow the surface to dry completely, and then use an appropriate brush. Use a stainless-steel brush only for stainless steel or aluminum, and keep that brush reserved for the same metal so you do not transfer particles from another alloy.
Decide whether the tacks will be made by melting the parent metal together or by adding a small amount of filler. A tight, clean joint in thin material may permit a fusion tack. A larger gap, an edge that needs support, or a joint that will later be welded with filler may call for a matching filler rod.
Keep filler rod clean and dry. The filler should be compatible with the base metal and the final weld specification, not simply whatever rod is closest. If the final weld requires a particular filler, using the same filler for the tacks can make later welding and inspection more consistent.
Step 5 Install the tungsten and set the shielding gas
Use a tungsten diameter and type suitable for the current range and the machine’s instructions. Extend the tungsten only enough to provide useful visibility and access; excessive stickout makes shielding less reliable. The tungsten should be ground with a smooth, lengthwise taper for DC work, with the point shaped according to the electrode and current guidance.
Set the shielding gas to the range recommended by the torch, cup, material, and workspace. Too little gas allows air into the weld, while too much can create turbulence that also pulls air into the shielding zone. Check for leaks by inspecting connections and listening for an unexpected hiss after the valve is opened.
A useful way to approach how to tack weld with a tig welder is to check your progress after each stage.
For steel and stainless steel, select DCEN. For aluminum, select AC and use the machine’s recommended balance and frequency starting points. Exact amperage, gas flow, tungsten size, and AC settings vary with thickness, joint design, torch cup, and equipment, so treat the manufacturer’s chart as the starting reference rather than copying a universal number.
Step 6 Set a conservative starting current and test on scrap
Begin with a current appropriate for the material thickness and joint type, then test on a clean offcut of the same or similar metal. A test tack should form a small molten puddle that wets into both pieces without immediately collapsing the edges. If the puddle grows too quickly, reduce current or shorten arc time; if it barely melts the surfaces, increase current carefully or improve contact and fit-up.
Make sure the work clamp is attached to clean metal with a solid electrical path. A poor ground can cause an erratic arc and lead you to change settings unnecessarily. Confirm that the gas starts before the arc and continues briefly after the arc stops, allowing the hot tungsten and weld area to remain shielded.
Watch the color and shape of the test area rather than relying only on a number displayed on the machine. Excessive discoloration, a wide heat-affected area, or a crater that sinks deeply indicates too much heat for the task. The best tack is usually small but visibly blended into both sides of the joint.
Step 7 Position the torch and establish the arc
Hold the torch so the tungsten is close to the joint without touching it. A short arc is easier to control and provides a more concentrated heat source. Keep the tungsten centered over the joint and angle the torch slightly in the direction of travel, commonly around a modest push angle rather than holding it upright or dragging it sharply.
Brace your torch hand or forearm when possible so your arc length does not change unexpectedly. Start the arc using the machine’s high-frequency or lift-start method as designed; do not scratch the tungsten across the work if you can avoid it. Scratching can contaminate the electrode and transfer metal into the weld.
Once the arc is established, form a small puddle at the exact tack location. You should see the surfaces brighten and begin to merge. If the tungsten touches the puddle, stop, let the electrode cool as needed, and regrind the contaminated end before continuing.
Step 8 Make a short tack and add filler when needed
For a fusion tack, hold the puddle only until both sides of the joint visibly flow together, then release the current or move the torch away in a controlled manner. For a filler tack, introduce the rod at the front edge of the puddle with small, deliberate additions. Keep the rod inside the shielding gas instead of withdrawing it into room air while its end is hot.
A tack should be compact and slightly raised without being a tall blob. It should have a smooth transition onto both pieces, with no visible gap underneath where the tack meets the joint. The exact size depends on the metal and final weld, but making a tack unnecessarily large adds heat and can make the final pass harder to control.
Use the post-flow period specified by the machine or torch setup. Removing the torch too soon can oxidize the hot weld and tungsten. A clean tack generally has a consistent surface and limited discoloration for the material; a gray, chalky, or sooty appearance suggests inadequate shielding or contamination.
Step 9 Place the remaining tacks in a balanced pattern
After the first tack cools enough to hold the alignment, check that the parts have not shifted. Place the next tack on the opposite side or at another balanced location rather than immediately extending the first tack. Continue alternating locations so the joint remains positioned as the metal expands and contracts.
For a rectangular frame or long seam, tack corners or ends first when that matches the fixture and joint design, then add intermediate tacks. Keep checking diagonals, edge alignment, and surface flushness. If a tack pulls the joint out of position, stop and correct the fit rather than trying to force the next tack to compensate.
Control heat between tacks. Pausing, changing locations, or using a heat-resistant fixture can help, but do not quench a hot weld with water unless an approved procedure specifically permits it. Sudden cooling can affect distortion and the material’s properties.
Step 10 Stop, clean, and inspect each tack
Turn off the arc and allow the workpiece to cool enough for safe handling. Remove any light surface residue with the appropriate clean brush, but do not grind away a questionable tack before understanding why it looks wrong. A tack that is cracked, porous, or attached to only one side should not be hidden under the final weld.
Look at each tack from both sides where access allows. It should hold the joint firmly, blend into both pieces, and have no visible crater crack, pinhole, undercut, loose edge, or trapped debris. Gently test the assembly by checking alignment and stability; do not strike the tack with a hammer as a substitute for proper inspection.
Understanding how to tack weld with a tig welder also means recognizing the limits of the method.
If a tack is defective, remove it completely with an appropriate method, clean the area, and retack it. When the tacks are sound and the joint remains correctly aligned, the assembly is ready for the final welding procedure appropriate to the material and joint.
What makes a TIG tack weld hold properly?
A reliable tack has three basic qualities: it is fused to both sides of the joint, it is free of significant contamination, and it is large enough to hold alignment without creating unnecessary distortion. Appearance helps, but a shiny surface alone does not prove fusion. The edges of the tack should transition into the parent metal rather than sitting as a separate lump.
TIG gives you precise control because the arc and filler are separate. That is useful for tacking, especially on thin sheet, but it also means the operator must coordinate torch position, arc length, current, and filler timing. A small movement can change the heat concentration enough to burn through an edge or leave a cold tack.
Fit-up is often the deciding factor. Parts that touch evenly require less heat and are easier to fuse. A wide or inconsistent gap can cause the puddle to fall through, draw the edges together, or produce a tack that bridges the opening without bonding at its roots.
Fusion tacks versus filler-metal tacks
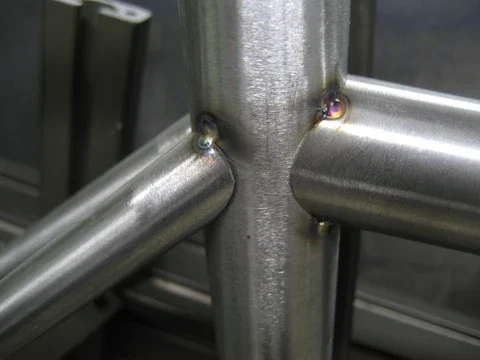
Fusion tacks melt the edges of the base metal together without adding rod. They can be useful on clean, tightly fitted thin material, but they are less forgiving when the edges are uneven or the joint has a gap. They also may not provide the composition or reinforcement required by the final weld procedure.
Filler-metal tacks add compatible rod to help bridge a gap or support an edge. They can be easier to control in some joints, but adding too much filler creates a bulky tack and more heat. The final weld procedure should determine which approach is acceptable, particularly for certified or safety-critical work.
Why tack placement affects distortion
When the weld pool cools, the metal contracts. A single tack at one end can pull the joint toward that location, while a sequence of closely spaced tacks can lock in an unwanted alignment or add excessive heat. Balanced placement distributes the restraint and gives you opportunities to check the assembly before it becomes difficult to correct.
For a component that must remain square, measure it after the first few tacks and again before final welding. A fixture can maintain position, but it does not eliminate thermal movement. Clamps that are too rigid or placed too close to the weld can also change how heat moves through the parts.
How to check the completed tacks
Verification starts with visual inspection under good lighting after the metal has cooled. The joint should remain in its intended position, and the tacks should be intact rather than cracked or visibly separated from one side. Clean the area enough to distinguish weld shape from surface residue.
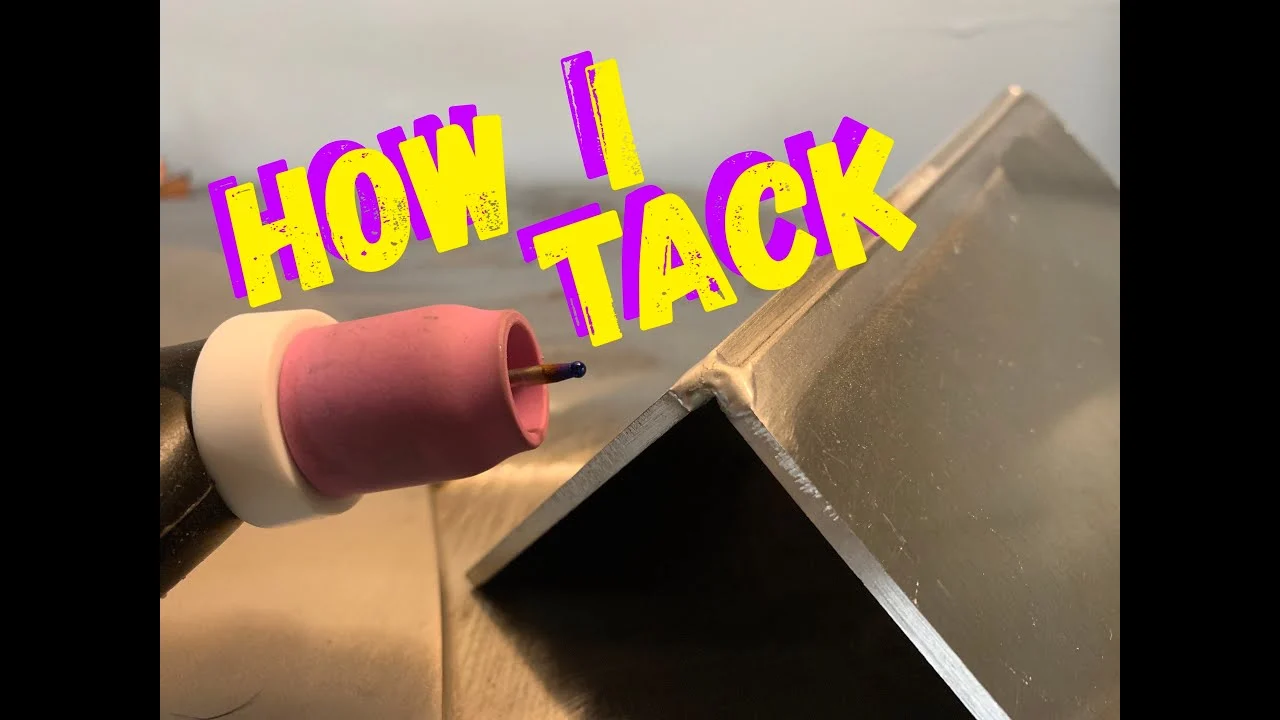
- Check that each tack reaches both members of the joint.
- Look for crater cracks, pinholes, wormholes, dark contamination, and trapped brush fibers.
- Look for undercut, where the arc has melted a groove beside the tack without filling it.
- Confirm that the tungsten did not contact the weld and leave a hard, dark inclusion.
- Measure or visually compare alignment, squareness, gap, and edge flushness.
- Make sure the tacks will not block torch access or interfere with the planned final weld.
If the part will carry a load, contain pressure, protect someone, or form part of a code-regulated assembly, visual inspection by itself may not be enough. Use the applicable welding procedure, qualification requirements, and inspection method. A beginner should seek qualified help before proceeding when the material, joint design, or consequences of failure are uncertain.
Check your result
A practical success check is simple: the joint stays aligned when the clamps are loosened, each tack is visibly bonded to both pieces, and no tack shows cracking, porosity, or a loose edge.
Common TIG tack welding problems
Most poor tacks come from one of four causes: contamination, unstable fit-up, incorrect heat, or lost shielding. Change one factor at a time so you can identify the cause instead of chasing the problem with several machine adjustments.
| What you see | Likely cause and correction |
|---|---|
| The tack is a high blob that does not blend | Arc time was too short, current was too low, or the joint was dirty. Clean the surfaces and establish a small puddle on both sides before adding minimal filler. |
| The edge burns away or the tack falls through | Too much heat, excessive arc time, or too large a gap. Reduce current or duration, improve fit-up, and use a shorter tack. |
| Gray, rough, or porous tack | Shielding was inadequate, gas flow was turbulent, or the metal was contaminated. Check leaks, cup position, gas flow, drafts, and cleaning. |
| The arc is erratic or the weld has a dark inclusion | The tungsten may be contaminated or the work clamp may be poor. Regrind the tungsten and attach the clamp to clean metal. |
| The parts move after tacking | Tacks were too few, too large, or placed in an unbalanced order. Correct the alignment and use a balanced tack pattern. |
When the tungsten touches the weld
Stop welding and inspect the electrode. A contaminated tungsten can make the arc wander and introduce tungsten into the weld. Let it cool safely, remove the contaminated portion by grinding lengthwise, and restore a suitable point before restarting on clean material.
When shielding gas is the problem
Check that the cylinder contains gas, the regulator and hose connections are tight, and the torch cup is not cracked or obstructed. Drafts from fans, doors, or compressed-air tools can disperse argon even when the flowmeter reading appears normal. Excessive flow can also cause turbulence, so increasing gas indefinitely is not a reliable solution.
Beginner questions about TIG tack welding
Can I tack weld without filler rod?
Sometimes. A clean, tightly fitted thin joint may be fusion-tacked without filler, but filler may be needed for a gap, an unsupported edge, or a specified weld composition. The final welding procedure and base-metal type should control the choice.
How far apart should TIG tacks be?
There is no single spacing that fits every joint. Thickness, length, shape, fit-up, and distortion risk determine the pattern. Place enough balanced tacks to hold alignment while leaving access for the final weld, then check the joint after each group of tacks.
Should I grind a tack before making the final weld?
Only when the tack is oversized, poorly shaped, contaminated, or interfering with torch access. A sound tack can usually be incorporated into the final weld. Remove defective tacks completely rather than simply grinding their surface smooth.
Why does my tack look clean but break easily?
It may be sitting on top of the metal without fusing to both sides. Common causes include low heat, a dirty joint, an excessive gap, or moving the torch before a shared puddle formed. Inspect the transition at both edges and correct the underlying cause.
Can I use the same TIG settings for steel and aluminum?
No. Steel and stainless steel commonly use DCEN, while aluminum generally requires AC, different oxide-cleaning practices, and aluminum-compatible filler. Use the machine manufacturer’s starting guidance and adjust for thickness, joint design, and torch setup.
How do I clean up after tack welding?
Close the cylinder valve when the work is finished, release pressure from the system according to the equipment instructions, turn off the welder, and allow hot parts and electrodes to cool. Store filler and tungsten clean and dry, remove metal debris safely, and inspect the torch and leads for damage before the next use.
Finish with sound, useful tack welds
Learning how to tack weld with a TIG welder is mainly an exercise in control: control the fit-up, cleanliness, heat, arc length, and order of placement. Prepare the joint carefully, use settings suited to the metal, make short balanced tacks, and inspect them before committing to the final weld.
Start with clean scrap and a simple joint, then compare your test tack with the checks in this guide. If the tack does not fuse to both pieces or the material has unknown hazards or structural consequences, stop and get qualified welding guidance before continuing.