How to Tig Weld Aluminum Tubing: A Beginner’s Guide
Thin aluminum tubing can look simple to join, but it quickly exposes weak TIG technique. Aluminum conducts heat away from the joint, its oxide layer melts at a much higher temperature than the base metal, and the tube can collapse or burn through before a beginner sees the problem. Clean preparation and controlled heat matter as much as the welder’s hand motion.
The good news is that a sound joint is attainable with an AC TIG welder, pure argon, the right tungsten, and practice on scrap made from the same alloy and wall thickness. The goal is not to force a large puddle into the seam. It is to establish a small, bright puddle, add filler only as needed, and keep the surrounding metal from overheating.
This guide explains how to tig weld aluminum tubing from fit-up through inspection. You will learn how to identify compatible tubing, clean and purge the joint, set up AC TIG equipment, tack and weld the seam, recognize common defects, and decide whether the finished joint is ready for service. Pressure, structural, vehicle, and safety-critical tubing should still be evaluated by a qualified welder or inspector.
At a glance
- Use AC TIG with pure argon and a clean, properly prepared joint.
- Control heat with torch movement, filler timing, and a foot pedal rather than chasing a fixed amperage.
- Verify the finished weld for complete fusion, even appearance, leaks, distortion, and cracks before use.
How to tig weld aluminum tubing safely and consistently
The basic method is to fit the tubes tightly, remove contamination without embedding it, tack the joint, and weld while maintaining a small molten puddle. For most beginner work, an AC TIG machine with high-frequency start and a foot pedal is the most forgiving setup because it cleans the oxide layer and lets you reduce heat as the tubing warms.
Before welding, confirm that the tubing alloy and wall thickness are suitable for the intended job. Common aluminum alloys do not all weld equally well: 6061 is widely used but can lose strength in the heat-affected zone, while some 5000-series alloys weld readily. If the tube is part of a pressurized, structural, fuel, brake, or safety system, do not treat a visually attractive bead as proof that it is safe.
Tools you will need
- AC-capable TIG welder with high-frequency start, torch, work lead, and foot pedal or fingertip amperage control
- Pure argon cylinder, regulator, flowmeter, and suitable gas hose
- Sharp 2% lanthanated tungsten and a collet, cup, and back cap sized for it
- Aluminum filler rod matched to the base alloy and joint requirements
- Stainless-steel brush reserved only for aluminum and lint-free solvent-cleaning cloths
- Nonchlorinated degreaser or acetone, used with ventilation and away from ignition sources
- Tube cutter, bandsaw, or fine-tooth saw; files or a deburring tool for clean edges
- Strong, nonflammable fixture or clamps that hold the tubing without distorting it
- Welding helmet with an appropriate shade, TIG gloves, flame-resistant clothing, and closed-toe leather footwear
- Optional: purge equipment, including a second regulator or purge manifold, for tubing that must have a clean internal root
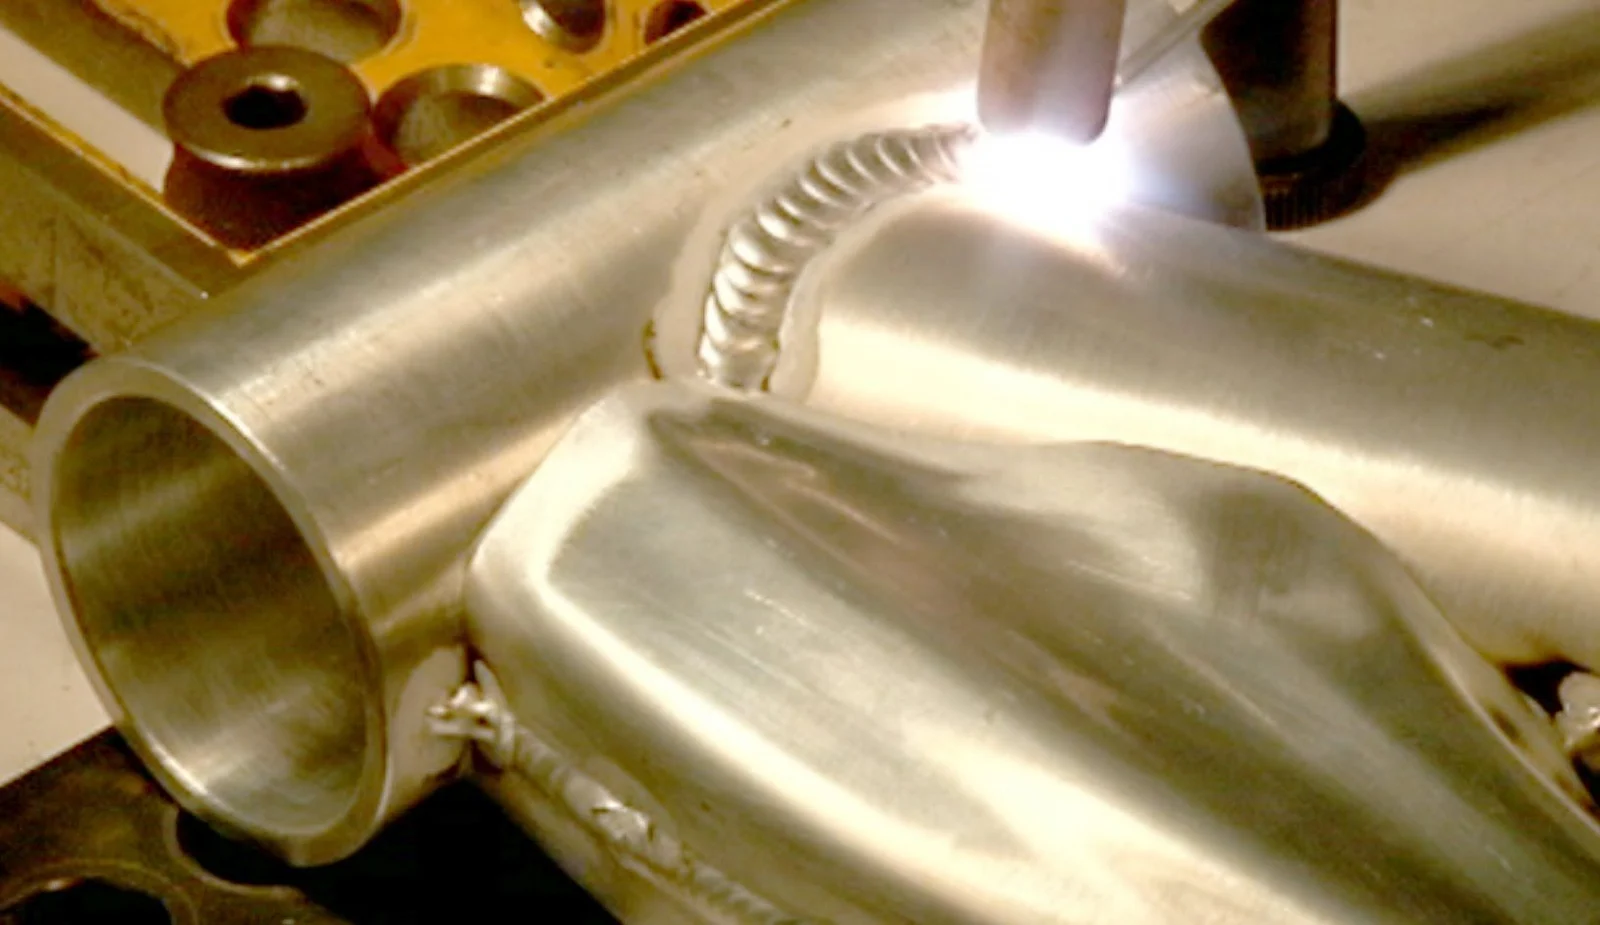
Step 1 Confirm the tubing and joint are weldable
Identify the tubing alloy, outside diameter, and wall thickness if possible. Read the material marking, supplier information, or project drawing rather than guessing from appearance. The filler selection, allowable heat input, and final strength depend on this information.
Choose a joint that gives the torch access all the way around. A butt joint with square, closely fitted ends is usually easiest for a beginner. A socket, lap, or fillet joint can be welded, but gaps and overlapping edges make it easier to trap contamination or melt through the thinner section.
For thin-wall tubing, aim for a very small, even gap or a nearly touching fit, according to the joint design. A large gap requires more filler and heat, increasing the chance of a collapsed edge. If the ends are uneven, trim them rather than trying to bridge the error with a heavy bead.
Step 2 Cut, deburr, and fit the tube
Cut both pieces squarely and remove the internal and external burrs. A burr can prevent a tight fit, catch the tungsten, or become part of the weld contamination. After deburring, wipe the ends with a clean cloth and solvent, then allow the solvent to evaporate fully.
Arrange the tubes in a rigid fixture and check alignment from several directions. The joint should remain concentric while you tack it. Clamps should hold the parts without flattening the tube, because a distorted cross-section can change wall thickness and make the weld unpredictable.
A good fit-up has consistent contact or gap, no visible oil, and no sharp mismatch at the seam. If the tubing rocks in the fixture or the seam opens and closes as you rotate it, correct that now; TIG welding will not compensate for unstable fit-up.
Step 3 Clean the aluminum without spreading contamination
First remove oil, marker residue, and fingerprints with a clean cloth and a suitable nonchlorinated degreaser or acetone. Then use a dedicated stainless-steel brush to remove the tenacious aluminum oxide from the weld area. Brush in one direction with light pressure and keep that brush away from steel, galvanized metal, and general shop dirt.
Do not use sandpaper that has already touched steel, and do not rely on a wire wheel covered with unknown residue. Do not handle the cleaned joint with bare fingers. Aluminum oxide reforms quickly, so clean shortly before welding and protect the prepared surfaces from dust.
Important
Solvents are flammable and their vapors can be hazardous. Use the product only as its label directs, provide ventilation, keep it away from sparks and hot metal, and never weld while wet solvent remains on the tubing. TIG welding also produces intense ultraviolet light, hot metal, and fumes from coatings or contamination; use proper eye, skin, and respiratory protection for the work environment.
Step 4 Prepare the torch, tungsten, and shielding gas
Install a sharp, clean 2% lanthanated tungsten of a size suitable for the machine and wall thickness. A small tungsten can provide a focused arc on thin tubing, while a larger one tolerates more current. Follow the electrode and torch manufacturer’s current limits rather than selecting a diameter from a generic chart alone.
Grind the tungsten lengthwise to a consistent point or truncated point, and keep the grinding wheel dedicated to tungsten. If the tip touches the aluminum, stop and regrind it; a contaminated electrode can make the arc wander and introduce dark inclusions into the weld.
Connect the cylinder to the regulator and set a stable argon flow appropriate to the cup size and workspace. Excessive flow can pull air into the shielding stream through turbulence, while too little flow allows porosity. Check hose connections for leaks and keep the torch cup close enough to shield the puddle without dragging it through the joint.
Step 5 Set AC TIG and make practice beads
Select AC TIG, high-frequency start, and a moderate AC balance or cleaning setting according to the welder manufacturer’s scale. AC balance controls how much of each cycle is devoted to electrode-negative welding action and electrode-positive oxide cleaning. Too much cleaning can make the tungsten ball up and reduce penetration; too little may leave a dirty oxide film.
Begin with the machine’s recommended amperage range for the tubing thickness, but treat it as a starting point rather than a fixed answer. Set a short post-flow period so argon continues to protect the hot tungsten after the arc stops. Use a modest downslope if available, especially on tubing that can crater or crack as the weld ends.
A useful way to approach how to tig weld aluminum tubing is to check your progress after each stage.
Practice on a cutoff or an extra piece of the same tubing. The arc should start cleanly, the puddle should form without a wide frosted area, and the tungsten should remain stable. If the puddle is sluggish and dirty, improve cleaning, gas coverage, or AC balance before simply adding more amperage.
Step 6 Tack the joint in several locations
Place the first tack, then allow the joint to cool briefly if necessary. Add additional tacks evenly around the circumference, commonly at opposing positions first, so the tubing does not pull out of alignment. Keep each tack small but fully fused to both tube edges.
Rotate the assembly or reposition yourself so the torch remains comfortable and the arc stays at a consistent angle. A useful torch position is close to perpendicular to the joint with a slight travel lean, while the filler approaches from the front edge of the puddle. Avoid a long arc; it spreads heat and weakens shielding.
Inspect the tacks before continuing. They should not contain obvious holes, soot, cracks, or unfused edges. If a tack is dirty or poorly placed, remove the defect and retack it rather than burying it under the final bead.
Step 7 Establish a small puddle and begin the weld
Brace both hands so the torch movement is controlled. Start the arc with high frequency, bring the tungsten close without touching the metal, and pause just long enough for a small puddle to wet both sides of the seam. Aluminum may appear cool until its surface suddenly becomes fluid, so watch the edges rather than waiting for a large bright pool.
Once the puddle is established, move steadily around the tube. Add a small dab of filler at the leading edge of the puddle, withdraw the rod slightly, and continue forward. The filler should melt into the puddle; it should not be held in the arc long enough to ball up or contaminate the tungsten.
Keep the arc length short and the cup close enough to maintain shielding. If the puddle grows wider as you travel, ease off the foot pedal, increase travel speed slightly, or pause less often. If the puddle will not wet both edges, stop and correct the surface condition, fit-up, torch angle, or amperage rather than piling filler onto cold metal.
Step 8 Control heat as the tube warms
Tubing often becomes easier to melt after the first part of the circumference has heated up. This is where a foot pedal or fingertip control helps: reduce amperage as the workpiece gets hot, then add a little power when crossing a cooler tack or a section that needs more fusion.
Use the smallest filler additions that produce a smooth, continuous bead. Excess filler makes a tall bead without fixing inadequate fusion, and repeated pauses can create lumps and heat concentration. A consistent travel rhythm is more useful than trying to imitate a particular “stack of dimes” appearance.
Watch the heat-affected zone, the discolored or changed area beside the weld. A narrow, controlled zone is generally preferable to a broad overheated area, but color alone does not prove strength or penetration. Stop if the edge begins to sag, the hole enlarges, or the torch loses shielding.
Step 9 Finish the weld without leaving a crater
As you approach the starting tack, overlap the bead slightly onto sound metal. Gradually reduce current while maintaining shielding and add a final small amount of filler if needed to fill the termination crater. Keep the torch in place during post-flow so the hot tungsten and weld end remain protected by argon.
Do not snap the torch away immediately. A sudden interruption can leave a concave crater that cracks, and removing shielding too soon can oxidize the hot end. Let the part cool naturally; quenching hot aluminum can distort the joint and may create unwanted stresses.
What makes an aluminum tube weld sound
A sound TIG weld joins both tube edges through a controlled molten pool while limiting contamination and distortion. The aluminum oxide layer must be disrupted by cleaning and AC action, but excessive cleaning, heat, or arc length can be just as damaging as insufficient cleaning.
For beginners, the most useful visual targets are a continuous bead with even wetting at both toes, no visible pinholes, and a heat-affected zone that is not dramatically wider on one side. A slightly imperfect appearance does not automatically mean failure, while a shiny bead can still conceal lack of fusion or internal porosity.
Understand filler and base-metal compatibility
Use filler recommended for the known base alloy and the service conditions. Filler is not selected only by diameter or color. Different filler alloys affect crack resistance, corrosion behavior, ductility, and the strength of the finished joint.
Understanding how to tig weld aluminum tubing also means recognizing the limits of the method.
For general practice, keep filler rod clean and stored so it does not collect dust or moisture. Wipe questionable rod before use. If the tube’s alloy is unknown, heavily anodized, painted, or contaminated, identify it or ask a qualified welding supplier before committing a critical part.
Use back purging when the inside matters
Back purging replaces air inside the tube with argon while the root is molten. It is particularly useful when the inner surface must remain clean and smooth, such as in certain fluid, sanitary, aerospace, or high-purity applications. Without a purge, the hot internal root can oxidize and form a rough deposit often called sugaring.
For ordinary noncritical tubing, a purge may not be necessary, but that decision belongs to the joint specification and service requirement. A purge setup must allow displaced air to escape; sealing both ends and filling blindly can create pressure that disturbs the weld or becomes unsafe as the gas warms.
Check the finished aluminum tubing weld
Inspection should start only after the joint has cooled enough to handle safely. Clean loose soot or residue without grinding away the weld profile, then inspect the entire circumference under bright light. Rotate the tube rather than checking only the most accessible side.
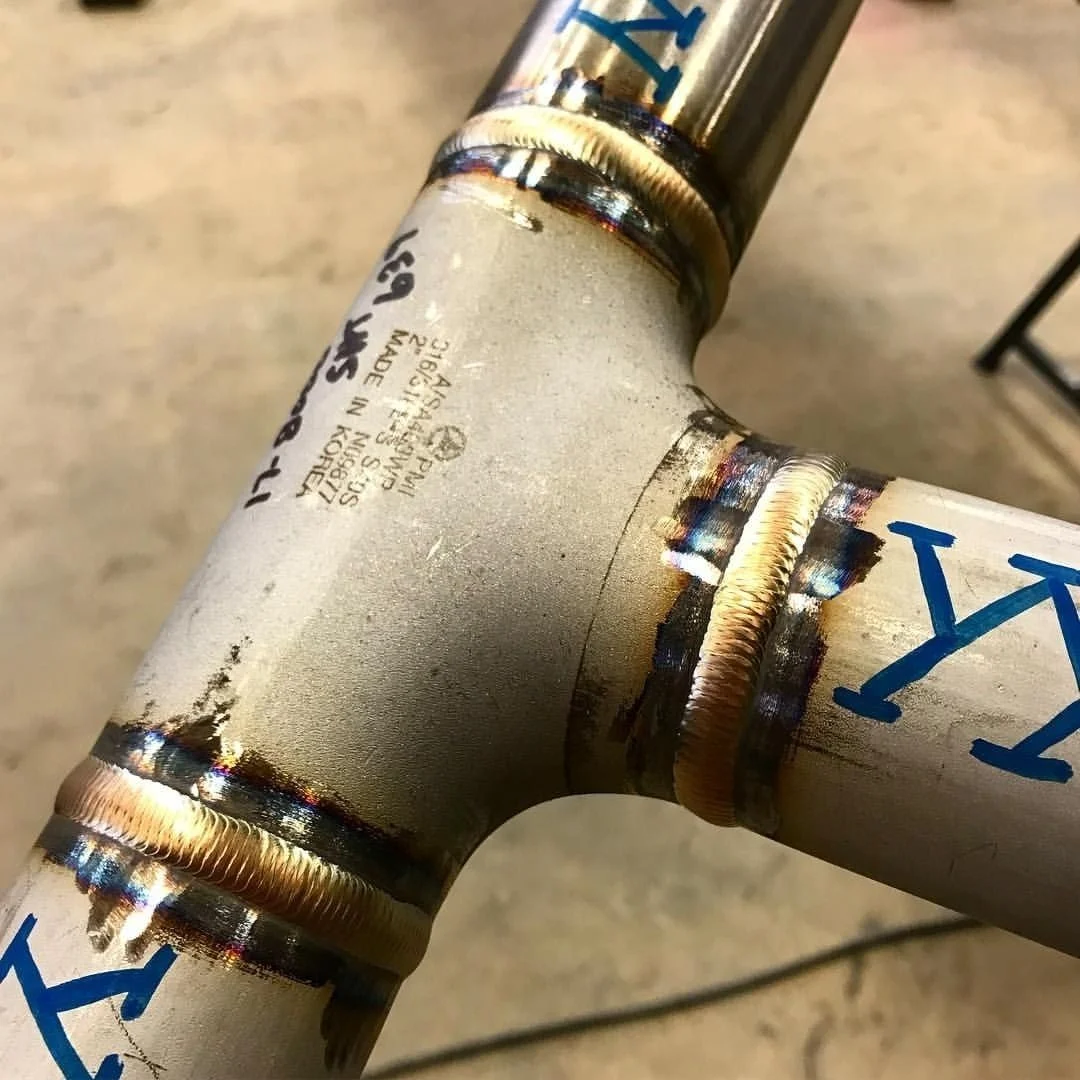
Step 10 Inspect the bead and surrounding tube
Look for a continuous bead that ties into both sides of the joint. The surface should not have visible cracks, open pinholes, deep undercut, trapped black particles, arc strikes away from the seam, or abrupt starts and stops. Excessive convexity can indicate too much filler or insufficient travel, while a concave crater at the end needs correction.
Check for burn-through, collapsed tubing, and severe distortion. A bead that looks even but sits on top of one edge may have lack of fusion. Lack of fusion means the weld metal did not properly melt and join one or both base-metal surfaces; it cannot be confirmed reliably from shine alone.
Check your result
A useful basic check is to compare the bead all the way around: consistent width, smooth transitions over the tacks, visible wetting at both edges, and no pinholes or cracks. For a critical joint, visual inspection is only one part of acceptance; use the specified leak, pressure, dimensional, or nondestructive test.
Step 11 Test only in a way appropriate to the application
For a noncritical practice assembly, examine the joint and, if appropriate, cut through a sample to inspect the cross-section. A cross-section can reveal penetration, lack of fusion, and internal voids, but it is destructive and does not qualify another production joint by itself.
For tubing intended to contain pressure or hazardous fluid, use the project’s documented test procedure. Never improvise a high-pressure air test on an unknown or questionable weld. Stored energy from compressed gas can turn a failed tube into a dangerous projectile; qualified personnel should determine the test medium, pressure, containment, and acceptance criteria.
Correct the problems before welding another joint
Most aluminum TIG problems have more than one possible cause, so change one variable at a time. Start with cleanliness and shielding because increasing amperage can hide a surface problem briefly while making the final defect worse.
| What you see | Likely causes and useful corrections |
|---|---|
| Black or sooty weld, dirty puddle | Oil, oxide, contaminated filler, poor gas coverage, drafts, or an electrode touch. Reclean, improve shielding, check flow and hoses, and regrind the tungsten. |
| Pinholes or porosity | Moisture or contamination, turbulent or insufficient shielding, long arc, or trapped gas. Clean the joint and rod, protect the work from drafts, and use a stable short arc. |
| Burn-through or sagging edge | Too much amperage, too slow a travel speed, excessive gap, or too many pauses. Tighten fit-up, move steadily, and reduce pedal input as the tube heats. |
| Bead sits on one edge | Arc aimed incorrectly, poor fit-up, oxide not removed, or insufficient heat for fusion. Center the puddle over both edges and correct the joint before adding filler. |
| Tungsten balls up or becomes unstable | Wrong AC balance, excessive current for the electrode, contaminated tip, or contact with the puddle. Stop, regrind, verify settings, and use the correct tungsten size. |
| Crater crack at the stop | Arc stopped abruptly, crater left unfilled, or the material remained too hot. Use downslope, taper current, add a small final filler dab, and maintain post-flow. |
| Tube pulls out of alignment | Too few or poorly placed tacks, uneven fit-up, or too much heat in one area. Tack opposite points first and alternate locations while welding. |
Know when to stop and repair rather than continue
Stop welding if the tungsten repeatedly contaminates, the arc becomes unstable, the joint starts to collapse, or a defect appears that cannot be completely removed. Continuing over a dirty or cracked area usually traps the problem under a smoother-looking layer.
To repair a noncritical joint, allow it to cool, remove the defective metal completely with an appropriate tool, reclean the exposed surfaces, and retack if alignment has changed. Do not simply grind a shallow depression and cover it if a crack, lack of fusion, or porosity extends below the visible surface.
Clean up the equipment and work area
Close the cylinder valve when welding is complete, release pressure from the regulator according to its instructions, and store the cylinder secured upright. Allow the torch and workpiece to cool before handling them, and remove hot scraps from the bench only with suitable tools.
Inspect the tungsten, cup, collet, gas lens if used, and torch lead. Remove aluminum contamination, replace damaged consumables, and keep the dedicated stainless brush and filler rod clean. A clean setup makes the next weld easier to diagnose and prevents yesterday’s contamination from becoming today’s mystery defect.
Beginner questions about aluminum tube TIG welding
Can I weld aluminum tubing with a DC-only TIG welder?
Usually not for normal aluminum work. Aluminum requires AC to help disrupt its oxide layer while the arc welds the base metal. A DC-only machine may be used for specialized methods by experienced welders, but it is not the practical beginner approach.
What gas should I use for TIG welding aluminum?
Use pure argon from a suitable cylinder and regulator. Argon-helium mixtures can provide additional heat in some applications, but pure argon is the straightforward starting gas for aluminum tubing. Do not use an oxygen, carbon dioxide, or argon-carbon-dioxide mix for this process.
Do I need to use filler rod on every aluminum tube joint?
No. A very tight, properly designed joint may sometimes be fused autogenously, meaning without added filler. Beginners generally benefit from compatible filler because it helps control the joint and provides metal to fill a small, consistent gap.
The drawing, alloy, wall thickness, and service requirements determine the acceptable method.
Why does aluminum suddenly melt after looking solid?
Aluminum has no obvious color change before melting, and its oxide layer can make the surface appear stable. Heat also spreads quickly through the tube, then accumulates as welding continues. Watch the puddle and edges closely, use pedal control, and reduce heat as the part warms.
How close should the tungsten be to the aluminum?
Keep a short, steady arc without touching the work. The exact distance depends on the cup, electrode, joint access, and machine settings, but a long arc usually weakens shielding and broadens the heat. If the tungsten touches the puddle, stop and regrind it before restarting.
Finish with a weld you can reasonably evaluate
Learning how to tig weld aluminum tubing is mainly an exercise in preparation and heat control. Identify the alloy, fit the joint accurately, remove oil and oxide with dedicated tools, use AC TIG with pure argon, and practice on matching scrap before welding the actual part.
During the weld, maintain a small puddle, add modest filler, shorten the arc, and reduce amperage as the tubing heats. Afterward, inspect the entire circumference for fusion, pinholes, cracks, distortion, and a sound termination. For pressure-bearing, structural, or safety-critical tubing, stop at visual inspection and obtain the required qualified testing or professional evaluation before putting the assembly into service.