How to Lift Tig Weld: Safe Setup, Arc Control, and Final Checks
Lift TIG is a useful way to start a TIG arc without using a high-frequency start. Instead of striking the tungsten across the work like a match, you touch it lightly to the metal, begin the shielding gas and welding current, then lift the tungsten a small distance to establish the arc. The method is gentler than a scratch start and can work well on compatible machines.
The attainable result is a clean, controlled arc with little or no tungsten damage and a small, consistent weld bead. It still requires clean metal, the correct polarity, suitable shielding gas, and careful control of the torch. Lift TIG is not the same as repairing or “lifting” an existing weld; it describes the way the arc begins.
This guide explains how to lift tig weld on a basic TIG-capable power source, from checking the machine and preparing the joint to starting the arc, controlling the puddle, ending the weld, and inspecting the result. It also covers common problems, material limitations, and the point at which a beginner should stop rather than risk damaging the work or creating an unsafe weld.
At a glance
- Touch the tungsten straight down, then lift it cleanly without dragging it across the joint.
- Use clean base metal, pure argon, DCEN for most steel and stainless steel, and settings appropriate to the material.
- Judge the result by arc stability, tungsten condition, bead shape, fusion, and the absence of contamination or visible defects.
How to lift tig weld with a controlled lift-arc start
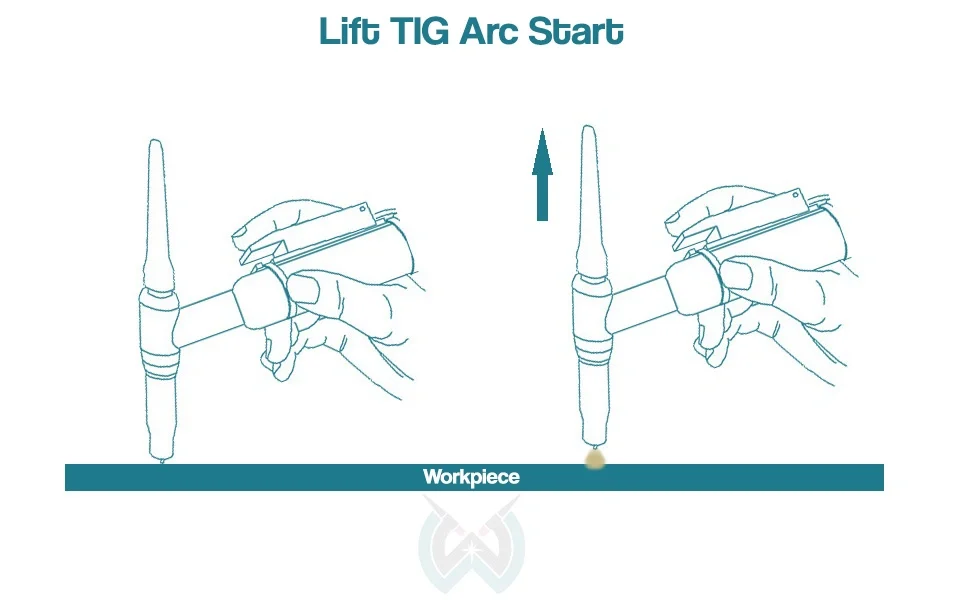
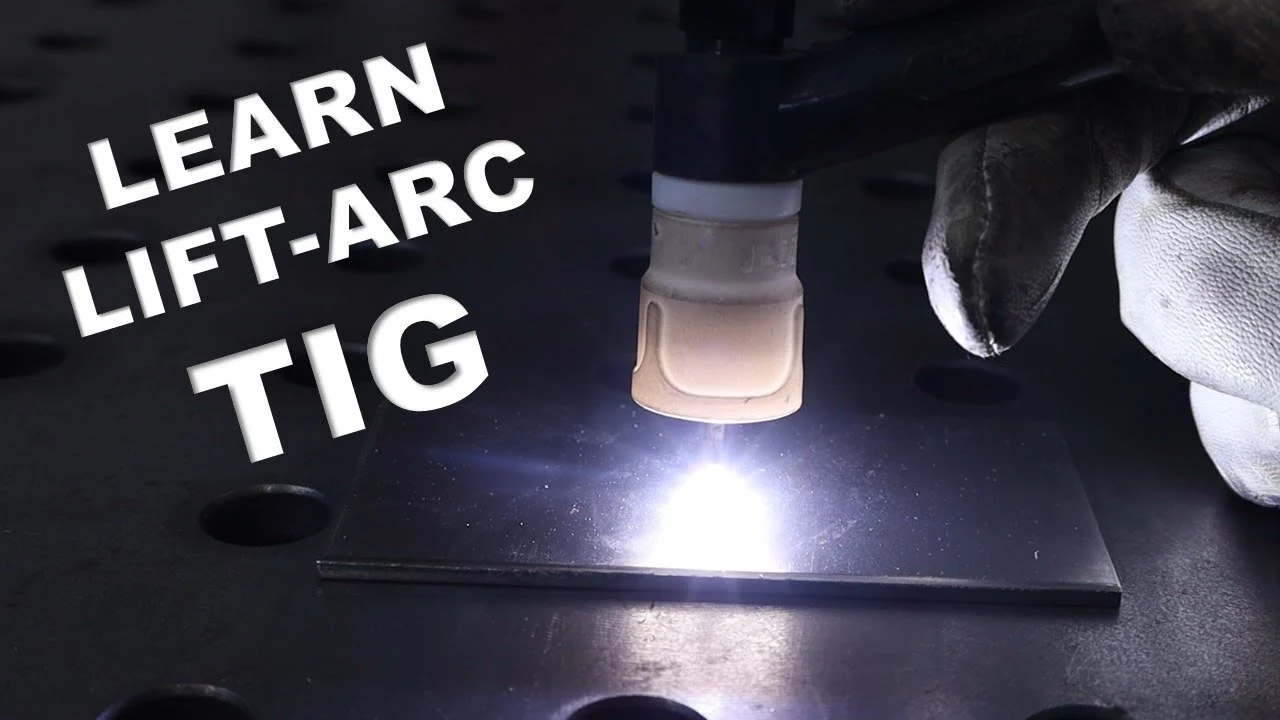
Lift TIG works by using the welding machine’s low-current contact-start circuit. The tungsten briefly contacts the workpiece, and the machine reduces the chance of a damaging short circuit while you lift the torch. Once the electrode is separated from the metal, the normal welding arc continues.
This method is best suited to a machine specifically labeled Lift TIG, Lift-Arc, or a similar contact-start TIG mode. Do not assume that every stick welder with a TIG torch connection supports it. If the manual does not identify the mode, verify the machine’s instructions before connecting a torch.
Tools you will need
- TIG-capable welding machine with a Lift TIG or Lift-Arc mode
- TIG torch with the correct collet, collet body, back cap, and sharpened tungsten
- Pure argon cylinder, regulator, flowmeter, hose, and the correct gas connection
- Work clamp and clean welding leads
- Appropriate filler rod for the base metal, when the joint requires filler
- Stainless-steel wire brush, degreaser, clean lint-free cloths, and an angle grinder or file for preparation
- Welding helmet with the correct shade, welding gloves, flame-resistant clothing, safety glasses, and hearing protection
- Optional: foot pedal or torch remote if the machine supports current control during welding
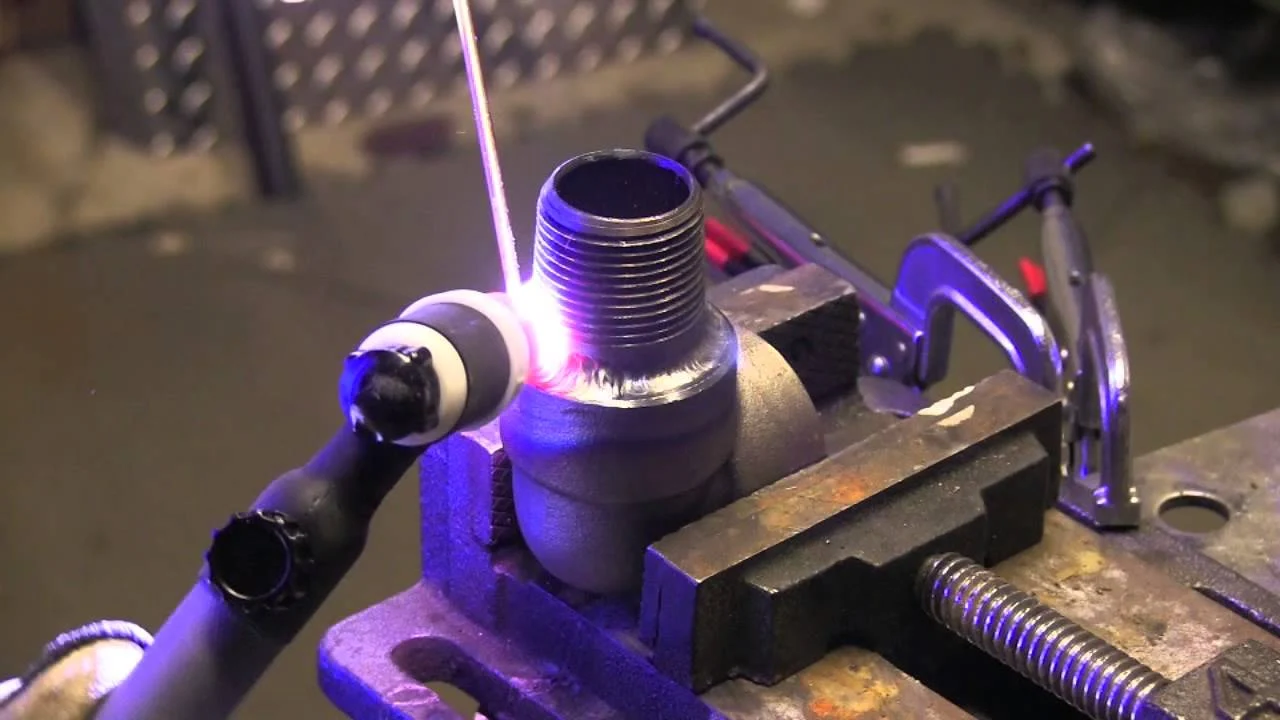
Step 1 Confirm that the machine and material are compatible
Read the machine label or manual and select the mode named Lift TIG, Lift-Arc, or contact-start TIG. Check that the torch connects to the machine’s TIG output and that the gas hose connects to the regulator and machine inlet in the arrangement specified by the manufacturer.
For most mild steel and stainless steel, TIG uses direct current electrode negative, commonly called DCEN. The torch is connected to the negative output and the work clamp to the positive output unless the machine’s instructions specify otherwise. Aluminum and some other materials generally require alternating current, or AC, and many simple lift-TIG machines cannot weld them correctly.
Lift TIG is commonly used on carbon steel, stainless steel, and some nickel alloys when the machine and tungsten are suitable. It is not a universal method for every metal. Do not proceed with aluminum merely because the torch fits; confirm that the power source provides AC TIG and the required control functions.
Step 2 Make the work area safe and prepare the joint
Move flammable materials away from the welding area, provide ventilation, and make sure the workpiece is supported securely. TIG welding produces ultraviolet radiation, hot metal, fumes, and electrical hazards even though the arc may look small. Protect nearby people with welding screens and keep the return path clear.
Wear a properly fitted welding helmet, gloves, flame-resistant clothing that covers exposed skin, leather footwear, and safety glasses under the helmet. Never weld on a container, pipe, or enclosed space that may have held fuel, solvents, or other contaminants unless it has been professionally cleaned and declared safe.
Remove paint, rust, mill scale, oil, moisture, and other contamination from both sides of the joint where practical. Use a dedicated stainless-steel brush on stainless steel so that carbon-steel particles do not become embedded in the surface. Wipe the prepared area with a suitable degreaser and allow it to evaporate fully before striking an arc.
Step 3 Install and prepare the tungsten
Choose a tungsten diameter that suits the current range and the torch parts. A smaller electrode is useful at lower amperage, while a larger one tolerates more heat. Follow the tungsten and machine manufacturer’s recommendations if you are unsure rather than choosing solely by appearance.
For DCEN work, grind the tungsten lengthwise to a smooth point or a short blunt tip, depending on the electrode type and the machine’s guidance. Longitudinal grinding keeps the grinding marks aligned with the electrode and helps the arc stay centered. Use a grinder reserved for tungsten or clean it carefully before use.
Extend only enough tungsten to see the tip and maintain the intended arc length. A common starting point is a short extension beyond the ceramic cup, but the correct extension depends on the cup, joint access, gas coverage, and welding position. Tighten the back cap and collet so the tungsten cannot move, but do not crush it by excessive tightening.
If the tungsten has touched the weld puddle or filler rod, stop and regrind it before continuing. Contaminated tungsten can make the arc wander, introduce inclusions, and produce a dark or unstable bead.
Step 4 Set the shielding gas and basic welding controls
Secure the argon cylinder upright, connect the regulator and gas hose, and open the cylinder valve slowly. Check the connections for leaks according to the equipment manufacturer’s procedure. Use pure argon unless the machine or welding procedure specifically calls for another approved shielding gas.
Set the gas flow within the range recommended for your torch, cup, and joint. Excessive flow can create turbulence that draws room air into the shielding envelope, while too little flow may leave the hot tungsten and puddle exposed. The exact flow setting varies with cup size, drafts, torch position, and gas lens design, so treat the manufacturer’s range as the starting point.
Choose Lift TIG mode, select the correct polarity, and set a conservative current appropriate for the thickness and type of metal. Start on clean scrap of the same material and similar thickness. A practice coupon lets you adjust current, travel speed, and gas flow without risking the actual part.
Set pre-flow and post-flow if the machine provides those controls. Pre-flow allows argon to displace air before the arc starts; post-flow keeps shielding the cooling tungsten and weld area after the arc stops. If the machine controls these functions automatically, leave them at the recommended default until you understand the effect of changing them.
Step 5 Position the torch and work clamp
Place the work clamp on bright, clean metal close enough to the joint to provide a dependable electrical return path. A clamp attached over paint, rust, or scale can cause a weak or intermittent arc. Confirm that the torch lead and gas hose are free from sharp bends and will not catch while you move.
Hold the torch like a thick pen, with the tungsten aimed at the beginning of the joint. Keep the torch angled slightly in the travel direction rather than holding it upright at a severe angle. The ceramic cup should remain close enough to protect the puddle with argon, but it must not touch the work.
Rest part of your gloved hand or wrist on a stable surface when possible. This reduces shaking and makes the small lifting motion more repeatable. Arrange the filler rod, if needed, so you can feed it with the other hand without crossing the arc or striking the tungsten.
Step 6 Start the arc by touching and lifting the tungsten
Place the torch over the starting point and hold the tungsten nearly perpendicular to the surface. Activate the torch switch or remote control if your machine requires it, then lower the tungsten until it makes a brief, light contact with the clean workpiece.
Do not scrape the tungsten sideways across the metal. The lift motion should be straight and controlled: touch, pause only momentarily, and raise the torch just enough for the arc to establish. Once the arc is stable, position the tungsten at a short, consistent arc length above the work.
A successful start produces a steady arc without a long scratch mark or a large spark. The tungsten tip should remain centered and reasonably sharp. If the electrode sticks, release the control, break it free without twisting aggressively, and inspect or regrind the tip before trying again.
Helpful tip
Practice the touch-and-lift motion with the machine off before welding. The goal is a small vertical movement, not a sweeping scratch. Keeping the tungsten aligned with the joint makes the arc easier to control.
Step 7 Establish the puddle before moving
Hold the arc over the starting point long enough for the surface to melt into a small, bright puddle. The puddle is the liquid area of base metal created by the arc. Its size should grow predictably rather than erupting, boiling, or spreading far beyond the joint.
A useful way to approach how to lift tig weld is to check your progress after each stage.
If the puddle does not form, the current may be too low, the work clamp may be poor, the metal may still be contaminated, or the torch may not be in the correct mode. If the metal melts through immediately, reduce current, move sooner, use a shorter heat application, or practice on thicker material.
Keep the tungsten tip centered over the leading edge of the puddle and avoid allowing it to touch the liquid metal. A stable, quiet arc and a clearly defined puddle are signs that the basic setup is working.
Step 8 Travel along the joint and add filler correctly
Move the torch smoothly along the joint once the puddle is established. Travel speed controls how much heat enters each section: moving too slowly makes a wide, deeply heated bead, while moving too quickly can leave poor fusion or an intermittent line.
When filler is needed, use rod that matches the base metal and is clean and dry. Feed small amounts into the front edge of the puddle, then withdraw the rod while keeping its end inside the argon shielding area. Do not wave the rod through the arc or touch it to the tungsten.
For a thin edge or a closely fitted joint, the base metal may provide enough material for a fusion weld without separate filler. That choice depends on joint design, thickness, service requirements, and the applicable welding procedure. A cosmetic bead is not proof that a structural or pressure-containing joint is acceptable.
Keep the torch angle, arc length, and travel rhythm consistent. Watch the puddle rather than the bright outer arc. You should see the joint edges blend into the puddle, with a controlled bead following behind the torch.
Step 9 End the weld without contaminating the crater
At the end of the joint, slow slightly if needed and fill the final crater with a small amount of filler. A crater is the depression left when the weld pool contracts. Stopping suddenly over a hot, unfilled crater can contribute to cracking or an obvious termination defect.
Release the current control or torch switch according to the machine’s normal procedure, but keep the torch in place while post-flow runs. This protects the cooling tungsten and the hot end of the weld from oxygen. Move the torch away only after the gas has stopped or the manufacturer’s instructions allow it.
Let the work cool naturally enough to handle safely. Do not quench a hot weld in water unless a qualified welding procedure specifically permits it, because rapid cooling can change the material’s properties or increase cracking risk.
Step 10 Inspect the practice weld and adjust one variable
Clean light residue from the cooled weld and examine it under good lighting. Look for a bead that follows the joint, blends with both edges, and has a consistent width. Check the tungsten for a clean tip and check that the weld does not have obvious pores, cracks, deep undercut, trapped black particles, or areas where the edges remain unmelted.
Make only one adjustment at a time on the next practice bead. Change current if the puddle is too small or too large, travel speed if the bead width varies, gas flow if shielding appears poor, or cleaning and torch technique if contamination is present. Repeating the same faulty setup makes it harder to identify the cause.
Check your result
A sound beginner practice bead usually has a stable arc, visible fusion at the joint edges, an even profile, and no gray or black contamination. Visual inspection is useful, but it cannot prove that a weld meets a structural, pressure, code, or safety requirement.
What makes lift TIG different from other arc starts?
Lift TIG is a compromise between a high-frequency start and a scratch start. High-frequency TIG starts the arc without touching the work, which is helpful when contamination and arc marks must be minimized. Scratch starting drags the tungsten across the surface and can leave tungsten particles in the weld.
Lift-Arc uses a brief contact followed by a controlled separation.
The main advantage is equipment simplicity. A machine that lacks high-frequency ignition may still provide a clean, repeatable TIG start through its lift circuit. The limitation is that the tungsten must contact the work, so poor technique or an incorrect machine mode can still cause contamination.
| Method | What happens | Main consideration |
|---|---|---|
| Lift TIG | Tungsten touches briefly, then lifts to start the arc | Requires a controlled touch and compatible machine |
| High-frequency start | Arc begins without touching the work | Usually gives the cleanest start but needs suitable equipment |
| Scratch start | Tungsten is dragged across the work to ignite the arc | More likely to contaminate the tungsten or workpiece |
When people search for how to lift tig weld, they are often asking how to avoid the scratch-start motion. The important distinction is that lift TIG is a machine function, not simply a different way to move a conventional TIG torch. If the power source does not regulate the initial contact, lifting the tungsten may behave like an ordinary short circuit.
Why polarity and material matter
DCEN concentrates most of the welding heat in the workpiece and is the usual choice for steel and stainless steel. AC alternates current direction and is commonly needed to weld aluminum because it helps manage the oxide layer while supplying useful penetration.
Some materials also demand special cleaning, preheating, filler selection, or post-weld treatment. A beginner can practice basic lift TIG on clean mild-steel scrap, but a production joint, pressure vessel, vehicle safety component, or load-bearing repair should follow a qualified welding procedure and inspection requirement.
How to check the weld and tungsten
Inspection begins with the arc start and ends with the cooled bead. Do not judge the weld solely by its shiny appearance. A bead can look smooth while having inadequate penetration, weak fusion, trapped contamination, or an unsuitable profile.
Inspect the arc start
The start should not contain a long scratch, a large black spot, or a visibly embedded tungsten fragment. A small start mark may be acceptable for a practice coupon, but repeated marks on the joint indicate that the contact or lifting motion needs improvement.
Inspect fusion and bead shape
Look for both joint edges to flow into the weld rather than sitting beside it like separate ridges. Excessive undercut, a sharp groove along the edge, suggests too much current, too much travel speed, excessive arc length, or poor torch control. A tall, narrow bead may indicate insufficient heat or filler being added too quickly.
Use a destructive check only on suitable scrap
For practice coupons, a bend, break, or cut-and-polish check can reveal whether the weld fused through the joint. Use only scrap and an appropriate method, and wear protection when cutting or breaking metal. Never apply an informal destructive test to a part that must remain in service.
Troubleshoot unstable starts and poor beads
Most beginner problems come from contamination, incorrect connections, an unsuitable start mode, excessive arc length, or trying to correct several settings at once. The table below gives a practical first check for common symptoms.
| Symptom | Likely cause and first correction |
|---|---|
| Tungsten sticks to the work | The contact lasted too long, the lift was too slow, or the machine is not in Lift TIG mode. Release control, inspect the tip, and verify the mode before trying again. |
| Arc wanders | The tungsten is contaminated or unevenly ground, the arc is too long, or the torch is moving. Regrind the tungsten and shorten the arc. |
| Gray, black, or porous weld | Shielding is inadequate, there is a draft, the metal is dirty, or the tungsten is contaminated. Check gas connections, clean the joint, and protect the area from airflow. |
| Weld burns through | Current is too high, travel is too slow, the material is too thin, or the joint gap is excessive. Reduce heat or move more steadily on a practice piece. |
| Edges do not fuse | Current is too low, travel is too fast, the torch angle is poor, or the joint is dirty. Clean the metal and adjust one factor at a time. |
| Gas continues or stops too soon | Post-flow or torch controls may be set incorrectly, or the hose and regulator may have a problem. Check the manual and inspect the gas system for leaks. |
When to stop and get qualified help
Stop welding if the machine, gas system, torch, leads, or workpiece behaves unexpectedly. Seek qualified help for damaged electrical equipment, suspected gas leaks, welding on unknown containers, confined-space work, structural repairs, pressure-containing parts, or any joint whose failure could injure someone.
Also stop if the material coating or history is unknown. Galvanized steel, painted metal, and alloys containing hazardous elements can produce dangerous fumes when heated. Removal of coatings, respiratory protection, ventilation, and exposure controls should be handled according to appropriate safety requirements rather than guessed at from the appearance of the metal.
Lift TIG welding FAQs for beginners
Can I use lift TIG on aluminum?
Only if the machine supports AC TIG and the torch, gas, tungsten, and settings are suitable. A DC-only lift-TIG machine is generally not the right equipment for aluminum welding because it cannot provide the alternating-current cleaning and heating behavior normally required.
Should the tungsten touch the workpiece?
Yes, but only briefly and deliberately when starting in Lift TIG mode. Touching during the weld or holding contact too long can stick the electrode and contaminate both the tungsten and the joint.
What gas should I use for basic lift TIG?
Pure argon is the normal starting gas for TIG welding steel and stainless steel. Use a secure cylinder, a compatible regulator and flowmeter, and a flow setting appropriate to the torch and joint. Do not substitute an unknown gas mixture.
Why does my lift-TIG start leave a black mark?
A black mark can come from contaminated metal, a contaminated tungsten, inadequate shielding, a draft, or holding the tungsten on the work too long. Clean the joint, regrind the electrode, verify gas flow, and repeat the start on scrap.
Is lift TIG better than high-frequency TIG?
Neither is automatically better. High-frequency TIG starts without touching the work and is often preferred for very clean or contamination-sensitive work, while lift TIG can provide a practical start on simpler equipment. The best choice depends on the machine, material, joint requirements, and operator control.
Finish with a clean, controlled lift TIG start
Learning how to lift tig weld comes down to controlled contact, clean preparation, correct polarity, reliable argon coverage, and a steady arc length. Touch the tungsten lightly, lift it straight and promptly, establish a small puddle, and watch the joint edges rather than chasing a perfect-looking bead.
Practice on clean scrap that matches the real material, inspect the tungsten and cooled weld, and change only one setting at a time. If the work is structural, pressure-related, safety-critical, or affected by unknown coatings or contamination, stop at practice and use a qualified welding procedure and competent inspection instead of relying on appearance alone.