How to TIG Weld Exhaust Pipe Safely and Cleanly
Exhaust tubing looks simple, but it is one of the easier welding jobs to spoil. The material is thin, the joints often fit awkwardly, and a little too much heat can leave a hole, pull the pipe out of alignment, or create a weld that leaks after the first drive. TIG welding gives you precise control, but it rewards careful preparation more than speed.
For a beginner, the attainable goal is a clean, sealed joint rather than a decorative bead. You can make that joint by matching the filler to the pipe, cleaning both sides thoroughly, using pure argon with a steady gas shield, and placing short welds instead of lingering on one spot. Stainless exhaust tubing also benefits from shielding the inside of the tube so the root does not oxidize.
This guide explains how to tig weld exhaust pipe with a conventional DC TIG setup, from identifying the metal and preparing the fit-up through tacking, welding, inspection, and leak testing. It focuses on repairable steel and stainless tubing. If the pipe is badly corroded, thin enough to crumble, or part of a safety-critical mounting system, replacement or qualified welding help is the better choice.
At a glance
- Clean, tight-fitting tubing is more important than high welding amperage.
- Use DC electrode negative and pure argon for steel or stainless exhaust tubing.
- Check the finished joint for distortion and leaks before reinstalling the exhaust.
How to TIG Weld Exhaust Pipe
The method is the same for most mild-steel and stainless-steel exhaust tubing: identify the alloy, cut and fit the joint, tack it while it is aligned, then TIG weld around it with controlled heat. The exact amperage depends on wall thickness, joint design, tungsten size, and your machine, so treat any starting range as a setup aid rather than a universal specification.
Tools you will need
- DC-capable TIG welder with a foot pedal or hand amperage control
- Pure argon cylinder, regulator, flowmeter, and suitable gas hose
- TIG torch with a clean ceramic cup, collet, and gas lens if available
- 2% lanthanated or ceriated tungsten electrode, sharpened for a stable arc
- Correct filler rod: commonly ER70S-2 for mild steel or ER308L for 304 stainless
- Angle grinder or files, stainless-only wire brush, and solvent for removing contamination
- Tube cutter, cutoff wheel, or saw for preparing the joint
- Clamps, magnets, or a simple fixture for holding the pipe in alignment
- Welding helmet, gloves, flame-resistant clothing, safety glasses, and hearing protection
- Optional: argon back-purge equipment for protecting the inside of stainless tubing
Step 1 Confirm the pipe metal and the repair limits
Start with the removed exhaust part whenever possible. Look for markings, compare the color and surface finish, and use a magnet only as a rough clue: stainless grades can be weakly magnetic or nonmagnetic, while many ordinary steel pipes attract a magnet. A magnet cannot identify the alloy reliably, so do not use it as the only basis for filler selection.
Most mild-steel exhaust tubing can be welded with a mild-steel filler such as ER70S-2. Common 304 stainless tubing is usually paired with ER308L filler. If the part is aluminized steel, remove the coating well away from the weld area and work with strong ventilation; the coating can produce hazardous fumes.
When the base metal is too thin to hold an edge, replacing the section is safer than trying to bridge it with weld.
Inspect nearby flanges, hangers, oxygen-sensor bungs, and flex sections as well. A crack may be caused by a failed hanger or excessive movement, and welding only the visible split can lead to another failure. Do not weld a hot, installed exhaust, and do not work on a vehicle supported only by a jack.
Step 2 Remove the damaged section and make a close-fitting joint
Mark the cut on sound metal, leaving enough length to create a square, accessible joint. A sleeve joint, where one tube fits over another, can work for a repair, but a butt joint is easier to control with TIG when the tubing ends can be aligned closely.
Cut the tubing as squarely as practical, then deburr both edges. Test-fit the pieces on a flat surface or in the vehicle position. The ends should meet evenly around the circumference, with a small, consistent root gap appropriate to the wall thickness.
Thin exhaust tubing generally benefits from a very small gap; a large opening forces you to add too much filler and heat.
Check the orientation before removing anything from the fixture. Flanges should remain parallel, bends should point in the correct direction, and sensor ports should not rotate out of position. A joint that is perfectly welded but misaligned can still prevent the exhaust from fitting.
Step 3 Clean the metal and prepare the TIG setup
Remove paint, scale, rust, oil, and any aluminized coating from several millimeters beyond the joint on both sides. Wipe the area with a clean solvent that is approved for the surface, and let it evaporate completely. Use a dedicated stainless-steel brush only on stainless; a brush previously used on ordinary steel can embed particles that later rust or contaminate the weld.
Install a sharp tungsten and set the machine to DC electrode negative for steel or stainless steel. A 1.6 mm tungsten is a practical starting size for thin tubing, although a smaller or larger electrode may be appropriate for your amperage range. Set argon flow according to the torch and cup; excessive flow can create turbulence and draw air into the shield instead of improving it.
For thin tubing, begin at a conservative amperage and use the pedal to add heat only when the puddle needs it. Many exhaust joints fall somewhere around 40 to 80 amps, but wall thickness and heat sinking can move that figure substantially. Set post-flow long enough to keep the hot tungsten and end of the weld shielded after you release the arc, following the welder or torch manufacturer’s guidance.
Important
Welding fumes, ultraviolet light, hot metal, and compressed gas all require real protection. Provide cross-ventilation or suitable fume extraction, keep flammable materials away, secure the argon cylinder upright, and never weld a fuel-soaked or recently contaminated exhaust component.
Step 4 Fit and tack the tubing in its final position
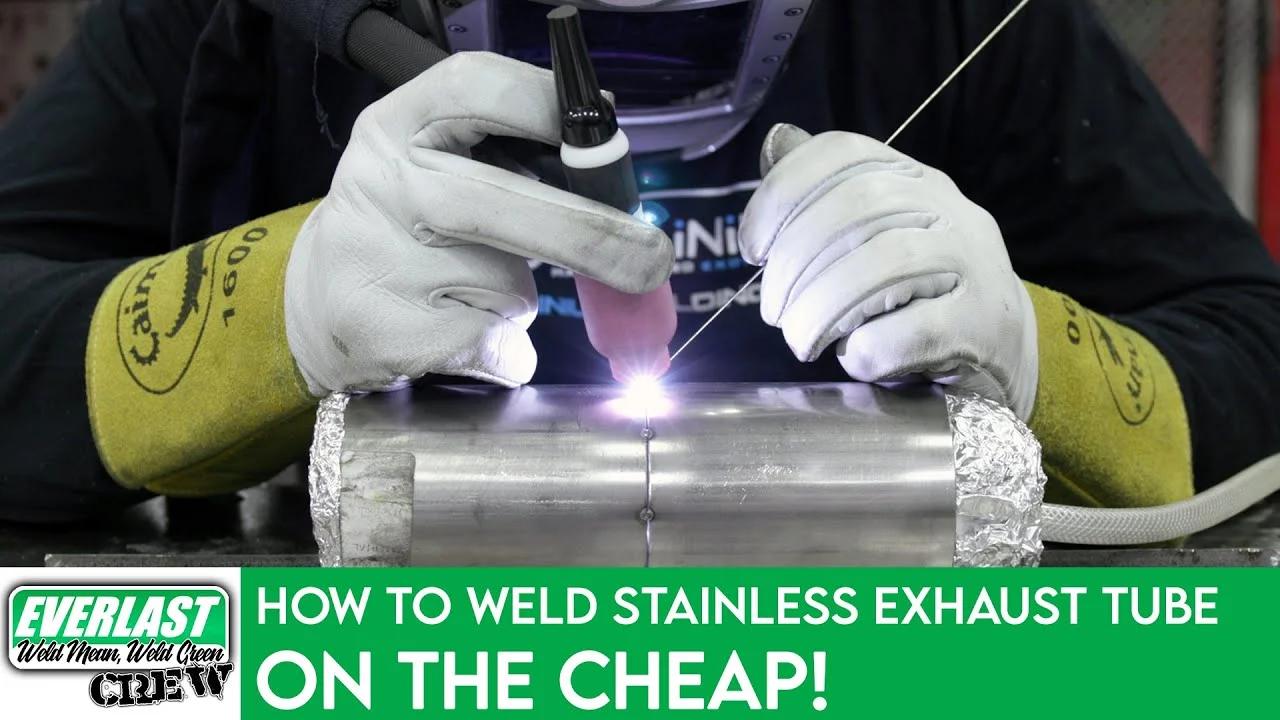
Clamp the pipe so the joint cannot spring apart. Place the first tack on one side, then a second tack directly opposite it. Add two more tacks between those points so the joint is held at four or more locations around the circumference.
Keep each tack short enough to avoid sinking the wall. Allow the tack to cool briefly if the tubing begins to discolor heavily or move. The successful result is a joint that stays closed and aligned when you release the clamps; if the gap opens between tacks, stop and correct the fit rather than filling the opening with a large bead.
Recheck the complete exhaust assembly after tacking. If the pipe has a flange or a nearby bend, bolt the flange to a spare matching flange or use a fixture to control movement when practical. Thin tubing contracts as it cools, so tack placement and sequence matter.
A useful way to approach how to tig weld exhaust pipe is to check your progress after each stage.
Step 5 Back-purge stainless tubing when the inside will be exposed
Back purging means filling the inside of the tube with argon while welding. It prevents oxygen from reacting with the hot stainless root, which otherwise can form a rough, dark layer called sugaring. That roughness can reduce corrosion resistance and disturb exhaust flow.
Seal the tube far enough from the weld to avoid pressurizing it, then introduce a low, steady argon flow through one opening and provide a small exit path at the other. The exact purge flow depends on the tubing and setup; the inside should be displaced without creating enough pressure to blow through the molten joint. A simple test is to confirm gas can enter and escape before striking the arc.
Back purging is especially worthwhile on stainless butt joints and whenever the inside of the weld must remain smooth. For a mild-steel exhaust repair, internal purging is usually unnecessary, though it can still help limit oxidation in some situations.
Step 6 Weld the joint in short, controlled sections
Hold the torch so the tungsten stays centered over the joint, with a short arc length and the cup close enough to provide coverage without touching the work. Feed filler at the leading edge of the puddle, not directly into the tungsten. Keep the torch angle modest so the argon shield is not pushed away from the molten metal.
Start at a tack and weld a short section, then move to the opposite side of the pipe. Alternating sides helps distribute heat and limits distortion. On very thin tubing, you may be able to fuse a properly fitted joint with little or no filler, but adding a small amount of matching filler is usually more forgiving and helps reinforce the seam.
Watch the puddle rather than trying to maintain a visually perfect bead. The base metal should melt into a small, controlled pool that advances smoothly. If the puddle suddenly grows, the surface turns excessively bright, or the edge begins to sag, reduce amperage or travel faster.
If the puddle will not form, improve the ground connection, clean the metal again, or add a little heat rather than forcing filler into a cold joint.
Continue around the circumference, overlapping each section into the previous one. Stop the arc while moving slightly back into the completed weld and keep the torch over the area during post-flow. This leaves a less abrupt termination and helps protect the cooling tungsten and crater.
Step 7 Finish the seam and let the pipe cool naturally
Inspect the full circumference while the pipe is still accessible. If you find a pinhole or a section that did not fuse, clean the area, allow the part to cool, and repair it with a short controlled pass. Do not repeatedly chase defects while the entire tube is heat-soaked; accumulated heat is a common cause of burn-through and distortion.
Let the tubing cool in still air. Do not quench a hot stainless or steel exhaust joint with water, because rapid cooling can create distortion and unnecessary thermal stress. Remove only loose discoloration after cooling.
Excessive grinding can thin the wall and turn a sound weld into a future leak.
Step 8 Test-fit, inspect, and verify the repair before installation
Place the cooled assembly back in its intended position and confirm that the hangers, flanges, heat shields, and oxygen-sensor wiring have their normal clearance. Make sure the pipe is not under tension when the fasteners are tightened. A weld can crack later if the exhaust is forced into alignment during installation.
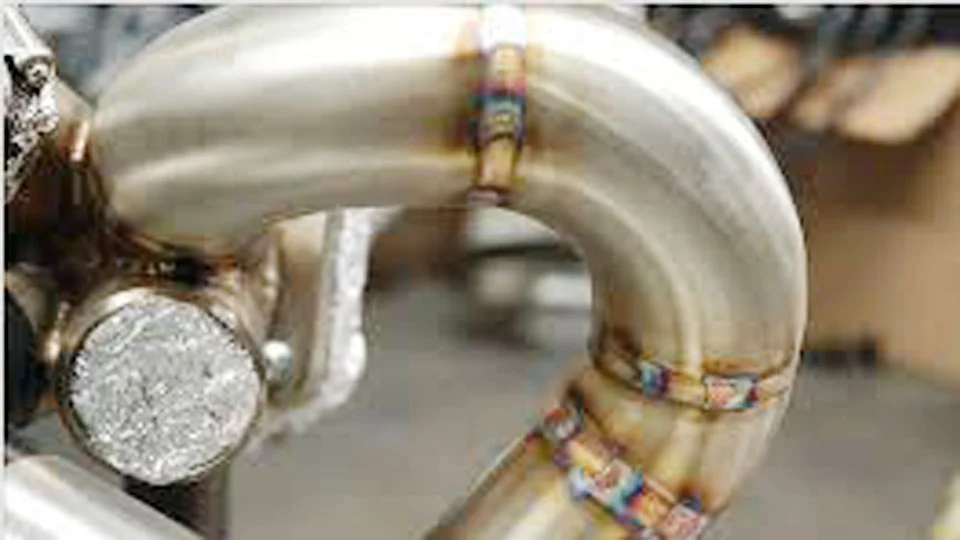
Perform a visual inspection with a bright light. A sound bead should be continuous around the joint, fused at both edges, and free of visible pinholes, cracks, undercut, and loose black contamination. Light heat color on stainless is normal; a heavily sugared or flaky interior indicates that the root was not adequately shielded.
Once the exhaust is installed safely, start the engine and let it run only long enough to inspect the repair. Keep hands, clothing, and tools away from moving or hot parts. With the engine cold or at a safe temperature, you can also apply a mild soapy-water solution around the seam while the exhaust is under slight pressure; bubbles indicate a leak.
Never block the tailpipe completely to force pressure into the system, and never rely on smell alone. Understanding how to tig weld exhaust pipe also means recognizing the limits of the method.
Check your result
A successful repair remains aligned, shows continuous fusion around the joint, produces no bubbles during a cautious leak check, and does not create a new exhaust noise when the engine runs.
Choosing Settings, Filler, and Joint Design
The best TIG result comes from matching the welding variables to the actual pipe rather than copying a single machine setting. Wall thickness, tubing diameter, joint gap, and whether the pipe is clamped to a heavy flange all change how quickly heat builds.
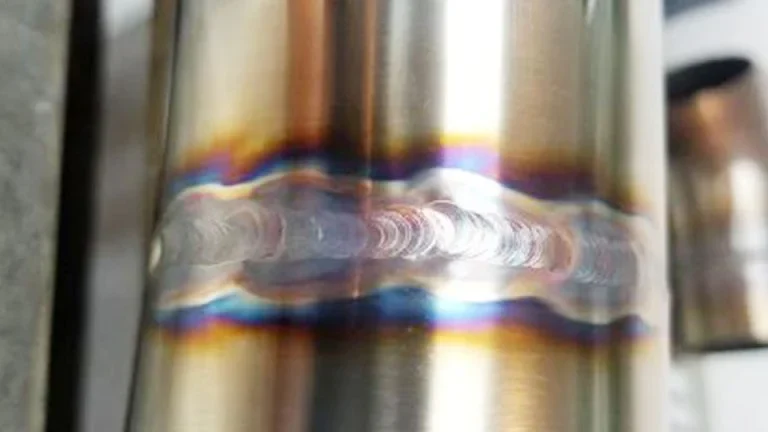
Polarity, shielding gas, and tungsten
For ordinary steel and stainless exhaust tubing, DCEN directs most of the welding current into the work and produces a focused arc. Pure argon is the normal shielding gas. Argon-helium mixtures can add heat, but they are not necessary for a beginner repairing thin exhaust tubing.
A properly sharpened tungsten should have a clean, even point. If the tip touches the filler or puddle, stop, let it cool, and regrind it before continuing. A contaminated tungsten can make the arc wander and introduce inclusions into the weld.
Filler selection and stainless compatibility
Use filler that matches the base material and service requirements. ER70S-2 is a common choice for mild steel, while ER308L suits many 304 stainless exhaust components. Stainless grades such as 409, 439, and 321 may require different filler considerations, particularly when the original material is known and the repair will experience repeated high temperatures.
Do not assume that a shiny pipe is 304 stainless or that every dark pipe is mild steel. When the alloy is uncertain, consult the tubing supplier, vehicle or exhaust manufacturer, or a qualified welding professional. Using an incompatible filler may produce a joint that looks acceptable but has poor corrosion or heat resistance.
Why fit-up controls the heat
A tight, even fit lets the arc fuse the two edges without requiring a large volume of filler. A wide or uneven gap makes the puddle larger and increases the chance of burn-through, especially on thin tubing. If the ends do not meet consistently, recut or reshape the joint instead of trying to compensate with higher amperage.
Exhaust tubing also expands and contracts repeatedly. Good support from hangers and a properly positioned flex section can matter as much as the weld itself. If the original design has a flexible connector, do not replace its function with a rigid welded section.
Troubleshooting Common TIG Exhaust Problems
Most failed beginner welds have a visible cause: contamination, poor fit-up, excessive heat, inadequate shielding, or movement during the pass. The table below helps connect the appearance of the weld with the most likely correction.
| Symptom | Likely cause and correction |
|---|---|
| Small holes or melted edges | Too much heat, slow travel, or excessive root gap. Reduce amperage, move faster, improve the fit, and let the part cool between sections. |
| Dark, rough, crusty stainless weld | Poor gas coverage or no back purge. Check leaks, cup position, gas flow, wind, and internal argon shielding. |
| Gray or unstable arc | Contaminated tungsten, dirty metal, poor ground, or gas contamination. Reclean the joint, regrind the tungsten, and inspect the gas setup. |
| Weld looks continuous but leaks | Incomplete fusion, a pinhole at a stop, or a hidden crack. Clean the area and use a controlled repair pass after the part cools. |
| Pipe no longer fits | Heat distortion or movement during tacking. Recheck alignment before welding, alternate sides, and use more secure fixturing. |
If the tubing repeatedly burns through even after cleaning and reducing heat, the metal may be too thin or too corroded for a dependable repair. Adding a patch over deteriorated tubing can conceal the problem without restoring sound structure. Replace the section when there is not enough solid metal for the weld to grip.
Cleaning and equipment mistakes
Silicone, oil, marker residue, and some degreasers can contaminate the weld. Use lint-free wipes and allow solvent to evaporate; never weld while the surface is wet with cleaner. Keep filler rods covered and wipe them if they have been handled with greasy gloves.
Gas problems can be subtle. A loose hose connection, empty cylinder, damaged O-ring, blocked torch screen, or draft across the work can all reduce shielding. If the weld suddenly becomes porous, stop and diagnose the gas path before adding more weld.
Beginner Questions About TIG-Welding Exhaust Pipe
These questions address the decisions that most often affect a first repair. When the material, condition, or vehicle fit is uncertain, a welding supplier or qualified exhaust technician can help identify a safer option.
Can I TIG weld an exhaust pipe while it is still on the vehicle?
It is better to remove it whenever possible. An installed exhaust can contain oil, road debris, coatings, and trapped fumes, and access is usually poor. If removal is impossible, the vehicle must be securely supported, the area must be cleaned and ventilated, and all nearby wiring, fuel-system parts, and heat-sensitive components must be protected.
Do I need to back-purge a mild-steel exhaust pipe?
Usually not. Back purging is most important for stainless steel because it protects the inside root from oxidation. Mild steel can generally be welded from the outside with normal torch shielding, provided the joint is clean and the fit-up is controlled.
What filler rod should I use for stainless exhaust tubing?
ER308L is commonly used with 304 stainless tubing. Other stainless grades may need a different filler, so confirm the base alloy when possible. Do not select filler solely from the pipe’s color or surface finish.
Can I weld a rusty or perforated exhaust pipe?
Not reliably if the corrosion has thinned the surrounding metal. Grind or cut back to solid material and inspect the remaining wall. If the area crumbles, develops new holes beside the weld, or cannot hold a clean edge, replacement is the sounder repair.
How do I know whether the weld is leaking?
Inspect the seam visually, listen for a new ticking or hissing sound, and use a cautious soapy-water check around the joint when practical. Test only with the exhaust supported and at a safe temperature, and never completely block the tailpipe to create pressure.
Finish With a Sealed, Supported Repair
Learning how to tig weld exhaust pipe is mainly an exercise in preparation and heat control. Identify the metal, cut back to sound tubing, make the joint fit closely, use the correct filler and DCEN setup, and tack the assembly so it stays aligned. Short alternating weld sections, clean shielding gas, and a back purge for stainless help prevent the most common failures.
Before calling the job complete, inspect the entire seam, reinstall the exhaust without forcing it into position, and perform a careful leak check. If the pipe is severely corroded, the alloy is uncertain, or the repair affects a critical mounting or emissions component, stop and have the part evaluated or replaced. A modest, properly verified repair is safer and more durable than a large weld built over weak metal.