How to TIG With a Stick Welder: Beginner Setup
A stick welder can sometimes perform basic TIG work, but it does not become a full-featured TIG machine by adding a torch. The realistic method is scratch-start TIG: the welder supplies a DC welding current, while a separate torch delivers argon shielding gas. This approach can make clean welds on suitable steel and stainless steel, but it lacks the easy arc starting and fine controls found on a dedicated TIG welder.
Before connecting anything, confirm that the machine is a DC-capable constant-current welder with a suitable current range and a manufacturer-approved way to use it for TIG. You also need a TIG torch, pure argon, a regulator and flowmeter, a ground clamp, and tungsten. A basic AC stick welder will not work for this process, and aluminum generally requires AC TIG.
This guide explains how to tig with a stick welder without treating the setup like a normal stick-welding job. You will learn how to prepare the joint, connect the torch with the correct polarity, start and control the arc, add filler, and inspect the finished bead. If the machine manual does not clearly support this arrangement, stop and use a dedicated TIG machine or ask a qualified welding supplier to verify the setup.
At a glance
- Use only a compatible DC constant-current welder; do not assume every stick machine can TIG.
- Run the torch on DC electrode negative and shield the molten pool with pure argon.
- Practice on clean mild steel first, then inspect the bead for smooth fusion and contamination.
How to tig with a stick welder
The method below is a controlled scratch-start TIG setup, not high-frequency or lift-arc TIG. The tungsten touches the work briefly to start the arc, then you move it away while keeping the arc short. Because the arc starts by contact, cleanliness and steady hand movement matter more than they do with a modern TIG machine.
Tools you will need
- DC constant-current stick welder with a TIG-compatible output range and manual guidance
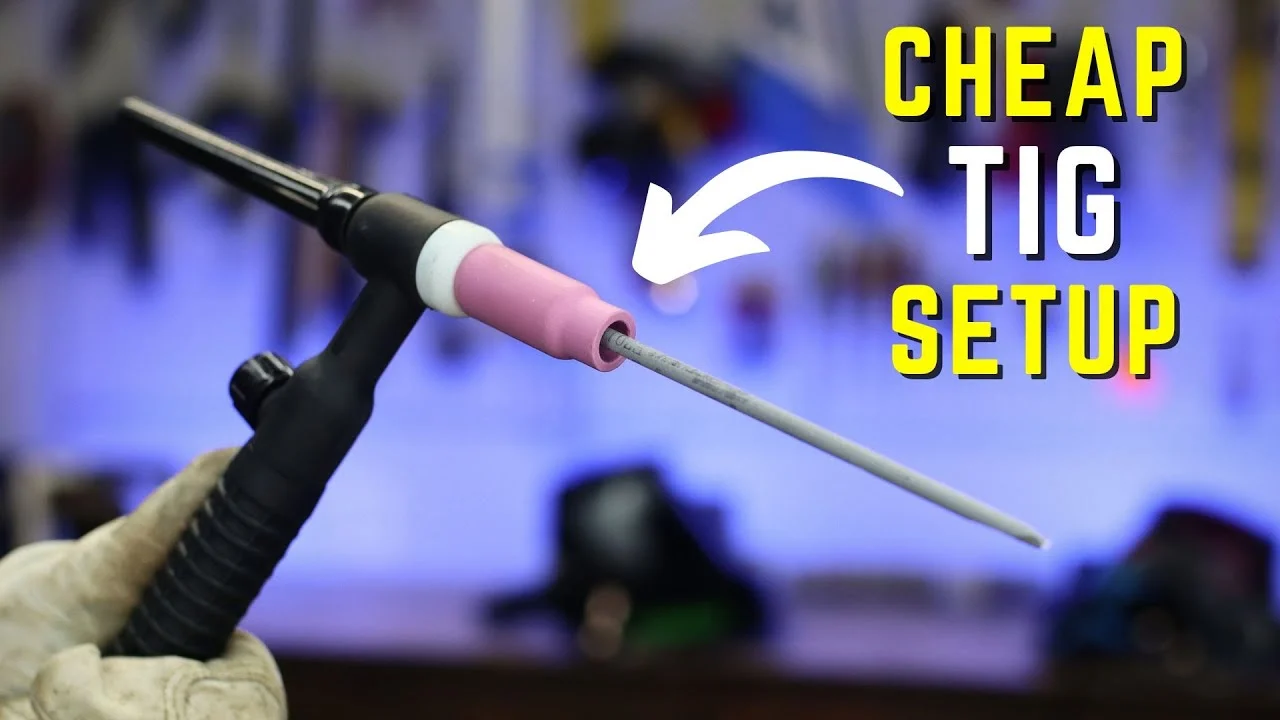
- Scratch-start TIG torch with a suitable collet, collet body, cup, and back cap
- Pure argon cylinder, regulator, and flowmeter for shielding gas
- 2% thoriated, ceriated, or lanthanated tungsten of an appropriate diameter; follow local handling guidance for thoriated tungsten
- Separate filler rod matched to the base metal, when the joint requires filler
- Welding helmet, fire-resistant clothing, welding gloves, safety glasses, and hearing protection
- Angle grinder or stainless-only wire brush for cleaning metal, plus a stable welding table and ground clamp
- Optional: foot pedal or torch switch only if the welder is specifically designed to accept one
Step 1 Confirm the welder and workpiece are compatible
Read the welder manual and its data plate before gathering connections. The machine should produce DC output and regulate welding current as a constant-current source. A simple transformer stick welder may provide DC but still be inconvenient or unsuitable for scratch-start TIG, while some inverter machines specifically list DC TIG or scratch-start TIG as an operating mode.
Choose clean, weldable steel for your first practice pieces. Mild steel is the easiest starting point; stainless steel is possible but demands better cleaning and heat control. Do not use this setup for aluminum unless the machine provides the required AC TIG function.
DC TIG on aluminum normally produces an unsuitable oxide-cleaning and heat balance.
Make sure the workpiece thickness fits the machine’s current range and the torch’s duty cycle. A stick welder with a high minimum output can quickly overheat thin sheet. Begin with a joint that can tolerate the available current rather than trying to force a very low-current weld from a machine that cannot regulate there.
Step 2 Prepare the joint and welding area
Remove paint, mill scale, rust, oil, and moisture from both sides of the joint. Use a clean abrasive tool or a dedicated stainless-steel brush; a brush previously used on carbon steel can embed contamination in stainless steel. Wipe the prepared area with an appropriate solvent and allow it to evaporate fully before striking an arc.
Fit the pieces tightly and clamp them so the joint cannot move as it heats. A loose or contaminated joint makes it difficult to tell whether a poor bead came from technique, bad fit-up, or an unsafe workpiece. Remove coatings from the surrounding area as well, because TIG does not tolerate surface contamination the way beginners sometimes expect.
Put the work on a noncombustible surface with enough room to move the torch and filler rod. Check behind and below the joint for paper, sawdust, solvents, insulation, or other flammable material. Ventilation must remove welding fumes without blowing directly across the argon shield.
Step 3 Assemble the torch and tungsten
Install the collet, collet body, ceramic cup, and back cap in the torch. Select a tungsten diameter that suits the current you will use and sharpen the electrode to a smooth point with the grinding marks running lengthwise. A pointed electrode helps focus a DC arc; do not sharpen it on a wheel contaminated with steel if you need a clean stainless-steel weld.
Let the tungsten extend only enough to maintain visibility and gas coverage. A short extension is easier for a beginner to control, while an excessively long stick-out exposes the electrode and weld pool to air. Check that the tungsten is tight but not crushed, and make sure the cup is clean and undamaged.
Connect the argon hose to the torch and the regulator to the gas cylinder, using the fittings supplied for that equipment. Keep the cylinder upright and secured. Open the cylinder valve slowly, then use the regulator and flowmeter according to their instructions.
Never use oxygen, compressed air, or a mixed shielding gas as a substitute for pure argon in this basic setup.
Step 4 Set polarity and connect the work lead
For ordinary DC TIG on steel and stainless steel, connect the TIG torch to DC electrode negative and connect the work clamp to positive. In practical terms, the torch lead goes to the negative output terminal and the work lead goes to the positive terminal. This polarity places most of the heat in the workpiece and gives the tungsten a useful operating condition.
Inspect the connectors for damage and make sure they are fully seated before turning on the machine. Attach the work clamp to bright, bare metal on the workpiece or a clean portion of the welding table that is electrically connected to it. A clamp attached over paint, rust, or a loose fixture can cause a wandering arc and excessive heating at the connection.
Important
Do not rely on color alone to identify polarity, and do not improvise with damaged leads or incompatible connectors. Follow the machine and torch manuals; if their polarity instructions conflict with this general DC TIG arrangement, the equipment instructions control.
Step 5 Choose a conservative current and gas flow
Set the machine to a low-to-moderate current appropriate for the material thickness and the tungsten diameter. Use the machine manual, a welding chart, or the torch manufacturer’s range as the starting point. Scratch-start TIG has no automatic current ramp, crater fill, or post-flow unless your equipment specifically provides those functions, so a beginner benefits from starting conservatively.
Set the argon flow using the flowmeter with the gas flowing. The correct setting depends on cup size, torch design, drafts, and setup, so avoid treating a single flow number as universal. Too little gas allows porosity and gray discoloration; too much can create turbulence that pulls air into the shield.
A useful way to approach how to tig with a stick welder is to check your progress after each stage.
Keep the torch and hose away from sharp edges and hot metal. A kinked gas hose, empty cylinder, or loose fitting can look like a technique problem because the arc still appears, but the weld will become porous or heavily discolored.
Step 6 Start the arc without sticking the tungsten
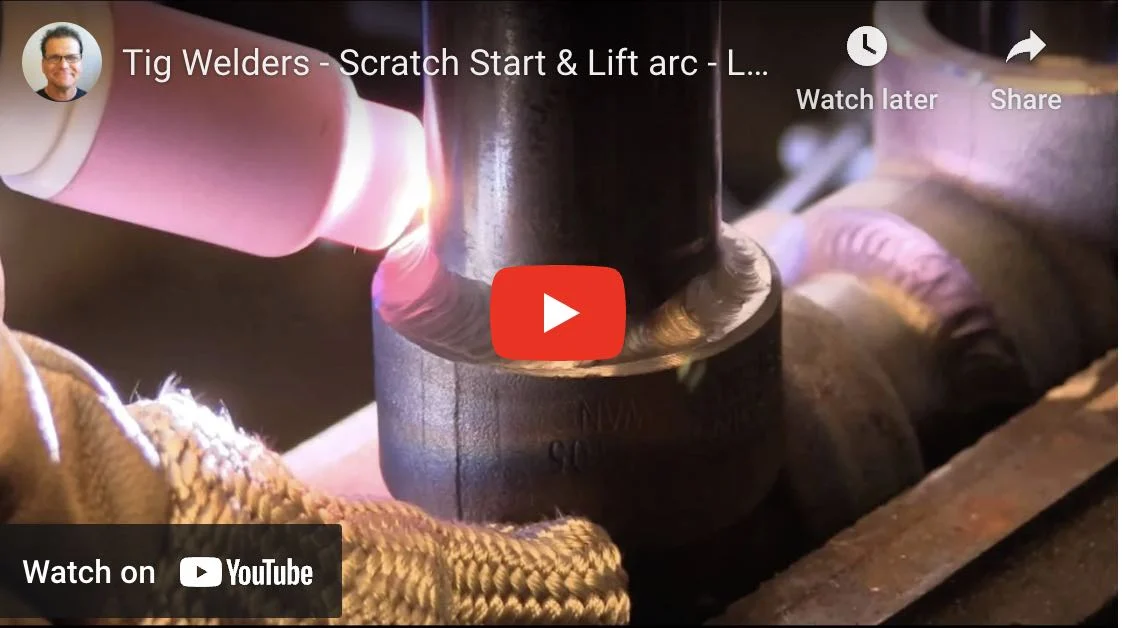
Hold the torch in your dominant hand and rest part of that hand against a stable surface if possible. Position the tungsten close to the joint without touching it, then briefly scratch or tap the tungsten against the starting point while moving it forward. As soon as the arc starts, lift the tungsten a small distance—roughly the diameter of the electrode is a useful visual goal—and establish a short arc.
The scratch should be a controlled starting motion, not a long drag across the joint. A long scratch spreads tungsten material over the workpiece and creates an uneven start. If the tungsten sticks, stop welding, switch off the output, allow the electrode to cool, and remove the contaminated section by regrinding it before trying again.
Keep the ceramic cup close enough to cover the pool without touching the work. Point the torch approximately 10 to 15 degrees in the direction of travel. The arc should be compact and quiet; a long, hissing arc usually indicates excessive arc length or an unstable start.
Step 7 Form the puddle and move steadily
After the arc is stable, pause long enough for a small molten puddle to form. Watch the edges of the puddle rather than staring only at the bright center. When the puddle wets both sides of the joint, move the torch smoothly along the seam while preserving the same angle, arc length, and travel speed.
Do not weave broadly while learning. A straight travel path produces a narrower, more predictable bead and makes it easier to identify a problem. If the puddle grows too wide, the edges sag, or the base metal begins to burn through, move faster or reduce current if the machine allows it.
If the puddle barely forms and the bead sits on top, you may need more heat, slower travel, or better joint cleaning.
Keep the torch moving even when you are not adding filler. Stopping over one spot concentrates heat and can enlarge the hole in thin material. At the end of the joint, move slightly beyond the intended stopping point while maintaining gas coverage, then break the arc in a controlled way rather than lifting suddenly from a large molten puddle.
Step 8 Add filler rod when the joint needs it
Use filler that matches the base metal and joint requirements. Hold the rod in your other hand at a shallow angle, generally ahead of the torch, and add small amounts to the front edge of the molten puddle. Dip the rod into the puddle without touching the tungsten.
Withdraw it slightly after each dip while keeping its hot end inside the argon shield.
Feed filler by moving your fingers or hand steadily instead of pushing a long length into the pool. The bead should grow in small, regular additions. If the filler balls up without joining, the rod may be dirty, the puddle may be too small, or the rod may be entering outside the protected molten area.
Autogenous TIG, which uses no filler, can be suitable for a tight-fitting thin joint when the base metal itself supplies enough material. It is less forgiving of gaps and poor fit-up, so adding a compatible filler rod is usually easier for a beginner when reinforcement or gap filling is needed.
Step 9 Finish the weld and allow shielding to end
At the end of the seam, reduce heat input by moving slightly faster and tapering the puddle if you can do so without losing control. Scratch-start equipment may not provide a post-flow timer, so keep the torch over the completed weld for several seconds after the arc stops while argon continues to flow manually or through the available gas control.
Moving the torch away immediately can expose the still-hot tungsten and weld end to oxygen. A dark gray, chalky, or heavily oxidized finish at the termination often indicates that the metal was not shielded while cooling. Do not touch the weld or tungsten until they have cooled sufficiently; they can remain hot even when the visible glow is gone.
Check your result
A good first practice bead usually has a consistent width, visible fusion into both sides of the joint, and small, regular filler ripples. The surface should not be covered with black soot, large pores, or a rough gray crust.
What makes scratch-start TIG different
Scratch-start TIG is a workable low-cost technique, but it has limitations that should shape your expectations. The stick welder controls amperage only; it normally does not control gas pre-flow, post-flow, high-frequency starting, crater fill, or pulse settings. That means the operator must coordinate the start and finish more carefully.
Unlike stick welding, TIG does not consume a flux-coated electrode. The tungsten creates the arc but should not melt into the joint. The argon shield protects the tungsten and molten metal from atmospheric oxygen and nitrogen, while the separate filler rod supplies metal when needed.
Understanding how to tig with a stick welder also means recognizing the limits of the method.
A stick electrode and a TIG torch are not interchangeable. Never put a coated stick electrode in a TIG torch, and never expect the torch to provide the flux protection used by a stick electrode. This setup is also not a way to TIG weld every metal: machine output, polarity, shielding, and base-metal requirements all matter.
Why electrode-negative polarity matters
With DC electrode negative, the torch and tungsten are connected to the negative side of the circuit. This is the usual arrangement for TIG welding steel and stainless steel because it keeps the tungsten relatively cooler while directing useful heat into the workpiece.
Reversing the leads can overheat and quickly damage the tungsten. It may also produce poor penetration or an unstable arc. Check the machine’s terminal markings before every change, especially if the welder is normally used for stick welding with a different polarity.
Why aluminum is usually outside this setup
Aluminum forms a tenacious oxide layer that melts at a much higher temperature than the aluminum underneath. Dedicated AC TIG uses alternating current to help break up that oxide while maintaining a controllable weld pool. A basic DC scratch-start arrangement does not provide that cleaning action in the normal way.
For aluminum, use a machine specifically designed for AC TIG, with the appropriate torch and controls. Do not compensate for a missing AC function by increasing current or grinding more aggressively; that can overheat the parent metal without producing a sound weld.
How to check the finished weld
Inspection begins after the workpiece has cooled enough to handle safely. A shiny bead is not automatically a strong bead, and a dull bead is not automatically defective. Look for evidence that the weld fused into the base metal rather than merely sitting on top of it.
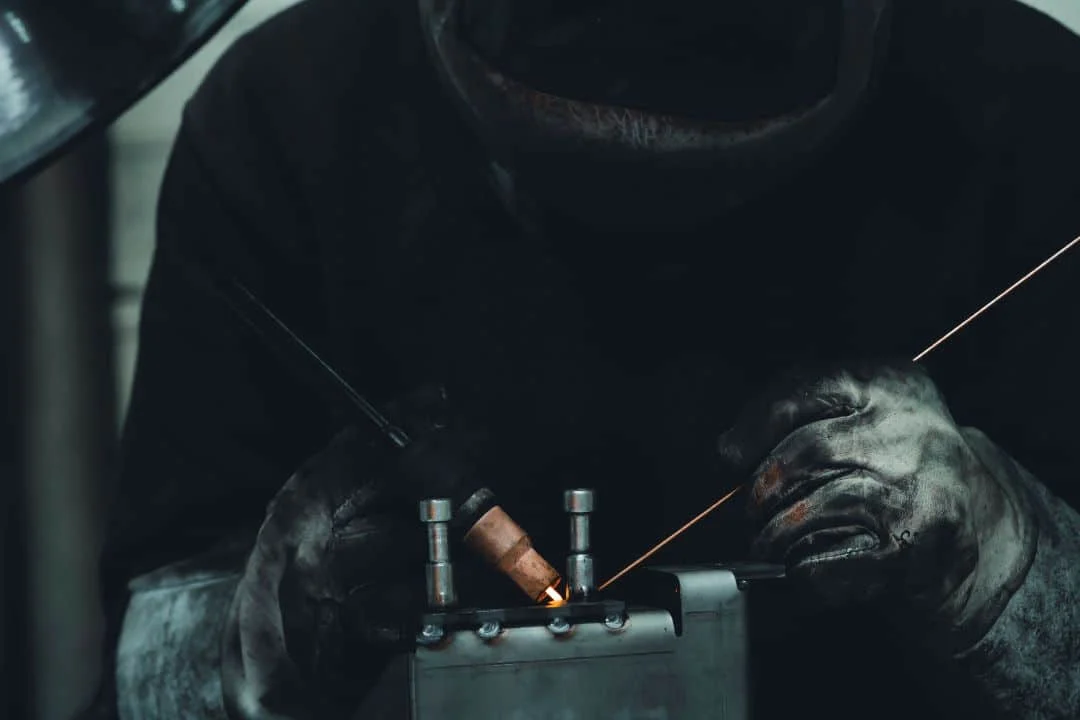
Inspect the bead surface
A sound beginner practice bead should be reasonably uniform in width and height, with smooth transitions at both edges. Small, evenly spaced ripples can show consistent filler addition and travel. Excessive undercut— a groove melted into the base metal alongside the bead—can indicate too much heat, too much arc length, or too fast a travel speed.
Look for pinholes, crater-like openings, black soot, or a rough gray surface. These signs can point to inadequate argon coverage, contamination, a dirty filler rod, a leaking hose, or a torch held too far from the work. A blue or straw tint on stainless steel may indicate heat or shielding issues, though appearance alone cannot prove structural quality.
Check fusion on a practice coupon
For practice, weld a short bead on a scrap coupon of the same material and thickness. After it cools, clean the surface and examine the bead edges. If the bead can be scraped away easily or the metal on each side remains visibly unmelted, the weld may have insufficient fusion.
When the joint matters structurally, appearance is not enough. Destructive testing, a qualified welding procedure, or inspection by a competent welding professional may be necessary. Stop and seek qualified help if the weld supports people, vehicles, pressure, lifting equipment, or other safety-critical loads.
Common problems and corrections
Most early TIG problems have a visible cause. Change one variable at a time so you can tell whether cleaning, polarity, gas coverage, current, or hand movement made the improvement.
| What you observe | Likely causes and useful checks |
|---|---|
| Tungsten sticks or becomes dirty | The start was dragged too far, the arc length collapsed, or the tungsten touched filler. Stop, regrind the contaminated end, and restart with a brief scratch and short lifted arc. |
| Porosity or black contamination | Check pure argon supply, hose fittings, flowmeter setting, drafts, dirty metal, and excessive torch distance. Keep the hot filler end inside the gas shield. |
| Bead sits on top with little joining | Clean the joint, verify DC electrode negative, reduce travel speed, or use more current if the material and machine permit it. |
| Burn-through or a wide sagging puddle | Current may be too high, travel may be too slow, or the material may be too thin for the machine’s minimum output. Use thicker practice material or a machine with finer current control. |
| Arc wanders or starts inconsistently | Look for a loose ground clamp, poor work contact, a damaged tungsten point, incorrect polarity, or a long arc. Re-establish clean electrical contact and sharpen the electrode. |
When to stop troubleshooting
Stop if the cylinder, regulator, torch, or electrical leads show damage, leaks, overheating, or unknown compatibility. Also stop if the machine trips repeatedly, produces erratic output, or lacks clear instructions for the proposed connection. A bargain setup is not worth bypassing a protective circuit or modifying a gas or welding connection without qualified technical advice.
Beginner questions about using a stick welder for TIG
Can any stick welder be used for TIG?
No. The machine must provide suitable DC constant-current output and be compatible with a scratch-start or other approved TIG arrangement. A machine that only supplies AC is not suitable for ordinary DC TIG, and a machine with an excessively high minimum current may be poor for thin metal.
Do I need a special TIG machine to get started?
No, not for basic scratch-start work on suitable steel. A compatible stick welder, TIG torch, argon system, tungsten, and filler can make simple DC TIG welds. A dedicated TIG machine becomes valuable when you need high-frequency or lift-arc starting, precise low-current control, post-flow, pulse, crater fill, or AC output.
Can I use the same argon regulator for another gas?
Use equipment rated and configured for the gas in question, and never mix gas-service components casually. Pure argon is the normal shielding gas for this method. Keep cylinders secured, inspect connections for leaks, and follow the cylinder supplier’s handling instructions.
Why does the tungsten turn into a ball?
A balled tungsten can result from excessive current, reversed polarity, contamination, or an electrode type and size that is not suited to the setting. Turn off the output, let the electrode cool, verify DC electrode-negative polarity, and regrind the damaged end before continuing.
Can I TIG weld without filler rod?
Yes, a tight-fitting joint can sometimes be welded autogenously, particularly in thin material. It is less forgiving of gaps and poor fit-up. Use compatible filler when the joint needs added metal, reinforcement, or gap control.
Finish with a controlled practice weld
Learning how to tig with a stick welder is mainly an exercise in using the right limitations to your advantage. Confirm DC compatibility, connect the torch negative and work clamp positive, use pure argon, keep the arc short, and practice on clean steel before attempting a demanding joint.
Judge the result by fusion, consistency, cleanliness, and the absence of porosity—not by appearance alone. If the machine or joint is beyond this simple scratch-start method, stop rather than improvising. A dedicated TIG welder or qualified inspection is the safer next choice for aluminum, thin sheet, precision work, and safety-critical repairs.