How to TIG Weld Thin Aluminum: A Beginner’s Safe, Clean Method
Thin aluminum can look simple to join, yet it gives beginners very little room for hesitation. Aluminum conducts heat quickly, its oxide layer melts at a much higher temperature than the base metal, and a small sheet can suddenly sag or burn through once the weld puddle becomes too hot. The goal is not to force the metal together with maximum amperage.
It is to create a small, controlled puddle while keeping the surrounding sheet cool enough to retain its shape.
Learning how to tig weld thin aluminum becomes much more manageable when the setup is correct before the arc starts. Clean metal, alternating current, pure argon, a properly prepared tungsten, and short welds make a bigger difference than simply turning up the machine. A close-fitting joint also reduces the amount of heat and filler needed.
This guide walks through a realistic beginner process for welding clean aluminum sheet and small tubing with a TIG machine. You will learn how to prepare the joint, select starting settings, establish the puddle, add filler without contaminating the tungsten, control heat, and inspect the finished bead. It also explains when to stop and seek help rather than risking damaged material or unsafe equipment.
At a glance
- Use AC, pure argon, and a dedicated stainless-steel brush reserved for aluminum.
- Keep the arc short and the puddle small; thin aluminum needs frequent pauses or short stitch welds.
- Judge the result by penetration, fusion, cleanliness, and the absence of burn-through—not by bead appearance alone.
How to TIG Weld Thin Aluminum Without Burning Through
The procedure below is intended for clean, weldable aluminum sheet or small sections, not painted, coated, oily, or unknown material. A tight butt joint or lap joint is easier for a beginner than a wide gap. If the material is part of a pressure vessel, structural component, vehicle safety system, fuel container, or other high-consequence assembly, use a qualified welder and the applicable welding procedure instead of relying on a practice guide.
Tools you will need
- AC/DC TIG welder with high-frequency start and amperage control, such as a foot pedal or fingertip control
- Pure argon cylinder, regulator, flowmeter, hose, and leak-free connections for shielding
- 2% lanthanated or ceriated tungsten electrode, sized for the sheet thickness and machine settings
- Aluminum filler rod matched to the base alloy when filler is needed
- Stainless-steel wire brush reserved only for aluminum oxide removal
- Acetone or an appropriate aluminum-safe degreaser, plus clean lint-free wipes
- Nonflammable work surface, clamps, magnets or fixtures, and a scrap aluminum coupon for practice
- Welding helmet with a suitable shade, flame-resistant clothing, welding gloves, safety glasses, hearing protection, and adequate ventilation
Step 1 Identify the aluminum and inspect the joint
Confirm that the pieces are aluminum and look for an alloy or temper marking if one is available. Common wrought alloys do not all weld the same way: some are easy to weld, while heat-treatable or highly alloyed grades can lose strength or crack if the joint and filler are poorly chosen. Do not weld material with an unknown coating, plating, paint, or residue until it has been correctly identified and cleaned.
Check the thickness and joint fit. Thin sheet should meet evenly with little or no gap, and the edges should not overlap unpredictably. A gap increases the heat needed to bridge the joint and makes burn-through much more likely.
Clamp the parts so they cannot spring apart, but leave enough access for the torch and filler rod.
Step 2 Prepare the aluminum and work area
Remove oil, marker residue, and other contamination with a suitable solvent and a clean wipe. After the surface dries, brush the joint and a narrow area around it with a stainless-steel brush used only on aluminum. This breaks up the tenacious aluminum oxide layer without embedding steel particles in the surface.
Do not use a carbon-steel brush or a brush that has already touched rusty steel. Avoid touching the cleaned joint with bare fingers because fingerprints can add oils that cause porosity. Clean the filler rod as well if it has been handled or stored where dust and grease can collect.
Set the work on a stable, nonflammable surface. Remove combustible items from the spark and heat area, provide ventilation for welding fumes, and make sure the argon cylinder is upright and secured. Ventilation does not replace respiratory protection or proper hazard control when the alloy or coating is uncertain.
Step 3 Set the TIG machine for aluminum
Connect the torch to the machine’s negative terminal and the work lead to the positive terminal, following the welder manufacturer’s instructions. Select AC polarity; alternating current provides the cleaning action needed to disrupt aluminum oxide while still allowing the arc to melt the base metal.
Use high-frequency start if the machine has it. It starts the arc without striking the tungsten against the work, which helps keep the electrode clean. Set the machine for 100 percent argon, not an argon-carbon dioxide mixture used for some wire-welding processes.
As a starting point, set maximum amperage around the upper end of the range appropriate for the material thickness, then control actual heat with the foot pedal or fingertip control. The correct number depends on thickness, joint type, fit-up, torch angle, and how quickly you travel. A beginner should practice on a scrap coupon rather than treating a single amperage value as universal.
Use moderate AC frequency and balance settings if your machine allows adjustment, staying near the manufacturer’s aluminum starting range. More cleaning action can help with an oxide-heavy surface but also adds electrode heating and can reduce penetration. Begin with the machine’s standard aluminum setting and change one control at a time.
Step 4 Prepare the tungsten and torch
Install a clean, properly sized tungsten and extend it only enough to maintain a clear view of the joint while preserving gas coverage. For a small, controlled arc, a short extension is generally easier than a long one. Grind the tungsten lengthwise to a consistent point or truncated point according to the electrode maker’s guidance.
Fit a clean ceramic cup and gas lens if available. A gas lens can provide smoother shielding and make a small arc easier to see, but it is not mandatory. Check that the collet, collet body, cup, and torch back cap are secure and free of aluminum dust.
Set argon flow within the torch and cup manufacturer’s normal range, then verify that gas actually flows when the torch is triggered. Excessive flow can create turbulence that pulls air into the shield, so more gas is not automatically better. If the tungsten becomes contaminated, stop, allow it to cool safely, and regrind or replace it before continuing.
Step 5 Practice the puddle on scrap aluminum
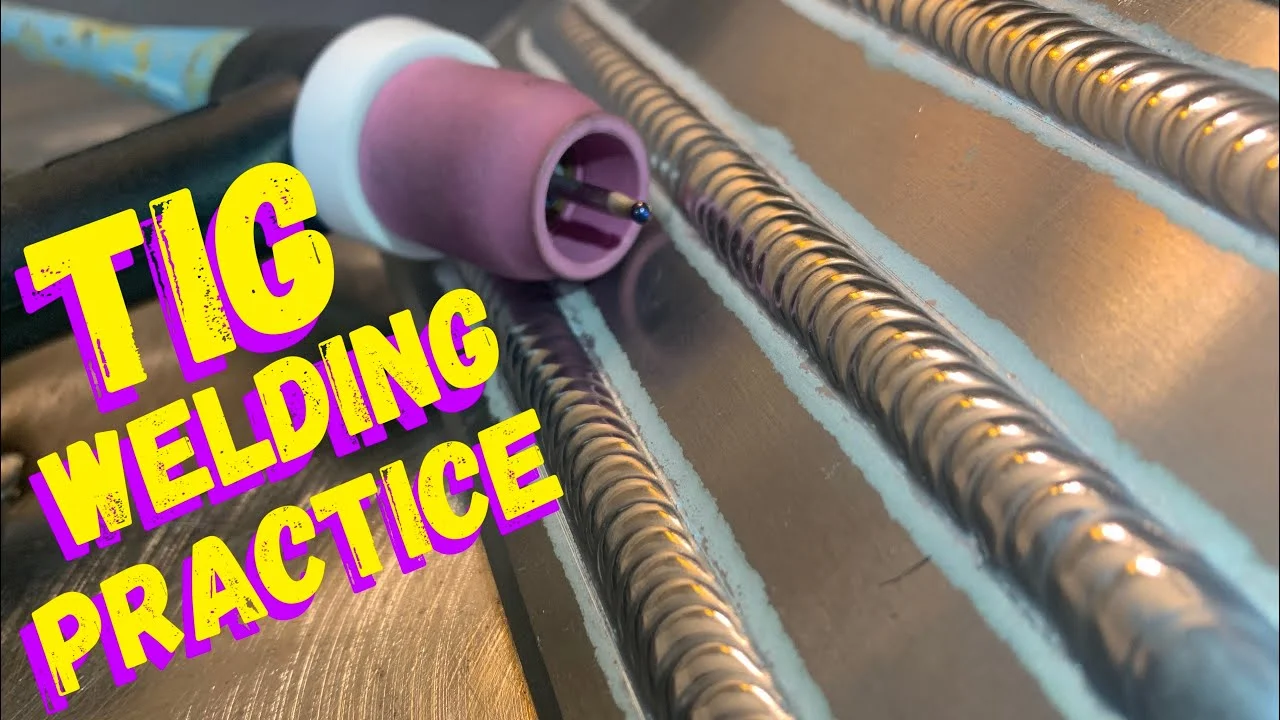
Place two scraps of the same or similar thickness in the intended joint configuration. Hold the torch so the tungsten points in the direction of travel, with the torch tilted only slightly from vertical. Keep the tungsten centered over the joint and maintain a very short arc without allowing the electrode to touch the aluminum.
Start the arc with high frequency and slowly increase pedal pressure until a small, shiny puddle forms. Aluminum oxide may make the surface look dull at first; the useful sign is a controlled molten area that wets into both edges rather than a broad, wandering pool. If the puddle immediately spreads away from the joint, reduce heat, improve fit-up, or increase travel speed.
Practice moving the puddle a short distance without filler. Thin aluminum often needs a quick travel speed because the surrounding material heats rapidly. The edges should soften and join without collapsing.
If the sheet develops a hole, stop immediately, release the pedal, and let it cool rather than trying to chase the opening with more heat.
Step 6 Tack the parts while controlling distortion
Place small tack welds at the ends and then at additional points along a longer joint, spacing them so the pieces remain aligned. A tack is a short weld that holds the parts before the continuous bead. Use enough heat to fuse the edges, but do not make large, tall tacks that require excessive heat to remelt.
Alternate sides or locations when the joint allows it. This distributes heat and limits the tendency of thin sheet to pull out of alignment. Let the metal cool between tack groups when it begins to discolor heavily, curl, or lose its shape.
Inspect the fit after tacking. The joint should remain closed and stable under light handling. If a tack has only sat on top without joining both edges, remove the weak section or correct the fit before proceeding; a cosmetic tack cannot compensate for a poor joint.
A useful way to approach how to tig weld thin aluminum is to check your progress after each stage.
Step 7 Run short welds and add filler correctly
Position the torch so the arc stays at the leading edge of the puddle. Start the arc on a tack or at a sound edge, establish a small puddle, and move smoothly along the joint. Keep the arc short and the torch movement steady; lifting the torch lengthens the arc and can reduce shielding and heat control.
When the edges begin to fuse, dip the end of the filler rod into the front edge of the puddle, then withdraw it without waving it outside the argon shield. Repeat small additions as needed. Feed filler from the side or front while keeping the rod close to the puddle, and avoid touching the tungsten.
For very thin, well-fitted sheet, autogenous welding—joining without filler—may be possible, but it leaves little material to bridge imperfections and can produce a narrow, heat-affected joint. Filler is usually helpful when the joint has a small, deliberate gap or needs reinforcement. Use a filler compatible with the base alloy rather than choosing solely by rod diameter.
Weld only a short section before easing off the pedal and letting the metal cool enough to regain control. Overlapping short welds can be safer than trying to complete a long uninterrupted bead on thin sheet. Stop at the edge of a tack or a previous weld while the puddle is still controlled, then restart on sound metal with enough overlap to avoid a crater.
Helpful tip
Watch the edges more than the center of the bead. A sound puddle wets both sides evenly; a bright, wide pool that keeps growing is a signal to reduce pedal pressure or travel faster before the sheet collapses.
Step 8 Finish the weld and protect the crater
At the end of each weld segment, reduce amperage gradually while continuing to move slightly forward. This tapers the puddle and helps prevent a crater, which is a depression at the weld termination that can crack or leave a weak spot.
Keep the torch over the finished area for the machine’s post-flow period so argon protects the hot tungsten and weld surface. Do not pull the torch away immediately while the metal is still glowing. If the weld becomes dirty or porous near the end, check for inadequate gas coverage, drafts, contamination, or an overly long arc.
Allow the part to cool naturally on the fixture. Quenching hot aluminum can distort the part and may affect its properties. Do not handle it bare-handed until you have confirmed that it is cool.
What makes thin aluminum difficult to TIG weld?
Aluminum’s high thermal conductivity carries heat away from the arc quickly at first. As the surrounding area warms, however, the same sheet can suddenly absorb less additional heat and melt through. This changing response is why a weld that looks stable at the beginning may become too wide near the end.
The oxide layer is another challenge. Aluminum oxide protects the surface but melts at a much higher temperature than aluminum itself. AC TIG’s cleaning portion helps disrupt that layer, while the electrode and arc provide the heat needed to form the puddle underneath.
Cleaning the surface remains essential; the AC setting cannot reliably compensate for oil, paint, moisture, or heavy contamination.
When people ask how to tig weld thin aluminum, they are often really asking how to manage accumulated heat. Short weld segments, tight fit-up, correct travel speed, tack placement, and pedal control all address that problem. Increasing amperage to force a puddle through contamination usually creates a larger hole rather than a stronger weld.
Choose filler and tungsten thoughtfully
Use a filler alloy recommended for the base material and intended service. Common aluminum fillers differ in fluidity, crack resistance, strength, and suitability for dissimilar alloys. If the alloy is unknown or the joint is safety-critical, stop and obtain the correct welding procedure or professional advice.
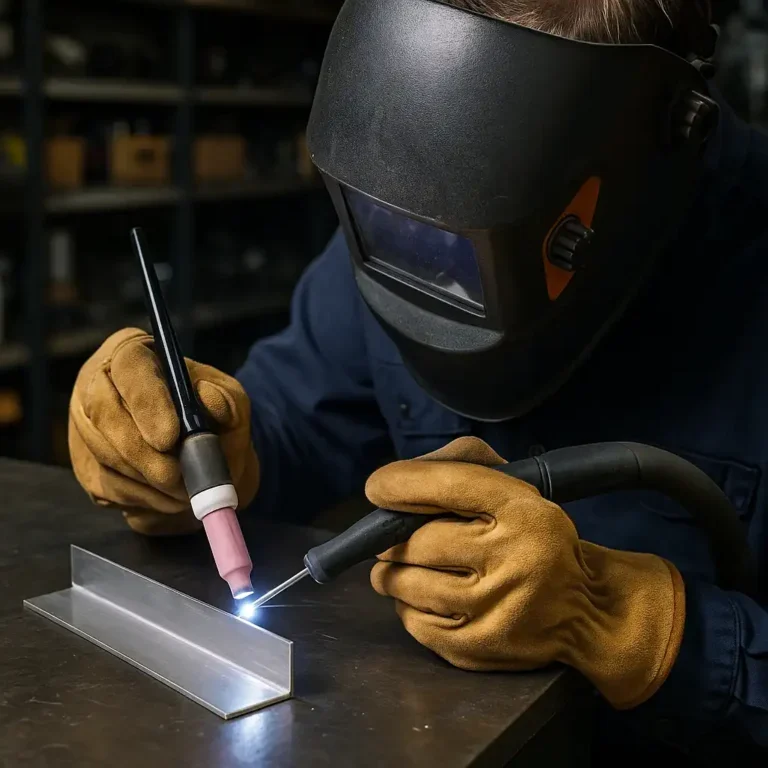
A lanthanated or ceriated tungsten is a practical general-purpose choice for inverter TIG machines. The diameter must suit the current range and torch setup. An oversized electrode can make a small arc less responsive, while an undersized one can overheat and lose its shape.
Use heat control instead of relying on one setting
Amperage is only one part of heat control. A foot pedal lets you use more current to start the puddle and less once the joint is hot. Travel speed, arc length, torch angle, filler additions, tack spacing, and cooling pauses all change the amount of heat entering the sheet.
Preheating is usually unnecessary for very thin aluminum and can make burn-through more likely. For thicker sections, a controlled preheat may help, but it should follow an appropriate procedure because excessive temperature can damage the material or create unsafe handling conditions.
How to check the finished aluminum weld
Begin with a visual inspection after the piece has cooled and been cleaned of loose residue. A useful weld should show continuity, fusion at both edges, and a controlled profile appropriate to the joint. A shiny bead alone does not prove that the weld penetrated or bonded correctly.
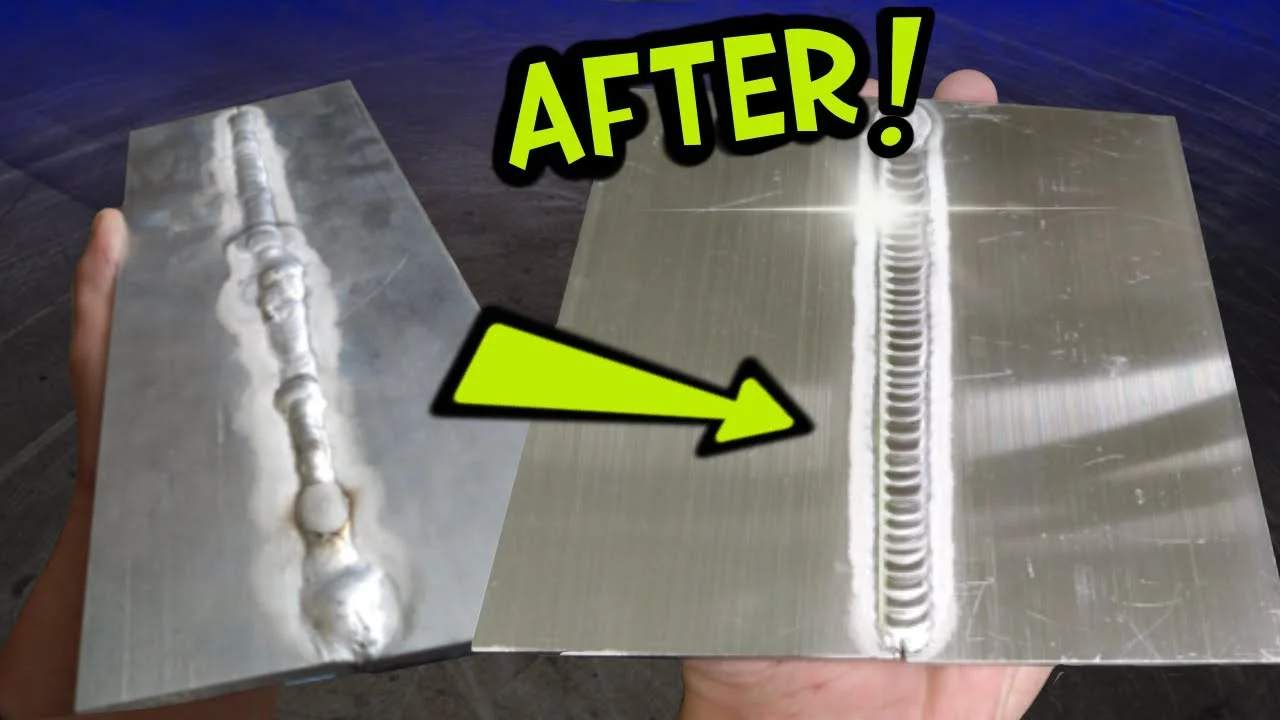
- Check the toes: The weld should blend into both pieces without a sharp unfused edge, deep undercut, or bead sitting entirely on top.
- Look for burn-through: Holes, severe sagging, or a thin edge indicate excessive heat or a poor gap.
- Look for porosity: Pinholes or small surface cavities suggest contamination, drafts, moisture, inadequate shielding, or an unstable arc.
- Check the crater: Weld ends should taper rather than finish in a deep depression or crack.
- Inspect distortion: Excessive warping can indicate too much heat, too few tacks, or an unsupported joint.
For practice coupons, cut across a sample only if you can do so safely and have the equipment to examine the section. A cross-section can reveal whether the weld fused both edges and whether penetration is consistent. Do not use a visually acceptable practice weld in a critical application without the required qualification, inspection, or testing.
Check your result
A sound beginner practice weld usually has an even width, smooth transitions at both edges, no visible pinholes, and a joint that remains aligned without a melted-through section. If any of those checks fail, correct the cause on scrap before welding the actual part.
Troubleshoot common thin-aluminum TIG problems
Change one variable at a time when diagnosing a poor weld. Clean a contaminated area and verify gas coverage before making major machine adjustments; otherwise, it is easy to mask the real problem with more heat.
| What you see | Likely cause and correction |
|---|---|
| The aluminum burns through | Too much heat, slow travel, a wide gap, or an overheated workpiece. Reduce pedal pressure, shorten the weld, improve fit-up, and allow cooling pauses. |
| The puddle will not wet the edges | Surface oxide or contamination, insufficient heat, poor torch angle, or an overly long arc. Reclean the joint, shorten the arc, and increase heat gradually. |
| The weld is gray, sooty, or porous | Weak shielding from low gas flow, a draft, leaks, excessive flow turbulence, a dirty cup, or contaminated metal. Check the gas system and clean the joint and torch parts. |
| The tungsten balls excessively or becomes dirty | Wrong AC setting, excessive current for the electrode, or contact with filler or molten aluminum. Stop, regrind or replace the tungsten, and verify settings. |
| The bead is tall and narrow | Travel is too fast, the puddle is too small, or filler is being added without enough base-metal fusion. Establish a controlled puddle and slow slightly without letting heat build excessively. |
| The joint pulls out of alignment | Too few or oversized tacks, inadequate clamping, or an uninterrupted long weld. Improve fixturing, use smaller alternating tacks, and weld in short sections. |
When to stop rather than keep adjusting
Stop welding if you cannot identify the material, the part contains a coating or residue that may produce hazardous fumes, the cylinder or torch leaks, or the workpiece is part of a critical pressure, lifting, fuel, or safety system. Stop as well if repeated cleaning and basic setup checks do not resolve contamination or lack of fusion.
A qualified welding professional can select a filler, welding procedure, preheat limit, and inspection method based on the alloy and service requirements. That is a safer choice than experimenting on a component whose failure could injure someone or cause significant damage.
Beginner FAQs about TIG welding thin aluminum
Can I TIG weld thin aluminum with a DC-only welder?
No, not reliably for normal aluminum welding. Aluminum generally requires AC to help break up its oxide layer. A DC-only TIG welder may be suitable for some specialized methods, but it is not the normal beginner setup for thin aluminum.
Do I need filler rod for every aluminum weld?
No. A tight, clean joint can sometimes be welded autogenously without filler. Filler is useful for bridging a small gap, controlling the joint profile, or adding material, but it must match the base alloy and should not be used to hide poor fit-up.
Why does my aluminum suddenly melt after the weld starts well?
Heat has accumulated in the sheet, so the metal begins melting faster than it can conduct heat away. Reduce amperage with the pedal, travel sooner, use shorter segments, and allow cooling between welds. Better clamping and fit-up can also reduce the required heat.
What gas should I use for thin aluminum TIG?
Use pure argon with a clean, properly adjusted regulator and leak-free torch connections. Argon-helium blends can be useful for some thicker or difficult work, but they are not necessary for a beginner’s thin-sheet setup.
Can I weld aluminum with a dirty or oxidized surface if I use AC?
No. AC cleaning action helps disrupt aluminum oxide, but it does not remove oil, paint, moisture, or embedded contamination. Degrease the surface, brush it with an aluminum-only stainless-steel brush, and keep the prepared area clean until welding.
Build control before welding the real part
The reliable way to learn how to tig weld thin aluminum is to make the process repeatable: identify the material, fit the joint tightly, clean both the aluminum and filler, use AC with pure argon, and practice a small puddle on scrap. Keep the arc short, add only the filler you need, and use short welds or stitch sections to prevent heat from accumulating.
Before accepting the finished weld, inspect both edges for fusion, look for porosity and burn-through, and confirm that the part has not distorted beyond its intended shape. If the alloy, coating, joint purpose, or weld quality is uncertain, pause and get qualified guidance. A few controlled practice coupons are a safer next step than repairing a critical component after excessive heat has already damaged it.