How to Prep Aluminum for TIG Welding: A Clean Start
Aluminum can look clean and still produce a dirty, unstable TIG weld. The metal quickly forms a hard aluminum oxide layer, and that oxide melts at a much higher temperature than the aluminum beneath it. Oil, marker residue, sanding dust, and moisture can add more contamination, leading to black soot, pinholes, lack of fusion, or a wandering arc.
Learning how to prep aluminum for tig welding is mostly a matter of controlling contamination before the arc starts. You do not need an elaborate process, but you do need the right sequence: identify the alloy and joint, remove grease, remove oxide with dedicated tools, fit the parts correctly, and keep everything clean until welding begins.
This guide explains that sequence for common aluminum sheet, plate, tube, and bar work. It also shows how to check whether the surface is truly ready, what to change when a test bead looks poor, and when surface preparation cannot compensate for an unsuitable machine setup or a damaged base metal.
At a glance
- Degrease aluminum before brushing or sanding so you do not spread oil across the joint.
- Use a dedicated stainless steel brush or clean abrasive only for aluminum, then protect the prepared surface.
- Confirm clean metal, sound fit-up, and dry filler rod before starting the arc.
How to prep aluminum for tig welding
The safest reliable method is a two-stage cleaning process followed by mechanical oxide removal. First remove oil and other organic contamination with a suitable solvent; then remove the thin oxide layer with a dedicated stainless steel brush or clean abrasive. Finish by checking the joint and protecting it from fingerprints, dust, and moisture.
Tools you will need
Gather clean lint-free rags, a suitable aluminum-safe degreaser such as acetone, a dedicated stainless steel brush or clean abrasive pad, eye protection, gloves, clamps, a file or deburring tool, and clean filler rod. Use ventilation and keep solvents away from sparks, hot metal, and the welding arc.
Step 1 Identify the aluminum and inspect the joint
Start by confirming what you are welding and how the pieces meet. Common alloys behave differently: some are readily weldable, while others are difficult or unsuitable for fusion welding because of cracking, poor corrosion resistance, or unknown composition. If the material is from a vehicle, aircraft component, pressure-containing part, or structural repair, do not assume that a visually clean surface makes it suitable for welding.
Inspect the edges for anodizing, paint, sealant, adhesive, heavy corrosion, deep scratches, and embedded dirt. Anodizing is an aluminum-oxide coating applied for appearance or corrosion resistance; it should normally be removed from the weld area because it can interfere with arc behavior and contaminate the weld.
Check the joint design before cleaning. The parts should sit where you want them without forcing a large gap closed with clamps. A loose or uneven fit-up requires more heat and filler, which makes aluminum more likely to slump, distort, or develop incomplete fusion.
For a beginner project, pause here if the alloy is unknown and the part is safety-critical. A welding supplier, material documentation, or qualified welding professional can help determine whether the base metal and joint are appropriate.
Step 2 Remove coatings, sealants, and heavy damage
Remove paint, powder coating, anodizing, stickers, adhesive, silicone, and sealant from the weld area and from the nearby heat-affected zone. A coating that is not directly under the arc can still burn, smoke, or leave residue as the part heats. Scrape or strip the coating first, then inspect the exposed metal rather than assuming the coating removal was complete.
For a clean edge, file away sharp burrs and remove torn or heavily oxidized metal. A deburring tool or fine file can make the joint easier to fit, but avoid grinding a deep groove into a thin part. If corrosion has pitted the joint, clean the area until sound metal remains or reconsider the repair; welding over corrosion tends to trap contamination.
Do not use a grinding wheel that has previously cut steel unless it is specifically clean and suitable for aluminum. Steel particles can become embedded in the softer aluminum and later appear as dark inclusions or rust-colored contamination.
Step 3 Degrease the aluminum before mechanical cleaning
Put on clean gloves and wipe the joint with a lint-free cloth dampened with an appropriate solvent. Acetone is commonly used because it evaporates without leaving much residue, but it is highly flammable and must be used with good ventilation. Follow the solvent label and the rules for your workspace; never use a solvent near an active arc, hot workpiece, or ignition source.
Wipe in one direction with a fresh section of the cloth, then allow the surface to dry completely. Do not simply spray solvent onto the part and let the liquid carry dirt into a seam. For a joint with a narrow groove, use a clean swab or a folded edge of cloth to reach the inside without pushing debris deeper.
Degreasing comes before brushing because a brush can spread oil over a larger area and press it into scratches. Remove cutting fluid, fingerprints, polishing compound, marker ink, and shop dust even if the surface looks bright.
Important
Solvent vapor can ignite from welding equipment, pilot lights, heaters, and hot metal. Keep the container closed, provide suitable ventilation, and wait until the part is fully dry and away from the solvent-handling area before welding.
Step 4 Break up the aluminum oxide layer
Use a dedicated stainless steel wire brush to scrub the joint and the nearby filler area. “Dedicated” means the brush has not been used on steel, galvanized metal, greasy parts, or other dirty materials. Brush firmly enough to remove the dull surface film, but do not gouge the base metal.
The oxide layer is not ordinary dirt. It forms naturally within moments of exposing aluminum to air and has a much higher melting point than the base metal. AC TIG welding uses arc cleaning to help disrupt oxide during welding, but that function is not a substitute for preparing the surface correctly.
For broad, flat surfaces, a clean abrasive pad or fresh aluminum-compatible abrasive can supplement the wire brush. Use light, controlled passes and avoid abrasives that shed fibers, binders, or steel particles. If you sand, remove the sanding residue afterward with a clean cloth and solvent, then let the surface dry.
Brush immediately before fit-up or welding when practical. If the prepared aluminum sits uncovered in a dusty or humid shop, inspect it again rather than assuming yesterday’s cleaning is still adequate.
Step 5 Clean the filler rod and tungsten separately
Filler rod needs the same attention as the base metal. Wipe each rod with a clean solvent-dampened cloth and let it dry before placing it near the joint. Store cleaned rod in a covered container or clean sleeve; do not leave it on a dirty welding table where it can collect grinding dust or oil.
A useful way to approach how to prep aluminum for tig welding is to check your progress after each stage.
Prepare the tungsten according to the electrode type and your TIG machine’s instructions. Keep the pointed end from touching the workbench, filler rod, or base metal. If the tungsten touches aluminum, stop and regrind or replace it as appropriate, because contaminated tungsten can make the arc unstable and transfer contamination back to the weld.
Do not use the same dirty cloth for the workpiece, filler, and torch parts. A clean cloth that has already picked up grease is no longer a cleaning tool.
Step 6 Fit, clamp, and protect the prepared joint
Bring the parts together and check the joint from several angles. The edges should be aligned, the gap should be intentional and consistent, and the clamps should hold the assembly without distorting it. Remove clamps or reposition them if they block torch access, interfere with the ground connection, or draw the joint out of alignment.
Clean the contact area for the work clamp so the electrical connection is reliable. A poor ground can look like a surface-preparation problem because it may produce an unstable arc, inconsistent cleaning action, or excessive heat.
After final cleaning, handle the joint only with clean gloves. Fingerprints contain oil and salts that can contribute to porosity and discoloration. Keep the prepared area covered from shop dust, but do not wrap it in a material that sheds fibers or leaves adhesive residue.
Helpful tip
Clean a little farther than the visible bead path, especially on thin sheet. Heat spreads beyond the arc, so nearby oil, paint, or oxide can be drawn toward the molten puddle as the part warms.
Step 7 Confirm the TIG equipment matches the material
Surface preparation cannot overcome an incompatible welding setup. Aluminum normally requires a TIG power source with alternating current, or AC, because the changing current helps break up the oxide while the electrode remains usable. A machine that provides only DC TIG is generally not the normal choice for fusion-welding aluminum.
Set up suitable argon shielding gas, a clean torch, the correct tungsten, and a gas cup that provides adequate coverage for the joint. Check the regulator, hose, fittings, and torch for leaks or damage. Shielding gas does not clean an oily joint; it only protects the hot weld area from atmospheric contamination.
Use the machine manufacturer’s guidance for AC balance, frequency, amperage, preflow, postflow, and tungsten size. These controls interact with thickness, joint design, torch movement, and alloy. Avoid changing several settings at once during troubleshooting, or you will not know which change helped.
Step 8 Make a small test weld or tack
Before committing to the finished joint, test the preparation on a scrap piece of the same or a closely matching alloy and thickness. If possible, use the same cleaning tools, filler, tungsten, gas flow, and machine settings. A test bead is not a perfect guarantee, but it can reveal obvious contamination and arc problems before the real part is damaged.
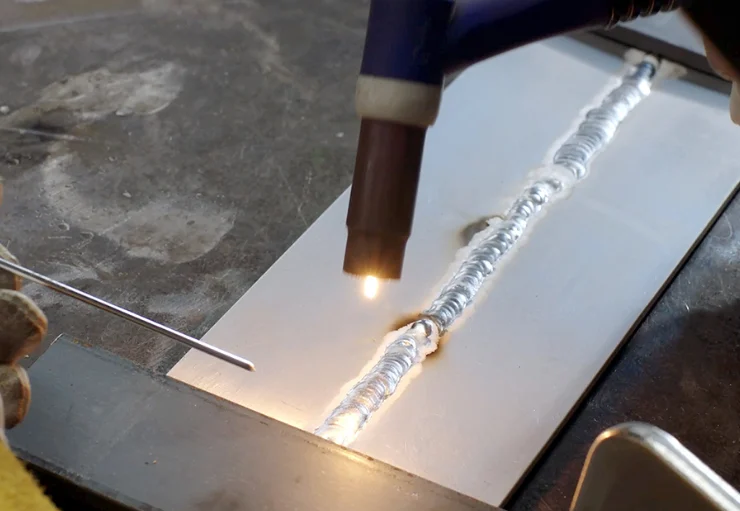
Watch the arc and the puddle. A properly prepared surface should allow the arc to start and remain reasonably stable, while the oxide layer gradually clears in the area being heated. The puddle should look fluid rather than covered by floating dirty material, and the filler should enter the leading edge without immediately boiling away or balling up.
Do not judge the weld only by its color. Aluminum may show a light, frosty cleaning band around the bead, but the size and appearance of that band depend on machine settings and surface condition. Excessive cleaning action can widen the etched area and reduce penetration, while too little cleaning or too much contamination can leave a dull, dirty boundary.
Step 9 Inspect the prepared surface immediately before welding
Use a bright light and look across the joint rather than only straight down at it. The weld path should be free of visible grease, loose dust, paint, adhesive, heavy corrosion, and abrasive residue. It should look uniform, with no shiny oily patches beside otherwise matte metal.
Run a clean gloved fingertip near—not across—the joint if you need to check for a burr or raised edge. Do not touch the prepared weld path with bare skin. Check that the filler rod is dry, the tungsten is clean and correctly shaped, and the part has not picked up fibers from a rag.
Once these checks pass, start welding without unnecessary delay. If the part becomes dirty again, repeat the affected cleaning steps rather than trying to burn the contamination away with extra amperage.
Why aluminum preparation changes the weld
Aluminum transfers heat quickly, so the joint can go from apparently cold to a broad molten puddle with little warning. Surface contamination makes that transition harder to control because oils and oxides change how the arc couples with the workpiece.
The natural oxide layer is thin but stubborn. It can remain as a film between the molten base metal and the filler, producing incomplete fusion or a dirty seam. Mechanical cleaning reduces the burden on the AC cleaning action, allowing the welder to focus on puddle control rather than trying to compensate for a neglected surface.
Understanding how to prep aluminum for tig welding also means recognizing the limits of the method.
Preparation also affects porosity. Porosity is gas trapped inside the solidifying weld. Moisture, grease, dirty filler, leaks in the shielding system, and contaminated base metal can all contribute.
Cleaning is only one part of preventing it, but it is the part a beginner can control most directly before striking an arc.
Joint fit-up matters for the same reason. A large gap or mismatched edge requires more filler and heat, increasing the opportunity for contamination to enter the puddle and increasing distortion. A well-prepared, closely fitting joint usually gives the process a more forgiving starting point.
How to verify the aluminum is ready
A ready-to-weld surface passes several simple checks. These checks are more useful than relying on a single visual clue because clean aluminum can still have a poor fit-up or a contaminated filler rod.
- Surface check: The weld path has no coating, adhesive, loose corrosion, visible oil, or sanding residue.
- Tool check: The brush, abrasive, cloth, filler, and tungsten are clean and have not contacted steel or greasy surfaces.
- Dryness check: Solvent has fully evaporated, and there is no condensation or moisture on the part.
- Fit-up check: The joint is aligned and held without an unintended gap or forced distortion.
- Equipment check: AC TIG, shielding gas, torch, work clamp, and tungsten are suitable and functioning.
- Test-weld check: A small bead or tack does not immediately show unusual soot, severe arc instability, or obvious surface contamination.
A light gray or frosted area near an AC TIG bead is not automatically a failure. Look at the complete result: bead continuity, fusion at the toes, absence of black inclusions, and the lack of pinholes or trapped debris are more meaningful than shine alone.
Check your result
For a final practical check, wipe a clean area beside the joint with a fresh white lint-free cloth. It should not pick up visible gray dust, oily streaks, or loose fibers. This does not replace a proper inspection, but it can expose residue you might otherwise miss.
Troubleshoot contamination and preparation problems
When a bead looks poor, avoid immediately increasing amperage. First examine the base metal, filler, tungsten, gas coverage, and joint fit-up in that order. A larger arc can hide a preparation problem briefly while adding distortion or burn-through.
| What you see | What to check first |
|---|---|
| Black soot or dirty gray residue | Oil, paint, adhesive, dirty filler, tungsten contamination, or weak shielding gas |
| Pinholes or small cavities | Moisture, solvent not fully evaporated, gas leaks, drafts, or porous/contaminated base metal |
| Arc wanders or will not stay focused | Contaminated or poorly prepared tungsten, weak ground, incorrect polarity, or surface contamination |
| Filler balls up without joining the edges | Oxide remains, the joint is too cold, fit-up is poor, or the filler is being added outside the molten puddle |
| Unexpected burn-through | Excessive heat, a thin or thinned edge, a large gap, or lingering too long while trying to remove oxide |
If the tungsten is contaminated, stop and prepare it again rather than continuing to weld. If the joint repeatedly produces porosity after careful cleaning, inspect the gas system for leaks and drafts, confirm the material is dry, and consider whether the alloy or base metal contains contamination that cannot be removed from the surface.
Do not confuse a normal AC cleaning band with a dirty weld. The cleaning band is usually a lighter etched area beside the bead. Black particles, soot, pinholes, or material that refuses to fuse are more concerning signs.
Alternative cleaning methods and limits
A stainless steel brush is the standard beginner-friendly choice because it is controllable and produces little airborne dust when used carefully. A dedicated abrasive pad can help on broad surfaces, while a clean file is useful for edges and burrs. Choose the least aggressive method that removes the coating or oxide without changing the joint geometry.
For thick sections or heavily contaminated parts, a flap wheel or other power tool may be appropriate, but it requires more control. Use equipment rated for the material, eye and face protection, suitable ventilation, and a tool that has not embedded ferrous debris into the aluminum. Power brushing can also spread dust and heat the surface, so inspect and degrease again afterward.
Chemical treatments and specialized aluminum cleaners may be used in industrial processes, but they are not automatically safer or better for a small TIG job. Some leave residues, attack the alloy, require neutralization, or create hazardous vapors. Unless the product specifically gives compatible instructions for welding preparation, mechanical cleaning followed by proper degreasing is the simpler choice.
Never try to make a questionable surface weldable by adding more solvent during welding or by holding the arc over contamination until it disappears. Stop, cool the part safely, remove the source of contamination, and begin again.
Clean up and preserve the prepared work
After welding, allow the part to cool enough for safe handling before brushing or wiping it. Remove loose residue with a clean brush or cloth, and inspect the bead and surrounding aluminum under good light. Do not quench a hot aluminum weld unless a qualified procedure specifically calls for it; sudden cooling can create distortion or other problems.
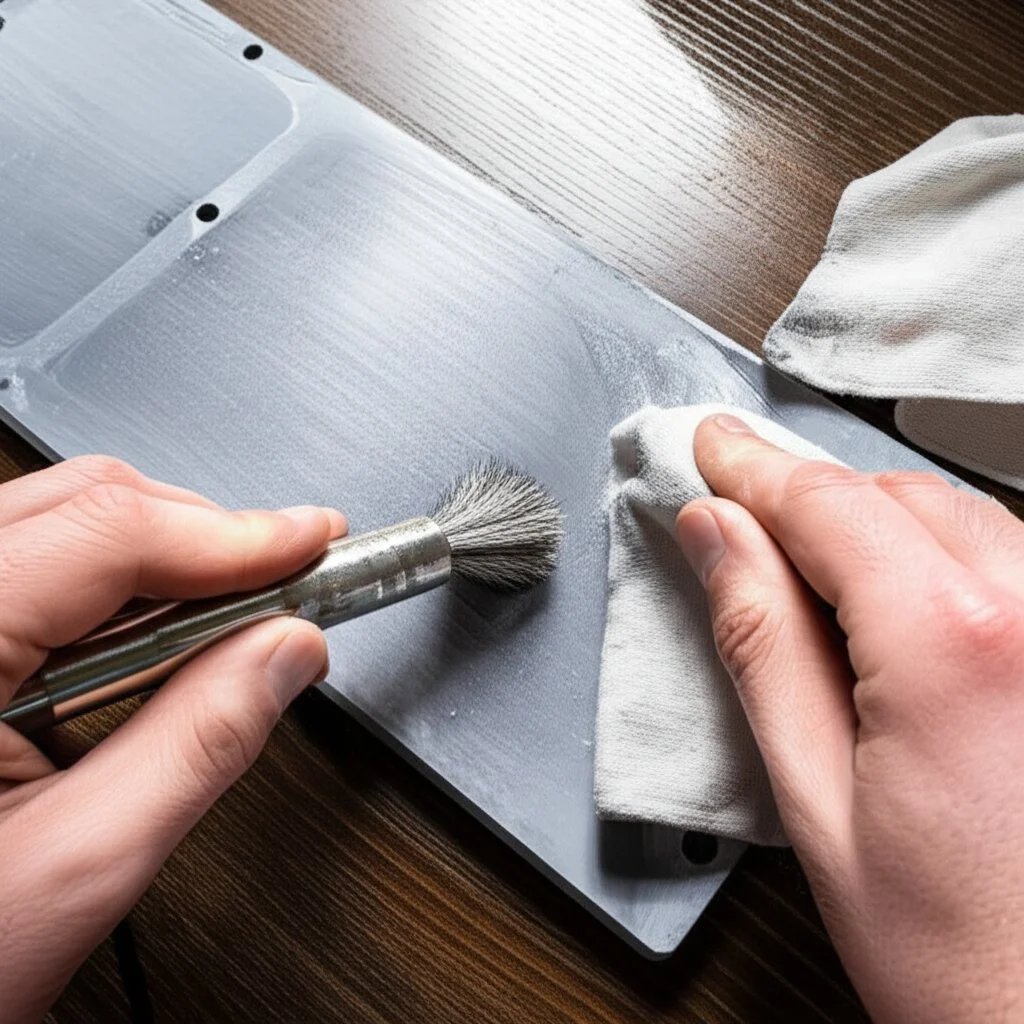
Clean the work area so steel dust, abrasive grit, and used solvent cloths do not contaminate the next aluminum job. Store the dedicated stainless brush separately and label it for aluminum. Replace a brush once it is oily, heavily worn, or visibly contaminated rather than assuming more pressure will restore it.
Keep filler rod capped or covered, and protect prepared parts from condensation. If aluminum has been stored in a damp environment or handled extensively, give the joint another inspection and light cleaning before welding.
Frequently asked questions
Can I weld aluminum without brushing it first?
It is possible for an arc to start on unbrushed aluminum, but skipping mechanical oxide removal makes contamination and incomplete fusion more likely. AC cleaning helps during welding, yet it works best after grease and surface oxide have already been removed.
Can I use a regular steel wire brush on aluminum?
No. A brush used on steel can leave iron particles embedded in the softer aluminum. Use a brush dedicated to aluminum and keep it away from steel, oily parts, and dirty work surfaces.
Should I use acetone before or after brushing aluminum?
Use solvent before brushing to remove grease, then brush to disrupt the oxide. If brushing or sanding leaves dust, wipe the joint again with a clean cloth and solvent, and wait until it is completely dry before welding.
How far around the joint should I clean?
Clean the full weld path and the nearby area that will become hot, not just the exact line where the arc will travel. The needed width depends on joint size and heat input, but removing nearby coatings and dirt gives the weld less contamination to draw in.
Why does clean aluminum still make a dirty TIG weld?
Base-metal preparation is only one possibility. Check the filler rod, tungsten, shielding gas flow, hose leaks, drafts, ground connection, AC settings, moisture, and the alloy itself. A contaminated tungsten or dirty filler can create the same symptoms as a dirty joint.
Is a shiny aluminum surface automatically ready to weld?
No. Shiny metal may still carry oil, a thin oxide layer, polishing compound, or embedded steel particles. Judge readiness by the cleaning process, tool cleanliness, dry surface, sound fit-up, and a controlled test weld—not by shine alone.
Finish with a clean, controlled starting point
Good aluminum TIG work starts before the torch is lit. Identify the material, remove coatings and damage, degrease first, use a dedicated stainless brush or clean abrasive, prepare the filler and tungsten, and protect the joint during fit-up. Then verify the surface, equipment, and a small test weld before moving to the finished part.
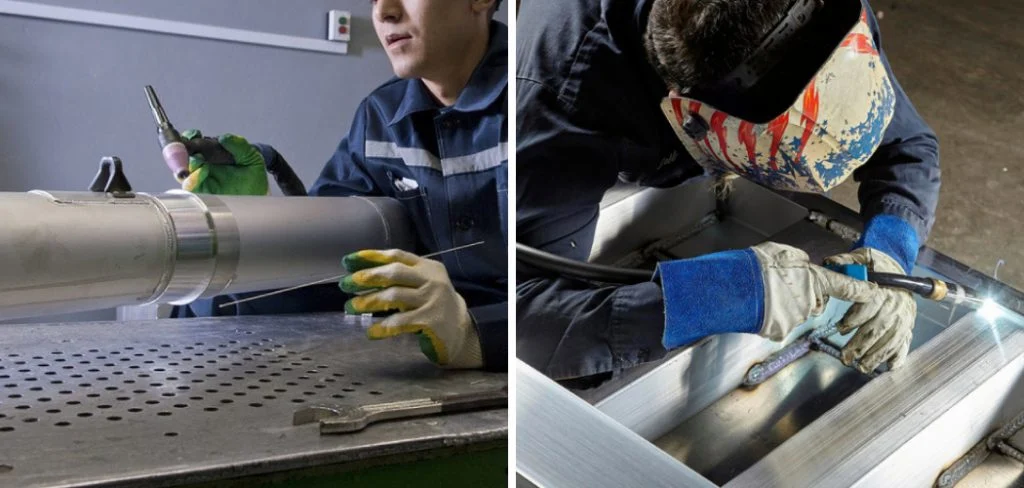
That sequence is the practical answer to how to prep aluminum for tig welding. It will not correct an unsuitable alloy, poor machine setup, gas leak, or badly designed joint, but it gives the welding process the clean and predictable starting point it needs. If the part is safety-critical or the material is unknown, stop before welding and obtain qualified technical guidance.