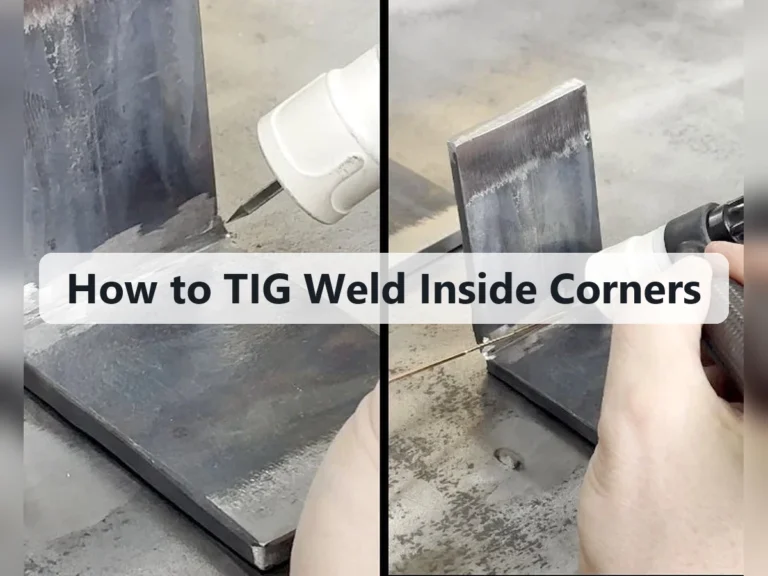
How to Set Up a TIG Welder: Setup Steps and Troubleshooting Tips
Setting up a TIG welder can feel more complicated than starting a basic stick or MIG machine because several details must work together: torch connections, tungsten preparation, shielding gas, polarity, amperage, and workpiece cleanliness. A small mistake, such as connecting the torch to the wrong terminal or forgetting the gas, can produce a weak, contaminated weld or damage the tungsten.
The good news is that the process is systematic. For most beginner work on clean steel or stainless steel, you can establish a reliable setup by following the machine manual, using DC electrode negative, fitting a sharpened tungsten, and adjusting argon flow without guessing. Aluminum requires a different current type and deserves special attention later in this guide.
This guide explains how to set up a TIG welder from an unplugged machine through a short test weld. You will learn what to inspect, which controls matter, how to confirm that gas is flowing, and how to recognize a sound setup before welding an important part. Stop and ask a qualified technician for help if a machine, gas cylinder, electrical connection, or torch is damaged or unfamiliar.
At a glance
- Use the machine manual to confirm terminal locations, polarity, and current type before connecting anything.
- For typical steel and stainless steel, start with DC electrode negative and pure argon shielding gas.
- Verify the setup on clean scrap before welding the actual project.
How to set up a TIG welder for a clean, controlled test weld
The safest approach is to build the setup in a fixed order: make the work area safe, identify the machine’s required connections, install the tungsten and gas equipment, choose a conservative starting program, and then test the arc on scrap. The exact connector names and control locations vary, so the owner’s manual takes priority over any general instruction here.
Tools you will need
- TIG welder with a compatible TIG torch and work lead
- Argon cylinder, regulator or flowmeter, and suitable gas hose
- Correct tungsten electrode and collet, collet body, and ceramic cup
- Welding helmet with an appropriate shade, TIG gloves, jacket, and closed-toe footwear
- Stainless-steel brush, acetone or an approved metal cleaner, and clean lint-free cloths
- Nonflammable welding table or surface and clean steel scrap for the test
- Optional: tungsten grinder or dedicated abrasive wheel used only for tungsten
Step 1 Make the work area and machine safe
Move combustible items away from the welding area and provide ventilation that carries welding fumes away from your breathing zone. Wear a properly fitted welding helmet, flame-resistant clothing, gloves, and sturdy footwear; TIG welding still produces ultraviolet radiation, hot metal, and electrical hazards even though it creates little visible smoke.
Inspect the welder, torch cable, work lead, gas hose, regulator, and power cord. Do not use equipment with cracked insulation, loose fittings, a damaged torch, or a regulator that is not rated and compatible with the cylinder. Keep the machine switched off and unplugged while making connections unless the manufacturer specifically states otherwise.
Place the argon cylinder upright and secure it so it cannot fall. Keep oil, grease, and other contaminants away from oxygen-free gas fittings and never use an oxygen regulator or hose for argon unless it is specifically approved for that service.
Important
Never weld on a closed container, a vessel that may have held flammable material, or metal with unknown coatings. If you are unsure about the electrical supply, cylinder hardware, or condition of the equipment, stop and have a qualified person inspect it.
Step 2 Identify the material and choose the correct current type
Start by identifying what you will weld. Steel, stainless steel, and many other ferrous metals are normally welded with direct current, while aluminum and magnesium commonly require alternating current because their oxide layer is difficult to break through with DC alone.
For a first test on mild steel or stainless steel, select DC and plan to use electrode negative, often labeled DCEN. In this arrangement, the torch is connected to the negative output and the work lead to the positive output. The manual may use different symbols or connector names, so confirm the diagram on the machine.
Do not select AC simply because it is available. AC settings often include balance and frequency controls, and those controls are useful for aluminum but can make a first steel setup less predictable. If the material is coated, galvanized, painted, or unidentified, clean it carefully and determine whether welding it is safe before proceeding.
Step 3 Connect the torch, work lead, and control cable
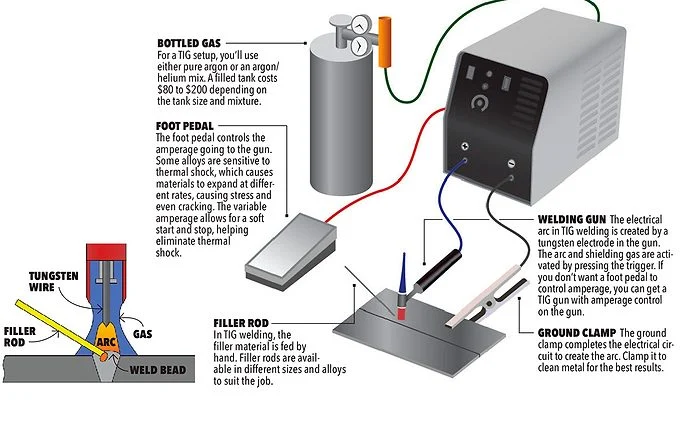
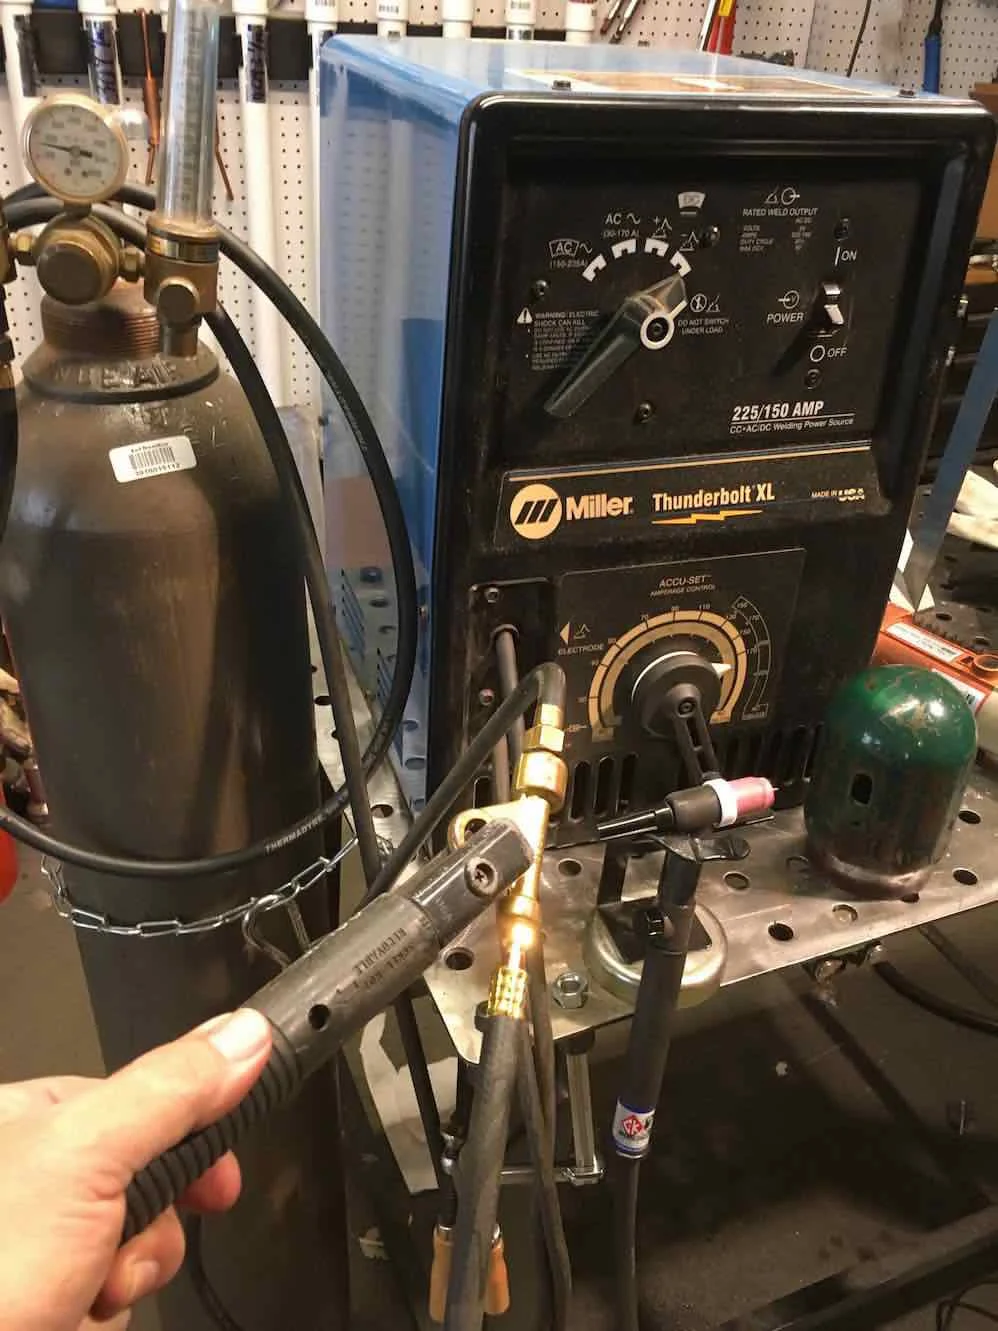
With the machine off, connect the TIG torch to the correct output terminal and connect the work lead to the opposite terminal required by the selected polarity. Attach the work clamp to bright, clean metal on the workpiece or to a clean welding table that is electrically connected to the workpiece.
If the torch has a trigger switch, connect its control plug to the matching receptacle. If you are using a foot pedal or hand control, connect it securely and select the corresponding control mode on the welder. A remote control lets you vary amperage while welding; without one, the machine may use a torch switch to start and stop a fixed current.
Route cables where they will not be cut, pinched, tripped over, or exposed to hot metal. The connection is successful when each plug is fully seated, the clamp grips clean metal, and no cable jacket is under obvious strain.
Step 4 Install and prepare the tungsten electrode
Select a tungsten size and type recommended by the machine or electrode manufacturer for your current range. For many general-purpose DC jobs, a 2 percent lanthanated tungsten is a practical choice, but the correct diameter depends on amperage, joint design, and the electrode’s rating.
Loosen the torch back cap, remove the collet and collet body if needed, and insert the tungsten so it extends only as far as the cup and joint require. A modest extension is easier to shield than a long one; follow the torch manufacturer’s guidance, especially when using a gas lens.
For DC welding, grind the tungsten lengthwise to form a centered point. Do not grind around the circumference because crosswise scratches can destabilize the arc. Use a dedicated tungsten grinder or an abrasive wheel that has not been used on steel, and remove any contamination before installing the electrode.
Tighten the back cap enough to hold the tungsten firmly without crushing the collet. The point should be centered in the cup, and the cup should be free of cracks, heavy spatter, and dirt. A useful way to approach how to set up a tig welder is to check your progress after each stage.
Step 5 Connect the argon cylinder and check the gas path
Make sure the cylinder valve is closed before attaching the regulator or flowmeter. Confirm that the regulator fitting matches the cylinder and that the regulator is intended for argon. Stand to the side of the regulator outlet rather than directly in front of it while opening the valve.
Inspect the hose for cuts and connect it from the regulator or flowmeter to the welder’s gas inlet, or directly to the torch if the machine uses that design. Tighten fittings appropriately; do not force a connection or use pipe sealant where the fitting is designed to seal with a face or washer.
Open the cylinder valve slowly and watch the regulator for an abnormal pressure change. With the torch pointed away from people and the machine’s gas control active, briefly trigger gas flow and listen for a steady hiss. Set the flow according to the torch, cup, and manufacturer guidance rather than treating a higher number as automatically better.
Too little shielding gas allows air to reach the molten weld pool. Excessive flow can create turbulence that pulls air into the shield, so more gas is not always safer. A properly connected system delivers gas smoothly without a damaged hose, loose fitting, or obvious leak.
Step 6 Set polarity, welding mode, and starting controls
Turn on the machine and confirm that the selected process is TIG rather than stick or another mode. Set the current type and polarity for the material, then select high-frequency start, lift-arc start, or the starting method supported by your welder.
High-frequency start can initiate the arc without touching the tungsten to the workpiece. Lift-arc start requires a controlled touch and lift, while scratch start is less desirable for precise TIG work because it can transfer tungsten into the joint. Use the method you understand and that the machine is designed to provide.
Choose a starting amperage based on material thickness, joint type, tungsten diameter, and the welder’s chart. If a foot pedal or hand control is connected, set the machine’s maximum current conservatively so you have room to increase heat without immediately overwhelming the test piece.
Set a short pre-flow if the machine provides it so argon reaches the torch before the arc starts. Set post-flow long enough to protect the hot tungsten and weld area after the arc stops; the machine manual’s range is more reliable than a universal number.
Step 7 Prepare the workpiece and position the torch
Remove paint, oil, rust, moisture, and oxide from the area to be welded. Use a stainless-steel brush reserved for the material when brushing is appropriate, then wipe the surface with a clean cloth and a suitable solvent. Allow solvent vapors to disperse completely before striking an arc.
Fit the pieces together with the intended joint gap and clamp them so they cannot shift. Attach the work clamp to clean metal close enough to provide a dependable electrical path. A clamp attached over paint, mill scale, or rust can produce erratic starts even when the welder itself is configured correctly.
Hold the torch so the tungsten is close to the surface without touching it, and keep the cup angled slightly in the direction of travel. If filler rod is needed, keep it clean and ready in your other hand. The exact angle and extension depend on the joint, but a stable, short arc is easier for a beginner to control than a long one.
Step 8 Strike an arc on clean scrap and observe the shield
Put on the helmet and position the torch over clean scrap of the same or a similar material. Activate the torch switch or foot pedal according to the selected start method. With high-frequency start, the arc should begin without the tungsten touching the metal; with lift-arc, follow the machine’s starting sequence rather than dragging the electrode.
Watch the tungsten, arc, and puddle. The arc should be stable, the gas should continue flowing, and the tungsten should remain centered and bright without immediately balling up, sparking, or becoming contaminated. On steel, the puddle should form without a broad cloud of smoke from surface contamination.
Stop the arc using the control and keep the torch in place long enough for post-flow to shield the cooling tungsten. Let the metal cool before touching it. A clean, silvery or evenly colored test bead with no obvious soot, heavy discoloration, or pinholes indicates that the basic setup is working.
Understanding how to set up a tig welder also means recognizing the limits of the method.
Check your result
A successful first check has a stable arc, continuous gas flow, a sharp tungsten that remains intact, and a test bead without widespread gray oxidation or black soot. If any of these are absent, correct the setup before welding the project.
What the main TIG controls and connections do
Understanding the controls makes troubleshooting much easier. TIG welding, also called gas tungsten arc welding or GTAW, uses a nonconsumable tungsten electrode to create the arc while an inert gas, usually argon, protects the hot metal from the atmosphere. Filler metal may be added separately, but it is not automatically fed through the torch.
Polarity and current type
Polarity determines how electrical energy is distributed between the torch and workpiece. DCEN is a common starting point for steel and stainless steel because it gives a concentrated arc and keeps the tungsten relatively cool compared with electrode-positive operation.
AC reverses polarity repeatedly and is commonly used for aluminum. It helps manage aluminum’s oxide layer, but AC balance, frequency, amperage, and cleaning action must be matched to the job. If the machine does not support the needed AC functions, do not try to substitute a DC setting for a demanding aluminum weld.
Shielding gas and flow
Argon is the normal shielding gas for beginner TIG work. The regulator shows cylinder pressure, while a flowmeter shows gas flow; these are different readings. Avoid confusing pressure with flow when adjusting the setup.
A cup that is too small, excessive torch angle, drafts, a cracked ceramic cup, or a dirty gas lens can disturb shielding. If the weld looks oxidized despite apparently correct flow, inspect the entire gas path rather than immediately turning the flow higher.
Amperage and remote control
Amperage controls heat input, but the useful setting depends on thickness and how quickly you move. A foot pedal or hand control allows real-time adjustment, which is helpful at the beginning and end of a weld and when the workpiece heats up.
Use the lowest current that forms a controllable puddle and lets the joint fuse. Excessive current can melt through thin stock, enlarge the heat-affected area, or make the puddle difficult to control.
How to verify the setup before the real weld
A short test on scrap is more informative than trusting a display alone. Use similar thickness and surface preparation, because a clean flat coupon can hide problems that appear on a dirty joint or a tight corner.
- Confirm the torch and work lead are connected for the intended polarity.
- Check that the cylinder is upright, secured, and open only as much as the regulator instructions require.
- Listen for gas flow before, during, and after the arc.
- Check that the tungsten is sharp, centered, and free of discoloration or contamination.
- Look at the test bead for smooth fusion, consistent color, and freedom from widespread porosity.
- Let the work cool before examining it or adjusting the torch.
If the bead is clean on one side but gray or sooty on another, inspect your torch angle and travel position for loss of coverage. If the entire bead is contaminated, stop welding and check gas supply, leaks, cup condition, surface cleaning, and post-flow.
Common TIG setup problems and practical fixes
Many poor TIG results come from a setup issue rather than a lack of hand skill. Make one change at a time so you can identify the cause instead of changing gas, amperage, tungsten, and travel speed simultaneously.
| What you observe | What to inspect first |
|---|---|
| Arc will not start | Power, process mode, torch switch or pedal connection, work clamp, polarity, and start method |
| Tungsten becomes dirty immediately | Accidental contact with the puddle, incorrect polarity, inadequate post-flow, or contaminated material |
| Black or gray weld bead | Empty cylinder, closed valve, gas leak, blocked hose, drafts, poor torch angle, or incorrect flow |
| Arc wanders | Dull or off-center tungsten, excessive extension, loose collet, dirty material, or magnetic interference |
| Burn-through on thin metal | Too much amperage, slow travel, a gap that is too large, or excessive heat buildup |
| Porosity or pinholes | Oil or moisture, poor shielding, a contaminated filler rod, or turbulence from excessive flow |
When the tungsten touches the work
Stop, let the electrode cool if necessary, and regrind or replace it if the point is contaminated. Continuing with a dirty tungsten can spread contamination through the bead and make the arc unstable.
When gas flow seems correct but shielding fails
Check for a loose cylinder connection, damaged hose, cracked cup, blocked gas passage, or a regulator problem. Also look for fans, open doors, or cross-drafts near the arc. TIG shielding is easily displaced by moving air.
When the arc is unstable or difficult to control
Verify that the current type and polarity match the material, then inspect tungsten shape and collet fit. Make sure the work clamp is on clean metal and that the torch cable is not sharply bent or damaged.
Beginner questions about TIG welder setup
These answers cover common choices, but the manual for the specific welder and torch remains the final authority for connector compatibility and control settings.
Can I use a TIG welder without shielding gas?
No. A conventional TIG process requires shielding gas to protect the electrode and molten weld pool from oxygen and nitrogen in the air. Without it, the arc and weld will usually be contaminated, and the tungsten may be damaged.
What gas should a beginner use for TIG welding?
Pure argon is the usual starting gas for TIG welding steel, stainless steel, and aluminum. Use a cylinder, regulator, hose, and fittings approved for argon, and do not substitute a mixed gas unless the welding procedure and equipment call for it.
Should the TIG torch be positive or negative?
For common DC welding of steel and stainless steel, the torch is normally negative and the work lead positive, which is called DCEN. Confirm the machine’s polarity diagram because connector layouts and labels differ.
Why does my TIG tungsten turn into a ball?
A ball can result from AC operation, excessive amperage for the electrode, an incorrect tungsten type or size, or a polarity mistake. On a DC steel setup, stop and verify polarity, tungsten selection, and current before continuing.
How do I know whether my argon cylinder is empty?
Read the cylinder pressure on the regulator while the valve is closed and compare it with the regulator’s normal indication. A pressure reading can fall during use, but it does not directly tell you the gas flow rate. If the reading or regulator behavior is unusual, close the valve and have the cylinder equipment checked.
Finish the setup with a controlled test
Learning how to set up a TIG welder is mainly a matter of following the correct order and checking each connection. Make the area safe, match current type and polarity to the material, install a clean tungsten, connect argon correctly, set conservative controls, and test on scrap before touching the project.
After welding, close the cylinder valve, release pressure from the hose according to the equipment instructions, turn off the machine, and allow hot parts to cool. Clean the torch cup and inspect the tungsten before storing the equipment. If the arc remains unstable, gas protection is unreliable, or any electrical or cylinder component is damaged, stop and seek qualified help rather than trying to compensate with higher heat or gas flow.