How to Get MIG Welds to Lay Flat: A Practical Step-by-Step Guide
Use the correct voltage and wire speed, keep a short stickout, hold a 10–15° travel angle, and move steadily without weaving. Clean metal, proper fit-up, and a stable arc are just as important as machine settings.
A flat MIG bead comes from a controlled puddle that wets both edges without piling up in the center If the weld sits high looks ropey or develops.
Learning how to get mig welds to lay flat protects more than appearance A bead that spreads evenly is easier to inspect has a better chance of achieving.
This guide separates normal bead variation from genuine defects and walks through the adjustments in the order that matters You will learn how to set the machine position.
- ✓Set voltage and wire-feed speed as a matched pair, then fine-tune travel speed for the bead profile you need.
- ✓Keep stickout consistent, use a modest travel angle, and avoid excessive weaving on ordinary butt and fillet welds.
- ✓Clean the joint and verify fit-up before changing settings; contamination and gaps can imitate machine problems.
- ✓A flat-looking bead is not automatically a sound bead—check fusion, penetration, porosity, undercut, and cracks.
What a Properly Laid MIG Bead Should Look
Before changing settings define the result A sound MIG bead is usually smooth and uniform with visible blending into both sides of the joint Its width and height.
“Flat” does not necessarily mean perfectly level with the surrounding plate. A small, even crown may be desirable, particularly when strength and adequate throat size matter. The goal is a controlled profile with good wetting, not the lowest possible bead.
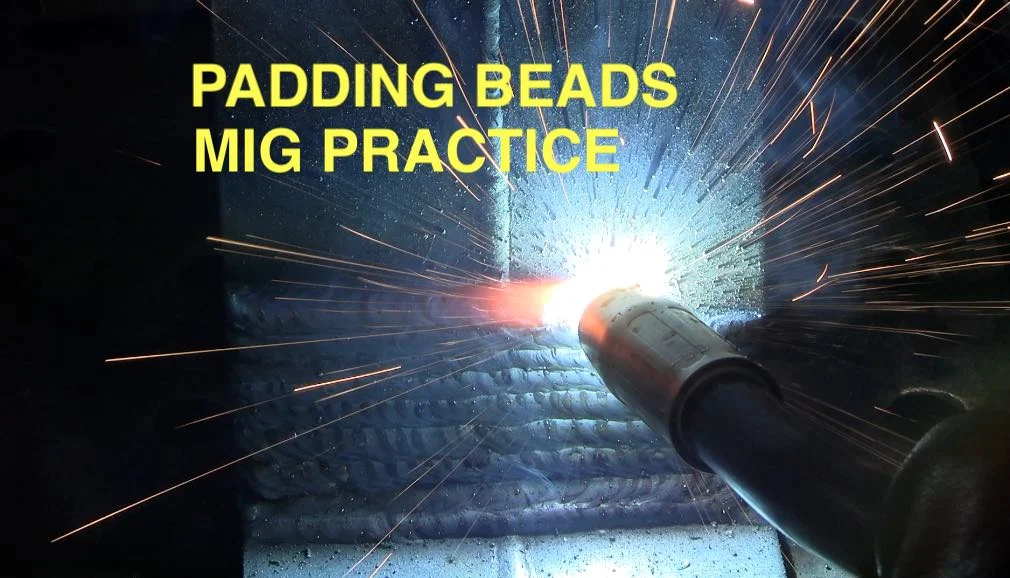
- Even tie-in: The bead transitions into both pieces without a sharp shelf or rolled edge.
- Consistent shape: Width, crown, and ripple spacing do not change dramatically during the pass.
- Limited spatter: A few particles are normal, but heavy spatter often signals an unstable arc or poor settings.
- Sound edges: There is no visible undercut, crater crack, trapped slag-like contamination, or unfilled termination.
A bead that is very wide and nearly flat can still be weak if the puddle was too cold to fuse the sidewalls Conversely a slightly convex bead.
How to Get MIG Welds to Lay Flat: Set the Machine First
Machine setup establishes the arc’s heat, fluidity, and deposition rate. The exact settings depend on material thickness, wire diameter, shielding gas, transfer mode, joint design, and machine capability, so a chart or procedure for your equipment is the correct starting point.
Most problems arise when operators adjust only one control without considering its relationship to the others Voltage primarily affects arc length and bead width while wire-feed speed strongly.

- Use the right process: Confirm solid or flux-cored wire, polarity, shielding gas, and wire diameter match the job.
- Start with the chart: Use the manufacturer’s range for the material, joint, wire, and gas instead of copying a setting from unrelated work.
- Listen to the arc: Excessive popping, harsh crackling, or an irregular buzz can indicate an incorrect voltage–wire-speed relationship.
- Test on scrap: Make a short bead on the same thickness and position before welding the actual assembly.
Balance voltage and wire-feed speed
If wire-feed speed is too high for the selected voltage the wire can push into the puddle producing a harsh arc spatter and a tall or irregular bead.
When the weld is narrow and crowned increase voltage slightly or reduce wire speed only if the machine s chart supports that direction When the bead is excessively.
Choose wire and gas for the joint
Solid ER70S-type steel wire with an appropriate argon-based shielding blend is commonly used for clean mild-steel work while flux-cored wire may be better suited to outdoor conditions or.
Gas flow that is too low can allow porosity flow that is too high can create turbulence and draw surrounding air into the shielding envelope Keep the nozzle.
Understand inductance and arc controls
Some machines offer inductance, arc-force, burnback, or similar controls. These features influence how quickly current responds and how the arc feels, but they cannot compensate for incorrect basic settings, poor technique, or contaminated metal.
Make a baseline weld with the recommended default or chart setting first. Change advanced controls only after voltage, wire speed, polarity, gas, stickout, and travel technique are under control.
Control Gun Angle, Stickout, and Travel Speed
Even a correctly adjusted machine can produce a high bead when the gun is held incorrectly or moved too slowly For many flat-position steel welds a slight push.
A drag angle can also work in certain applications especially with flux-cored wire but it changes puddle behavior and may encourage a taller bead when used too aggressively.
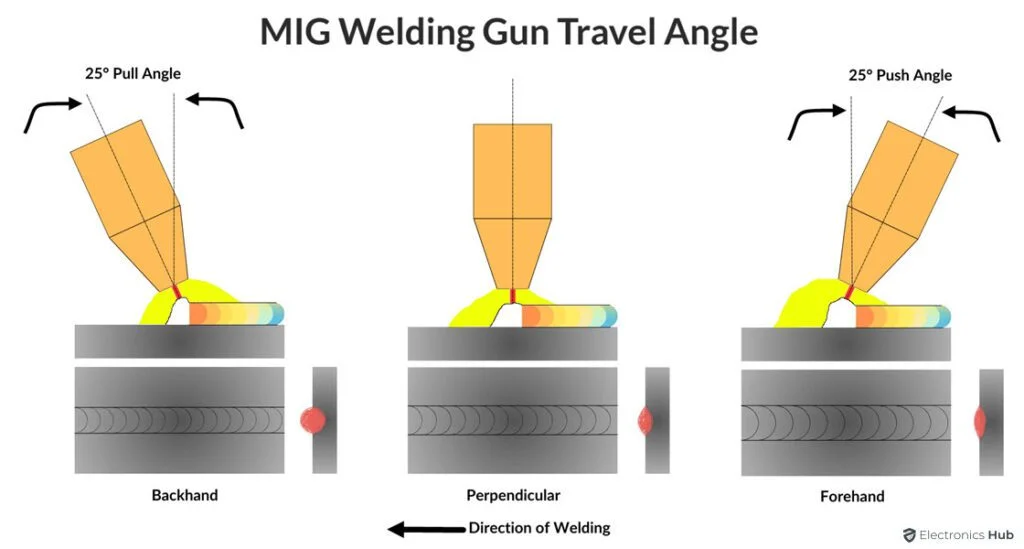
- Keep the gun steady: Avoid rolling your wrist or changing the angle as you cross the joint.
- Maintain stickout: For solid wire, a common starting range is about 3/8 to 1/2 inch, but follow the process guidance for your setup.
- Travel consistently: Move fast enough to avoid piling up metal, but not so fast that the puddle fails to wet the edges.
- Watch the leading puddle: Use the molten pool, not only the arc sound, to judge whether the bead is spreading correctly.
Why excessive stickout creates a tall bead
Long stickout allows more wire to heat before it reaches the arc This can reduce effective arc energy at the joint make the wire feel soft and deposit.
Shorten the stickout gradually and keep the contact tip-to-work distance consistent. Do not push the nozzle directly into the puddle, and do not shorten stickout so far that the tip overheats or becomes contaminated. This distinction matters when answering “how to get mig welds to lay flat”.
Find the right travel speed
Moving too slowly gives the puddle time to grow and stack up, creating a wide, convex bead. Moving too quickly produces a narrow bead with poor sidewall wetting, insufficient penetration, or intermittent contact with the joint.
Use a smooth hand motion and adjust speed based on the puddle’s response. If the puddle is running ahead of the arc, slow down slightly or reduce heat. If it is building behind the arc, increase travel speed or review wire-feed and voltage balance.
Use weaving sparingly
A small weave can help bridge a wider joint or distribute heat across a fillet, but broad side-to-side motion often causes a high center ridge and inconsistent fusion at the toes. It also increases the time the puddle remains over each edge.
For a typical narrow butt weld or fillet weld, try a straight bead first. If a weave is necessary, pause only briefly at each side, keep the pattern narrow, and avoid lingering in the center.
Prepare the Metal and Joint Before Welding
Surface preparation is one of the easiest variables to overlook because the welder often focuses on the arc Oil paint rust mill scale moisture and galvanized coatings can.
Clean the joint area and the nearby ground connection with a suitable mechanical method. Remove coatings according to safe shop procedures, and do not weld unknown painted, plated, or solvent-contaminated material without understanding the fumes and hazards involved.
- Clean both sides: Prepare the joint faces and the surrounding surface where the arc and shielding gas will act.
- Verify the gap: An inconsistent or excessive root opening changes penetration and can make the puddle sag or require multiple passes.
- Align the pieces: Hold the joint securely so movement does not alter travel angle or weld size.
- Check the ground: Place a clean, tight work lead connection near the weld when practical.
Joint design affects bead profile
A square butt joint, lap joint, and inside fillet do not require the same puddle shape. A large gap may demand slower travel or multiple passes, while a tight lap joint can trap contamination and encourage a bead that sits on the upper piece.
For thicker material, beveling and root control may be needed to achieve fusion through the joint. Adding more wire to a poorly prepared joint can make the surface look full while leaving an unfused root beneath it.
Manage tack welds and starts
Large tall tacks can interrupt travel and create lumps at the beginning of the bead Grind or feather them when appropriate and make sure the arc actually remelts.
At the end of the weld, fill the crater instead of pulling away abruptly. A crater can shrink and crack, and it often leaves an indentation that makes an otherwise uniform bead look incomplete.
Diagnose a High, Ropey, or Uneven Bead
Diagnosis is faster when you classify the symptom before touching the controls A tall bead with little sidewall blending points to inadequate heat excessive wire deposition slow travel.
Make a short test pass after each meaningful correction. Long experimental welds consume material and can conceal which change helped. Compare the new bead with the previous one under the same lighting and joint conditions.
- Changing everything: Altering voltage, wire speed, gas flow, angle, and travel speed at once prevents useful diagnosis.
- Chasing appearance: Flattening a bead by adding heat can cause undercut or burn-through.
- Ignoring position: Settings that work flat may not work overhead, vertical, or on a different joint.
- Rewelding contamination: Covering porosity or trapped dirt with another pass does not restore sound metal.
| Observed symptom | Likely causes | First correction to try |
|---|---|---|
| Tall, narrow, ropey bead | Low voltage, high wire speed, long stickout, slow travel, or cold material | Check chart settings, shorten stickout, and increase travel slightly |
| Wide bead with undercut | Voltage too high, wire speed too low, travel too fast, or excessive edge dwell | Reduce voltage slightly and watch the toes of the weld |
| Heavy spatter and harsh arc | Voltage and wire speed are mismatched, polarity is wrong, or stickout varies | Verify polarity and return to a matched chart setting |
| Porosity or pinholes | Contamination, gas interruption, drafts, leaks, or blocked nozzle | Clean the joint and inspect gas delivery before changing heat |
| Bead looks flat but lacks fusion | Travel too fast, heat too low, poor joint access, or surface scale | Inspect the sidewalls and root; increase effective heat only after cleaning |
Read the weld toes
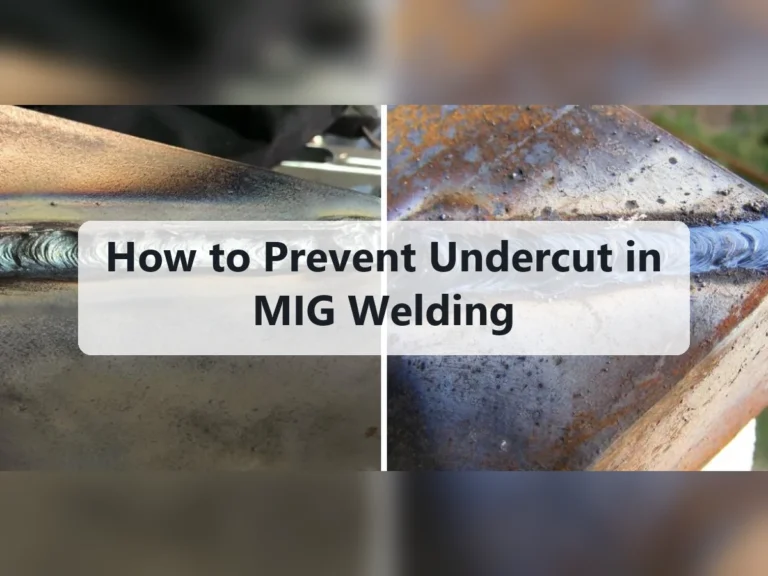
The toes are where the bead meets the base metal. A smooth transition indicates wetting, while a sharp raised edge suggests the puddle did not flow into the parent metal. Undercut appears as a groove melted into the base metal beside the bead.
If the toes are not blending, do not simply slow down. First check whether the arc is centered, the joint is clean, the gun angle is stable, and the voltage–wire-speed combination is appropriate. Keep these limitations in mind when considering “how to get mig welds to lay flat”.
Distinguish convexity from lack of fusion
A convex bead has a rounded crown It may result from a cold arc or excess deposition but visual convexity alone does not prove failure Lack of fusion.
When the application matters, use the inspection method required for the job, which may include visual checks, a bend test on suitable practice pieces, or other qualified inspection. Do not grind a bead flat and assume the underlying weld is sound.
Adjust for Position, Thickness, and Joint Type
Flat-position welding gives the puddle the most support, but it still changes with material thickness and joint geometry. Thin sheet can burn through before a high bead has time to flatten, while thicker plate may need more heat, preparation, or multiple passes.
Position also changes gravity s effect In vertical or overhead work a smaller puddle and shorter controlled movements are generally easier to manage than the large fluid puddle used for a flat weld Apply the procedure for the position rather than simply.
- Thin sheet: Use short welds, appropriate lower heat, good fit-up, and pauses that limit heat buildup.
- Flat fillets: Keep the gun centered in the joint and avoid excessive travel angle that favors one leg.
- Vertical welds: Reduce puddle size and use a controlled pattern suited to the direction of travel.
- Overhead welds: Favor stable, small deposits and protect against falling spatter and molten metal.
Inside fillet welds
In an inside corner, the arc can favor one workpiece if the gun is not centered. Aim the wire into the root area while maintaining a modest angle that divides heat and metal between both legs.
A bead that is too large can sag or create an undesirable profile. Multiple controlled passes may provide better fusion and shape than one oversized pass.
Lap joints and sheet metal
Lap joints are especially sensitive to fit-up. A gap or dirty overlap can cause the upper sheet to melt away while the bead remains on the surface. Direct the arc and puddle so both pieces receive adequate heat without lingering on the thin edge.
For sheet metal, stitch welding can reduce distortion, but each stitch must still have proper starts, stops, and overlap. A flat appearance achieved by moving too quickly may hide incomplete fusion.
Use a Repeatable Test-and-Correction Method
Random adjustment wastes time. A repeatable method turns the weld into a controlled experiment and helps you create a setting record for similar work later.
- Identify the variables: Record wire type and diameter, gas, polarity, material thickness, joint design, position, voltage, wire-feed speed, and approximate stickout.
- Prepare matching scrap: Use metal with the same thickness and similar surface condition as the actual job.
- Make a short bead: Keep the gun angle, travel direction, and stickout as consistent as possible.
- Inspect the profile: Look at bead width, crown, toes, spatter, crater, and signs of porosity or undercut.
- Change one factor: Make a small correction, then repeat on a fresh section of scrap.
- Check more than the surface: Where appropriate, use a destructive test or approved inspection method to verify fusion and penetration.
For a tall bead, the first technique checks should be stickout, travel speed, gun angle, and chart compliance. If those are consistent, adjust the voltage–wire-speed relationship in small steps rather than making a dramatic change.
- Keep a settings card: Record the successful setup beside the material or in a shop log.
- Mark the change: Label each test bead so you know which adjustment produced the result.
- Judge the puddle: A stable, controllable puddle is more useful than an isolated attractive ripple pattern.
Safety and Quality Limits You Should Not Ignore
MIG welding produces intense ultraviolet light, heat, fumes, sparks, and electric hazards. Wear a properly rated welding helmet, protective clothing, gloves, and suitable footwear. Keep combustible materials away, provide appropriate ventilation or fume control, and use screens to protect nearby people.
Galvanized, painted, plated, oily, or unknown materials deserve special caution because heating them can release hazardous fumes. Cleaning a surface may improve the bead, but it does not remove the need for safe material identification and ventilation.
- Protect your eyes and skin: Use the correct lens shade and cover exposed skin from arc flash and spatter.
- Control fire risk: Inspect the opposite side of the work and nearby areas for hidden combustibles.
- Secure gas cylinders: Keep cylinders upright, capped when not in use, and away from heat or physical damage.
- Stop for defects: Do not rely on grinding, paint, or another cover pass to conceal cracks, porosity, or suspected lack of fusion.
If a structural, pressure-containing, lifting, vehicle, or safety-critical component is involved, follow the applicable qualified welding procedure and inspection requirements. A general technique guide cannot replace an engineer, certified procedure, or competent inspection where the consequences of failure are high.
FAQ: How to Get MIG Welds to Lay Flat
Why are my MIG welds piling up instead of laying flat?
The most common causes are travel that is too slow wire-feed speed that is high for the selected voltage excessive stickout or an arc that is too cold.
Should I increase voltage to flatten a MIG weld?
Sometimes, but only in a controlled amount. More voltage can lengthen and broaden the arc, yet too much can create undercut, excessive spatter, or burn-through. Confirm wire speed and material thickness first, then change voltage slightly and test on matching scrap.
Does pushing the MIG gun make the bead flatter?
A modest push angle often improves visibility and encourages the puddle to spread ahead of the wire. It does not automatically fix a high bead, however. Excessive angle, inconsistent stickout, or incorrect settings can still produce poor wetting and an uneven profile.
How fast should I travel for a flat MIG bead?
There is no single speed because wire size, amperage, material thickness, joint design, and position all matter. Move steadily enough that the puddle does not build into a mound, but slowly enough for both edges to melt and blend.
Can a flat MIG bead still be a bad weld?
Yes. A bead can look smooth while having lack of fusion, inadequate penetration, porosity, or undercut. Evaluate the toes and crater, and use the inspection or test method appropriate for the job rather than judging surface flatness alone.
Why does my bead look good on clean steel but bad on rusty metal?
Rust, mill scale, oil, paint, and moisture interfere with the arc and shielding. They can create porosity, spatter, and poor wetting. Clean the joint and the ground connection, then retest before changing the machine settings.
Should I weave to make a MIG weld flatter?
Usually not for a straightforward butt or fillet weld. A narrow straight bead is easier to control and often produces more consistent fusion. Use only the amount of weaving needed for the joint width or procedure, with brief pauses at the toes.
Conclusion
The reliable way to get MIG welds to lay flat is to control the entire system clean and fit the joint match voltage with wire-feed speed maintain a.
Remember that a flatter profile is not automatically stronger, and high-consequence work requires the applicable procedure and inspection. Practice on matching scrap until the puddle becomes predictable, then preserve the successful settings for the next similar joint.
Clean a matching scrap joint, return your machine to its recommended chart settings, and make three short test beads while changing only travel speed, stickout, or voltage one at a time.
The answer to “how to get mig welds to lay flat” should be applied with these conditions and limitations in mind.