How to MIG Weld Horizontal: Setup Steps and Troubleshooting Tips
To MIG weld horizontally, use a short arc, moderate wire speed, a slight upward travel angle, and controlled movement to keep the puddle from sagging.
Learning how to mig weld horizontal starts with controlling gravity rather than fighting it In the horizontal position the weld puddle tends to flow toward the lower edge.
This position is common when joining plates fabricating frames repairing equipment and welding fillet joints between a vertical plate and a horizontal base It is generally easier than.
Are you about to weld a long horizontal fillet on a frame and wondering whether to increase heat immediately or first correct your angle stickout and travel speed.
- ✓A clean joint, correct polarity, and stable work angle matter as much as voltage and wire speed.
- ✓Keep the gun nearly perpendicular to the joint with a small upward work angle and a short, consistent stickout.
- ✓Use a small puddle and controlled travel; pause briefly at the toes instead of making a wide, fast weave.
- ✓Correct one variable at a time, beginning with technique and setup before making large machine adjustments.
How to MIG Weld Horizontal Without Losing Puddle
Horizontal welding usually means the weld axis runs side to side while the joint face is vertical or nearly vertical A common example is a horizontal fillet weld.
The goal is a puddle that is fluid enough to fuse both sides of the joint but small enough to stay where you place it A short circuiting.
- Control the lower toe: Keep the arc centered in the joint and avoid directing too much heat into the bottom plate.
- Watch the upper edge: A cold upper toe usually points to excessive travel speed, poor angle, or inadequate heat.
- Keep the puddle small: A compact puddle responds faster to changes in angle and travel speed.
- Practice on similar material: A test bead should match the actual thickness, joint type, wire, and shielding gas.
Choose the joint and weld size first
Before striking an arc identify whether the joint is a fillet lap butt or groove weld A fillet joint often needs the gun directed into the corner while.
For a fillet aim for an even leg length and a face that blends smoothly into both members If the joint has a large gap the puddle may.
Position your body before positioning the gun
Set the work at a comfortable height whenever possible. Plant both feet, support the welding hand, and arrange the cable so it does not pull the gun sideways during travel. A stable body position helps maintain contact-tip-to-work distance and makes the bead more consistent.
Look at the leading edge of the puddle not only the bright arc The leading edge shows where heat is going while the rear of the puddle reveals.
Machine Setup, Wire, Gas, and Safety Checks
Correct setup prevents many defects blamed on technique Confirm that the machine is configured for the wire process the work lead is attached securely the gun liner and.
Use a solid steel MIG wire with an appropriate diameter for the material and amperage range when welding ordinary mild steel Smaller wire can provide finer control on.
- Polarity: Verify the positive or negative connection required by the wire being used.
- Shielding gas: Check the cylinder, regulator, hose, fittings, and flow before welding.
- Wire path: Confirm the spool feeds smoothly without excessive drive-roll pressure or bird-nesting.
- Consumables: Use the correct contact tip, nozzle, liner, and drive-roll groove for the wire diameter.
Start with the manufacturer’s range
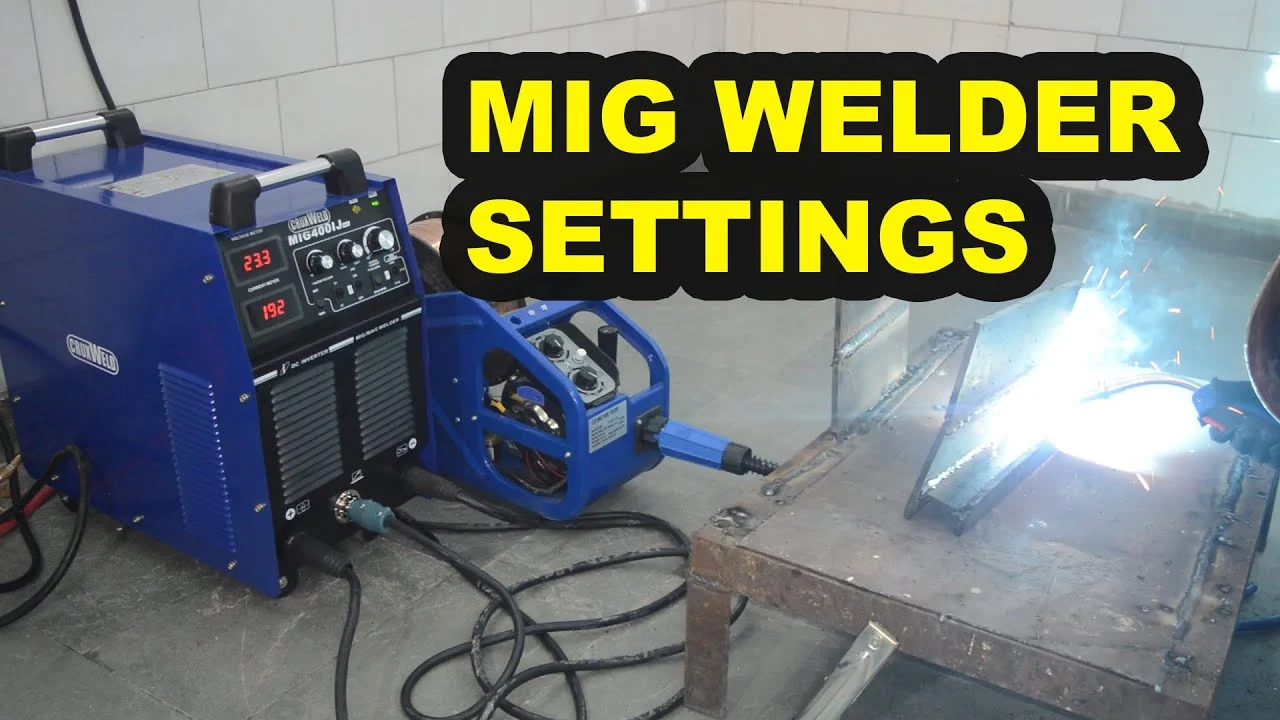
Use the chart on the machine, wire package, or welding procedure as your starting point. Voltage controls arc length and bead profile, while wire feed speed strongly influences amperage with many MIG systems. These controls interact, so changing one can alter arc behavior even when the other remains unchanged.
For a horizontal fillet on mild steel begin near the recommended setting for the actual thickness and wire diameter then make a short test bead A test coupon.
Shielding gas and airflow
Solid-wire MIG welding requires adequate shielding to keep atmospheric oxygen and nitrogen away from the molten metal Excessive gas flow can be just as troublesome as insufficient flow.
Keep the nozzle clean and close enough to protect the arc, but do not drag it through the puddle. Spatter inside the nozzle restricts gas coverage and can cause porosity. A clean nozzle, sound diffuser, and unobstructed gas passage are basic checks before changing voltage.
Protect yourself and the work area
Wear a properly rated welding helmet, flame-resistant clothing, welding gloves, and substantial footwear. Cover exposed skin because arc radiation can burn skin and damage eyes. Remove combustible materials from the work area, protect nearby people from the arc, and provide ventilation that controls fumes without blowing directly across the weld.
Do not weld containers tanks drums or piping that may contain flammable residues unless they have been properly cleaned and made safe by a qualified procedure Be especially.
- Hot metal remains dangerous: Mark or isolate the workpiece and use pliers or tongs rather than bare hands.
- Ground the work correctly: Place the clamp on clean, solid metal as close to the weld as practical.
- Control fire risk: Check both sides of the joint and nearby areas for sparks, slag, or heat transfer.
Gun Angle, Stickout, and Travel Technique
Gun position is the most immediate control you have over the puddle For a horizontal fillet hold the gun close to perpendicular to the joint when viewed from.
Use a slight travel angle in the direction of movement rather than holding the gun perfectly upright A small drag or push angle can work but follow the.
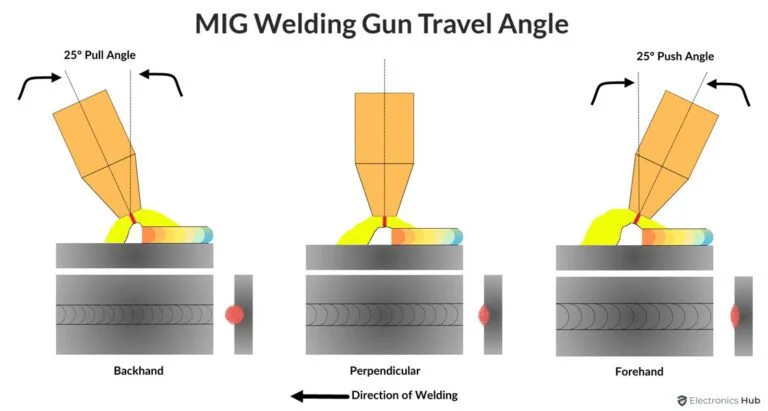
- Work angle: Aim into the joint while avoiding a direct heat bias toward the lower toe.
- Travel angle: Keep it modest and consistent; large angles make bead shape and gas coverage unstable.
- Stickout: Maintain a short, steady electrode extension appropriate for the process and wire.
- Travel path: Keep the contact tip moving smoothly rather than making abrupt corrections.
Short arc and steady stickout
A short arc generally gives better control for horizontal short-circuit MIG welding If the wire extension becomes long the arc can become erratic shielding can suffer and the.
Do not use stickout as a substitute for adjusting the machine. Hold a consistent extension, listen to the arc, and make changes at the machine when the test bead shows a real need. A stable hand position is more valuable than constantly moving the gun closer and farther away.
Travel speed and puddle rhythm
Move quickly enough to prevent the puddle from sagging but slowly enough for the leading edge to wet both sides of the joint If the bead is narrow.
For a small fillet a straight travel path is often the best starting point If a slight weave is necessary to reach both toes use a tight motion.
Where to begin and end
At the start pause only long enough to establish a stable puddle then move smoothly A cold start may leave an undersized or poorly fused beginning while an.
When joining multiple beads, clean spatter and contamination between passes. Overlap the previous bead enough to tie in without burying an unfused edge. On a long weld, use a sequence that limits distortion, such as alternating sections, when the assembly and welding procedure allow it.
This distinction matters when answering “how to mig weld horizontal”.
Settings and Adjustments for Common Horizontal Welds
There is no universal voltage or wire-feed number for every horizontal weld. Material thickness, wire size, shielding gas, transfer mode, joint design, and machine calibration all affect the useful range. Treat published settings as a starting point, not a promise that the first bead will be correct.
When learning how to mig weld horizontal it helps to separate visible symptoms from likely causes A bead profile tells you what happened but it does not always.
| What you observe | Likely causes | First correction to try |
|---|---|---|
| Puddle sags or runs down | Too much heat, slow travel, oversized weave, lower-toe bias | Use a smaller puddle, increase travel slightly, and center the arc |
| Bead is tall and narrow | Travel too fast, insufficient heat, poor wetting | Slow slightly or make a small controlled setting increase |
| Poor upper-toe fusion | Arc aimed low, travel too fast, cold setting | Pause briefly at the upper toe and correct the work angle |
| Porosity or pinholes | Drafts, low gas coverage, dirty steel, blocked nozzle | Clean the joint and nozzle, then check gas flow and leaks |
| Excessive spatter | Unbalanced voltage and wire speed, long stickout, dirty material | Restore consistent stickout and tune the setting gradually |
Reading voltage and wire feed together
If the arc sounds harsh and the wire repeatedly stubs into the puddle the wire feed may be too high for the selected voltage or the voltage may.
Do not chase a quiet sound alone. A smooth arc can still produce poor fusion if the joint is dirty or the travel is too fast. Confirm the result by inspecting bead shape and, where appropriate, using a test coupon or approved inspection method.
Thin material versus heavy material
Thin sheet is vulnerable to burn-through and distortion. Use lower heat input, shorter weld segments, good fit-up, and a travel speed that keeps the puddle moving. Skip welding or alternating sides can reduce heat buildup, but the sequence must still provide the required fusion and strength.
Heavier plate may require more heat preheating where specified beveling or multiple passes A large joint should not be filled with one oversized horizontal pass if that pass.
Common Horizontal MIG Problems and Troubleshooting
Troubleshooting works best when you change one factor at a time. Stop welding, let the work cool enough to handle safely, and inspect the joint, nozzle, wire, and ground connection. Changing voltage, wire speed, angle, and travel speed simultaneously may improve the appearance temporarily while hiding the real cause.
Start with simple causes: contamination, loose connections, incorrect polarity, a damaged contact tip, poor gas coverage, or unstable stickout. Once those are eliminated, evaluate the puddle and bead profile before making a machine adjustment.
- Overcorrecting heat: A sagging bead is often caused by angle or travel, not only excessive voltage.
- Ignoring the nozzle: Spatter buildup can restrict gas and create porosity even with a correct flow setting.
- Welding over scale: Rust, mill scale, paint, oil, and moisture interfere with arc stability and fusion.
- Using a wide weave: A broad motion increases heat input and makes horizontal sag more likely.
Cold lap and lack of fusion
Cold lap appears when deposited metal rolls onto the base metal without properly melting and joining it. The bead may look smooth but have a sharp, unblended toe. Common causes include insufficient heat, excessive travel speed, an angle that directs the arc away from the toe, and welding over contamination.
Clean both members to bright sound metal where practical Direct the arc so it reaches both sides of the joint slow slightly at each toe and verify that.
Undercut and excessive lower-toe buildup
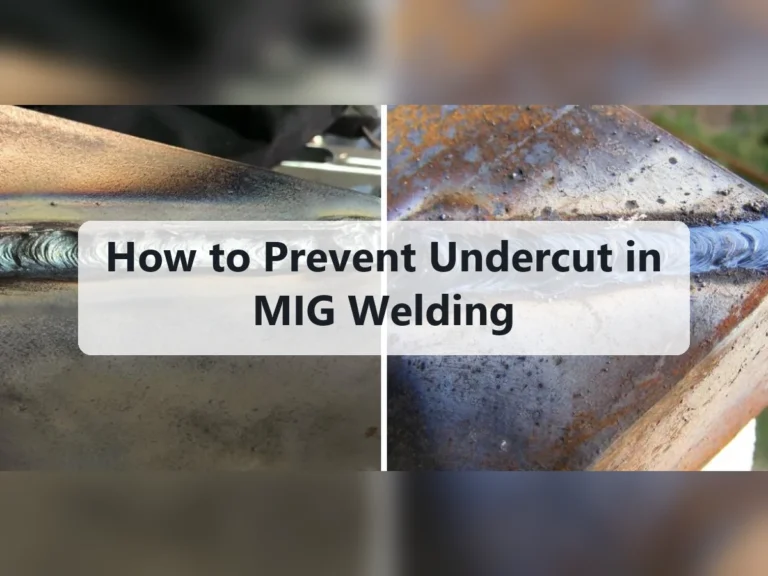
Undercut is a groove melted into the base metal beside the weld that remains unfilled It can result from excessive heat high travel speed a long arc or.
Use a shorter arc reduce the weave and keep the gun centered A small pause at an underfilled toe can help but do not dwell so long that.
Porosity, worm tracks, and erratic arc
Porosity often appears as visible holes or pinholes but some pores may be hidden below the surface Check for drafts an empty or nearly empty gas cylinder a kinked hose a leaking fitting an obstructed nozzle and an incorrect flow setting Also inspect the steel for moisture.
Wormlike marks with flux-cored wire can indicate trapped gas or unsuitable technique; the exact cause depends on the wire and process. Keep the correct polarity, use the recommended stickout, and clean between passes. If the arc suddenly becomes inconsistent, inspect the contact tip and liner before adjusting the weld parameters.
Burn-through and distortion
Burn-through occurs when the arc melts through the material faster than the puddle can bridge the opening. Thin stock, large gaps, excessive heat, and slow travel all increase the risk. Reduce heat input, improve fit-up, use shorter intermittent welds where permitted, and allow the material to cool between sections.
Distortion results from uneven heating and shrinkage. Clamp the assembly without preventing all natural movement, tack it in a balanced sequence, and distribute welds rather than completing one long side immediately. For critical fabrication, use a documented sequence and fit-up plan instead of relying on appearance alone.
Inspection, Practice, and Maintenance
A finished bead should be evaluated for continuity adequate tie-in even profile and the absence of visible cracks crater defects excessive undercut overlap or porosity Appearance is useful.
Practice on scrap that matches the production material. Make several short beads while changing only one variable—such as travel speed or work angle—then compare the puddle and profile. This builds a cause-and-effect reference that is more reliable than memorizing a single machine setting.
- Before welding: Confirm clean metal, sound fit-up, polarity, wire path, gas supply, and PPE.
- During welding: Watch the leading puddle edge, listen for a stable arc, and maintain consistent stickout.
- After welding: Inspect both toes, the start and stop areas, bead continuity, and nearby heat damage.
Cleaning and consumable maintenance
Remove spatter from the nozzle regularly and replace a damaged or clogged contact tip. Keep the liner clean and use the correct drive-roll tension: too little tension causes slipping, while too much can deform soft wire and create feeding problems.
Store wire in a dry, clean environment and protect the gas cylinder and hose from damage. If the wire is rusty, contaminated, or feeding unevenly, replacing it may be more effective than repeatedly changing machine settings.
When a weld should be rejected or repaired
Do not grind away a questionable area and cover it automatically. First identify whether the issue is cosmetic or a true discontinuity, then remove defective metal completely if repair is allowed. Repair welding may require a defined preparation, preheat, filler metal, pass sequence, and inspection method.
Cracks, incomplete fusion, significant porosity, severe undercut, or an incorrect weld size deserve special caution. If the weld carries a critical load or forms part of regulated equipment, obtain qualified technical direction rather than relying on a visual fix.
FAQ: Horizontal MIG Welding
What is the best angle for a horizontal MIG fillet weld?
Hold the gun close to perpendicular to the joint and use a small upward work angle so the arc reaches the corner without directing excessive heat into the lower plate. Keep the travel angle modest and consistent.
The exact angle changes with access, joint size, and material thickness. Watch the puddle rather than forcing a fixed number; both toes should wet evenly without the lower toe becoming oversized.
Should I push or pull a horizontal MIG weld?
Either technique can work when it matches the wire, gas, and joint. A slight push can provide a broad view and flatter bead, while a slight drag may increase penetration and narrow the profile.
Avoid extreme travel angles. If changing from push to pull, retest because arc length, puddle visibility, penetration, and shielding can change with the gun position.
Why does my horizontal MIG weld sag?
Sagging usually comes from a puddle that is too large or too fluid for the position. Excessive heat, slow travel, a wide weave, long arc, or an angle aimed at the lower toe can all contribute.
First reduce the puddle size through steadier travel and a centered arc. Then make a small machine adjustment if the test bead still shows excessive heat; do not immediately make a large voltage change.
How long should my stickout be for horizontal MIG welding?
Use the stickout recommended for the wire and transfer mode, then keep it consistent throughout the bead. A short, stable extension usually gives better control than a constantly changing one.
Too much extension can produce an erratic arc and poor shielding, while too little can cause contact-tip problems. The correct distance depends on the consumables and process, so verify it against the wire guidance.
Can I use a weave on a horizontal MIG weld?
A small weave may help reach both toes of a wider joint, but a straight bead is often easier to control. If you weave, keep the motion tight and pause briefly at the toes rather than sweeping broadly.
For a large weld, use multiple manageable passes when appropriate. A single oversized pass usually increases heat input, distortion, and sag risk.
Why is the top of my horizontal weld not fusing?
The arc may be aimed too low, the travel may be too fast, or the setting may be too cold for the joint. Dirt, mill scale, and poor fit-up can also prevent the upper toe from melting properly.
Clean the joint, correct the work angle, and briefly pause at the upper toe while maintaining a small puddle. If fusion remains poor, retest with a modest setting change.
Is horizontal MIG welding safer than vertical or overhead welding?
It is often easier to control because the operator has a more natural view and molten metal is less likely to fall directly downward. It still produces arc radiation, fumes, hot metal, sparks, and fire hazards.
Use appropriate PPE, ventilation, fire controls, and material identification. Position alone does not make an unsafe work area safe.
Conclusion
Good horizontal MIG welding comes from balancing heat travel angle and puddle size Clean the joint verify polarity and shielding begin with a recommended setting and use a.
The method has limits: appearance cannot confirm internal soundness, and safety-critical work may require qualified welding procedures and inspection. With those limits in mind, how to mig weld horizontal becomes a repeatable process of setup, observation, and controlled adjustment rather than trial and error.
Clean a matching test coupon, set the machine from the wire guidance, and make one short horizontal bead while watching both toes of the puddle.