How to MIG Weld Cast Aluminum: A Practical Step-by-Step Guide
You can MIG weld cast aluminum successfully by using a spool gun, 100% argon, aluminum wire, thorough cleaning, and controlled heat.
Cast aluminum is weldable, but it is less forgiving than clean, wrought aluminum plate. The casting may contain trapped oil, paint, oxidation, porosity, sand, or impurities that enter the weld pool and create contamination, cracking, or weak repairs.
The practical distinction many beginners miss is that there is no single setting or technique that works for every casting A thin decorative housing a thick engine bracket. This guide examines “how to mig weld cast aluminum” and explains the details that matter in practice.
This guide explains how to mig weld cast aluminum from identification and preparation through machine setup welding technique inspection and troubleshooting You will learn when MIG is a.
- ✓Cleanliness and removal of contaminated metal matter as much as machine settings.
- ✓A spool gun, aluminum wire, and pure argon are the practical MIG setup for most repairs.
- ✓Short welds, controlled heat, and interpass cleaning help limit distortion and porosity.
- ✓Porous, oil-soaked, cracked, or highly loaded castings may be poor candidates for a home repair.
How to MIG Weld Cast Aluminum
Before striking an arc identify what you are welding and what the repair must withstand Cast aluminum is usually an aluminum alloy poured into a mold so its.
Common examples include brackets, housings, intake components, machinery parts, transmission cases, pump bodies, and wheels. A casting that only needs a nonstructural cover repair presents a very different risk from a suspension component, pressure-containing part, or part that supports a rotating assembly.
- Part function: Treat steering, suspension, pressure, lifting, and rotating-machine components as safety-critical rather than ordinary repair work.
- Alloy clues: Look for casting markings, service information, or a replacement specification before choosing filler metal.
- Wall thickness: Thin sections burn through quickly, while thick sections may require preheating and multiple controlled passes.
- Contamination: Oil, coolant, grease, paint, and embedded debris can remain inside pores and emerge during welding.
Why cast aluminum behaves differently
Aluminum conducts heat rapidly and its oxide layer melts at a much higher temperature than the base metal That makes the surface appear intact while the metal underneath.
Many cast aluminum alloys contain silicon, magnesium, copper, or other alloying elements. Those additions affect fluidity, cracking behavior, strength, and corrosion resistance. A general-purpose filler may produce a visually acceptable bead without matching the original alloy’s mechanical or service requirements.
When MIG is an appropriate choice
MIG is useful when the repair is relatively accessible, the joint is not extremely delicate, and productivity matters. A spool gun can deposit aluminum wire faster than TIG, making it practical for filling missing material, repairing broken tabs, or rebuilding worn edges.
MIG is less attractive when the part is extremely thin the joint requires precise cosmetic control or the casting is heavily contaminated TIG with alternating current can offer.
Gather the Right Equipment and Consumables
The welding machine must be capable of aluminum MIG operation not merely steel MIG welding Aluminum wire is soft and can buckle bird-nest or jam in a conventional.
Use a clean gas system and a regulator suitable for argon Aluminum MIG normally uses 100 argon not the argon-carbon dioxide mixtures commonly used for mild steel Carbon dioxide can produce an unstable arc.
- Wire system: Use a compatible spool gun or an aluminum-capable push-pull setup.
- Filler wire: ER4043 is often selected for general cast-aluminum repair; ER5356 may be preferable when higher strength or better anodizing color is important, subject to alloy compatibility.
- Contact tip: Fit the tip for the wire diameter and keep it free of buildup that could disrupt feeding.
- Shielding gas: Use dry, clean argon with sound hoses, fittings, and a properly positioned nozzle.
Choosing between ER4043 and ER5356
ER4043 generally offers good fluidity and can reduce the likelihood of certain hot-cracking problems in compatible aluminum alloys. Its lower melting behavior often makes it comfortable for general repairs and castings with uncertain chemistry, although it may not provide the highest strength.
ER5356 is commonly chosen where greater tensile strength and improved resistance to some service conditions are needed It can be a good match for certain magnesium-bearing base alloys.
For an unknown casting that is not safety-critical, ER4043 is often a practical starting point. For a critical component, identify the base alloy and consult the equipment or material manufacturer rather than guessing from the color or texture of the casting.
Useful supporting tools
Have a stainless-steel brush reserved only for aluminum, carbide burrs, files, degreaser, lint-free cloths, clamps, a temperature indicator if needed, and adequate lighting. A sharp burr is useful for opening cracks and removing contaminated material, but grinding dust must be removed before welding.
Use a properly rated helmet flame-resistant clothing gloves hearing protection and ventilation that keeps welding fumes away from your breathing zone Aluminum does not produce visible smoke in.
Prepare the Casting Before You Start
Preparation is often the difference between a sound repair and a porous bead that only looks finished Remove the part from service drain fluids and clean the entire.
Inspect the casting under bright light. Find the full length of the crack, identify missing material, and look for secondary cracks around bolt holes, corners, and previous repairs. If the part is bent or distorted, welding it in that condition may lock in the wrong geometry.
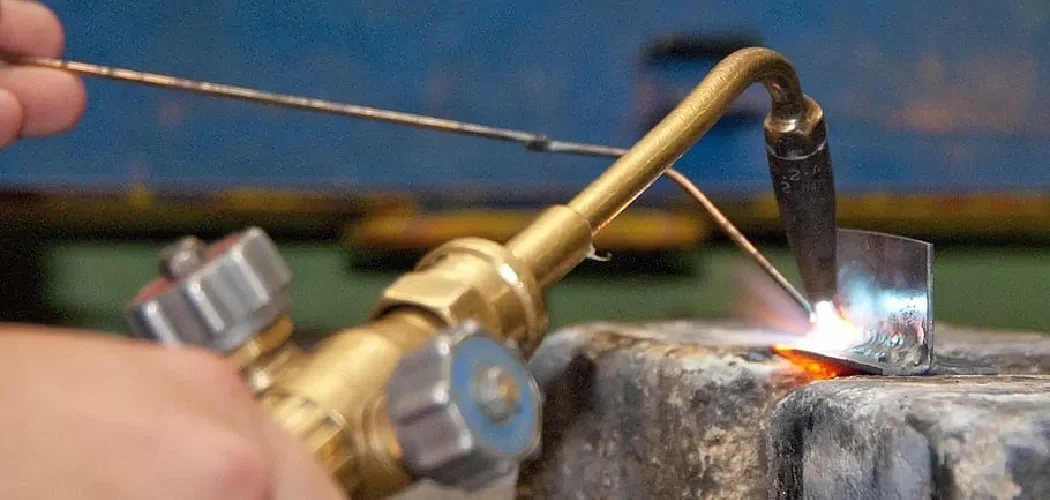
- Degrease first: Remove oil and grease before using an abrasive tool so contaminants are not smeared deeper into the surface.
- Expose sound metal: Grind or carbide-burr the crack into a clean groove with no dark, wet, or crumbly material remaining.
- Brush immediately: Use a dedicated stainless brush after machining and again shortly before welding.
- Control the fit: Clamp or fixture the part without forcing a gap closed or creating excessive restraint.
Cleaning and oxide removal
Begin with a compatible degreaser and allow the surface to dry completely Avoid welding over solvent residue After degreasing remove paint anodizing oxide and damaged metal mechanically A. This distinction matters when answering “how to mig weld cast aluminum”.
Do not rely on a wire brush to remove a deep crack or oil-soaked porosity. Brush fibers can polish over defects while leaving contamination below the surface. Open the defect with a burr or suitable abrasive, then brush the exposed metal and wipe away residue.
Grooving cracks and preparing a joint
For a crack repair extend the groove slightly beyond each visible end if inspection shows the crack continues Use a rounded groove rather than a sharp notch where.
Leave enough clean base metal to support the weld An excessively deep groove increases heat input and filler volume while a shallow groove can trap contaminated material For.
Preheating decisions
Moderate preheating can help a thick casting accept the weld without pulling heat rapidly away from the puddle It may also help drive moisture and some surface contamination.
Use a controlled, even heat rather than a concentrated flame on the crack. A temperature indicator can help prevent overheating. If the part has seals, bearings, electronics, paint, trapped fluids, or heat-sensitive treatments, remove or protect them before applying heat.
Set Up the MIG Welder for Aluminum
Once the casting is clean and supported configure the machine according to the wire diameter material thickness and manufacturer guidance Start with the machine s aluminum program if.
Install the spool gun correctly and check that the wire feeds smoothly with minimal tension Aluminum wire is soft so excessive drive-roll pressure can deform it and create.
- Polarity: Use the polarity specified for aluminum MIG by the machine and wire manufacturer; most aluminum MIG processes use direct current electrode positive.
- Wire speed and voltage: Adjust them together, starting with a proven program and fine-tuning on test material.
- Gas flow: Set enough argon flow to shield the puddle without creating turbulence that draws in air.
- Stick-out: Keep a consistent, moderate distance from contact tip to work and avoid an excessively long arc.
Transfer mode and machine capability
Aluminum MIG is commonly performed with spray or pulsed-spray transfer, depending on the machine, wire diameter, and material thickness. These modes can provide a smoother transfer than short-circuit welding, but they also require adequate amperage and control.
Very small machines may struggle with thick castings especially when long welds are required Duty cycle also matters Repeatedly welding near the machine s limit can cause thermal.
Test before touching the casting
Make a short bead on clean aluminum of similar thickness Listen for a stable arc observe the puddle and inspect the bead for black soot pinholes excessive spatter.
A test coupon also lets you compare filler choices and practice travel speed The goal is a bead that wets both sides of the joint without excessive buildup.
Weld the Casting in Controlled Passes
Position the casting so the joint is visible and accessible preferably in a flat or slightly horizontal orientation Confirm that the work clamp has a clean electrical connection.
For many repairs short weld segments are safer than one continuous bead Cast aluminum absorbs heat quickly and a long weld can enlarge the heat-affected zone distort the.
- Start ahead of the defect: Begin on clean metal and move into the prepared groove so the arc is established before entering the repair zone.
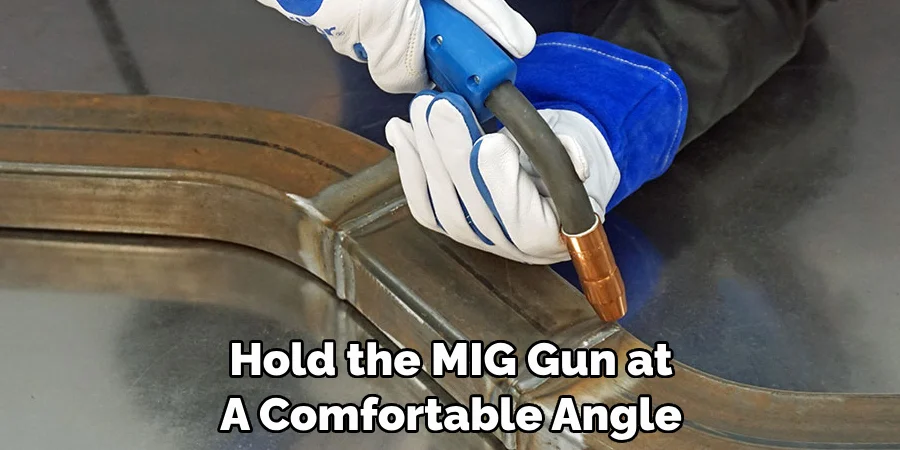
- Maintain a consistent angle: Use a modest push angle unless the machine or joint requires otherwise, keeping the nozzle close enough for reliable shielding.
- Watch the puddle: Focus on wetting the groove walls and controlling the leading edge rather than simply stacking wire on top.
- Pause between segments: Let heat spread and inspect the bead before adding more filler.
- Clean between passes: Remove soot and surface residue with the dedicated stainless brush before continuing.
- Use short beads: Small controlled segments reduce distortion and make it easier to stop when contamination appears.
- Keep moving: Dwelling in one place can melt through thin walls or cause the puddle to collapse.
- Do not bury defects: Stop, clean, and remove contaminated metal rather than covering pinholes with another pass.
- Protect the crater: Finish each segment with a controlled fill so the bead does not end in a concave crack-prone depression.
Managing heat on thin and thick areas
Thin cast sections need a quick deliberate arc and may benefit from skip welding place a short bead move to a separated area and return after the first.
Thick sections may need preheat and multiple passes. Do not assume a large current setting is automatically better; excessive heat can make the base metal collapse before the groove fills. Build the repair gradually and blend the final contour only after the weld is sound.
Welding around oil-soaked porosity
Black specks, pinholes, bubbling, or a dirty-looking puddle often indicate contamination rather than an incorrect travel angle alone. Stop welding and excavate the affected area. Reclean, brush, and test again.
Keep these limitations in mind when considering “how to mig weld cast aluminum”.
Repeated contamination from the same spot suggests that oil or fluid is trapped inside the casting. Heating may drive more residue toward the weld, so additional cleaning, controlled bake-out, machining, or replacement may be necessary. Do not keep adding passes to hide a porous repair.
Inspect, Finish, and Evaluate the Repair
Let the part cool naturally unless the repair procedure calls for a controlled cooling method. Rapidly quenching a hot casting can increase thermal shock and distortion. Once cool, remove residue carefully and inspect the entire weld, including the ends and adjacent base metal.
A sound-looking surface is not proof of a sound repair Look for crater cracks undercut overlap pinholes incomplete fusion and cracks that continue beyond the weld If the.
- Surface condition: The bead should be reasonably uniform, without visible pinholes, crater cracks, severe undercut, or trapped debris.
- Fusion: The weld should blend into both sides of the prepared joint rather than sit as a raised strip.
- Geometry: Check bolt holes, mating faces, clearances, and alignment after welding.
- Service risk: Reject a cosmetic-only assessment when failure could cause injury, leakage, or major equipment damage.
Grinding and blending
Grind only as much as necessary. Removing too much weld can reduce strength, expose pores, and leave a sharp transition. Use controlled passes with clean abrasives, and stop frequently to compare the repaired profile with the original shape.
If the surface will be machined, leave the appropriate amount of material for final sizing. Do not grind a structural repair flush simply to improve appearance unless the design allows it and inspection confirms adequate weld thickness.
Pressure and leak checks
For a noncritical fluid housing, a controlled leak check may reveal obvious pinholes after the repair. Use a safe test medium and pressure appropriate to the component; never improvise a high-pressure test on an unknown casting.
A failed leak check is useful information not a reason to smear sealant over the weld Locate the leak excavate contaminated or porous metal and repair only if.
Troubleshoot Common MIG Problems
Most aluminum MIG failures have a recognizable pattern. Diagnose the symptom before changing settings, because increasing voltage or wire speed cannot correct oil trapped below the surface or a damaged spool-gun liner.
| Symptom | Likely causes | Practical response |
|---|---|---|
| Wire bird-nests near the gun | Excessive drive-roll pressure, feed resistance, bent liner, or poor spool tension | Reduce pressure, straighten the cable, inspect the liner and tip, and confirm the correct drive roll. |
| Black soot or dirty bead | Contamination, inadequate shielding, wind, or an excessive gun distance | Stop, clean the joint, check gas flow and leaks, and improve nozzle position. |
| Burn-through | Too much heat, slow travel, thin wall, or excessive joint gap | Use shorter segments, increase travel speed, reduce heat where appropriate, and support the joint. |
| Poor fusion | Oxide layer, low heat, fast travel, or incorrect gun angle | Remove oxide mechanically, verify settings, and direct the puddle into both joint walls. |
| Pinholes after cooling | Porosity, moisture, oil, turbulent gas, or trapped contamination | Excavate the affected area and correct cleaning, shielding, or material conditions before rewelding. |
Arc starts poorly
A hesitant start can result from a dirty contact tip poor ground excessive stick-out or unstable wire feeding Aluminum oxide on the work can also prevent the arc.
Weld cracks after cooling
Cracking may come from incompatible filler excessive restraint a contaminated base metal a crater left unfilled or an alloy that is difficult to weld Remove the cracked material.
Excessive distortion
Distortion grows with heat input, long beads, poor fixturing, and uneven welding sequence. Use intermittent welds, alternate sides where the joint permits, and avoid clamping so tightly that the part cannot relieve stress naturally. Check alignment during the repair, not only after it is complete.
Safety and Repair Limits
Welding a cleaned casting can still be dangerous if it contains trapped fuel oil refrigerant solvent or hydraulic fluid Drain and clean the component according to the service.
Use ventilation, eye and skin protection, insulated gloves, and clothing that covers exposed skin. Arc radiation reflects strongly from aluminum, and hot aluminum can look less dangerous than it is because the metal’s color changes little before melting.
- Do not weld blindly: Identify the material and confirm that no combustible liquid or vapor is trapped inside.
- Protect nearby components: Remove seals, bearings, wiring, electronics, and coatings that heat could damage.
- Respect shielding gas: Argon can accumulate in poorly ventilated spaces and displace breathable oxygen.
- Escalate critical repairs: Use a qualified welding professional for safety-critical, pressure-bearing, or heavily loaded castings.
Some castings should be replaced rather than repaired. Replacement is often the better decision when the part is badly cracked, repeatedly porous, dimensionally distorted, inaccessible for inspection, or made from an unknown alloy with a critical function.
FAQ: How to MIG Weld Cast Aluminum
Can you MIG weld cast aluminum with a standard steel setup?
Usually not reliably. Aluminum wire needs a spool gun or another low-friction feeding system, the correct drive roll and contact tip, and pure argon shielding gas. A long conventional steel-gun cable commonly causes wire feeding problems.
What gas should you use when MIG welding cast aluminum?
Use 100% argon for typical aluminum MIG work. Avoid the argon-carbon dioxide blends used for many steel applications unless the equipment and process documentation specifically states otherwise.
Is ER4043 or ER5356 better for cast aluminum?
Neither is universally best. ER4043 is often a practical general-purpose choice because of its fluidity and compatibility with many cast alloys, while ER5356 can offer higher strength for suitable base alloys. Confirm alloy and service requirements before selecting filler.
Why does my cast aluminum weld become porous?
Common causes include oil-soaked pores, grease, paint, moisture, inadequate shielding, wind, excessive nozzle distance, or turbulent gas flow. Stop welding, remove the contaminated metal, clean again, and verify the gas system before continuing.
Should cast aluminum be preheated before MIG welding?
Thick castings may benefit from moderate, even preheating, but thin sections can overheat quickly. Excessive preheat can increase distortion and damage heat treatment, so use temperature control and follow the part’s requirements.
Can you weld a cracked aluminum engine or transmission case?
Often, but the result depends on alloy, contamination, wall thickness, crack location, and service loads. Drain fluids, remove contaminated material, and consider professional repair when the case is structural, pressure-related, or difficult to inspect.
How do you know whether a cast aluminum weld is strong enough?
Visual appearance alone cannot establish strength. Check fusion, cracks, porosity, dimensions, and service requirements; critical parts may need nondestructive examination or a qualified repair procedure. When failure has serious consequences, replacement or professional evaluation is the safer choice.
Conclusion
Successful how to mig weld cast aluminum work depends less on simply increasing heat and more on controlling the entire process: identify the casting, remove contamination, choose compatible filler, feed aluminum through a spool gun, shield it with argon, and weld in short controlled sections.
The major limitation is that some castings are too porous, contaminated, damaged, or safety-critical for an improvised repair. If the part carries a major load, contains pressure, or must retain precise dimensions, use qualified evaluation before returning it to service.
Practice your settings on clean aluminum of similar thickness, then prepare and inspect the casting thoroughly before committing to the repair.