How to Set a TIG Welder for Stainless Steel: Settings That Work
Stainless steel can produce a clean, strong TIG weld, but it is less forgiving than mild steel. Too much heat can discolor the joint, distort thin material, or damage the corrosion-resistant surface. Poor shielding can leave a gray, sugared weld that looks rough and may be weak on the back side.
The good news is that the basic setup is straightforward. For most stainless steel, you will use direct current electrode negative, pure argon, a sharpened tungsten, and enough amperage to form a controlled puddle without lingering. The exact settings still depend on thickness, joint fit-up, tungsten size, cup size, and whether the joint is open to air on the back.
This guide explains how to set a tig welder for stainless steel, from identifying the metal and preparing the joint to choosing polarity, gas flow, amperage, tungsten, and filler. You will also learn how to make a short test weld and inspect the color, shape, penetration, and heat-affected area before welding the actual part.
At a glance
- Use DCEN polarity and 100% argon for ordinary stainless steel TIG work.
- Start with moderate amperage, then adjust based on the puddle and material thickness rather than relying on a single chart number.
- A clean, controlled test weld with light straw or pale gold color is usually a better target than a perfectly bright finish.
How to set a tig welder for stainless steel
Set up the welder in a deliberate order: confirm the material, clean the joint, select the electrical settings, establish shielding gas, and then make a test weld. This method prevents a common beginner problem—changing several controls at once and not knowing which adjustment caused the result.
Tools you will need
- TIG welder with a foot pedal or hand amperage control, for regulating heat during the weld
- 100% argon cylinder, regulator, and flowmeter, for shielding the molten metal
- Sharp tungsten electrode and collet, sized for the selected amperage
- Stainless steel wire brush and acetone or an appropriate degreaser, for cleaning the joint
- Properly rated welding helmet, gloves, jacket, safety glasses, and ventilation equipment
- Stainless-compatible filler rod, when the joint requires added metal
- Optional gas lens and larger ceramic cup, for smoother and more generous gas coverage
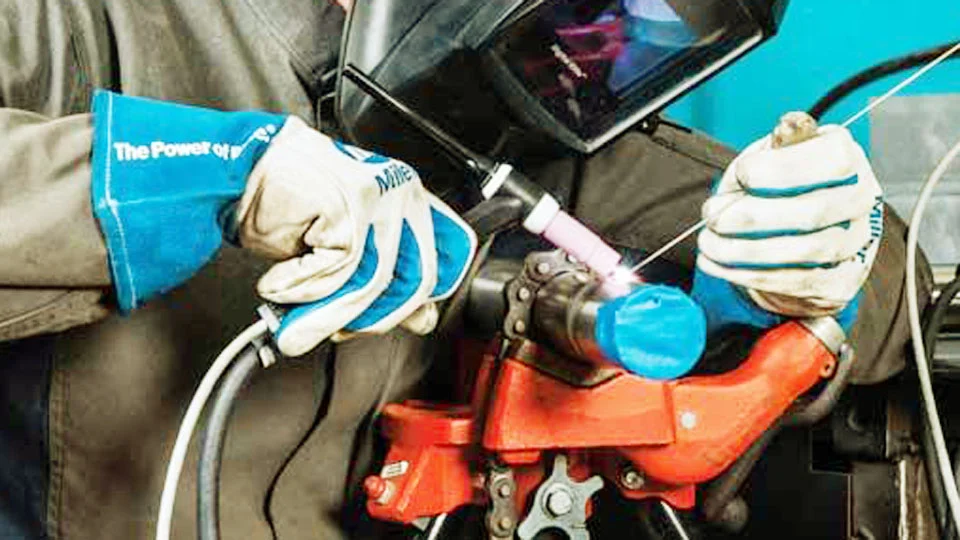
Step 1 Confirm the stainless steel and joint thickness
Identify the stainless grade if possible, and measure the thickness of the pieces being joined. Common austenitic grades such as 304 and 316 are normally TIG welded with direct current electrode negative, or DCEN. They do not require the AC cleaning action used for aluminum.
Thickness determines the starting amperage more than the steel grade does. A practical starting range is roughly 1 amp per 0.001 inch of thickness, or about 40 amps per millimeter, but this is only a starting point. Joint design, fit-up, heat sinking, and your travel speed can move the useful setting substantially.
For example, thin sheet may need pulse or careful pedal control at a relatively low amperage, while a thick butt joint may require preheating, multiple passes, or a different joint preparation. Do not force a large weld onto thin stainless simply because the machine is capable of producing high current.
Step 2 Prepare the joint and surrounding metal
Remove oil, marker, paint, adhesive, and other contamination from both sides of the joint. Wipe the area with a clean solvent-compatible cloth, allow it to dry, and then use a dedicated stainless steel brush if light surface oxide or residue remains.
Use a brush reserved for stainless steel. A brush previously used on carbon steel can embed iron particles in the surface, leading to rust-colored contamination later. Keep filler rod clean as well; wipe it if it has been handled with dirty gloves.
Fit the parts closely and consistently. A large gap forces you to add more filler and heat, while an uneven gap encourages burn-through on one side and incomplete fusion on the other. Clamp the work securely, but leave enough access for the torch and filler.
Important
Welding coatings, solvents, or unknown residues can release hazardous fumes. Remove contamination before welding, provide effective ventilation, and follow the safety instructions for the specific metal and cleaning product. Stop if you cannot identify the material or control the fumes.
Step 3 Connect the torch for DCEN polarity
Set the TIG machine to DCEN, sometimes labeled DC negative. The torch connects to the negative terminal and the work lead connects to the positive terminal, unless the welder’s instructions specify a different connector arrangement.
DCEN sends most of the welding heat into the workpiece while keeping the tungsten relatively cool. That gives stainless steel the penetration and arc behavior normally needed for TIG welding. AC is generally not the starting choice for stainless steel because its alternating cleaning action is intended mainly for aluminum and magnesium.
Check the work clamp connection on clean metal rather than on a painted table, rusty clamp, or heavily oxidized edge. A poor return path can cause an unstable arc that looks like an incorrect machine setting.
Step 4 Choose and sharpen the tungsten
Select a tungsten diameter that suits the amperage. A 1/16-inch tungsten is useful for many low-amperage thin-material jobs, while 3/32-inch is a versatile choice for moderate current. Larger diameters may be appropriate for higher amperage, but the machine, torch, and collet must all support the selected size.
Use a tungsten designed for modern TIG welding, such as 2% lanthanated tungsten, and follow the recommendations for your machine and electrode. Grind the tip lengthwise on a dedicated wheel or belt rather than across it. A lengthwise grind helps produce a stable arc.
For stainless steel on DCEN, form a pointed tip with a small flat at the end. The exact point angle depends on current and joint access; a sharper point concentrates the arc, while a blunter point tolerates more amperage. Keep the point centered and free of flat spots or deep grinding marks.
Set only a modest electrode extension beyond the cup for ordinary joints. Excessive stick-out weakens gas coverage and increases the chance of atmospheric contamination. A gas lens can allow more extension where access requires it, but it does not eliminate the need for shielding.
Step 5 Set pure argon and gas coverage
Use 100% argon rather than an argon-carbon dioxide or argon-oxygen mixture. Those mixtures are common in other welding processes but are not suitable shielding choices for a conventional stainless steel TIG weld.
Set the flowmeter according to the cup, gas lens, torch position, and workspace. A common starting point is about 15 to 20 cubic feet per hour, but the correct flow is the amount that creates stable coverage without turbulence. Too little gas exposes the puddle; too much can pull surrounding air into the shielding stream.
Inspect the hose, fittings, torch, and regulator for leaks. Keep the torch cup clean and make sure the gas passages are not blocked by spatter. Set pre-flow long enough to displace air before the arc starts, and set post-flow long enough to protect the hot tungsten and weld end as the arc stops.
Use a gas lens and a slightly larger cup when you need smoother coverage, longer stick-out, or better protection around a wider puddle. These are helpful options, not mandatory replacements for correct torch angle and gas flow.
Step 6 Set amperage, pulse, and arc-start controls
Set the machine to a starting amperage based on the thinner piece and the joint type. For a simple butt joint, approximately 1 amp per 0.001 inch of thickness can provide a first estimate, but use the foot pedal or hand control to reduce heat as the workpiece warms.
For thin stainless sheet, pulse can help limit average heat input. If you use it, begin with a moderate pulse frequency and a reasonable background current rather than choosing extreme values. Pulse is not a substitute for a steady torch or correct travel speed, and many beginners find it easier to learn puddle control with pulse turned off.
Set high-frequency start if the machine provides it, and avoid scratch-starting the tungsten on the stainless. Touching the electrode to the work contaminates the tip and can transfer tungsten into the weld. If contamination occurs, stop and regrind the electrode before continuing.
Use a short arc length—roughly no longer than the tungsten diameter for many flat-position joints. A long arc spreads heat, weakens shielding, and often produces a broad gray weld. Keep the torch close enough for coverage without allowing the tungsten to touch the puddle or filler.
Step 7 Select filler rod and plan the torch movement
Use filler that matches the base metal and service requirements. ER308L is commonly paired with 304 stainless, while ER316L is commonly paired with 316 stainless. When the grade, corrosion exposure, temperature, or structural requirement is uncertain, confirm the filler selection from the material specification or a qualified welding source rather than guessing.
Choose filler diameter according to the joint size and puddle. The rod should melt at the leading edge of the puddle, not be held in the arc until it becomes a large ball. Feed it with small, consistent additions while keeping the rod end inside the argon shield.
A useful way to approach how to set a tig welder for stainless steel is to check your progress after each stage.
Angle the torch so the arc pushes the shielding gas toward the unwelded area. Keep the torch moving steadily and avoid wide side-to-side weaving unless the joint specifically calls for it. A narrow, controlled bead generally makes it easier to limit heat tint and distortion.
Step 8 Protect the back of the weld when needed
Open-root stainless joints and tube work can require back purging. Back purging means filling the opposite side of the joint with argon so the hot root is not exposed to oxygen. Without it, the back may become rough, dark, and granular—a condition often called sugaring.
Use a suitable purge setup with a controlled argon outlet and enough venting to prevent pressure from pushing gas through the molten puddle. Seal gaps carefully, but do not create a closed container that can become dangerously pressurized when heated.
Not every surface weld needs a full back purge, but a corrosion-sensitive pipe interior, sanitary tube, or open-root joint may require it for acceptable results. If the back side matters to the application and you cannot establish reliable shielding, stop and obtain qualified welding guidance.
Step 9 Make a test weld and adjust one control at a time
Use a piece of the same stainless grade and thickness, prepared in the same way as the actual work. Start the arc, form a small puddle, and watch how quickly the edges melt. Add filler only after the puddle reaches both sides of the joint.
The puddle should appear bright and fluid but remain controllable. If it instantly collapses through the sheet, reduce amperage, increase travel speed, improve fit-up, or use a smaller tungsten and filler. If the puddle refuses to wet both edges, increase heat slightly, slow down, shorten the arc, or improve surface cleaning.
Change only one major setting at a time. For example, do not increase amperage and gas flow simultaneously when troubleshooting a dull bead. A controlled test makes it easier to connect the visible result with the adjustment that produced it.
Step 10 Weld the part with heat control
Begin with a stable torch position and establish the puddle before feeding rod. Move at a speed that keeps the puddle small and the edges fused. On longer seams, alternate sections or use skip welding where appropriate to limit accumulated heat and distortion.
Use the pedal to taper heat as the workpiece becomes hotter. Stainless steel conducts heat less efficiently than mild steel, so the joint can become progressively easier to melt even when the machine setting has not changed. A brief pause may be enough at the start, but the same pause later in the seam can cause burn-through.
At the end, add enough filler to maintain the bead profile, taper the current gradually, and keep the torch over the cooling weld until post-flow finishes. Pulling the torch away immediately can oxidize the crater and discolor the tungsten.
What the stainless TIG settings are doing
Understanding the controls makes it easier to adapt the setup to a different thickness or position. The goal is not a magic combination of numbers; it is a stable arc, complete fusion, adequate shielding, and the lowest practical heat input.
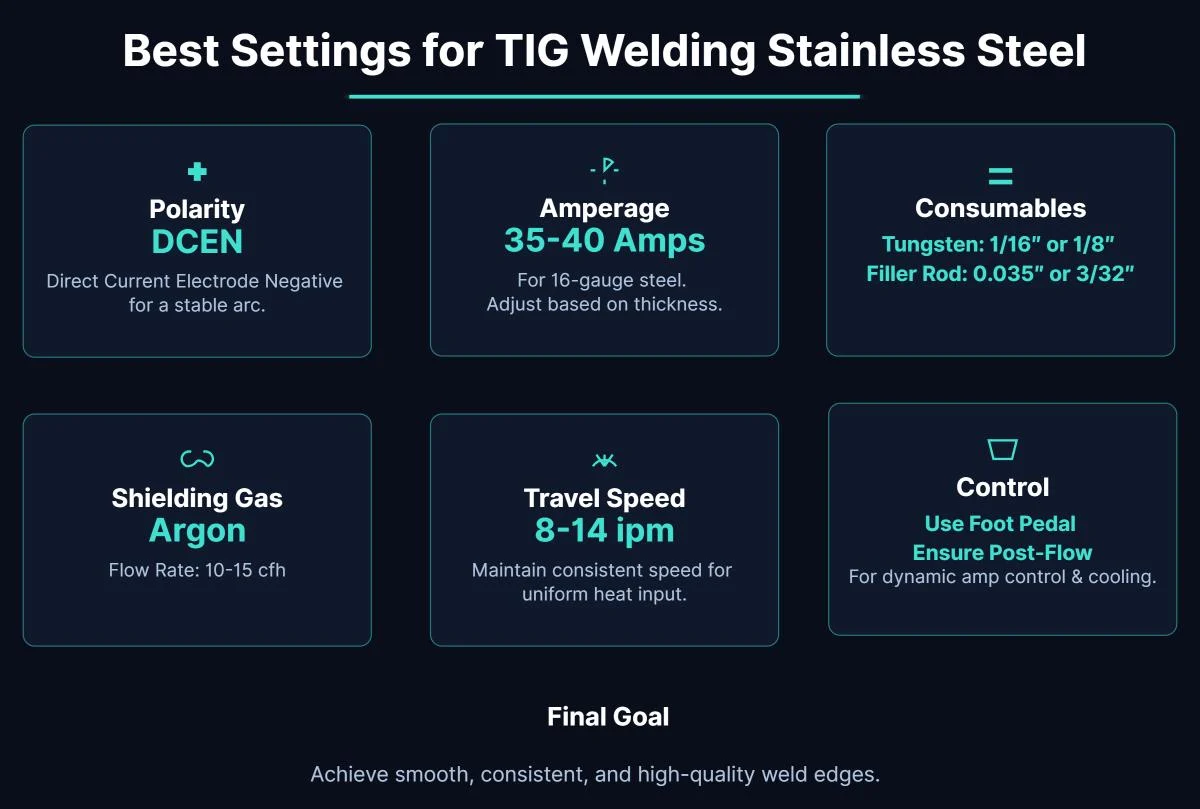
Polarity and current type
DCEN is the normal choice for stainless steel TIG welding. It concentrates useful heat in the workpiece and supports a focused arc with a pointed tungsten. DCEP places much more heat into the tungsten and is generally unsuitable for ordinary stainless TIG work at useful welding currents.
AC is mainly selected when the work requires oxide cleaning, particularly aluminum. Switching to AC because the surface looks dirty is not a substitute for cleaning stainless steel correctly.
Amperage and heat input
Amperage controls how quickly the puddle forms, but travel speed controls how long heat remains in each area. Excess heat can create wide beads, distortion, heavy heat tint, and loss of corrosion resistance near the weld.
That is why how to set a tig welder for stainless steel cannot be reduced to one amperage chart. The useful setting changes with joint restraint, thickness transitions, edge preparation, torch speed, filler additions, and whether the material is already warm from surrounding welds.
Color as a useful but limited indicator
A clean stainless TIG bead may remain silver, but pale straw, gold, or light bronze color can still be acceptable depending on the application. Dark blue, gray, black, or heavily scaled metal usually indicates excessive heat, inadequate shielding, contamination, or too much exposure to air.
Color is not a complete quality test. A bright bead can still have incomplete fusion, lack of penetration, cracks, or a contaminated root. Inspect the bead shape and both sides of the joint whenever access allows.
How to check the finished weld
Let the part cool naturally enough to handle safely before inspecting it. Do not judge only by shine; examine the bead, toe fusion, crater, surrounding heat-affected zone, and back side if the joint is accessible.
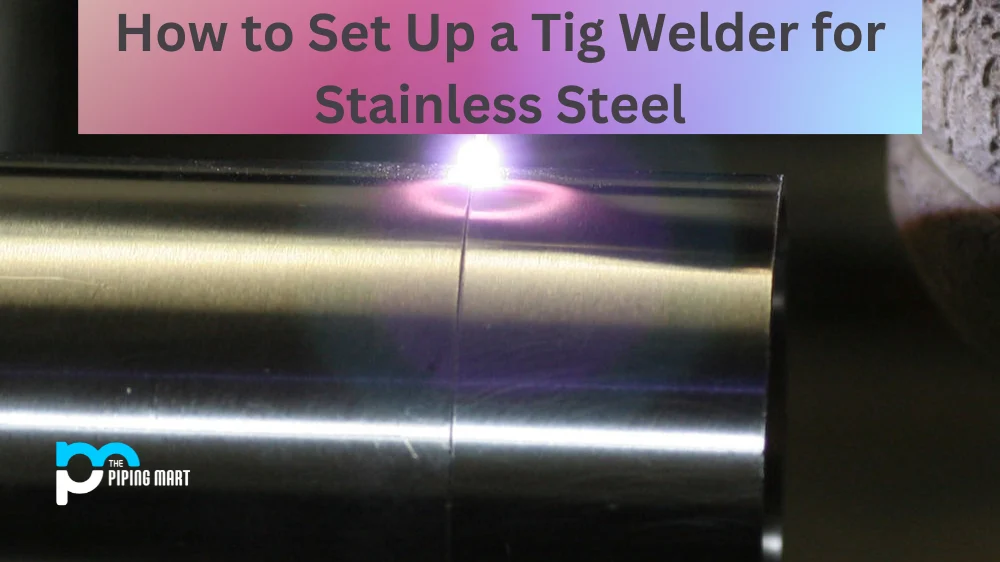
- Bead shape: Look for a reasonably consistent width and a smooth transition into both pieces.
- Fusion: The bead should appear tied into the edges rather than sitting on top as a rounded strip.
- Surface: Reject visible pores, deep pinholes, cracks, severe undercut, and black granular oxidation.
- Heat control: Compare the heat tint and distortion with the requirements of the part, not just its appearance.
- Crater: Check that the weld end is filled and tapered rather than ending in a sharp depression.
- Back side: For an open-root or purged joint, look for a smooth, protected root instead of sugaring.
For a practice coupon, bend, break, or section the test weld only if you have the appropriate equipment and know how to interpret the result. A visually attractive surface does not prove internal soundness, especially on a joint that carries a load or contains pressure.
Check your result
A good initial test result is a stable arc, a small puddle that reaches both joint edges, a consistent bead, and little or no dark oxidation. If any of those conditions is missing, correct the setup before welding the final part.
Troubleshoot common stainless TIG problems
Make changes systematically. First check cleanliness, polarity, gas coverage, and tungsten condition; those basics cause many apparent amperage problems.
| What you see | Likely causes and first response |
|---|---|
| Gray, black, or heavily colored bead | Insufficient shielding, gas leak, excessive flow turbulence, long arc, dirty material, or too much heat. Check the cup, hose, flow, torch distance, and cleaning. |
| Tungsten turns dull, balls, or contaminates | Wrong polarity, contact with the puddle, inadequate post-flow, or excessive amperage for the electrode. Regrind the tungsten and verify DCEN. |
| Burn-through on thin sheet | Too much current, slow travel, wide gap, or excessive dwell. Reduce heat, tighten fit-up, move steadily, or use controlled pulse. |
| Bead sits on top of the joint | Insufficient heat, fast travel, poor cleaning, or an arc that is too long. Improve fit-up and cleaning, shorten the arc, then raise heat modestly if needed. |
| Porosity or pinholes | Gas leak, drafts, moisture, dirty filler, contaminated base metal, or poor post-flow. Protect the work area and inspect the complete shielding system. |
| Root is rough or sugary | Oxygen reached the hot back side. Add or improve back purging, reduce purge pressure, and verify that the joint is properly vented. |
When gas flow is not the answer
Increasing argon flow can make a poor weld worse if it creates turbulence. Turbulent gas draws room air into the shield, especially around a large cup or an exposed tungsten. Before increasing flow, check for drafts, cup damage, leaks, torch angle, and excessive electrode extension.
When the tungsten becomes contaminated
Stop welding as soon as the tungsten touches the puddle or filler. Allow it to cool as appropriate for your equipment, remove the contaminated section, and regrind it lengthwise. Continuing with a contaminated tip often produces an unstable arc and transfers more tungsten into the weld.
When discoloration matters more than appearance
For decorative work, light heat tint may be acceptable, while food, pharmaceutical, marine, or corrosion-sensitive work may require stricter cleaning and color control. Follow the specification for the finished part, including any approved post-weld cleaning or passivation process.
Frequently asked questions
Can I TIG weld stainless steel with a regular argon mix?
Use 100% argon for conventional stainless steel TIG welding. Argon-carbon dioxide and argon-oxygen mixtures used for some other processes can contaminate the weld or produce unsuitable arc behavior.
Do I use AC or DC to TIG weld stainless steel?
Use DCEN for most stainless steel TIG work. AC is generally associated with aluminum and other materials where oxide cleaning is needed; it is not the normal starting setting for stainless.
What gas flow should I use for stainless TIG?
A common starting range is about 15 to 20 cubic feet per hour, but the correct flow depends on the cup, gas lens, torch position, and drafts. Use the lowest flow that provides stable coverage without visible oxidation or turbulence.
Why does my stainless weld turn blue or black?
Blue or black discoloration usually points to excessive heat, inadequate shielding, contamination, or a long arc. Check gas coverage and cleanliness first, then reduce heat input with faster travel, lower current, or better heat control.
Is back purging always required?
No. It is especially important for open-root joints, tubing, pipe, and applications where the inside surface must remain corrosion-resistant and smooth. A simple surface weld may not need it, but the job specification should decide.
Finish the setup with a controlled test
Learning how to set a tig welder for stainless steel is mainly an exercise in controlling heat and protecting the molten metal from air. Start with DCEN, pure argon, a clean joint, a properly sharpened tungsten, and moderate amperage suited to the thinner material. Then let the test puddle and bead appearance guide small adjustments.
Inspect both sides of the test weld before committing to the final part. If the arc is unstable, the bead is heavily oxidized, or the joint does not fuse cleanly, stop and correct the setup rather than trying to hide the defect with extra filler. With clean preparation, steady movement, and appropriate back purging where required, stainless steel TIG welding becomes predictable and repeatable.