Welding Safety Training PPT: Clear Overview and Expert Insights
A welding arc flashes brighter than the sun molten metal can travel several feet and a small spark may ignite dust paper insulation or solvent vapor long after.
A well-designed Welding safety training PPT helps turn those hazards into visible decisions. It can show the correct personal protective equipment, explain ventilation and fire prevention, and give supervisors a consistent way to brief new and experienced workers.
I use a presentation as a training tool rather than treating it as proof of compliance The strongest material connects each hazard to a control a worker action.
What a Welding Safety Training PPT Should Accomplish
A welding safety presentation is a visual training aid for workers who perform, assist with, supervise, or work near welding and allied processes. It may cover shielded metal arc welding, gas metal arc welding, gas tungsten arc welding, flux-cored arc welding, oxyfuel cutting, brazing, and related hot work.
Its main purpose is to help a worker answer five practical questions before starting:
- What hazards are present in this task?
- What controls must be in place before the arc or torch is started?
- What protective equipment is required?
- What should happen if conditions change?
- How will the worker respond to an emergency?
A presentation works best when it supports a broader training process. That process may include a site orientation, hands-on demonstrations, a written procedure, equipment-specific instruction, a knowledge check, and documented attendance. Slides can explain and reinforce those elements, but they do not replace competent supervision or practical qualification.
Who needs the training?
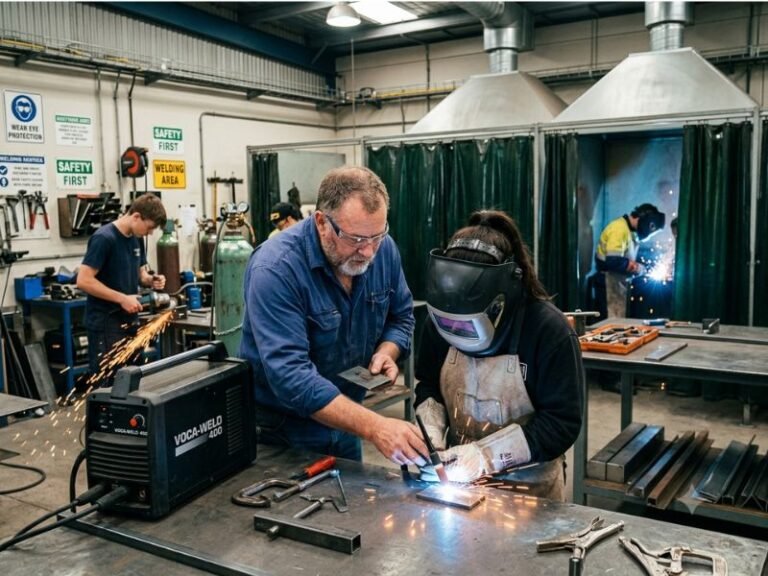
The audience is broader than the person holding the electrode or torch. Welders, fitters, helpers, fire watch personnel, maintenance employees, contractors, supervisors, and nearby workers may all need relevant instruction. A person who does not weld can still be exposed to arc flash, fumes, sparks, noise, compressed gases, or fire.
I recommend identifying the audience before building the deck. A short orientation for office staff should not look like a qualification session for a production welder. The same core hazards may appear, but the examples, controls, and level of technical detail should match the work.
Core Hazards to Explain Clearly
Effective welding safety training starts with hazards, not equipment lists. Workers remember controls more reliably when the presentation explains what can go wrong and why the control matters.
Arc radiation and eye injuries
Welding arcs produce ultraviolet, visible, and infrared radiation. Ultraviolet exposure can cause painful inflammation of the cornea commonly called arc eye or welder’s flash. Intense visible light can also injure the eyes, while infrared radiation contributes to heat exposure.
Training should distinguish between a welding helmet and ordinary safety glasses Safety glasses with side shields protect against impact and some flying particles but they do not replace.
Nearby employees need protection too. Screens, curtains, barriers, distance, and suitable eye protection help prevent bystander exposure. A presentation should show that an open work area is not automatically safe simply because another person is not looking directly at the arc.
Fumes, gases, and indoor air
Welding fumes contain metal and other substances that vary with the base metal, filler metal, coating, process, and contaminants. Stainless steel, galvanized metal, painted surfaces, and materials with lead, cadmium, or other hazardous coatings require particular caution. Shielding gases can also displace oxygen in enclosed or poorly ventilated spaces.
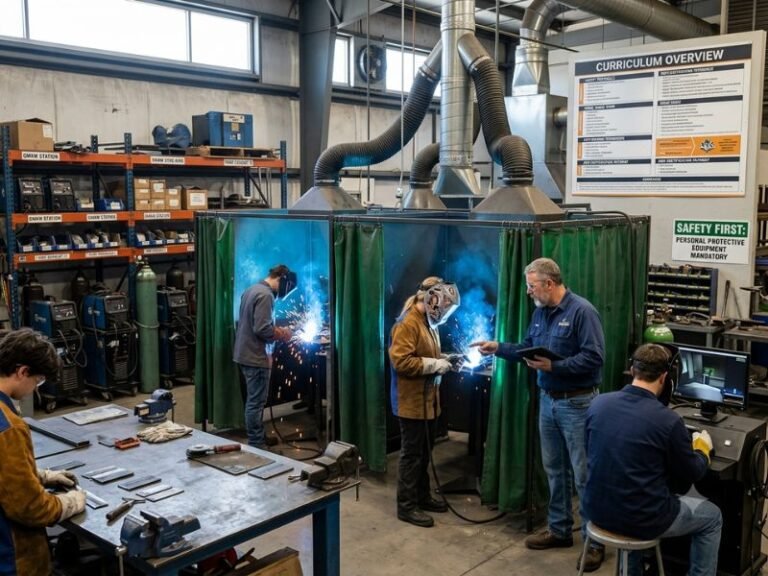
Ventilation is not a vague instruction to work in a ventilated area Training should show the difference between general dilution ventilation and local exhaust ventilation Local exhaust captures.
A respirator may be necessary after feasible engineering and administrative controls have been evaluated or where the hazard assessment requires it Respirator use brings additional obligations including medical.
Fire and explosion
Welding and cutting create sparks, slag, hot surfaces, and radiant heat. These ignition sources can reach combustible materials outside the immediate work area. Flammable liquids, gases, wooden structures, insulation, packaging, dust, and concealed spaces all deserve attention.
A strong slide deck explains hot work preparation step by step:
- Inspect the area for combustible materials and flammable atmospheres.
- Remove combustibles when practical or protect them with suitable fire-resistant covers.
- Check the opposite side of walls, floors, ceilings, and partitions.
- Provide suitable fire extinguishing equipment.
- Assign a trained fire watch when the hazard assessment or procedure requires one.
- Control access and post warning signs or barriers.
- Inspect the area after work ends for smoldering materials or hidden heat.
Fire watch responsibilities should be specific. A fire watch is not simply someone standing nearby. The person must understand the hazards, have a clear view of the work area when possible, know how to raise an alarm, and have authority to stop the job when unsafe conditions develop.
Electric shock and unexpected energy
Arc welding equipment can expose workers to electric shock, especially in wet conditions, confined spaces, damaged cables, or situations involving poor grounding. Training should cover dry gloves, dry clothing, insulated surfaces where appropriate, sound electrode holders, intact cables, and safe work practices around energized components.
Workers should not use welding cables electrode holders or power cords with damaged insulation Equipment inspections should occur before use and defects should be reported and removed from.
Burns, hot metal, and sparks
Molten metal and slag can penetrate ordinary clothing and ignite synthetic fabrics. Workers need flame-resistant clothing appropriate to the task, welding gloves, sleeves or jackets, sturdy footwear, and protection for exposed skin. Clothing should be free of oil, grease, and frayed edges that can catch sparks.
A presentation should emphasize that metal may remain hot after it stops glowing. Marking hot workpieces, using tongs, allowing cooling time, and communicating before moving material reduce contact burns. Workers should never assume that a dark surface is cool enough to touch.
Noise, ergonomics, and related hazards
Grinding, gouging, air arcing, cutting, and some welding environments can produce hazardous noise. Hearing protection may be required based on the employer’s noise assessment. Training should also mention sharp edges, awkward postures, heavy cylinders, trip hazards, and strain from moving workpieces.
These hazards may seem secondary beside the arc, but they often cause injuries during setup, cleanup, and material handling. A complete presentation covers the whole task rather than showing only the moment of welding.
Essential Slides and Training Topics
A practical deck can be organized in the order a worker experiences the job: prepare, inspect, weld, monitor, shut down, and respond. The following topics provide a useful structure without turning every slide into a block of text.
Learning objectives and scope
Begin with clear objectives. For example, participants should be able to identify welding hazards, select required PPE, inspect equipment, explain fire prevention controls, describe ventilation requirements, and respond to an emergency.
State which work the presentation covers and which work requires additional instruction. A general welding deck should not imply that it qualifies someone to operate unfamiliar machinery, weld pressure vessels, enter a permit-required confined space, or handle specialized gases without task-specific training.
Job hazard assessment
Teach workers to assess the work area before striking an arc. Useful questions include:
- What material is being welded, and does it have paint, plating, oil, or another coating?
- Could fumes or shielding gas accumulate?
- Are combustibles above, below, behind, or inside the work area?
- Is the work near an opening, traffic path, electrical equipment, or a confined space?
- Who else could be exposed to radiation, sparks, fumes, or noise?
- What emergency equipment and communication method are available?
Including a sample job hazard analysis makes the training more actionable. A table can connect the hazard to a control and a verification step:
| Hazard | Control | Verification |
|---|---|---|
| Arc radiation | Correct filter, helmet, screens, and bystander protection | Inspect shade and barriers before starting |
| Fumes | Local exhaust or approved ventilation method | Confirm capture position and airflow |
| Fire | Remove or cover combustibles; provide extinguisher and fire watch | Complete hot work check |
| Electric shock | Dry conditions and intact equipment | Perform pre-use inspection |
PPE selection and inspection
PPE slides should explain selection, not merely display photographs. Cover helmet or hand shield, correct lens shade, safety glasses, face protection for grinding, hearing protection, gloves, flame-resistant clothing, sleeves, leggings where needed, and safety footwear.
Show common defects cracked lenses damaged auto-darkening helmets holes in gloves exposed boot laces frayed clothing and contaminated garments PPE must fit the wearer and remain compatible with other equipment For example a respirator helmet face shield.
Auto-darkening helmets deserve careful explanation. Workers should inspect the lens, batteries or charging system, sensitivity, delay settings, and shade setting as applicable. An auto-darkening feature does not eliminate the need for a proper filter or pre-use inspection.
Equipment setup and inspection
A setup sequence might include checking the power source, leads, electrode holder, ground connection, torch, hoses, regulators, cylinder connections, and work clamp. The exact items depend on the process, so examples should be labeled by equipment type.
For gas cylinders explain upright storage securement valve protection separation from damage and heat correct identification and careful handling Oxygen equipment must be kept away from oil and.
Training should identify actions that are not acceptable, such as using compressed gas to clean clothing or skin, defeating safety devices, repairing defective equipment without authorization, or placing hot equipment near combustibles.
Safe operating practices
Workers should position themselves to keep their head out of the fume plume, maintain stable footing, keep cables and hoses organized, and avoid welding on containers that have not been properly cleaned, isolated, and determined safe. A container that appears empty may still contain flammable residue or vapor.
Explain communication around shared work areas. Before starting, the welder should notify affected workers, establish barriers, coordinate with nearby operations, and confirm that no one is working on the opposite side of a surface where heat or penetration could cause injury.
Shutdown procedures matter as much as startup. The deck should address stopping the process, closing gas valves when appropriate, turning off equipment, removing electrodes, allowing workpieces to cool, managing hot slag, inspecting for fire, and returning the area to a safe condition.
Regulatory and Standards Context
For a United States audience a welding presentation should be aligned with the employer s hazard assessment and applicable requirements from the Occupational Safety and Health Administration Depending.
These references are not a substitute for reviewing the actual rule, state-plan requirements, or site-specific obligations. Construction activities may fall under different OSHA provisions, including 29 CFR 1926.350 through 1926.354. State and local fire codes can also affect hot work permits, fire watch duration, and fire prevention measures.
ANSI Z49.1, Safety in Welding, Cutting, and Allied Processes, is a widely recognized consensus standard that provides additional guidance. NFPA 51B addresses fire prevention during welding, cutting, and other hot work. A presentation can reference these standards, but it should not imply that a citation alone makes the training legally sufficient.
Why citations belong in the presenter notes
Short citations on slides can help establish credibility, while detailed references in presenter notes or a final reference slide help the instructor verify content. I prefer linking each major topic to a current company procedure or authoritative requirement rather than filling the screen with legal text.
Requirements can change, and a slide deck can become outdated when equipment, chemicals, processes, or regulations change. Assign an owner to review the content on a defined schedule and whenever a serious incident, near miss, process change, or regulatory update occurs.
How to Build an Effective Presentation
Use one decision per slide
A slide should answer one useful question, such as “What must be checked before hot work begins?” or “How is a bystander protected from arc radiation?” One strong photograph, diagram, or short checklist is usually more useful than a paragraph copied from a manual.
Use plain language, readable contrast, and captions for images. If a photograph shows correct PPE, label the important features. If it shows an unsafe condition, explain exactly what is wrong and how to correct it. Avoid stock images that depict poor practices, such as welding without eye protection or handling cylinders improperly.
Show correct and incorrect examples
Comparison slides can make hidden hazards memorable. Examples include a clear fume plume versus effective local exhaust, an intact cable versus damaged insulation, and a protected hot work area versus an area with exposed cardboard and solvent containers.
Every incorrect example should have a corrective action. Otherwise, the audience may remember the picture without understanding the expected behavior.
Add interaction and verification
Ask scenario questions during the presentation:
- “A worker finds paint on the opposite side of the wall. What happens before welding starts?”
- “The exhaust hood is noisy but does not appear to capture fumes. Should work continue?”
- “A fire watch loses sight of the work area. What action is required?”
- “The electrode holder has exposed metal. Is it acceptable for temporary use?”
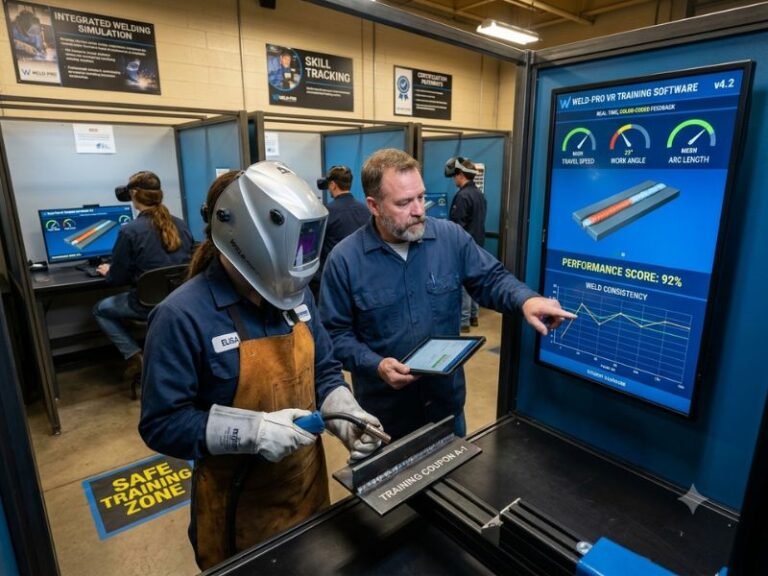
The answer should be discussed, not merely displayed. A short quiz can check knowledge, but hands-on demonstrations may be necessary for equipment inspection, PPE use, fire extinguisher response, gas-cylinder handling, or emergency procedures.
Localize the deck
Replace generic language with site-specific information: emergency numbers, evacuation routes, alarm methods, fire extinguisher locations, hot work permit forms, approved ventilation systems, designated welding areas, and the person authorized to stop work.
Include photographs of the actual workplace only when they accurately represent current conditions. A presentation that shows a barrier, exhaust hood, or cylinder rack that no longer exists can create dangerous confusion.
Common Mistakes to Avoid
Treating attendance as competence
Signing a roster proves attendance, not understanding or ability. Use questions, observation, demonstration, or supervisor verification when the task requires more than general awareness. Keep records of the training date, instructor, topics, attendees, and any required evaluation.
Overloading slides with regulations
Long quotations are difficult to read and rarely change behavior by themselves. Put the practical rule on the slide and provide the reference in notes or supporting material. The instructor can explain how the requirement applies to the site.
Using vague instructions
“Wear proper PPE” is weaker than “Wear safety glasses under the welding helmet, select the required filter shade, and inspect the lens before use.” “Ensure ventilation” is weaker than “Position local exhaust at the source and stop if capture is ineffective.” Specific verbs make expectations observable.
Ignoring non-welders and changing conditions
A presentation aimed only at welders may miss the helper who moves hot metal the cleaner who brings solvent into the area or the contractor who walks through.
Assuming a general deck covers special work
Welding on tanks, drums, pipes, coated metals, lead-painted surfaces, or contaminated equipment may require additional controls and specialized evaluation. Confined spaces, elevated work, underwater welding, and work near flammable atmospheres each introduce hazards that a basic presentation may not address fully.
Using the Presentation in a Training Program
A useful delivery plan has three stages Before the session the instructor reviews the deck against current procedures confirms that examples match the workplace prepares equipment for demonstrations.
Afterward, the employer documents attendance and evaluation, provides access to procedures and safety data sheets where applicable, and observes whether workers apply the controls. Supervisors should correct unsafe practices promptly and record follow-up training when needed.
Refresher training may be appropriate after an incident, a near miss, a process change, introduction of new equipment, evidence of unsafe behavior, or a change in applicable requirements. A fixed annual slideshow is not always enough. Training frequency should reflect risk and workplace conditions.
Language and accessibility also matter. Provide understandable instruction for workers with limited English proficiency, use interpreters or translated material when appropriate, and consider hearing, vision, literacy, and learning needs. The objective is safe comprehension, not simply completion of a presentation.
FAQ: Welding Safety Training PPT
What should a Welding safety training PPT include?
It should include learning objectives, welding and hot work hazards, PPE, arc radiation protection, ventilation and fumes, fire prevention, electrical safety, gas-cylinder handling, equipment inspection, safe operating practices, emergency response, site-specific procedures, and a knowledge check. It should also identify topics that require separate task-specific training.
Is a Welding safety training PPT enough for OSHA compliance?
No. A slide deck is one training resource, not a complete compliance program. Compliance may also require hazard assessments, written procedures, qualified or competent personnel, PPE programs, respiratory protection measures, hot work controls, equipment inspections, records, and hands-on instruction. The employer must match training to the actual work and applicable OSHA requirements.
How long should welding safety training slides be?
There is no universal required slide count or duration. The session should last long enough to cover the hazards employees face, answer questions, demonstrate relevant practices, and verify understanding. A short awareness briefing may take less time than training for welders, fire watch personnel, or workers performing specialized hot work.
Should the presentation cover all welding processes?
It can explain shared hazards, but process-specific risks should be identified separately. Arc welding, oxyfuel cutting, plasma cutting, and brazing use different equipment, gases, settings, and controls. The presentation should clearly state which processes are included and where additional instruction is required.
Does welding training need a quiz?
A quiz is useful for checking basic knowledge, but it may not demonstrate practical competence. Pair questions with observation or hands-on verification when employees must inspect equipment, select PPE, set up ventilation, manage cylinders, or perform emergency actions. Keep documentation of the evaluation method.
How often should a welding safety PPT be updated?
Review it on a planned schedule and whenever the workplace changes. Update it after an incident or near miss, when equipment or materials change, when procedures are revised, or when applicable regulations and standards change. Assigning an owner prevents the deck from becoming obsolete.
Conclusion
A welding presentation is most valuable when it converts hazards into clear actions inspect the area control fumes protect eyes and skin prevent fires verify equipment communicate with. When I evaluate Welding safety training PPT, I apply these points to the specific situation instead of relying on a one-size-fits-all assumption.