How to TIG Weld Stainless Steel Pipe: Step-by-Step Instructions
Stainless steel pipe can produce a clean, corrosion-resistant weld, but it is less forgiving than mild steel. Heat quickly creates discoloration, distortion, and a loss of corrosion resistance, while poor shielding can leave the inside of the pipe heavily oxidized. The joint may look acceptable from the outside and still be unsound internally.
Learning how to tig weld stainless steel pipe is mainly a matter of controlling four things: joint fit-up, arc length, heat input, and shielding gas. Tungsten inert gas welding, also called GTAW, gives you that control, but it rewards a deliberate setup more than a fast hand.
This guide covers a practical butt-weld method for common stainless tubing and pipe, including cleaning, tack welding, argon coverage, filler selection, travel technique, and inspection. It assumes you are using compatible, clean material and a properly maintained TIG machine. If the pipe carries pressure, fuel, oxygen, toxic material, or critical process fluid, use the applicable welding procedure and a qualified welder rather than relying on a general guide.
At a glance
- Keep the joint tight and clean; stainless steel transfers contamination easily.
- Use a trailing cup and back purge when the inside of the pipe must remain corrosion-resistant.
- Judge the finished weld by penetration, profile, color, and defects—not appearance alone.
How to TIG Weld Stainless Steel Pipe
This method is for joining compatible stainless pipe or tubing with a TIG torch, a nonconsumable tungsten electrode, and argon shielding. It describes a typical open-butt joint with square-cut ends; wall thickness, alloy, diameter, code requirements, and position can change the exact amperage, joint gap, filler, and purge requirements.
Tools you will need
- AC/DC TIG welder with a foot pedal or fingertip amperage control
- High-purity argon cylinder, regulator, flowmeter, and hoses for torch shielding
- Argon purge equipment, such as a second regulator or purge manifold, plugs, and vent holes, when inside protection is required
- 2% ceriated, lanthanated, or equivalent tungsten electrode, sharpened for a stable arc
- Stainless-compatible filler rod, commonly ER308L for 304 stainless or ER316L for 316 stainless
- Stainless-only wire brush, clean lint-free wipes, and acetone or another approved degreaser
- Pipe cutter, saw, or grinder; deburring tool; clamps; and a fit-up gauge or measuring tools
- Welding helmet, fire-resistant clothing, TIG gloves, safety glasses, hearing protection, and adequate ventilation
Step 1 Confirm the alloy, wall thickness, and service requirements
Identify the stainless grade before choosing filler metal. ER308L is commonly paired with 304 or 304L stainless, while ER316L is commonly used with 316 or 316L. These are common starting points, not universal substitutions; duplex, ferritic, martensitic, precipitation-hardening, and dissimilar-metal joints may require different consumables and procedures.
Measure the outside diameter and wall thickness, then determine whether the weld is cosmetic, structural, sanitary, or pressure-retaining. A pipe that will carry pressure or hazardous material may require a qualified welding procedure, controlled preheat or interpass limits, visual acceptance criteria, and nondestructive testing.
Do not weld a used pipe until it has been positively identified, drained, cleaned, and made safe. Never weld a container or line that may contain flammable vapor, oxygen-rich material, or toxic residue without the required isolation and testing.
Step 2 Cut, deburr, and fit the pipe ends
Cut both ends square to the pipe axis. A square end makes the arc length and filler addition more consistent around the circumference; an angled or irregular cut forces you to vary the torch position and can create uneven penetration.
Remove the burr from the inside and outside without thinning the edge. Clean a narrow band around each end, and check that the pieces are round, aligned, and supported without excessive force. For thin-wall tubing, a close fit is often appropriate.
Thicker material may need a specified root opening, bevel, or land based on the welding procedure.
Do not assume a large gap will improve penetration. Excessive root opening increases heat demand and filler consumption, encourages burn-through, and makes the pipe harder to keep aligned. The visible sign of good fit-up is a uniform joint around the full circumference with minimal mismatch.
Step 3 Clean the joint and isolate stainless tools
Degrease the prepared ends with a clean, lint-free wipe and an approved solvent. After the solvent evaporates, use a dedicated stainless-steel brush or abrasive that has never been used on carbon steel. Iron particles pressed into stainless can later rust and can contaminate the weld.
Keep filler rods covered and handle them with clean gloves. Do not touch the prepared joint with oily fingers, and do not use a marker, brush, grinding wheel, or file that has contacted mild steel. Cleaning is not cosmetic: oil, paint, oxide, and embedded iron can cause porosity or surface corrosion.
Step 4 Set up shielding gas and purge the pipe
Connect the torch to high-purity argon and set the flow according to the torch, cup, and welding procedure. Too little flow allows air into the shielding envelope; too much can create turbulence that pulls air into the arc. A gas lens and a larger cup often provide smoother coverage than a small standard collet body.
When the inside of the pipe will be exposed to corrosive service, food or pharmaceutical service, or a root weld that must be smooth and oxidation-free, back purge the pipe with argon. Seal the ends as far from the joint as practical, provide a controlled gas inlet, and leave a small outlet so displaced air can escape. Do not fully seal a heated pipe with no vent.
Purge until the trapped air has been displaced according to the applicable procedure. A purge monitor is useful when the weld quality matters; otherwise, allow sufficient flow and time for the joint volume and purge arrangement rather than simply starting as soon as gas is turned on. Keep purge flow low enough that it does not disturb the molten root.
Important
Shielding gas can displace breathable air in a small or poorly ventilated space. Do not weld in a confined area without a documented confined-space plan, atmospheric testing, ventilation, and an attendant where required.
Step 5 Prepare the tungsten and choose initial machine settings
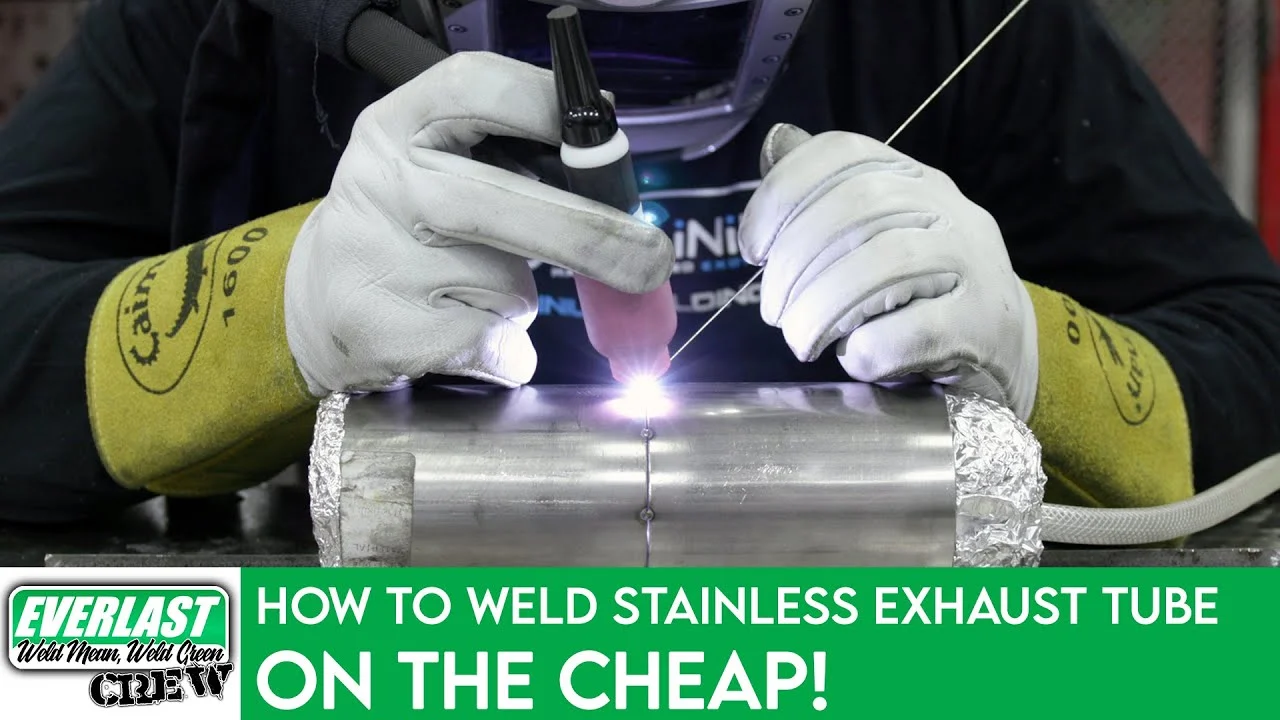
Use a clean tungsten suitable for DC electrode-negative TIG welding, which is the normal polarity for stainless steel. A sharp, symmetrical point helps concentrate the arc. Grind lengthwise rather than around the electrode, and dedicate the grinding wheel to tungsten so it does not pick up contaminants.
Set the welder to DCEN, high-frequency start, and post-flow. Set amperage according to wall thickness and your qualified procedure; do not copy a single number across every pipe. Thin tubing needs careful current control, while thicker pipe may need a joint preparation, multiple passes, or a different procedure.
A useful way to approach how to tig weld stainless steel pipe is to check your progress after each stage.
Set the foot pedal or fingertip control so you can reduce current before the puddle becomes too large. Keep the tungsten extension short enough for reliable shielding, increasing it only when the joint geometry requires it and the gas lens can protect the electrode.
Step 6 Tack the joint while maintaining alignment
Bring the pipe into alignment and place small, evenly spaced tacks around the joint. For a round pipe, tack at opposing points first, then add intermediate tacks so the pieces do not pull out of line as heat is added.
Use enough tack length and penetration to hold the joint, but avoid tall blobs that prevent a smooth weld transition. Let the joint cool as needed between tacks, and verify that the pipe has not shifted. A straight alignment, consistent root opening, and tacks that can be blended into the weld are signs that the joint is ready.
If a tack contains a crack, crater, visible contamination, or incomplete fusion, remove the defective area and retack it. Do not simply bury a questionable tack under the final bead.
Step 7 Establish a small puddle and start the root weld
Position the torch so the tungsten is close to the joint without touching it. Start the arc with the torch already aimed at the seam, then form a small, controlled puddle. Keep the torch angle shallow enough that the shielding gas covers the molten metal and avoid directing the arc far ahead of the joint.
Add filler at the leading edge of the puddle, dipping the rod and withdrawing it without dragging it through the arc. If the joint is designed for autogenous welding, filler may not be required, but removing filler from a procedure that calls for it changes the weld size and chemistry.
Watch the root through the joint when possible. A properly purged root is usually smooth and bright to lightly colored, while a dull gray, black, sugary, or heavily crusted interior indicates oxidation or inadequate shielding. Stop and correct the cause rather than continuing over a damaged root.
Step 8 Travel steadily around the circumference
Move at a speed that keeps the puddle narrow and the penetration consistent. Use a short arc, hold the torch at a consistent angle, and add small, regular amounts of filler. The torch should lead the weld slightly, while the filler enters the protected front portion of the puddle.
For a thin wall, continuous motion is usually safer than lingering to make the bead look wide. If the puddle grows, reduce current or increase travel speed; if the arc will not bridge the joint or the root is not fusing, correct fit-up and settings rather than simply slowing down.
At each tack, pause only enough to remelt the tack edges and tie them into the surrounding bead. Do not stop directly over a tack with excessive heat. Rotate the pipe on a positioner when available, or use a stable sequence that keeps your body and torch position controlled.
Step 9 Finish the weld without leaving a crater
As you approach the starting point, overlap the existing bead smoothly. Reduce current gradually with the pedal or machine downslope while adding enough filler to fill the crater. A sudden arc stop can leave a depression that cracks or leaks.
Keep the torch over the weld until post-flow has protected the hot tungsten and weld area. Do not move the torch away immediately after extinguishing the arc, and do not blow compressed air onto the hot stainless. A controlled finish should have a continuous profile, no open crater, and no abrupt lump at the overlap.
Step 10 Allow controlled cooling and remove surface contamination
Let the pipe cool in still air while maintaining any required purge until the root is no longer vulnerable to oxidation. Rapid quenching can distort the pipe and may be unsuitable for some alloys or procedures. Follow the project specification if it gives a maximum interpass temperature or a required cooling practice.
Once cool enough to handle, remove light heat tint with an appropriate stainless brush or approved chemical or electrochemical cleaning process. Heavy blue, purple, gray, or black oxidation is not automatically fixed by brushing; it may require more aggressive treatment and a review of heat input and shielding. Understanding how to tig weld stainless steel pipe also means recognizing the limits of the method.
What makes a stainless pipe TIG weld sound?
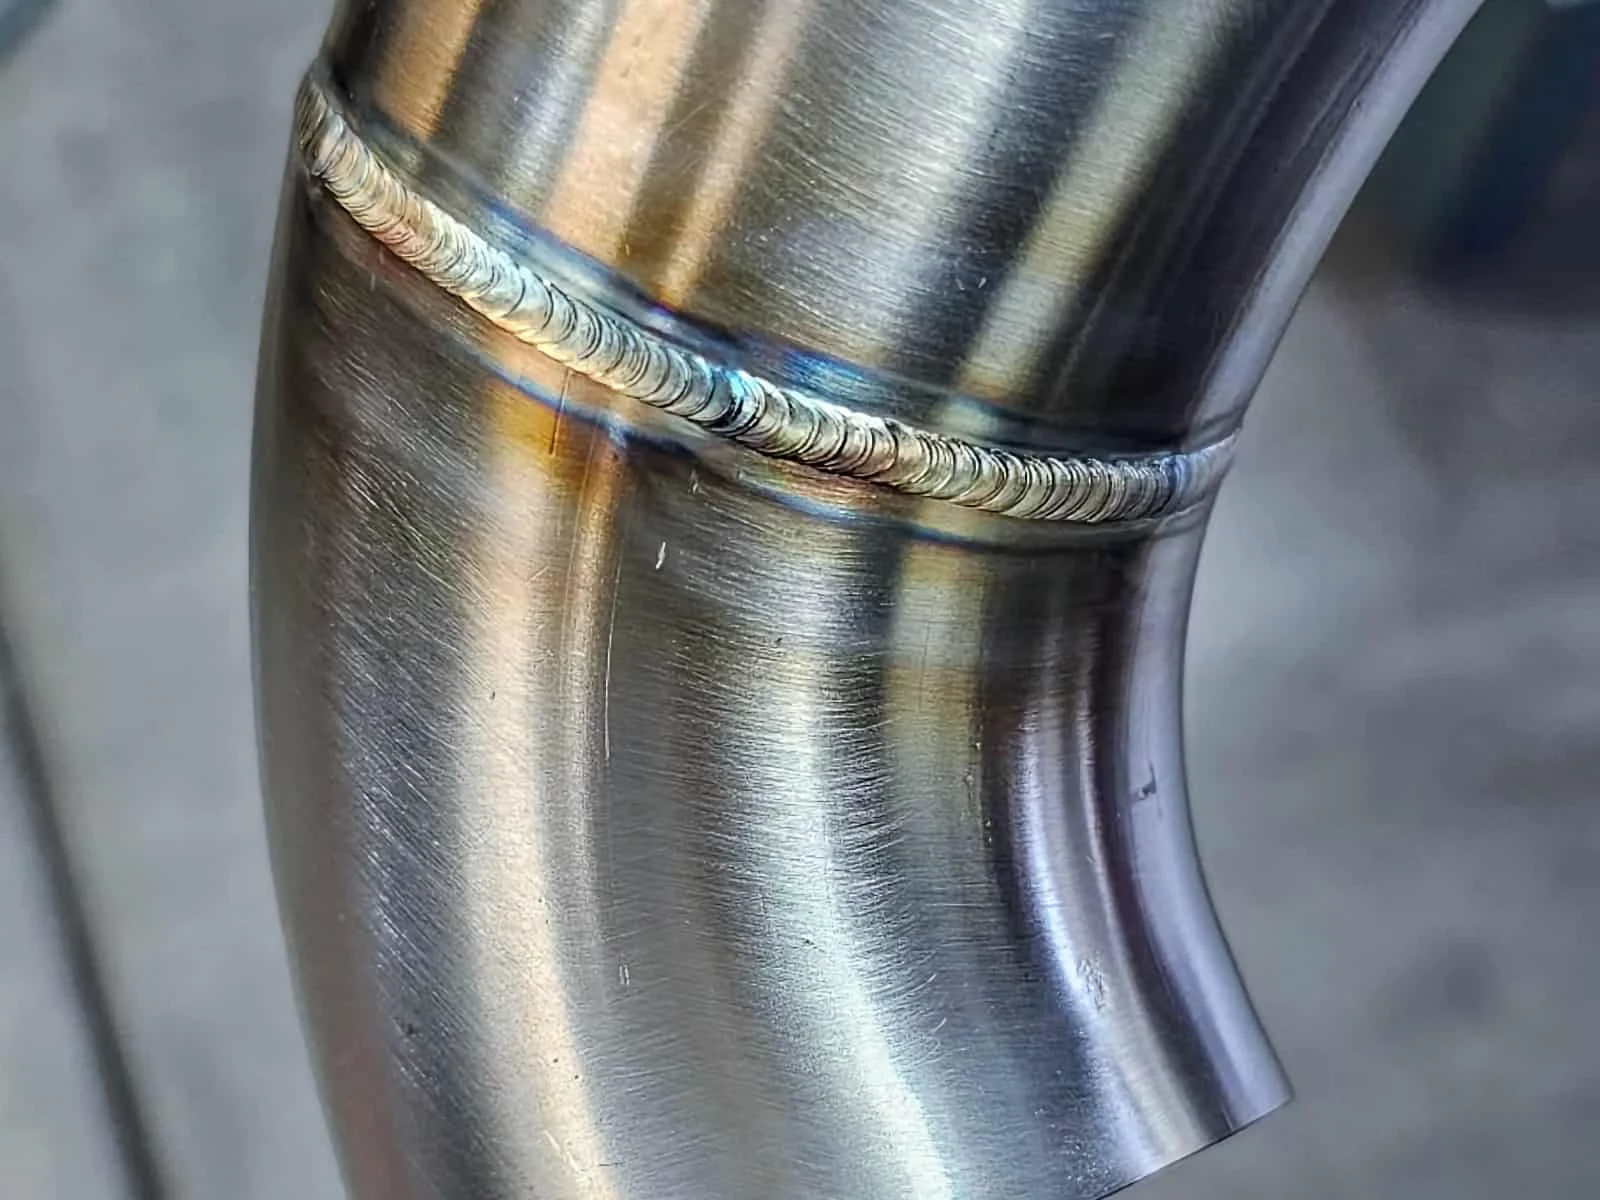
A sound weld has complete fusion at both sides of the joint, suitable penetration at the root, a reasonably even bead, and no cracks, pinholes, undercut, overlap, or trapped contamination. Appearance matters because it reveals process control, but a bright outside bead cannot prove that the inside is sound.
Stainless steel conducts heat differently from carbon steel and can distort as heat accumulates. It also expands and contracts significantly, so a weld that starts smoothly may become wider and hotter later in the circumference. Short arc length, clean filler, consistent travel, and current control help limit that accumulation.
Choose filler metal by the base alloy
Use the filler specified for the base metals and service. ER308L is a common choice for 304-series stainless, and ER316L is a common choice for 316-series stainless. The “L” indicates low carbon, which helps reduce the risk of carbide precipitation in many welded applications, but it does not replace an engineering or code decision.
For unknown stainless, stop and identify the material before welding. A magnet test, spark test, or visual guess is not a dependable substitute for material documentation or appropriate analysis. Dissimilar combinations and repairs to cast or heat-treated components deserve specific guidance.
Understand purge quality at the root
Back purging protects the hot underside of the weld from oxygen. Without it, the root can develop a rough, dark oxide commonly called sugaring. That texture traps contaminants, reduces corrosion resistance, interferes with flow in sanitary systems, and may create a stress concentration.
Gas dams should seal well without blocking the purge outlet. Excessive purge pressure can push the molten root outward or create an unstable puddle, while leaks can make the gas supply appear adequate even though air is still reaching the weld. A purge monitor provides a more dependable check than judging gas flow by sound.
Inspect and verify the finished joint
Begin inspection only after the weld has cooled enough to handle safely and the surface has been cleaned as specified. Use bright, even light and examine the entire circumference, including the start-stop overlap and both toe lines.
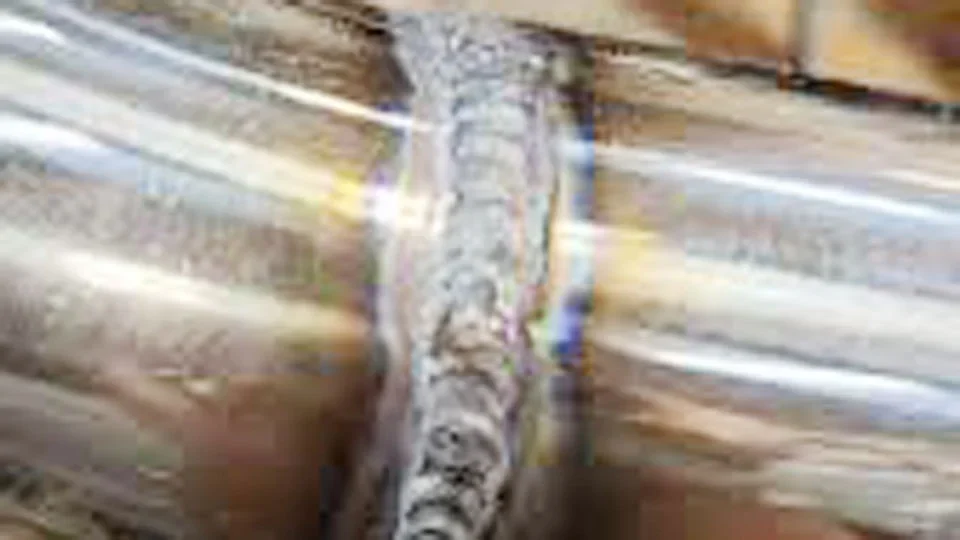
- Profile: Look for a continuous bead with smooth transitions, no excessive convexity, and no sharp undercut.
- Fusion: Check that the bead ties into both pipe walls rather than sitting on top of one edge.
- Surface: Look for cracks, pinholes, arc strikes, tungsten inclusions, trapped slag-like particles, and heavy oxidation.
- Root: If visible, confirm that it is continuous and reasonably smooth, with no sugaring, burn-through, or incomplete penetration.
- Alignment: Check for distortion, mismatch, ovalization, and a restriction that could affect flow.
For a leak-tight but noncritical tube, a suitable low-pressure leak check may be useful after the system is safely assembled and isolated. Never use oxygen or an unsafe gas for a leak test, and never pressure-test a questionable weld beyond the approved procedure.
Pressure piping, structural work, sanitary process lines, and regulated equipment may require dye penetrant testing, radiography, ultrasound, borescope inspection, hydrostatic testing, or other documented examination. Those tests should be selected and interpreted under the governing specification, not improvised from visual appearance.
Check your result
A useful visual result is a uniform bead, clean tie-ins, minimal heat tint after proper cleaning, and a bright, smooth root where the inside is accessible. If the root is black and rough or the bead has visible defects, treat the weld as a failed inspection until the cause is corrected.
Troubleshoot common stainless TIG problems
When a weld goes wrong, change one variable at a time if the joint is safe to continue. Most defects trace to contamination, unstable fit-up, excessive heat, poor gas coverage, or an arc that is too long.
| What you see | Likely cause and correction |
|---|---|
| Black or sugary root | Insufficient back purge, a leak, too much purge turbulence, or starting before air was displaced. Improve sealing and purge practice, then remove the oxidized area before rewelding. |
| Pinholes or porosity | Oil, moisture, dirty filler, contaminated tungsten, or disrupted shielding. Reclean the joint, inspect hoses and cup, and protect the arc from drafts. |
| Burn-through | Excessive current, slow travel, a gap that is too large, or too much dwell at tacks. Improve fit-up and reduce heat input while preserving required penetration. |
| Weak, narrow bead with poor fusion | Travel is too fast, current is too low, or the torch is not aimed at both joint edges. Verify the puddle reaches both sides before adding filler. |
| Gray or heavily colored surface | Long arc, insufficient torch shielding, excessive heat, drafts, or poor post-flow. Check gas coverage and technique; remove tint according to the specification. |
| Crater crack at the stop | Arc was stopped abruptly or the crater was not filled. Use downslope and add filler during the final overlap. |
When to stop instead of welding over the problem
Stop if the pipe loses alignment, the root becomes visibly oxidized, a crack appears, the tungsten repeatedly contaminates, or shielding cannot be stabilized. Grinding or brushing over a defect does not guarantee that the underlying lack of fusion or contamination is gone.
For a pressure or safety-critical line, isolate the joint and obtain the required repair procedure. A second pass may be appropriate for a qualified multi-pass weld, but adding an unplanned cap or cosmetic layer over a defective root can conceal the problem.
Beginner questions about TIG welding stainless pipe
Can I TIG weld stainless pipe without back purging?
You can make an outside weld without back purging, but the inside root may oxidize and become rough or contaminated. For corrosion-resistant, sanitary, flow-critical, or pressure service, back purging is commonly required unless an approved alternative procedure says otherwise.
Should stainless steel be welded with AC or DC?
Most stainless steel TIG welding uses direct current electrode negative, or DCEN. AC is normally associated with aluminum and magnesium because it helps break their oxide layer; changing to AC for stainless can reduce useful penetration and is not the typical choice.
How close should the tungsten be to the pipe?
Keep the arc short and consistent without allowing the tungsten to touch the puddle or filler. The exact extension depends on the cup, gas lens, joint access, and procedure, but a long exposed tungsten makes shielding less reliable and increases contamination risk.
Why did my stainless weld turn blue or black?
Color usually indicates heat tint or oxidation. It can result from excessive heat, slow travel, poor torch coverage, drafts, inadequate post-flow, or an ineffective purge. Light tint may be cleaned according to the specification; heavy black oxidation calls for process correction and possibly removal of the affected metal.
Can I use a regular steel wire brush to clean stainless pipe?
No. A carbon-steel brush can embed iron particles that later rust on the stainless surface. Use a brush or abrasive reserved for stainless steel, and keep it protected from shop contamination.
Finish with a controlled, inspectable weld
Good results from how to tig weld stainless steel pipe come from preparation more than speed: identify the alloy, create consistent fit-up, clean every surface, protect both sides of the root when required, and manage heat around the circumference. A short arc, steady travel, clean filler, and a gradual stop help produce a smooth joint with dependable fusion.
After welding, inspect the root and face, remove heat tint as specified, and perform the required leak or nondestructive examination. If the pipe is pressure-retaining, hazardous-service, sanitary, or otherwise critical, use the governing welding procedure and qualified inspection rather than treating a visually attractive bead as proof of serviceability.