How to TIG Weld Stainless Steel Exhaust Cleanly, Without Warping
Stainless exhaust tubing looks simple to join, but it punishes rushed preparation. Thin 304 stainless steel can discolor, distort, or develop pinholes before a beginner realizes the puddle has become too hot. The inside of the tube matters too: a rough, oxidized weld bead can restrict flow and shed contamination into the exhaust system.
Learning how to tig weld stainless steel exhaust successfully comes down to controlling three things: fit-up, heat, and shielding gas. A clean joint with small gaps, a sharp tungsten, and steady torch movement will produce a far better result than simply increasing amperage and trying to weld faster.
This guide explains a practical method for joining stainless exhaust tubing with a gas tungsten arc welding (GTAW, commonly called TIG) machine. You will learn how to select compatible filler, purge the tube when needed, tack and weld without excessive heat, then inspect the finished joint for leaks and overheating. It assumes you can operate a TIG welder safely; stop and get qualified help if the work involves a pressurized vessel, a fuel system, or a vehicle that cannot be safely supported.
At a glance
- Clean stainless, tight fit-up, and a sharp tungsten are more important than high amperage.
- Back purging protects the inside of a stainless tube from sugary oxidation.
- Confirm the repair with a leak test rather than judging the outside bead alone.
How to TIG Weld Stainless Steel Exhaust Without Warping
This method is intended for thin-wall stainless exhaust tubing and simple butt or slip-joint connections. It uses direct-current electrode-negative TIG welding, pure argon, compatible stainless filler, and short weld segments so heat can spread instead of building in one area.
Tools you will need
- DC-capable TIG welder with a foot pedal or fingertip amperage control
- TIG torch with a gas lens and an appropriate collet for the tungsten
- Sharp 2% lanthanated or ceriated tungsten electrode
- High-purity argon cylinder, regulator, flowmeter, and hoses
- Stainless filler rod matched to the base metal, commonly ER308L for 304 stainless
- Stainless-only wire brush, abrasive pads, and acetone or another suitable degreaser
- Tube saw, band saw, or thin abrasive cutting wheel for square cuts
- Clamps, a fit-up fixture, or magnets rated for welding use
- Optional: a second argon regulator and fittings for internal back purging
- Welding helmet, gloves, flame-resistant clothing, safety glasses, hearing protection, and adequate ventilation
Step 1 Identify the tubing and plan the joint
Confirm that the parts are actually stainless steel and note their wall thickness. Common exhaust tubing is 304 stainless, but 321 stainless is also used in higher-temperature systems; the filler should suit the alloy rather than being chosen only by appearance. If the material is unknown, check markings, purchase records, or the manufacturer’s specification before welding a critical component.
Decide whether the joint will be a butt joint, where two cut tube ends meet, or a slip joint, where one tube overlaps another. A butt joint normally gives a cleaner internal profile, while a slip joint can be easier to align but may trap contaminants and create a crevice. Keep the weld away from an area that will be inaccessible for inspection or leak testing.
Remove the exhaust from the vehicle whenever practical. Welding beneath a vehicle introduces awkward torch angles, raises fire risk, and makes it harder to protect wiring, fuel lines, rubber parts, and painted surfaces. Never weld a component that may contain fuel vapor or other flammable residue.
Step 2 Cut and fit the tubing accurately
Cut both tube ends as squarely as possible, then deburr the inside and outside edges. A square cut gives a consistent joint gap and prevents you from compensating for a large opening by adding excessive filler. If the tube is oval, dented, or badly stretched, correct that condition before attempting the weld.
Fit the pieces so they are aligned in diameter and angle. For a butt joint in thin tubing, aim for a small, even gap rather than forcing the ends tightly together or leaving a visibly wide opening. The exact gap depends on wall thickness and your welding setup, but consistency matters more than chasing a universal measurement.
Clamp the pieces without distorting them and rotate the assembly so the most comfortable torch position is available. Look through the joint from several directions. Success at this stage means the tube remains round, the joint line is even, and the parts stay aligned when the clamps are released and reapplied.
Step 3 Clean the stainless and prepare the tungsten
Degrease the joint area and nearby tubing, then scrub the stainless with a brush or abrasive pad used only on stainless steel. Carbon-steel brushes and dirty shop rags can embed particles that later appear as dark inclusions or start surface corrosion. Remove marker ink, oil, oxide, fingerprints, and abrasive dust.
Grind the tungsten lengthwise to a sharp point on a clean wheel. A pointed electrode produces a controlled arc and narrow heat zone; a contaminated or blunt tungsten can wander, create a wide arc, and force you to use more heat. If the tungsten touches the puddle or filler, stop, cut back the contaminated section, and regrind it.
Use a clean filler rod and wipe it if it has been handled or stored in a dirty area. For many 304 stainless exhaust repairs, ER308L is a reasonable starting filler. ER309L is commonly used when joining stainless to carbon steel or when the base alloy is uncertain, but the correct choice for a high-temperature or highly stressed part should come from the material or exhaust-system specification.
Step 4 Set the TIG machine and shielding gas
Set the machine to DC electrode negative. Start with a conservative amperage appropriate for the wall thickness and use the foot pedal or fingertip control to reduce heat as the tubing warms. Thin exhaust material may require less amperage than expected, especially when the joint is well fitted and the torch is moving efficiently.
Use pure argon for torch shielding. Set gas flow according to the torch, cup, gas lens, and workspace rather than blindly using a high number. Excessive flow can create turbulence and pull air into the shield, while too little flow allows the weld to turn gray, brown, or black.
Check that the torch hose, regulator, and fittings do not leak.
For a butt joint or any weld where the inside surface matters, arrange an internal argon purge. Seal the ends of the tube with purge plugs, tape, or temporary fittings that allow the gas to displace air without creating pressure. A small vent is necessary; a sealed tube can become pressurized as it warms, pushing gas through the molten joint and causing porosity.
A useful way to approach how to tig weld stainless steel exhaust is to check your progress after each stage.
Important
Argon is colorless and can displace breathable air in enclosed areas. Weld only with effective ventilation, keep the cylinder secured upright, and never purge in a confined space without proper atmospheric controls.
Step 5 Tack the joint while controlling alignment
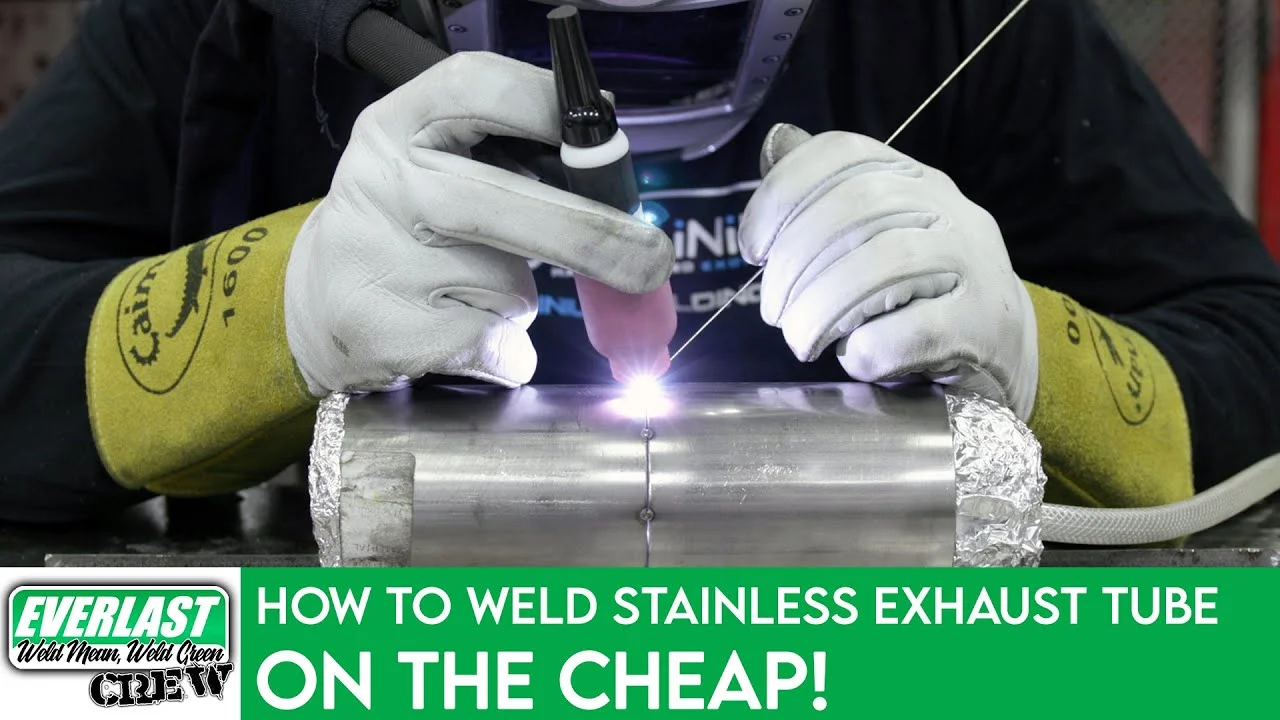
Place the torch so the arc is directed at the joint, with the tungsten close enough to maintain a short, stable arc without touching the material. Establish a small puddle and add only enough filler to bridge the joint. Make several evenly spaced tacks around the circumference instead of one long tack on a single side.
Allow each tack to solidify before moving on, and alternate locations so the tube does not pull toward one hot spot. Check alignment after the first few tacks. If the ends have shifted, correct them now; trying to force a misaligned tube straight while making the final weld usually leaves an uneven bead and a distorted opening.
A good tack is small, fully joined at both edges, and free of a crater or visible pinhole. If the tack collapses the tube edge, your arc was too hot, the gap was too large, or you held the puddle in one place too long.
Step 6 Make the weld in short, overlapping sections
Begin near a tack and create a small molten puddle. Feed the filler at the front edge of the puddle while moving the torch steadily along the joint. Keep the tungsten centered over the seam and maintain consistent torch angle, arc length, and travel speed.
For thin exhaust tubing, weld a short section, let the color and puddle settle, then move to a cooler section of the joint. Work in alternating locations rather than continuously circling the tube. The purpose is to distribute heat; stainless expands and contracts noticeably, so an uninterrupted pass can pull the joint out of alignment.
Use enough filler to produce complete fusion without making a tall bead. A smooth, slightly raised bead is generally preferable to a wide, lumpy deposit. Do not whip the torch excessively or make a large side-to-side motion; those habits broaden the heat-affected zone and make it easier to overheat the tubing.
Keep the torch shielding the weld until the metal loses its bright heat. If you lift away immediately, the hot stainless can oxidize even after the arc stops. When ending a section, reduce current gradually if your machine allows it, add a small amount of filler to fill the crater, and then maintain post-flow until the tungsten and weld are protected.
Helpful tip
Watch the puddle, not only the bead behind it. If the edge suddenly sinks, the hole enlarges, or the puddle becomes excessively fluid, back off the pedal and move. A brief pause can save the joint; continuing at the same heat usually makes the repair larger.
Step 7 Finish the circumference and manage the heat tint
Continue around the remaining unwelded sections, overlapping each restart slightly onto sound metal. Before restarting, clean away any visible contamination and confirm that the tungsten is still sharp. A restart placed on a dirty or heavily oxidized crater is a common source of pinholes.
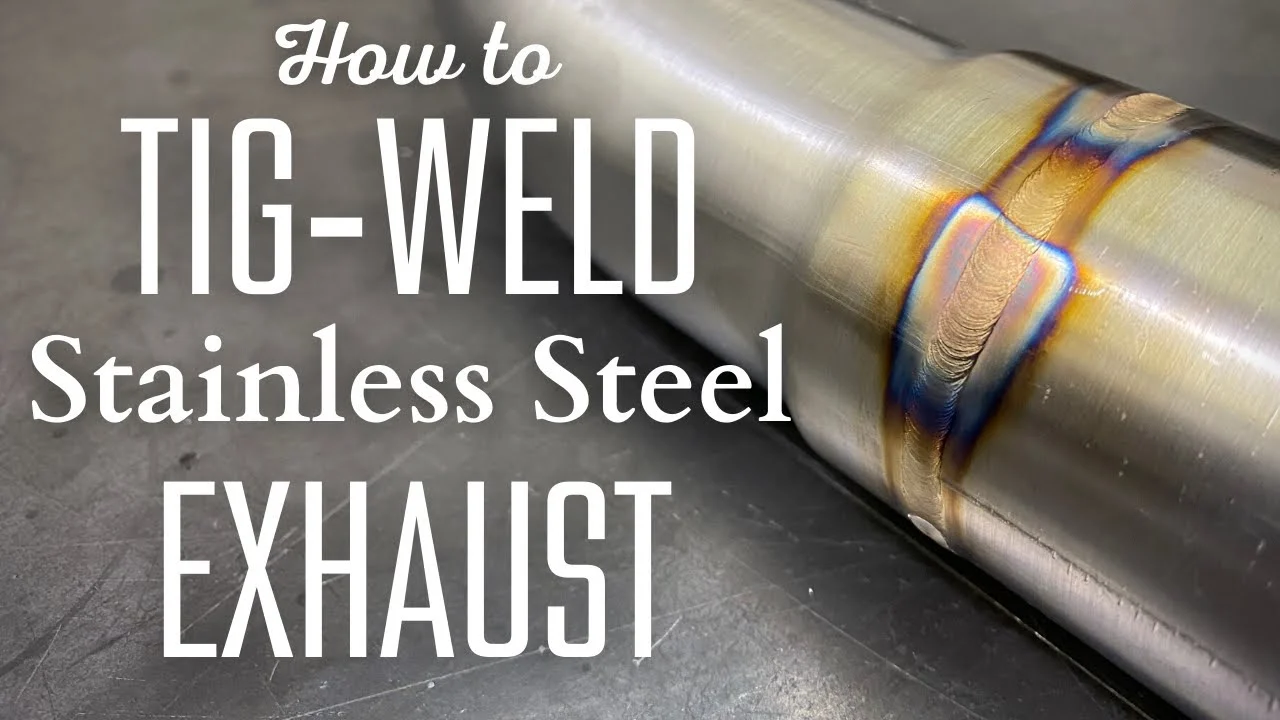
Some straw or light gold discoloration can occur on stainless, especially near the weld. Dark blue, purple, gray, or black oxidation indicates that shielding, purge, cleanliness, or heat control needs improvement. Do not hide heavy oxidation with polish; it can indicate that the weld surface and the inside of the tube were not adequately protected.
If the part is a high-temperature exhaust component, avoid grinding the finished bead merely to make it look flat unless clearance requires it. Grinding removes material and can create a thin spot. If grinding is necessary, use clean stainless-compatible abrasives and finish without leaving sharp notches that can concentrate stress.
Step 8 Cool, clean, and inspect the completed weld
Let the assembly cool naturally in clean air. Do not quench a hot stainless weld with water, since sudden cooling can contribute to distortion and may spread contamination. Once cool enough to handle, remove purge plugs, tape, clamps, and loose scale.
Inspect the entire circumference under bright light. Look for continuous fusion at both edges, pinholes, crater cracks, undercut, burn-through, trapped black residue, and sections where the bead merely sits on top of the tubing. Check that the tube is still round and that the joint has not pulled out of its intended angle.
Clean the outside with an appropriate stainless-safe method. If visible heat tint must be removed, use a compatible chemical or mechanical process according to its instructions and protect yourself from corrosive products. The inside should be free of loose soot, abrasive grit, and wire fragments before the exhaust is installed.
Understanding how to tig weld stainless steel exhaust also means recognizing the limits of the method.
Step 9 Test for leaks before putting the exhaust back in service
Block or cap the openings in a way that will not damage the tubing, then introduce low-pressure air or another appropriate test method while applying a mild soapy-water solution around the weld. Do not use compressed air at a pressure that could rupture a thin tube or turn a temporary cap into a projectile.
Watch for growing bubbles. A leak may be tiny and difficult to hear, so inspect the entire joint slowly, including the start and stop areas. If bubbles appear, mark the location, release pressure, clean and dry the area, and repair the defect rather than simply smearing sealant over it.
After installation, inspect again with the engine safely operating and the exhaust system cool enough to approach. Keep hands, clothing, and tools away from moving or hot components. A repaired exhaust should not produce a ticking sound, visible soot trail, or exhaust odor near the cabin.
Why stainless exhaust TIG welds fail
Most beginner failures are not caused by an incorrect bead pattern. They come from contamination, poor fit-up, inadequate shielding, or too much heat. Stainless steel does not tolerate careless preparation as well as mild steel, and its low thermal conductivity allows heat to remain concentrated around the weld.
Heat distortion and burn-through
Stainless exhaust tubing can warp as one side expands and contracts before the other. Burn-through occurs when the tube edge melts away, leaving a hole or a severely thinned area. Reduce the risk with close, even fit-up, short weld segments, lower heat input, and cooling pauses.
A copper backing bar can sometimes support an edge and absorb heat, but it must not contaminate the joint and may not fit inside curved tubing.
Internal oxidation, sometimes called sugaring
When oxygen reaches the hot inside of a stainless tube, the root can become rough and dark. Welders often call this sugaring because the oxidized surface resembles coarse crystals. It weakens the root and can interfere with exhaust flow, so back purging is strongly preferred for a full-penetration butt weld.
Back purging does not require forceful gas flow. The aim is to replace air inside the tube with argon and maintain a gentle protective atmosphere while the root is hot. Seal leaks around the purge setup, leave a controlled vent, and allow enough time for air displacement before starting the arc.
Filler selection and mixed metals
ER308L is commonly compatible with 304 stainless, while ER347 or another stabilized filler may be specified for some high-temperature applications. ER309L is often selected for stainless-to-mild-steel transitions. These are general material-selection references, not a substitute for the exhaust manufacturer’s specification or an engineer’s recommendation for a highly loaded or heat-critical component.
How to judge the finished weld
A visually attractive weld is not automatically sound. Verification should combine appearance, dimensional inspection, and a controlled leak test. If the component carries structural loads, supports a turbocharger, or is part of a racing system exposed to severe vibration, use a qualified welder or inspector when your safety depends on the joint.
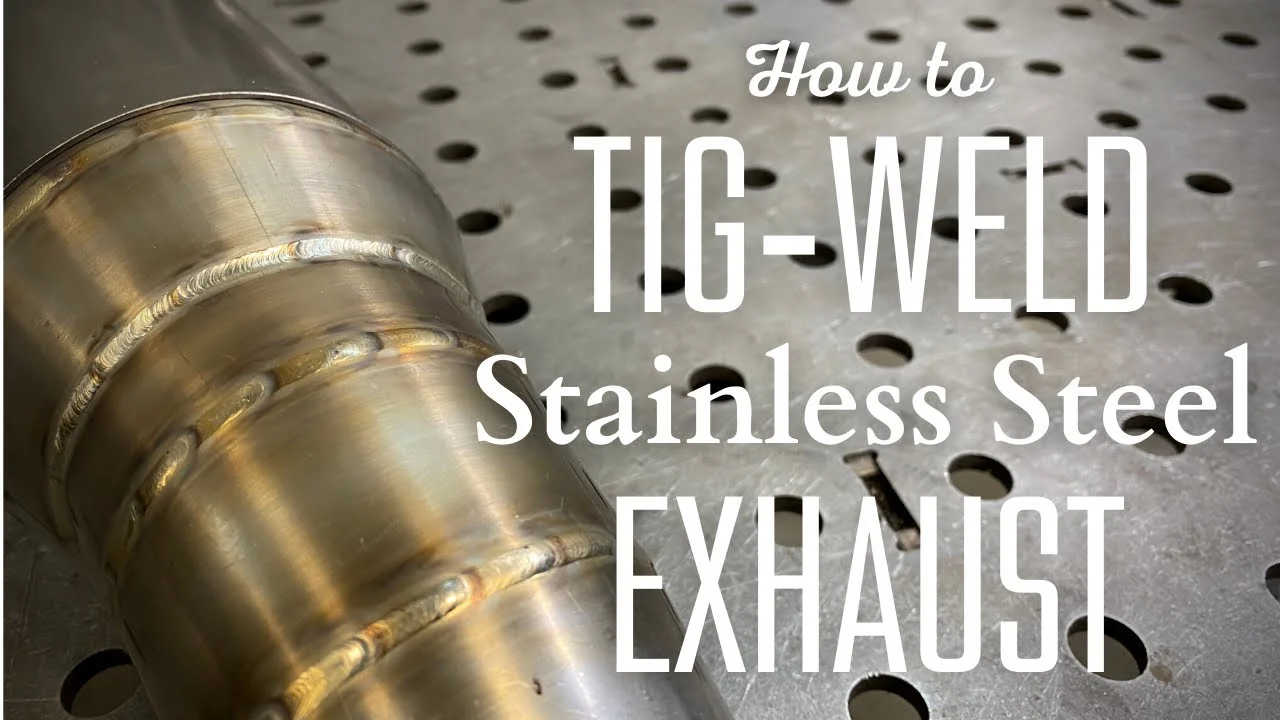
- Fusion: The bead should tie into both tube edges without a continuous dark line along either side.
- Surface: The weld should be reasonably smooth and free of cracks, pinholes, deep craters, and loose oxidation.
- Shape: The tube should remain round enough to fit its clamps, hangers, and neighboring parts.
- Color: Light gold or pale straw is preferable to heavy gray, blue, or black oxidation, though color alone cannot prove weld quality.
- Interior: A properly purged root should be clean and smooth rather than rough and crystalline.
- Leak performance: A low-pressure bubble test should show no persistent bubbles around the joint.
Do not rely on exhaust paste to compensate for a porous weld. Sealants may be useful for a manufacturer-approved slip connection, but they are not a substitute for complete metal fusion in a welded joint.
Troubleshoot the result before reworking it
Identify the failure pattern first. Cutting away sound material without understanding the cause can make the repair thinner and harder to align.
| Observed problem | Likely cause and correction |
|---|---|
| Black or heavily gray weld | Insufficient shielding, drafts, contaminated material, poor gas coverage, or no internal purge. Clean again, improve gas coverage, check for leaks, and purge the tube. |
| Pinholes or bubbles on a leak test | Porosity, a contaminated restart, an unfilled crater, or a hole from burn-through. Grind or cut back to clean metal and repair with better preparation and controlled heat. |
| Tube pulls out of alignment | Too few tacks, uneven tack placement, or a long continuous pass. Refit if necessary, add evenly spaced tacks, and alternate short weld sections. |
| Bead sits on top of the joint | Insufficient heat, excessive travel speed, a long arc, or poor joint access. Improve torch position and establish fusion at both edges before adding filler. |
| Edge melts away | Too much current, excessive dwell, a large gap, or a contaminated tungsten that spreads the arc. Tighten fit-up, reduce heat, and keep moving. |
If the tungsten repeatedly contaminates, check torch control and filler placement. Keep the electrode out of the puddle, avoid dipping the rod against the tungsten, and use enough post-flow to protect the hot electrode. If the arc wanders, regrind the tungsten lengthwise and inspect the collet and gas lens for dirt.
Beginner questions about stainless exhaust TIG welding
Can I TIG weld stainless exhaust without back purging?
You can make an outside bead without purging, but the inside root may oxidize and become rough or brittle. For a butt-welded exhaust tube, especially one with full penetration, back purging is the safer quality practice. A simple external patch or noncritical overlap joint may have different requirements, but the inside still should not be ignored.
What tungsten size should a beginner use?
A small, sharp lanthanated or ceriated tungsten is commonly suitable for thin stainless tubing, with the exact diameter matched to the amperage range and torch setup. Follow the electrode manufacturer’s guidance and avoid using a large tungsten simply because it is available; an oversized electrode can make low-current control less precise.
Should stainless exhaust be welded with AC or DC?
Use DC electrode negative for stainless steel TIG welding. AC is normally associated with aluminum and magnesium because its cleaning action helps break up their oxide layer. Switching to AC for stainless exhaust is unnecessary and can make heat and arc control less suitable for this work.
Why does my stainless weld turn blue?
Blue color usually means the hot metal received more heat or oxygen exposure than ideal. Possible causes include slow travel, excessive amperage, weak torch shielding, drafts, a dirty joint, or inadequate back purging. Light discoloration may be cosmetic, but heavy blue, gray, or black oxidation deserves investigation and often rework.
Can I weld the exhaust while it is still installed?
It is possible in limited circumstances, but removal is usually safer and produces better access and alignment. Before any in-place welding, isolate the battery as appropriate, protect wiring and fuel components, remove flammable contamination, provide ventilation, and support the vehicle securely. Never work beneath a vehicle supported only by a jack.
Finish with a clean, leak-free stainless joint
Good results from how to tig weld stainless steel exhaust are built before the arc starts. Identify the alloy, make the fit-up even, clean stainless with dedicated tools, use a sharp tungsten and compatible filler, and protect both sides of the joint with stable argon shielding. Short, alternating weld sections keep heat manageable and help preserve the tube’s shape.
After welding, let the part cool naturally, inspect the bead and interior, and perform a cautious low-pressure leak test. If the weld is badly oxidized, porous, cracked, or structurally important, cut back to clean material or have the repair evaluated by a qualified welder rather than hiding the defect. With those limits respected, a beginner can produce a durable stainless exhaust repair and verify it before returning the vehicle to service.