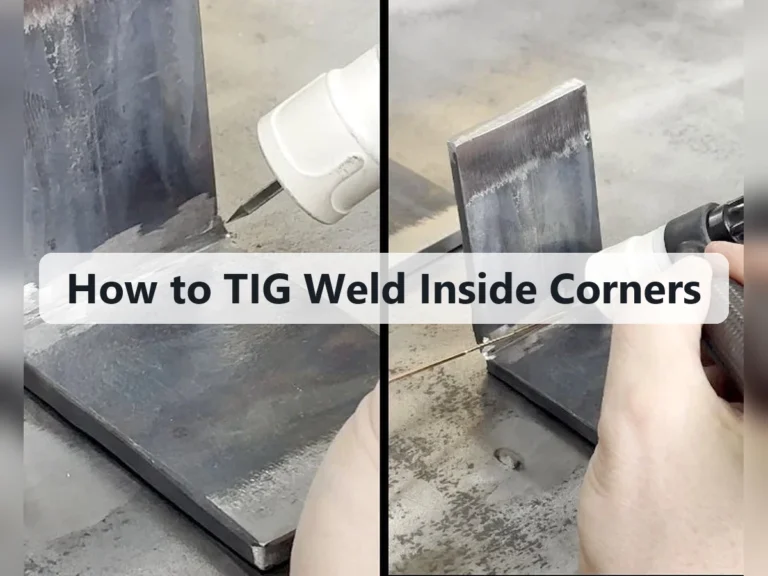
How to TIG Weld Magnesium: Instructions, Tips, and Useful Advice
Magnesium can produce clean, strong TIG welds, but it is not simply a lighter version of aluminum. Its low melting point, high thermal conductivity, and flammability when finely divided make preparation and heat control unusually important. A dirty part, an overheated joint, or a pile of grinding dust can turn a routine repair into a serious fire hazard.
This guide explains how to tig weld magnesium on a small, sound part when you already have basic TIG skills. The realistic beginner goal is a short practice weld or a carefully prepared repair—not welding an unknown casting, a pressurized component, or a highly loaded structural part without qualified supervision.
You will learn how to identify the alloy as far as practical, prepare the joint, choose AC TIG equipment and filler, establish shielding, control the puddle, and inspect the finished bead. If the base metal is unidentified, contaminated, badly cracked, or part of an aircraft, wheel, suspension, pressure, or safety-critical component, stop and use a qualified welding specialist instead.
At a glance
- Use AC TIG with clean, dry argon and a properly prepared tungsten.
- Remove oil, paint, oxide, and magnesium dust before striking an arc.
- Control heat closely and keep a suitable Class D fire-control method nearby.
How to tig weld magnesium safely and accurately
Magnesium TIG welding is best approached as a controlled, low-heat operation on a clean, known alloy. The sequence below assumes a noncritical test piece or repairable shop part, a TIG machine with adjustable AC balance and amperage, and a work area specifically prepared for combustible metal work.
Tools you will need
- AC/DC TIG welder with a foot or hand amperage control, for establishing and adjusting the arc
- High-purity argon cylinder, regulator, flowmeter, and sound gas hose
- Sharp tungsten electrode suitable for AC TIG, such as 2% lanthanated or ceriated tungsten
- Magnesium-compatible filler rod matched to the base alloy, commonly ER AZ61A or ER AZ92A when the alloy calls for it
- Stainless-steel wire brush reserved for magnesium, plus solvent and clean lint-free wipes
- Nonflammable work surface, clamps, face shield, welding helmet, gloves, jacket, and adequate ventilation
- Class D metal-fire extinguishing media or an appropriate dry powder agent, selected according to local fire-safety guidance
- Optional: a dedicated AC TIG torch with a gas lens and a small practice coupon of the same or a confirmed compatible alloy
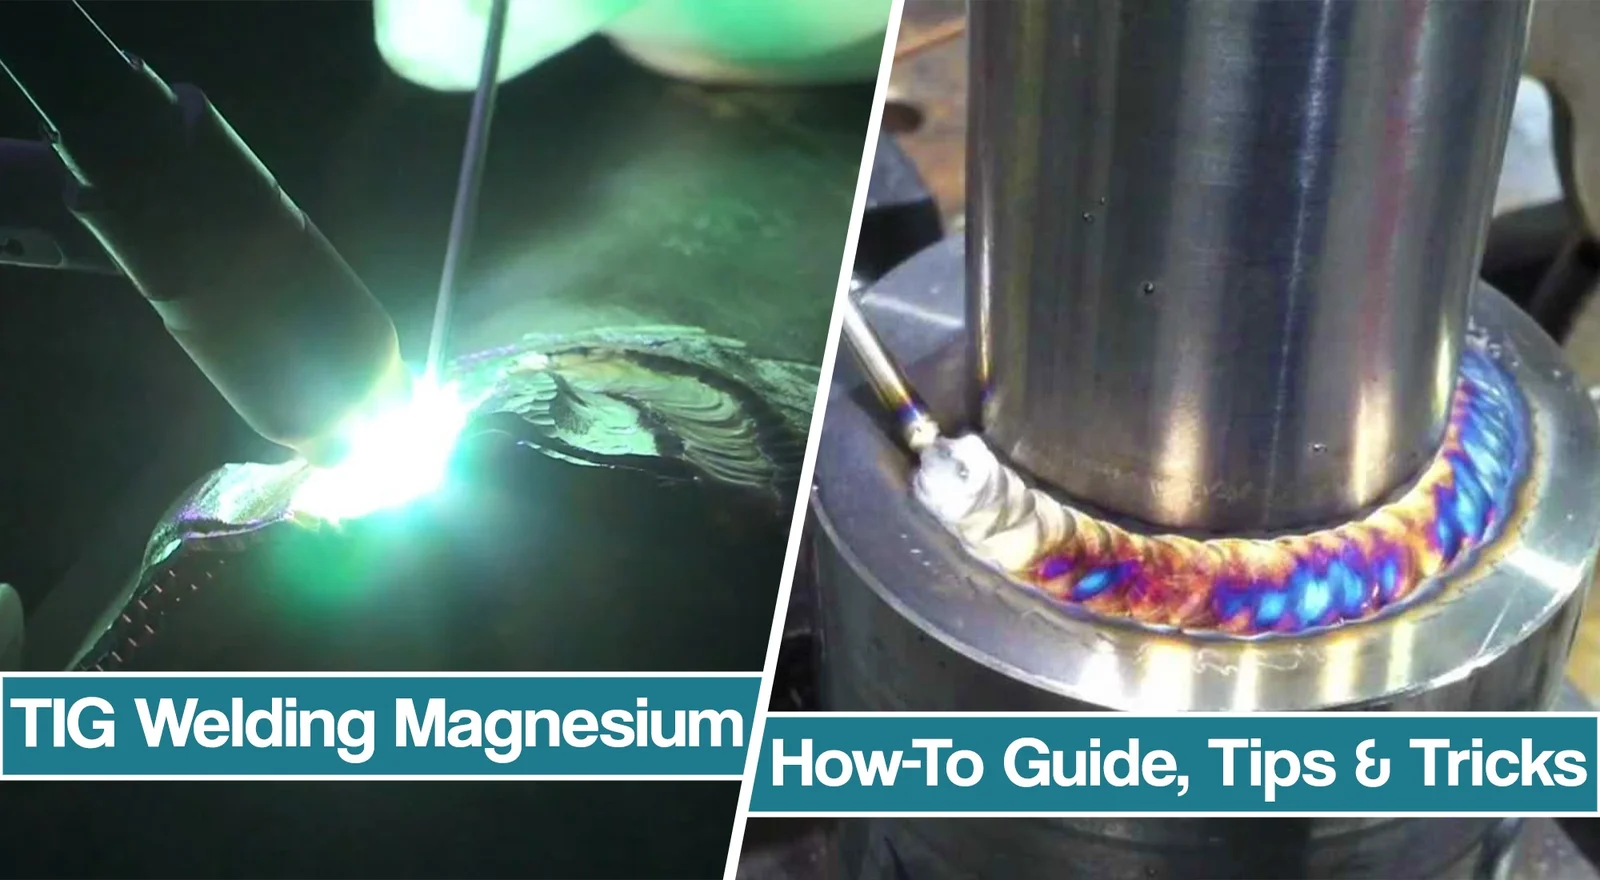
Step 1 Confirm the part and alloy before welding
Identify the part, its alloy, and its service requirements before setting up the welder. Magnesium alloys differ in composition and weldability; a casting may contain porosity, inclusions, or surface treatments that make it unsuitable for a casual repair. A part that merely looks like magnesium may instead be aluminum, zinc alloy, or a coated material.
Check manufacturer information, a part marking, a material certificate, or a qualified material-identification service. Do not rely on color, weight, or a spark test. If the repair affects a wheel, aircraft component, engine mount, steering or suspension part, pressure boundary, or other safety-critical item, do not proceed as a beginner experiment.
For practice, use a clean coupon with a known alloy. The successful starting point is a piece with no oil trapped in pores, no paint or plating near the joint, and enough thickness to tolerate a test weld.
Step 2 Make the work area safe for magnesium
Remove paper, rags, wood dust, flammable liquids, and other combustibles from the immediate welding area. Sweep or vacuum magnesium filings and grinding dust using equipment approved for combustible-metal dust; do not scatter the dust with compressed air. Fine magnesium particles ignite much more readily than a solid, clean workpiece.
Keep the workpiece on a stable, nonflammable surface and arrange clamps so the part cannot shift as it heats. Provide ventilation that removes welding fumes without blowing shielding gas away from the arc. Wear a welding helmet with a suitable lens shade, flame-resistant clothing, gloves, closed footwear, and safety glasses beneath the helmet.
Know exactly how a magnesium fire will be handled before starting. Never use water on a burning magnesium fire; water can react violently with hot magnesium and may spread burning material. Do not assume a normal shop extinguisher is suitable.
Use the Class D dry powder or other metal-fire medium specified by your facility’s safety plan, and stop immediately if the workpiece or surrounding dust begins to burn.
Important
Do not weld magnesium in a location where fire-control equipment, ventilation, and an unobstructed exit are unavailable. If a fire starts, disconnect power only if it is safe, warn others, evacuate as needed, and follow the site emergency plan rather than improvising with water or compressed air.
Step 3 Prepare the joint without embedding contamination
Remove paint, anodizing, conversion coating, grease, oil, and corrosion from both sides of the joint. Use a solvent that is compatible with the part and allow it to evaporate fully before welding. Wipe rather than flooding the joint, because liquid trapped in pores can produce fumes and porosity when heated.
Use a dedicated stainless-steel brush that has never been used on carbon steel, galvanized metal, or oily work. Brush immediately before welding with firm strokes in one direction, then wipe away loosened residue with a clean, lint-free cloth. Do not use a contaminated brush merely because it looks clean; embedded iron or dirt can enter the puddle and weaken the weld.
Prepare the joint according to its thickness. A tight, well-fitted butt joint reduces the amount of filler and heat required, while a small root gap may be appropriate when the joint design requires penetration. Remove sharp burrs and loose edges, but avoid aggressive grinding that creates a cloud or pile of magnesium dust.
Step 4 Set up the AC TIG torch and shielding gas
Install a clean, properly sized tungsten and grind it on a dedicated wheel so the point is free of foreign metal. A 2% lanthanated or ceriated tungsten is a practical starting choice; follow the electrode and welder manufacturer’s limits for diameter and current. Keep the tip clean and do not allow it to touch the work or filler.
Set the machine to AC TIG. AC provides cleaning action that helps disrupt the tenacious oxide film while also supplying penetration. Start with the machine’s balanced or moderate AC-cleaning setting and adjust only after observing the arc and bead.
Excessive cleaning can widen the etched zone and heat the electrode; too little cleaning may leave a dirty, unstable puddle.
Use dry, high-purity argon and verify that the hose, fittings, and torch are leak-free. Set gas flow according to the torch, cup, and shop conditions rather than copying a number blindly. Excessively high flow can create turbulence and draw air into the shield, while too little flow allows oxidation and porosity.
Position the torch so the cup provides full coverage without making the arc excessively long. A short, steady arc and a slight torch angle help keep atmospheric oxygen away from the molten metal. Use a gas lens if available, especially on a joint that is sensitive to drafts.
Step 5 Choose filler metal and make a dry practice pass
Match the filler to the confirmed base alloy and the required properties. ER AZ61A is commonly used with many wrought magnesium alloys, while ER AZ92A may be selected for certain cast or alloy-specific applications, but neither is a universal answer. The material manufacturer, repair specification, or qualified welding procedure should control the final choice.
Cut filler rods to clean, manageable lengths and wipe them before use. Keep them off the floor and away from steel dust. If you cannot determine which filler is compatible, do not guess on a service part; practice without filler on a coupon only to learn arc control, then obtain an approved filler before making a repair.
Before touching the actual part, rehearse torch travel, filler-hand placement, and foot-pedal movement with the machine off or on a suitable practice coupon. You are looking for a controlled, comfortable position that lets you keep the arc short and add small amounts of filler without reaching across the puddle.
Step 6 Establish a small puddle and control heat
Clamp the clean workpiece, start the argon preflow if your machine provides it, and initiate the arc with high-frequency start rather than scratching the tungsten across the metal. Begin at a conservative amperage appropriate for the thickness and use the foot control to add heat gradually. Magnesium can appear solid until it suddenly collapses into a puddle, so do not stare only at the bright arc.
Watch the surface immediately in front of the arc. A useful puddle is small, fluid, and contained, with the edges just beginning to wash together. The cleaned area around the bead should be even rather than heavily sooty, and the tungsten should remain stable without a large glowing ball or repeated contamination.
Once the puddle forms, move smoothly and avoid lingering at the start or end of the joint. Add filler at the leading edge in small dips, keeping the rod inside the argon shield. If the puddle suddenly spreads, the edge slumps, or the part becomes excessively hot, back off the pedal and let the area cool rather than trying to outrun the heat.
A useful way to approach how to tig weld magnesium is to check your progress after each stage.
Step 7 Complete the bead with controlled starts and stops
Travel at a consistent speed and maintain a short arc length. Use enough filler to create the joint profile specified for the part, but do not build a tall, cold-looking ridge. A sound bead normally has smooth tie-in at both edges, regular ripples, and no obvious dark contamination.
At the end, reduce amperage gradually while continuing argon post-flow over the solidifying crater. This protects the hot tungsten and weld area from immediate oxidation. If the crater needs filling, add a final small amount of filler before tapering out, rather than stopping abruptly with a deep depression.
For a long joint, weld in short sections only if the design and procedure permit it. Allow the part to cool between passes; do not quench it with water or place it on a surface that can trap combustible dust against the hot metal.
Step 8 Stop, cool, and examine the weld before further work
Keep the torch over the joint during post-flow, then close the gas and shut down the machine according to its instructions. Leave the part undisturbed until it is cool enough to handle safely. Inspect the surrounding bench and floor for hot particles, glowing dust, or smoldering debris before cleanup.
Do not wire-brush, grind, or sand the weld while it is hot. Those operations can create combustible particles and may conceal defects. Once the part is fully cool, remove loose residue with a dedicated tool and collect magnesium chips and dust in the container required by your facility’s fire-safety procedure.
What makes magnesium TIG welding different
Magnesium conducts heat away from the arc, yet its melting range is low enough that a thin edge can fail suddenly. This combination rewards a focused arc, close amperage control, good fit-up, and short welds. The oxide film also has a much higher melting temperature than the underlying metal, so surface preparation and AC cleaning matter.
Unlike steel, magnesium should not be treated as a routine material for casual grinding and welding. A clean solid part is manageable under controlled conditions, but chips, dust, and thin flakes are significantly more fire-prone. That is why housekeeping is part of the welding procedure, not a separate cosmetic task.
AC balance and arc behavior
AC balance controls the relative amount of electrode-positive and electrode-negative time. More electrode-positive time generally increases oxide-cleaning action but also increases tungsten heating and can reduce penetration. Begin near the machine’s recommended balanced setting, then make small changes while watching the cleaned zone, arc stability, and tungsten condition.
If the arc wanders, check tungsten shape, torch connections, gas coverage, drafts, and contamination before changing several machine settings at once. A clean, stable setup makes cause and effect easier to see than a series of large adjustments.
Filler choice is an alloy decision
There is no single filler rod that makes every magnesium alloy compatible. Filler selection affects cracking resistance, strength, ductility, corrosion behavior, and the appearance of the repair. A filler that produces an attractive bead can still be wrong for the alloy or its service conditions.
When documentation is unavailable, the safest answer is not a confident guess. Use a qualified welding engineer, repair specification, or material-identification service, especially when the component carries a load or must retain pressure.
Why cleanliness affects the result
Oil and moisture can create porosity, while steel contamination can cause inclusions and an unstable arc. Oxide, paint, and conversion coatings may release unpleasant or hazardous fumes. Clean both the joint and the filler, and keep the brush, wipes, gloves, and work surface dedicated to clean-metal preparation.
How to check the finished weld
Visual inspection is the first check, not proof that a critical weld is sound. Examine the bead after cooling under bright light and compare it with the intended joint profile. A practice weld can teach technique, but a service repair may require dye penetrant, radiography, or another inspection method performed by qualified personnel.
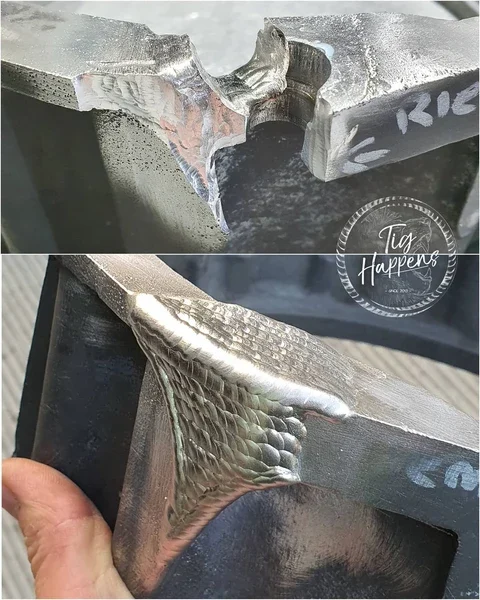
Look for a stable bead profile
A promising bead has consistent width, smooth transitions into both parent-metal edges, and no obvious crater, undercut, overlap, pinholes, or dark, powdery contamination. The surrounding heat-affected area should be reasonably even rather than deeply melted, burned, or collapsed.
Check the reverse side when accessible. Evidence of appropriate penetration depends on the joint design, but a severe hole, sagging root, or isolated lack of fusion is a reason to reject the practice weld and correct technique before welding the real part.
Use a simple practice-weld test
For a noncritical coupon, cut across a representative section only if you can do so safely and without creating uncontrolled magnesium dust. Examine the cut and, where appropriate, polish it using a process designed for magnesium. Look for voids, cracks, incomplete fusion, or a sharp boundary between bead and base metal.
Do not treat a bend test or break test as permission to repair a safety-critical component. Such tests can show that a particular coupon and procedure produced a defect-free sample, but they do not establish a qualified repair procedure for a different alloy, thickness, geometry, or service condition.
Check your result
A reasonable beginner practice result is a clean, even bead with full edge fusion, no visible pores or cracks, stable arc behavior, and no overheating of the surrounding metal. If any of those observations is missing, correct the cause on a coupon before continuing.
Troubleshoot common magnesium TIG problems
When learning how to tig weld magnesium, change one variable at a time. Most poor results come from contamination, incorrect material identification, weak shielding, excessive heat, or an unsuitable filler—not from a need to turn every control to an extreme setting.
| What you see | Likely causes and first response |
|---|---|
| Porosity or pinholes | Dirty metal or filler, moisture, gas leaks, drafts, or turbulent flow. Reclean, check connections, improve coverage, and use fresh dry argon. |
| Dark, sooty, or heavily oxidized bead | Insufficient shielding, a long arc, contaminated tungsten, or inadequate cleaning. Check gas coverage and torch position before increasing cleaning action. |
| Edges melt away or the joint suddenly drops | Too much heat, slow travel, excessive AC cleaning, or poor fit-up. Reduce amperage, move steadily, and allow cooling between sections. |
| Arc wanders or tungsten balls excessively | Contaminated or unsuitable tungsten, unstable settings, poor ground, or excessive electrode-positive time. Regrind or replace the tungsten and inspect the setup. |
| Cracks appear after cooling | Wrong alloy or filler, contamination, excessive restraint, overheating, or a casting-related defect. Stop and obtain qualified material and procedure advice. |
If the same defect returns after the joint is thoroughly cleaned and the gas system is verified, stop experimenting on the part. Repeated cracking, unexplained porosity, or a sudden fire risk indicates that the alloy, geometry, or procedure may be unsuitable for an informal repair.
Beginner questions about TIG welding magnesium
Can a beginner TIG weld magnesium?
A beginner with basic TIG control can practice on a known, clean coupon under supervision and with appropriate fire precautions. Magnesium is not a good first-ever TIG material, and a beginner should not independently repair a critical component or an unidentified casting.
Does magnesium require AC TIG?
AC TIG is the normal starting method because its alternating current provides oxide-cleaning action while maintaining useful penetration. DC settings may be specified for unusual processes, but they should not be substituted casually for a documented procedure.
Can I use aluminum filler rod on magnesium?
Do not assume aluminum filler is compatible. Magnesium requires filler selected for the particular magnesium alloy and service requirement; use the applicable material specification or qualified welding guidance instead.
What gas should I use for magnesium TIG welding?
Dry, high-purity argon is the usual shielding gas for manual TIG welding. Verify the torch, flowmeter, hose, and connections, and protect the shield from drafts. A gas mixture or different flow should come from a documented procedure or equipment recommendation.
Can I use water to cool a magnesium weld?
No. Do not quench hot magnesium with water, and never use water on a magnesium fire. Let the work cool in a controlled area and use only fire-control methods approved for combustible metals.
Why does my magnesium weld look dirty even after brushing?
The brush, solvent, filler, or work surface may be contaminated, or the torch may be losing shielding to a leak or draft. Reclean with dedicated tools, inspect gas coverage, and check tungsten condition before changing amperage.
Finish with a controlled, verifiable magnesium weld
Learning how to tig weld magnesium starts with restraint: identify the alloy, prepare a clean joint, use AC TIG with stable argon coverage, choose compatible filler, and keep the puddle small. The finished bead should be judged by its fusion, cleanliness, profile, and absence of cracks or porosity—not by appearance alone.
Practice only on a known, noncritical coupon until your arc, filler, and heat control are consistent. If the part is safety-critical, the alloy is uncertain, or any fire or cracking behavior seems abnormal, stop and refer the work to a qualified welding professional with an approved procedure and inspection plan.