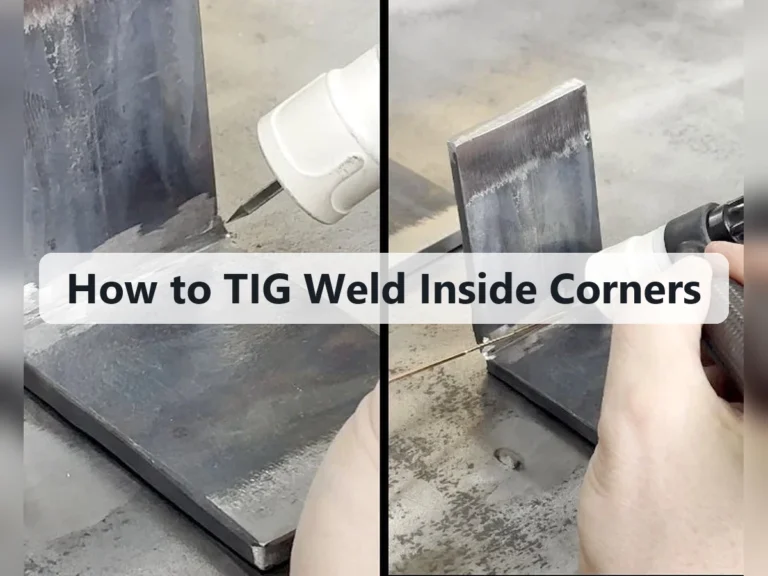
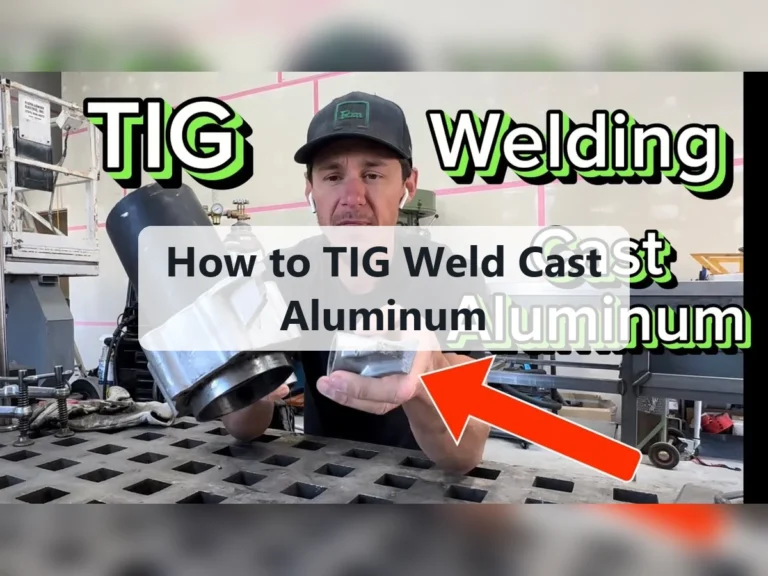
How to TIG Weld Brass Safely: Settings, Steps, and Final Checks
Brass can be TIG welded, but it does not behave like mild steel or stainless steel. Its copper content carries heat away quickly, while its zinc content can vaporize when the base metal becomes too hot. That combination makes a brass weld vulnerable to porosity, contamination, burn-through, and a rough, porous surface if the setup or technique is careless.
The attainable goal for a beginner is a small, clean joint on a known brass alloy, not a long structural weld on an unknown casting. In many repairs, brazing or silver brazing is a better choice because it introduces less heat into the brass. TIG becomes useful when you need precise control, a narrow heat-affected area, or a neat joint that can be inspected closely.
This guide explains how to tig weld brass using a conservative DC TIG process, clean preparation, an argon shield, and short controlled welds. You will learn how to identify the material, select filler, set up the torch, add heat without boiling the surface, and check the finished joint for visible defects. If the brass contains an unknown coating, lead, or zinc-rich finish, stop until its composition and safe handling requirements are known.
At a glance
- Use a clean, known brass alloy and remove coatings before heating.
- Start with DC electrode negative, pure argon, and low heat rather than trying to force penetration.
- Judge the result by the joint’s continuity, wetting, porosity, and service requirements—not by appearance alone.
How to tig weld brass: a controlled TIG method
TIG welding brass is a fusion process: the edges of the parent metal melt and combine with added filler. The safest realistic beginner method is to weld a small, clean, noncritical joint with direct current electrode negative (DCEN), a sharp tungsten, and 100% argon. Practice on offcuts of the same alloy before touching the actual part.
Brass varies substantially. Cartridge brass, naval brass, free-machining brass, bronze, plated brass, and cast brass can respond differently to heat. If the part is pressure-containing, load-bearing, safety-critical, antique, or made from an unknown alloy, use a qualified welding professional or choose a joining process recommended for that specific material.
Tools you will need
- TIG welder with adjustable amperage, high-frequency start, and DC output
- TIG torch with a gas lens or standard ceramic cup
- 2% lanthanated or ceriated tungsten, sharpened for DCEN use
- High-purity argon cylinder, regulator, flowmeter, and suitable gas hose
- Brass coupons or offcuts of the same alloy for practice
- Silicon bronze filler rod, or a filler specified for the known brass alloy
- Stainless steel brush reserved for brass and solvent or approved degreaser for cleaning
- Welding helmet, fire-resistant clothing, welding gloves, safety glasses, hearing protection, and suitable respiratory protection when required by the coating or ventilation assessment
- Clamps, a nonflammable welding table, and a heat-resistant backing or fixture
- Optional: infrared thermometer for monitoring the workpiece temperature without touching it
Step 1 Confirm the brass is suitable for TIG welding
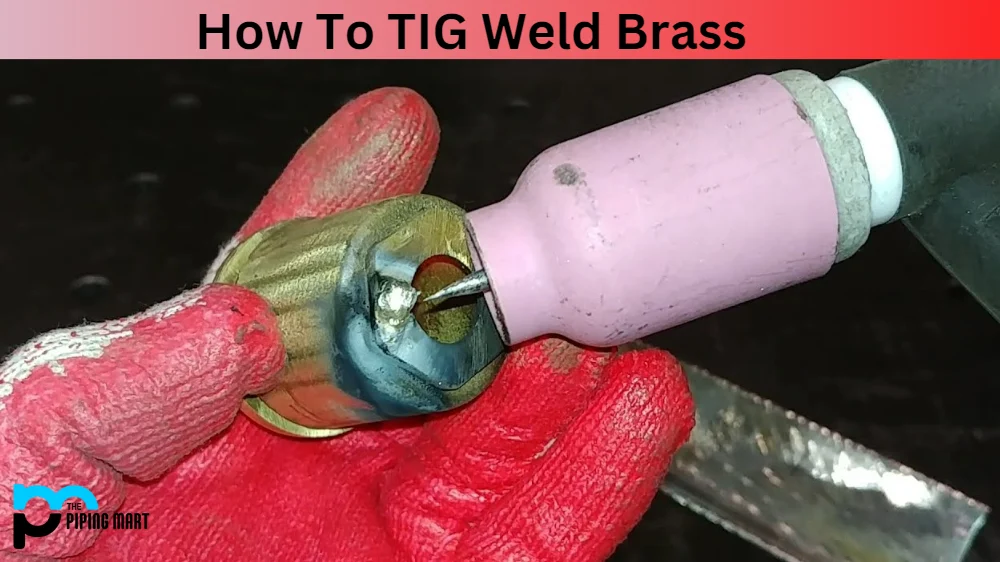
Inspect the part and identify the alloy, if possible. Look for labels, material records, machining documentation, or an uncoated offcut from the same stock. Do not assume a yellow metal is weldable brass: it could be bronze, plated steel, copper, a zinc die casting, or an alloy containing lead.
Remove the part from service and empty it completely if it has held fuel, gas, chemicals, oil, or compressed fluid. A container that appears empty can still release flammable or toxic vapor when heated. Never TIG weld a closed or poorly vented vessel.
Check the proposed joint for fit-up. A tight, even gap is easier to bridge than a wide gap, and the edges should be thick enough to tolerate local melting. A jagged edge or a large missing section encourages you to add excessive filler and heat, which often produces a weak, porous repair.
Important
Brass can release irritating or hazardous metal fumes, especially when zinc-rich surfaces, plating, paint, or unknown coatings are heated. Remove coatings using a safe method, provide strong local exhaust, and follow the requirements for your workplace and the specific material. Do not rely on a household fan to pull fumes across your breathing zone.
Step 2 Prepare the joint and remove contamination
Degrease the joint first with a cleaner compatible with the metal and your workplace rules. Let all solvent evaporate before striking an arc. Solvent residue can decompose into hazardous vapors or cause contamination when exposed to the arc.
Remove oxidation, lacquer, paint, plating, and dirt from both sides of the joint. Use a stainless steel brush that has not been used on ordinary steel, then wipe again with a clean lint-free cloth. A contaminated brush can embed iron particles and create dark inclusions or rust-like marks in the weld.
Be especially careful with free-machining brass. Some grades contain lead or other additions that make them easier to machine but more difficult and hazardous to weld. If the alloy is not documented, treat it as unsuitable for casual TIG practice until a competent materials or welding specialist confirms the correct procedure.
Set the pieces on a clean, stable fixture and leave enough access for the torch, filler, and shielding gas. Tack welds should be small and evenly distributed. If the pieces move during tacking, stop and improve the fit-up rather than chasing a shifting joint with more heat.
Step 3 Choose the filler and establish conservative machine settings
For many brass-to-brass practice joints, silicon bronze filler is a practical starting point because it flows at a lower temperature than the brass and can reduce the amount of base-metal melting required. It is not a universal filler. The filler must be compatible with the exact brass alloy and the intended service, so follow the filler manufacturer’s recommendation or a qualified welding procedure when the joint matters.
Use DCEN, which places most of the arc’s heat into the workpiece and gives a stable arc with a pointed tungsten. A common starting range is roughly 35 to 60 amps for thin sheet or small coupons, adjusted for thickness, joint design, and the machine. Begin below the level that would quickly melt the edge; increase gradually only if the puddle will not form.
Set the shielding gas to 100% argon. Start with a moderate flow appropriate for the cup and gas lens, commonly around 15 to 25 cubic feet per hour, then adjust for drafts and torch configuration. Excessive flow can create turbulence and draw air into the shield, so more gas is not automatically better.
Use a short pre-flow and post-flow according to the welder’s instructions. Post-flow must continue long enough to protect the hot tungsten and cooling weld from air. Set a modest downslope if your machine provides one, and use a foot pedal or fingertip control so you can reduce heat as the joint warms.
Do not use an aggressive steel-welding setting simply because the brass looks thick. Brass conducts heat rapidly, so the workpiece may demand more amperage to start a puddle but then overheat suddenly. The correct setting is the lowest controllable heat that produces sound wetting and enough penetration for the joint.
Step 4 Prepare the torch and test the gas shield
Fit a clean tungsten and grind it lengthwise to a sharp, symmetrical point. A 1.6 mm tungsten is suitable for many small practice joints, while larger work may require a different diameter. Keep the electrode extension short enough that the ceramic cup still protects the arc, and avoid touching the tungsten to the brass or filler.
Install a cup that gives a clear view of the puddle. A gas lens can provide a smoother, more uniform shield and may allow a slightly longer electrode extension, but it cannot compensate for drafts, a dirty cup, or an incorrect flow rate.
Before welding, activate the torch and observe the gas flow. Check hose connections for leaks and make sure the cylinder is secured upright. Set the torch angle and cable position so the hose will not pull the torch away from the joint during the weld.
A useful way to approach how to tig weld brass is to check your progress after each stage.
Practice starting an arc on a clean coupon without adding filler. The arc should start without a violent scratch, the tungsten should remain intact, and the shield should not produce visible swirling or discoloration. If the tungsten balls, cracks, or becomes contaminated, stop, allow it to cool, and regrind it.
Step 5 Preheat the work carefully when the joint needs it
Preheating can help a thick brass part accept a small TIG arc without forcing the amperage too high. Warm the part evenly with a suitable method and monitor it with temperature-indicating products or an infrared thermometer. Avoid heating the joint until the surface changes color, smokes, or begins to produce visible fumes.
There is no single safe preheat temperature for every brass alloy. Some brasses lose zinc more readily as temperature rises, and some components contain solder, seals, or finishes that cannot tolerate heat. If the alloy specification does not provide a preheat limit, use minimal preheat or obtain a qualified procedure rather than guessing.
Thin coupons may not need preheating at all. A heat sink, copper backing, or intermittent weld sequence can be safer than raising the entire part to a high temperature. The workpiece should be warm enough to make the puddle controllable, not so hot that the surface boils or fumes.
Step 6 Tack the joint and watch the first puddle
Place the torch over the joint with the tungsten centered and the cup close enough to maintain coverage without touching the work. Keep the torch nearly perpendicular to the surface, with a slight angle in the direction of travel. Start the arc without scratching and form a small puddle before moving.
Make a short tack at one end, then another at the opposite end. Add intermediate tacks if the part is long or likely to pull out of alignment. Each tack should be smooth and attached to both sides of the joint; a shiny blob sitting on one edge is not a useful tack.
Observe the surface as it heats. A controlled puddle has a distinct liquid boundary and wets into both edges. If the surface suddenly bubbles, spits, or develops tiny craters, stop the arc and let the area cool.
Those signs can indicate contamination, zinc vaporization, trapped cleaner, or excessive heat.
Step 7 Run short welds with controlled filler additions
Start at a tack and move steadily enough to keep the puddle small. Add filler at the leading edge of the puddle rather than plunging the rod into the arc. Withdraw the filler slightly after each dip so the rod end remains inside the argon shield and does not oxidize.
Use the foot pedal or amperage control to reduce heat as the part warms. Brass often begins acceptably and then becomes increasingly fluid, so maintaining the same pedal position can cause the joint to sag or burn through. Short runs with cooling intervals are usually easier to control than one continuous pass.
Keep the arc short and avoid a long wandering arc. Excessive arc length spreads heat, weakens shielding, and encourages oxidation. Travel just fast enough to keep the puddle from growing; if the puddle widens, the edges collapse, or the surface starts to boil, back off the amperage and move away from the hot area.
Silicon bronze filler may appear to flow over the surface rather than dig deeply into it. That can be acceptable for a fillet or buildup only when the base metal has been properly fused and the joint design supports it. Do not use filler to hide a gap, a lack of fusion, or a contaminated surface.
Step 8 Finish the bead under shielding gas and inspect the cooling joint
At the end of a weld segment, reduce current gradually if possible and keep the torch over the crater during downslope and post-flow. Do not lift the torch immediately after extinguishing the arc. The hot end of the bead and the tungsten both need shielding while they cool.
Allow the brass to cool naturally on the fixture unless the qualified procedure specifies another method. Do not quench hot brass in water as a casual way to speed up the job. Rapid cooling can distort the part, create thermal shock, and make the joint difficult to inspect.
Once cool enough to handle, brush away light surface residue with the dedicated stainless brush. Do not grind immediately just to make a rough weld look smooth. Grinding can remove evidence of porosity or lack of fusion and may reduce the remaining wall thickness.
Why brass is difficult to TIG weld
Brass is primarily copper and zinc, but the proportions and additional elements vary. Copper conducts heat efficiently, so heat spreads away from the arc. Zinc melts and vaporizes at temperatures far below the melting temperature of copper, which means an overheated puddle can lose zinc and release fumes before the joint is fully controlled.
This behavior explains why brass can seem resistant to melting and then collapse suddenly. The welder increases amperage to establish a puddle, the surrounding metal becomes hot, and the joint quickly becomes too fluid. A small torch angle, a shorter arc, and active heat control are more useful than simply selecting a larger machine.
Brass, bronze, and plated parts are not interchangeable
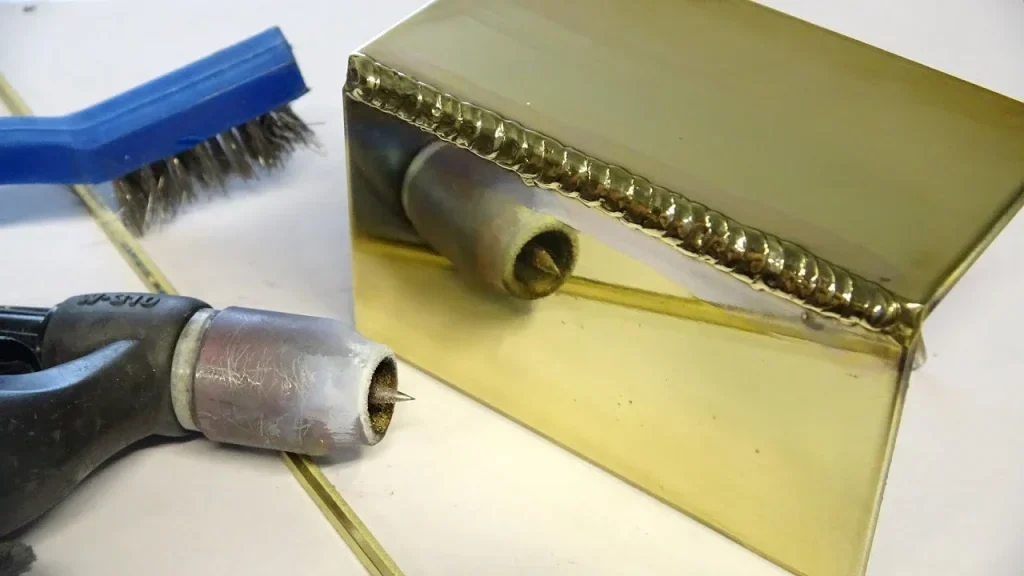
Brass is a copper-zinc family of alloys. Bronze generally contains copper with tin, aluminum, silicon, or other alloying elements and may require a different filler and procedure. A brass-colored surface can also be nickel-plated, chrome-plated, lacquered, or applied over steel.
Understanding how to tig weld brass also means recognizing the limits of the method.
Plating and coatings must be removed from the weld zone, but removal does not make an unknown base metal suitable for TIG. If a magnet, grinder spark, documentation, or other basic inspection suggests the part is steel or a layered assembly, stop and identify it before choosing polarity, filler, and heat settings.
When silicon bronze is useful—and when it is not
Silicon bronze is often used as a lower-temperature filler for copper-based metals. It can produce an attractive bead and is useful for some buildup, fillet, and joining applications. However, a bronze-colored bead does not prove that the base metal fused correctly or that the joint has the required strength.
For pressure, fatigue, elevated-temperature, or structural service, use a filler and procedure qualified for the exact alloy combination. A general-purpose silicon bronze rod is not a substitute for engineering review. Brazing may also be preferable where the design needs a low-temperature filler rather than fusion of the brass edges.
How to check the finished brass weld
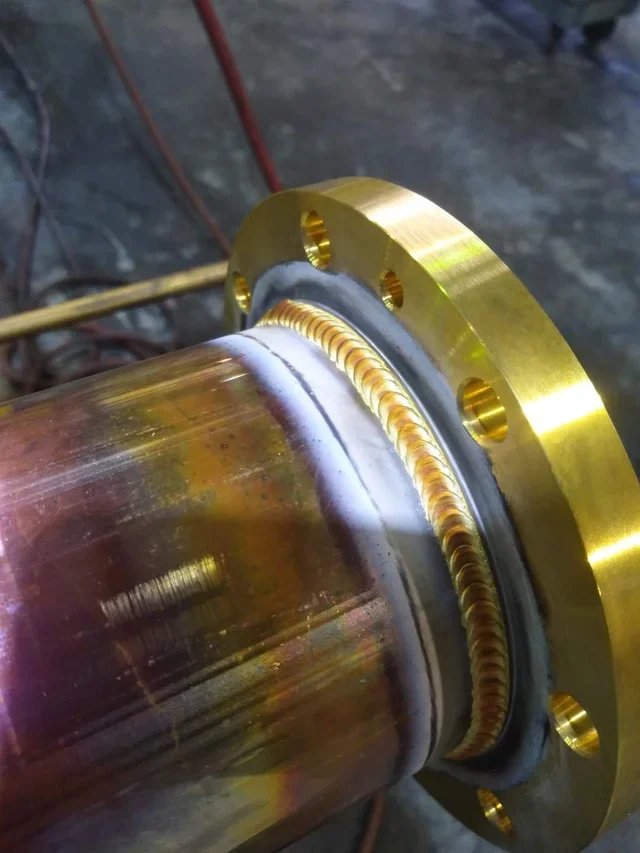
Begin with a visual inspection after the joint has cooled and been cleaned. Use bright, angled light so surface pits and edge defects are easier to see. The bead should be continuous for the intended length, attached to both sides, and free of obvious cracks, deep craters, black soot, and clusters of pinholes.
Look closely at the toes, which are the transitions between the bead and the parent metal. A smooth transition with visible wetting is preferable to a rounded bead sitting on top. Undercut appears as a groove beside the bead; overlap appears as a shelf of metal that has flowed over the surface without properly fusing.
| Observation | Likely cause or concern |
|---|---|
| Many tiny holes or pinholes | Moisture, oil, poor shielding, contamination, or zinc vaporization |
| Bead sits on top with sharp edges | Insufficient heat, excessive travel speed, or incorrect filler technique |
| Edges melt away or the joint sags | Too much heat, too slow a travel speed, or excessive preheat |
| Dark, dirty, or heavily oxidized surface | Inadequate gas coverage, drafts, contaminated metal, or long arc length |
For a practice coupon, a destructive check is more informative than appearance alone. Cut across the weld, file or polish the cross-section, and inspect whether the weld reaches both sides of the joint. A surface bead with a dark line underneath may have little or no fusion.
Do not perform a destructive test on the actual component if it is needed for service. For a critical part, use the inspection method specified for that application, which may include dye penetrant testing, radiography, ultrasonic testing, pressure testing, or review by a qualified inspector. A casual visual check cannot certify a pressure boundary or load-bearing repair.
Check your result
A useful beginner check is to make several practice coupons, cut one through the center, and compare the cross-sections. A sound coupon should show a continuous joint without obvious voids, trapped dirt, or an unfused line between the bead and either brass edge.
Troubleshooting common TIG problems on brass
Most brass TIG failures come from contamination, excessive heat, unsuitable filler, or poor gas coverage. Change one variable at a time on practice coupons so you can tell whether the improvement came from cleaning, current, travel speed, torch position, or shielding.
Porosity appears as pinholes
Reclean the brass and filler, check for oil in a joint gap, and inspect the gas system for leaks. Shielding gas can be disrupted by a draft, a blocked cup, a cracked ceramic, excessive flow, or a torch held too far away. If the surface still bubbles after thorough cleaning, the alloy may contain elements that make it unsuitable for casual fusion welding.
The weld will not wet into the edges
Confirm that the tungsten is sharp, the polarity is DCEN, and the arc is centered over the joint. Increase current slightly or slow the travel only on a practice piece, watching closely for the sudden fluid behavior that brass can develop. If you are using silicon bronze, remember that adding more rod cannot replace enough base-metal heating to establish fusion.
The edges burn away
Reduce amperage, shorten the weld segment, move more steadily, and use the pedal to back off as the workpiece heats. A copper backing bar or a better-fitting joint can remove heat without raising the power. Do not compensate for a wide gap by lingering over the edges.
The tungsten becomes dirty or unstable
The tungsten may have touched the puddle or filler, or the gas shield may have failed. Stop, allow it to cool, cut back the contaminated section, and regrind it lengthwise. A contaminated point can make the arc wander and can transfer tungsten into the weld.
The weld is dark or heavily oxidized
Check that the cylinder contains argon, the flowmeter is working, and the torch cup is not cracked. Reduce drafts and avoid excessive gas flow, which can cause turbulence. Keep the torch over the crater through post-flow and clean the brass again if the surface was handled after preparation.
When another joining method is better
TIG is not automatically the best process for every brass repair. Brazing can be more forgiving when the design allows a lower-temperature filler and broad capillary action. Silver brazing may suit some clean, close-fitting joints, while soft soldering can be appropriate for low-strength electrical, plumbing, or decorative work when service temperature and regulations permit.
Mechanical fastening is often safer for thin unknown parts, components with heat-sensitive seals, or assemblies that cannot be thoroughly cleaned. A qualified welder may also recommend replacing a cracked casting rather than trying to fuse a porous or leaded brass alloy.
Choose TIG when precise local heat, appearance, and a fusion joint are important and the alloy is known. Choose another process when the base metal is uncertain, the component contains hazardous residue, the joint is safety-critical without a qualified procedure, or the required strength cannot be verified with the available inspection method.
Beginner FAQs about TIG welding brass
Can I TIG weld brass with a regular DC TIG welder?
Often, yes. Many small brass joints can be attempted with DCEN, a sharp tungsten, and pure argon. AC is not automatically required for brass; more important factors are alloy identification, clean preparation, suitable filler, heat control, and safe fume management.
What gas should I use for TIG welding brass?
Use 100% argon for a typical TIG setup. Mixed gases should only be used when the machine and a qualified procedure specifically call for them. Keep the flow high enough for coverage but not so high that turbulence pulls room air into the arc.
Do I need special brass filler rod?
You need filler compatible with the base alloy and the service. Silicon bronze is a common starting option for some brass work because it melts and flows differently from the brass, but it is not a universal answer. The alloy manufacturer or a qualified welding procedure should determine the filler for critical joints.
Why does brass suddenly melt away after seeming cold?
Brass conducts heat away from the arc, so the puddle may take time to form. Once the surrounding metal becomes hot, the joint can become fluid quickly, and zinc may vaporize. Reduce current as the part heats, use short welds, and avoid lingering in one location.
Is it safe to weld brass indoors?
Only with ventilation and fume controls appropriate to the alloy, coatings, and work environment. Zinc-rich brass, plating, paint, and unknown residues can create hazardous fumes. Never weld a contaminated container or rely on a fan that blows fumes through your breathing zone.
Make a controlled, verifiable brass TIG weld
Learning how to tig weld brass starts with recognizing its limits: identify the alloy, remove every coating and contaminant, use proper ventilation, and practice on matching scrap. A conservative DCEN setup with argon, a sharp tungsten, compatible filler, short welds, and active heat control gives a beginner the best chance of producing a clean joint.
Inspect the bead after cooling, and use a cut-and-polish check on practice coupons to confirm that the weld actually fused to both sides. If the part is critical, unknown, contaminated, pressure-containing, or difficult to inspect, stop before welding and obtain a qualified procedure or choose brazing, fastening, replacement, or professional repair instead.