How to Walk the Cup TIG Welding: A Beginner’s Practical Guide
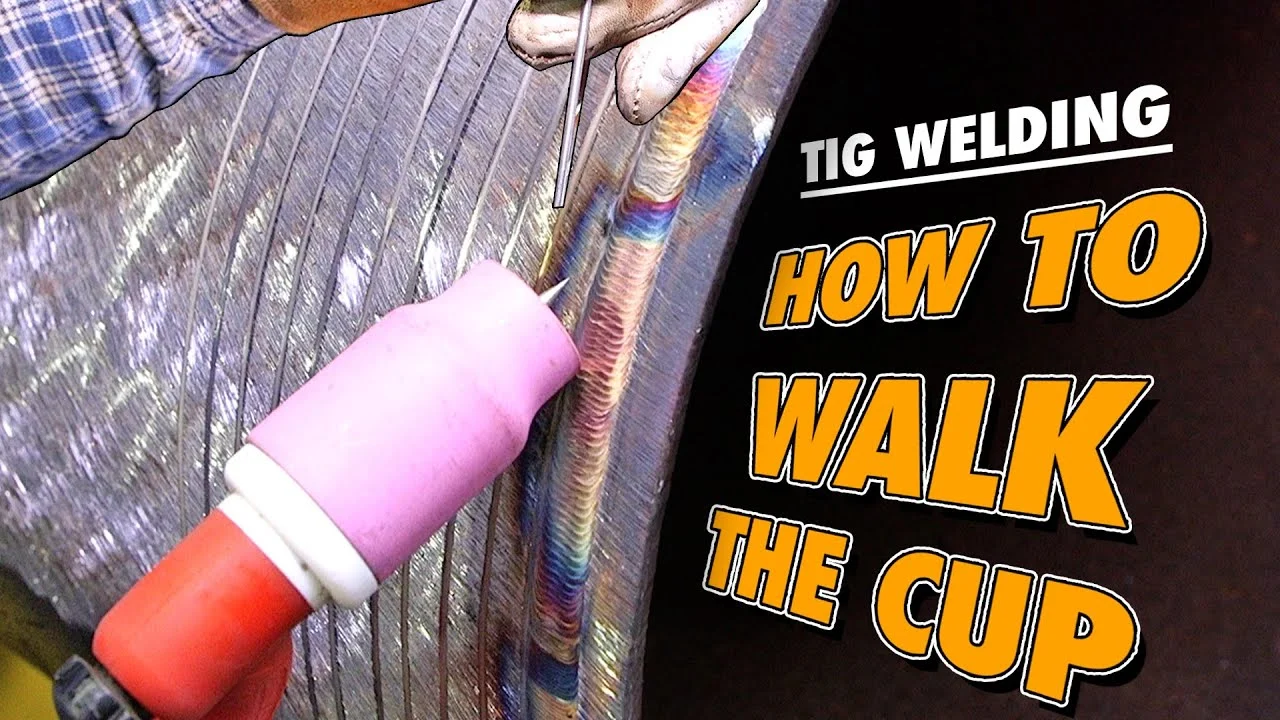
Walking the cup is a TIG welding technique that lets the ceramic cup rest lightly on the work while the torch moves in a controlled rocking motion. The cup rolls or pivots along the joint, helping support your hand and keep the arc length more consistent. Used correctly, it can make long welds feel steadier and produce a more uniform bead.
The technique is not a substitute for clean metal, correct amperage, or sound torch positioning. A cup that is dragged aggressively, tilted too far, or contaminated with molten metal can disturb the shielding gas and ruin an otherwise good weld. Beginners usually get better results by practicing on flat coupons before trying a pipe, corner, or out-of-position joint.
This guide explains how to walk the cup TIG welding safely and predictably. You will prepare the joint, choose a suitable cup and tungsten, set up the torch, practice the rocking motion, add filler when needed, and inspect the finished bead. The method below assumes a standard GTAW setup with an air-cooled or water-cooled torch and pure argon; always follow the welder and torch manufacturer’s limits.
At a glance
- Rest the cup lightly; do not use it as a hard pivot that gouges the work.
- Keep the tungsten centered, the arc short, and the torch angle consistent as the cup moves.
- Practice the motion without an arc before welding a real joint.
How to walk the cup TIG welding
Walking the cup works best when the ceramic cup can move smoothly along a relatively accessible joint. The cup provides a stable contact point while the torch is rocked a small amount from side to side or advanced in short rolling motions. Your goal is controlled movement, not a wide weave.
Start with a flat, clean practice joint and a comfortable seated or supported position. The numbered sequence below takes you from preparation through a finished weld, so keep the same setup and adjust only one variable at a time.
Tools you will need
- TIG welder with a foot pedal or fingertip amperage control, for starting and adjusting the arc
- TIG torch with a ceramic cup, collet, collet body, and suitable tungsten electrode
- Pure argon cylinder, regulator, flowmeter, hose, and leak-free connections for shielding
- Clean carbon-steel or stainless-steel practice coupons matched to the procedure
- Stainless wire brush, acetone or approved solvent, lint-free wipes, and a clean work surface
- Matching TIG filler rod when the joint requires added metal
- Welding helmet, TIG gloves, flame-resistant clothing, safety glasses, hearing protection, and ventilation equipment
- Optional: gas lens and a larger ceramic cup if the torch and joint allow them
Step 1 Set up a safe welding area
Clear flammable materials from the work zone, provide suitable ventilation, and make sure the work clamp can connect to clean metal. TIG welding creates intense ultraviolet light, hot metal, fumes, and an electrical arc, so wear a properly rated helmet, gloves, flame-resistant clothing, and safety glasses under the helmet. Do not weld on containers, tanks, or unknown coatings unless they have been professionally cleaned and confirmed safe.
Secure the gas cylinder upright and check that the regulator, hose, torch, and fittings are rated for the equipment. Confirm that the welder is switched off while connecting the torch and that the tungsten cannot contact the workpiece or grounded metal when the machine is energized.
Important
Stop and get qualified help if the material may contain lead, galvanized coating, asbestos, oil, or another hazardous substance, or if you are unsure whether a container is safe to weld. Ventilation does not make an unknown or contaminated workpiece safe.
Step 2 Clean and fit the practice joint
Prepare two pieces with a tight, consistent fit. Remove mill scale, oxidation, paint, oil, and moisture from the joint area with the appropriate cleaning method. For stainless steel, use a dedicated stainless brush that has not been used on carbon steel.
For aluminum, remove surface contamination and oxide without embedding dirt into the joint.
Wipe the metal with a clean, compatible solvent and allow it to dry completely. Arrange the coupons so the joint is stable and supported, then tack them at intervals if the joint can move from heat. A gap that changes as you weld will make torch control much harder than the walking motion itself.
A clean joint should have a consistent metallic appearance, no visible oil film, and no loose debris near the arc. If the filler rod is dirty, wipe it as well; feeding contaminated rod into the puddle can create porosity.
Step 3 Choose the cup, tungsten, and shielding setup
Use a ceramic cup large enough to rest on the work without hiding the joint from your view. A gas lens is often helpful because it produces a smoother shielding-gas pattern and can support a longer electrode extension when the joint requires better visibility. It is optional, not a requirement for learning the technique.
Select a tungsten diameter and type that match the material, amperage, and power source. Follow the welder manufacturer’s recommendations rather than choosing by appearance alone. Grind the tungsten lengthwise to a clean point or truncated point as appropriate for the electrode and current type, and keep the ground end free of burrs.
Set the argon flow according to the torch, cup, joint, and local draft conditions. Excessive flow can create turbulence and pull air into the shielding zone, while too little flow can leave the hot tungsten and weld pool exposed. Check the post-flow setting too, because the tungsten needs shielding while it cools after the arc stops.
Step 4 Set amperage and make a dry run
Choose an initial amperage based on the material thickness, joint design, and welding procedure. If your machine has pulse settings, begin with pulse off while learning the cup motion; extra controls can make cause and effect harder to see. Set the correct polarity and current type for the material and machine instructions.
Place the cup near the joint with the tungsten retracted inside it. Hold the torch as you would during welding and move along the joint without starting an arc. Practice advancing while gently rocking the cup from one edge of the joint toward the other, then returning just enough to keep the motion smooth.
During the dry run, look for a relaxed wrist, a supported forearm, and a torch cable that does not pull on your hand. If the cup catches, twists, or lifts repeatedly, reposition your body or support the torch before striking an arc. A comfortable dry run is a useful sign that the joint is accessible enough for this method.
Step 5 Strike the arc and establish the puddle
Place the cup lightly on the workpiece, with the tungsten centered over the joint and close enough to produce a short arc. Use the machine’s high-frequency start or lift-arc procedure as specified by the manufacturer. Do not scratch the tungsten across the work to start the arc, because that can contaminate the electrode and the joint.
A useful way to approach how to walk the cup tig welding is to check your progress after each stage.
Use the pedal or fingertip control to establish a small, fluid weld pool. The correct pool size depends on the material and procedure, but it should visibly wet both sides of the joint without racing ahead or collapsing through the work. Hold the torch steady for a moment before beginning the walking motion.
If the puddle does not form evenly, stop and correct the fundamentals rather than trying to compensate by rocking faster. Check the work clamp, polarity, amperage, joint fit, and surface cleanliness.
Step 6 Begin the cup-rocking motion
With the arc established, keep the cup resting lightly on the surface and move it in small, repeated rocks. The exact motion depends on the joint: on a fillet, the cup may roll along the corner; on a butt joint, it may pivot gently from one side of the joint to the other while advancing.
Keep the tungsten aimed at the leading edge of the puddle and maintain a consistent torch angle, commonly close to perpendicular across the joint with a modest travel angle in the direction of travel. The cup should guide the torch, not force the torch into the metal. Advance only when the puddle has adequately fused the joint edges.
Watch the puddle rather than the outside edge of the cup. A steady arc length, clear puddle, and even movement indicate that the technique is working. If the cup rocks so far that the tungsten points away from the joint or the arc length changes visibly, reduce the motion.
Helpful tip
For early practice, use a cup that is easy to see over and make the rocking movement deliberately small. Smooth, repeatable contact is more useful than trying to create a pronounced side-to-side weave.
Step 7 Add filler without losing torch control
If the joint requires filler, hold the rod in your non-dominant hand and feed its end into the front edge of the puddle. Add small, regular amounts, then withdraw the rod while keeping its hot end inside the shielding-gas area. Do not wave the rod far outside the gas coverage or jab it into the tungsten.
Coordinate filler addition with the cup motion. Many beginners stop the torch whenever they dip the rod, which creates uneven bead spacing and excessive heat in one location. Practice the hand movements separately over a cold joint, then combine them at a controlled travel speed.
A sound filler addition briefly enlarges the puddle and leaves a consistent ripple as the torch advances. A large blob, sharp ridge, or sudden crater usually means the rod was added too heavily, the travel paused, or the heat input was not balanced.
Step 8 Control travel speed and finish the weld
Move quickly enough to avoid an oversized, sunken bead, but slowly enough to achieve fusion at both sides of the joint. The puddle should remain manageable and the bead should not outrun the arc. Adjust amperage with the pedal when the joint heats up, especially on longer sections where the base metal stores heat.
At the end of the weld, taper the current gradually if your machine allows it. Continue shielding the cooling weld and tungsten during post-flow, and do not lift the torch abruptly while the metal is still bright. A properly finished end should not have a deep crater, a pinhole, or a visible crack radiating from the stop.
Step 9 Stop, cool, and inspect the bead
Allow the workpiece to cool enough for safe handling, then inspect the weld under good lighting. Look for a continuous bead, even wetting on both sides, consistent width, and a clean surface without black soot, clusters of pinholes, or visible cracks. For a fillet weld, check that the bead reaches both legs of the joint rather than sitting on top of one side.
Do not judge the weld only by its ripples. A decorative appearance can hide lack of fusion, undercut, porosity, or excessive penetration. If the weld is structurally important, use the inspection method required by the applicable drawing, welding procedure, code, or qualified inspector.
Record what you changed if you make another practice pass: cup size, tungsten diameter, amperage, gas flow, travel speed, and whether filler was used. Changing several settings at once makes it difficult to identify what improved the result.
What the walking motion should feel like
Walking the cup is mainly a hand-positioning method. The ceramic cup touches the work lightly and gives your torch hand a reference surface, while your wrist and forearm make small movements that keep the arc aligned with the joint. It should feel more like controlled rolling or pivoting than dragging a block across the metal.
Understanding how to walk the cup tig welding also means recognizing the limits of the method.
The electrode should remain centered in the cup and pointed where the puddle needs heat. A long, exposed tungsten may improve visibility in a tight corner, but it also increases the chance of bending, contamination, and unstable shielding. Use only the extension supported by your cup and gas setup.
When the technique is a good fit
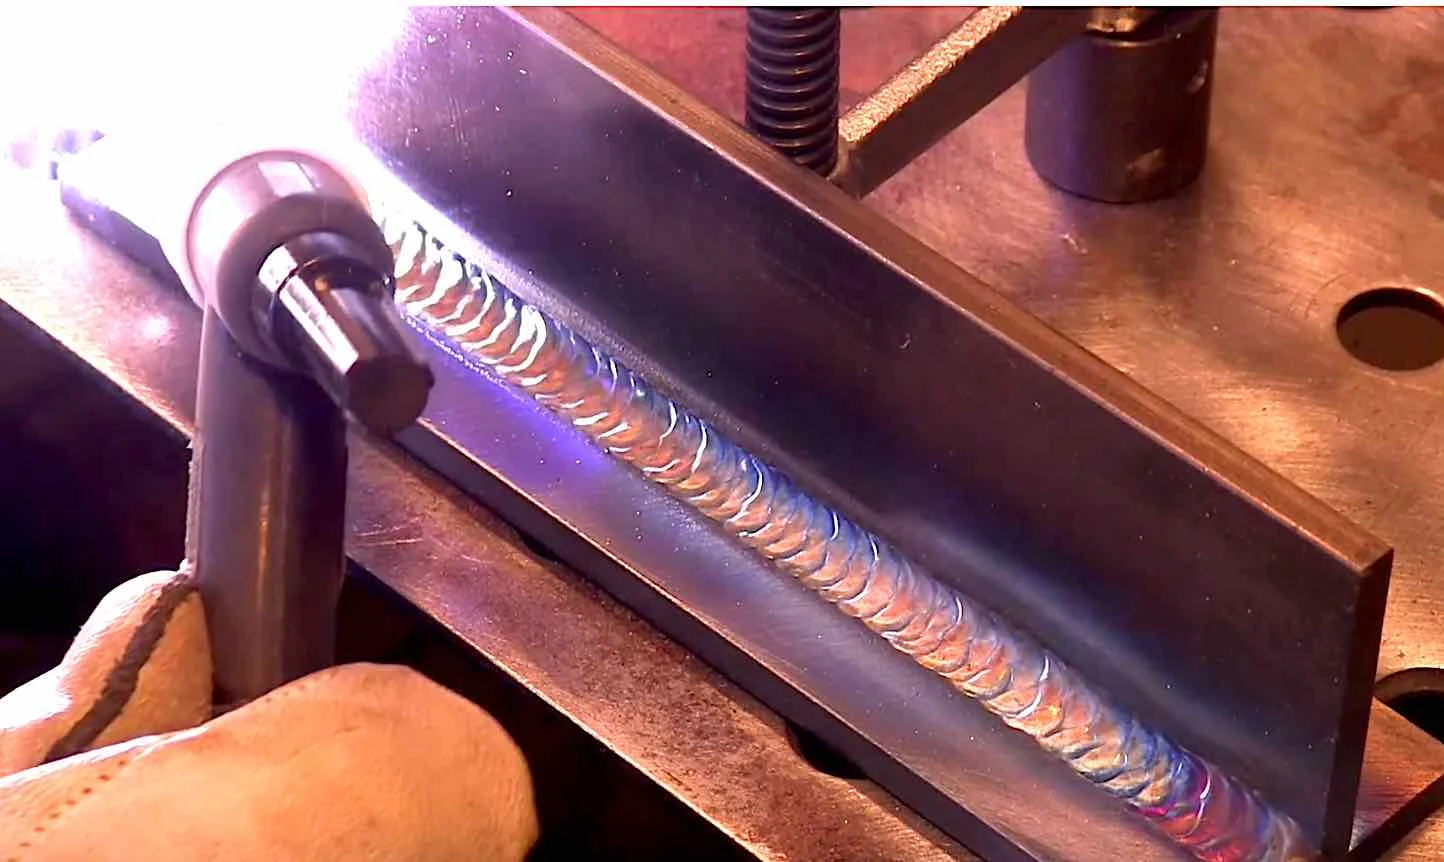
The method is useful on accessible flat and horizontal joints, especially when a long weld makes unsupported torch movement tiring. It can also help maintain a consistent torch height on some pipe and fillet welds, provided the cup can move freely and does not catch on the joint.
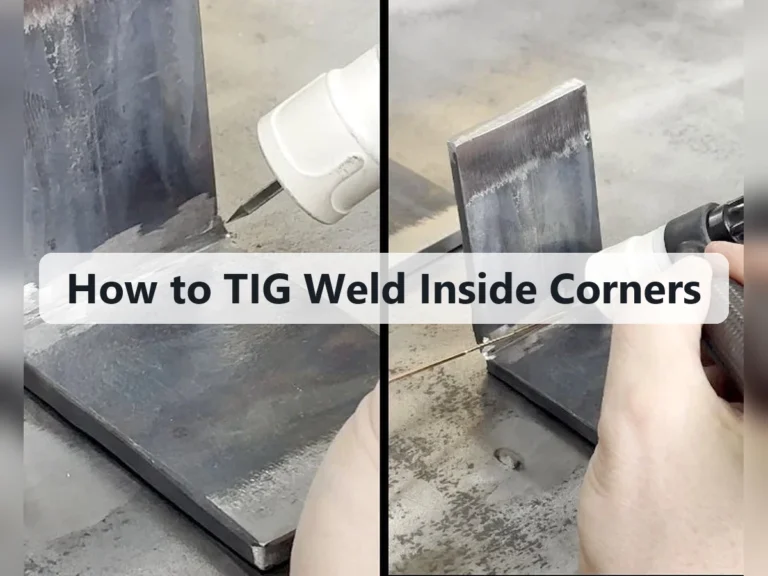
It is less suitable where the cup cannot contact a smooth surface, such as a tight inside corner, a highly irregular joint, or a position where the cup would interfere with visibility. In those cases, a freehand torch technique may be more practical.
Walking the cup versus freehand TIG
Freehand TIG holds the torch without resting the cup on the work. It offers more freedom around corners and uneven surfaces, but it demands stronger control of torch height and hand stability. Walking the cup offers physical support and can make a consistent arc easier, but it limits movement and can transmit bumps directly into the torch.
Neither technique is automatically stronger. Joint preparation, fusion, shielding, heat control, and inspection determine weld quality. A beginner should learn both methods rather than forcing cup walking into a joint that does not accommodate it.
How to check whether the weld is sound
A visual check is a useful first screen, not proof that every defect is absent. Clean the weld enough to see its edges, then compare the bead with the joint design and the acceptance requirements for the work. Do not grind away a questionable area and assume the underlying weld is sound.
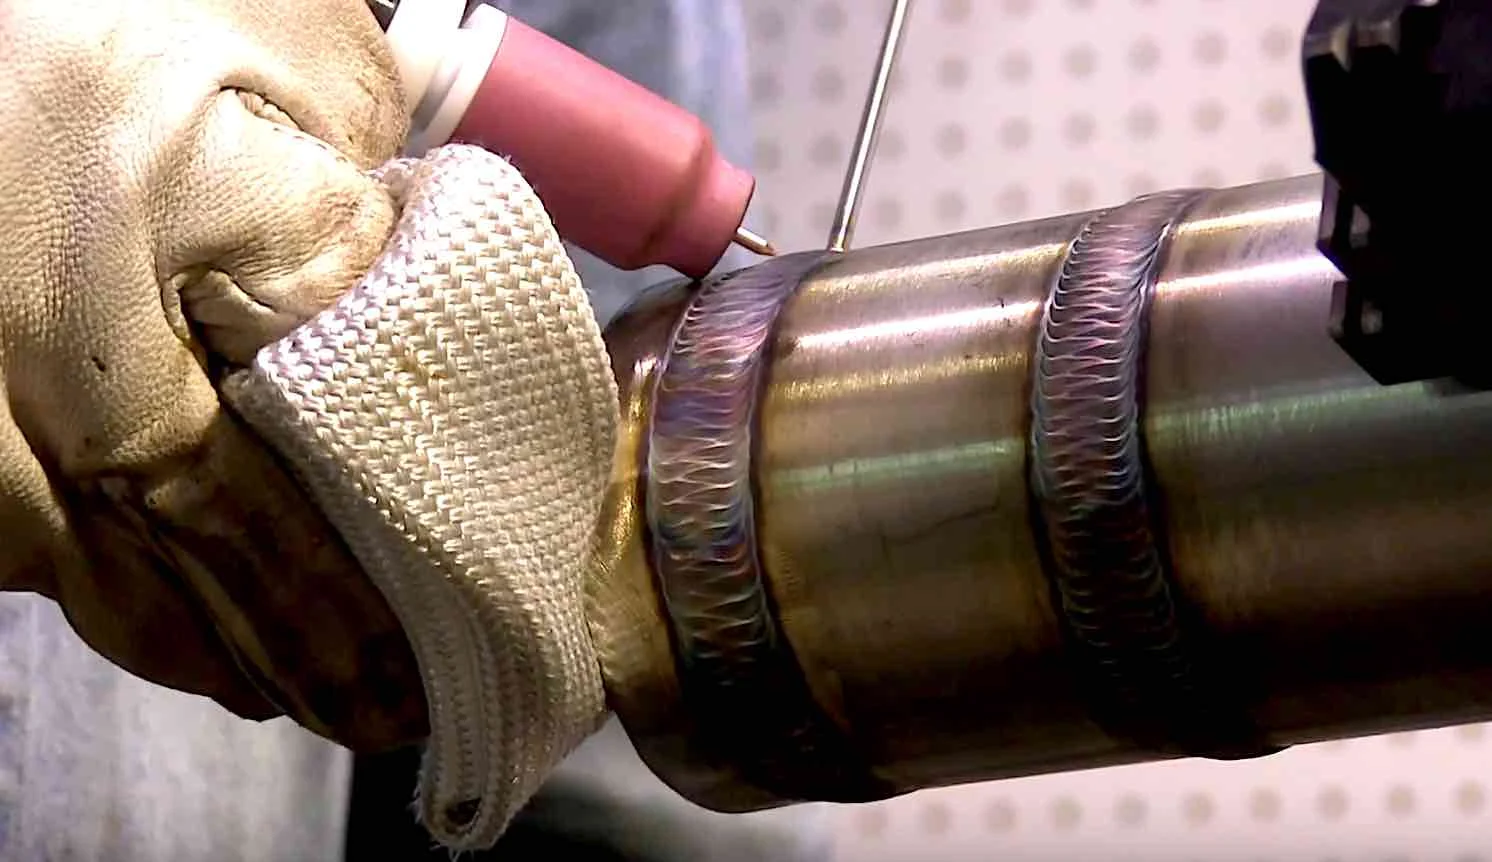
Visual signs of a controlled pass
- The bead follows the joint without wandering or abrupt changes in width.
- Both sides of the joint show smooth wetting rather than a sharp, unfused edge.
- The surface is relatively clean, with no repeated soot, heavy oxidation, or pinhole clusters.
- The stop has been filled or tapered without a deep crater or crack.
- The base metal is not visibly undercut, melted away along the edge, or excessively distorted.
A shiny stainless bead or a neat row of ripples is not enough by itself. Shielding-gas coverage, heat input, and internal fusion can still be inadequate even when the surface looks attractive.
When a practice coupon should be rejected
Reject the pass for practice if you see clear porosity, lack of fusion, severe undercut, cracks, tungsten inclusions, or contamination that runs through much of the bead. Cut a new edge or clean the joint and make a fresh pass after identifying the likely cause. Do not use a visibly defective practice result as a model for production work.
Common walking-the-cup problems
Most problems come from combining too much cup movement with an unstable puddle. Make the smallest useful correction first, then repeat the pass on clean material. The table below connects common symptoms with likely causes and practical corrections.
| What you see | Likely cause and correction |
|---|---|
| Uneven bead width or scalloped travel | The rocking motion is too large or inconsistent. Reduce the side-to-side movement and support your forearm more securely. |
| Porosity or gray, dirty-looking weld | Check gas flow, drafts, leaks, dirty material, contaminated filler, and excessive electrode extension. Clean the cup and regrind a contaminated tungsten. |
| Tungsten touches the puddle | The arc is too long for the hand position, the cup is catching, or the torch is tilted too far. Stop, allow the area to cool, and regrind the electrode before continuing. |
| Weld fuses one side but not the other | The electrode is not centered, the torch angle is biased, or travel is too fast. Aim at the leading edge and confirm that the puddle wets both edges. |
| Bead is wide and overheated | Travel is too slow, amperage is too high, or the cup motion pauses. Increase travel speed or reduce heat while preserving joint fusion. |
| Cup drags or catches | The surface is irregular, the cup is too large, or pressure is excessive. Use lighter contact, change the cup, reposition the work, or switch to freehand TIG. |
What to do after tungsten contamination
If the tungsten contacts the puddle, stop the arc and remove the contaminated section by grinding it away. Grind lengthwise, not randomly around the electrode, and restore the point recommended for your current type. Also inspect the weld area for a tungsten fragment before restarting.
If contamination happens repeatedly, shorten the arc, reduce the rocking range, and change your hand support. Continuing with a contaminated electrode can spread inclusions and make the arc unstable.
How to practice without wasting material
Draw parallel lines on a clean coupon and practice moving the cup along them with the machine off. Then make arc-on beads without filler, concentrating on arc length and travel. After that, add filler while keeping the same torch movement.
Practice in short sections and inspect each one. Once the bead remains consistent across several passes, extend the weld length or introduce a joint. This progression exposes control problems before heat buildup, joint distortion, or difficult access complicates the exercise.
Beginner questions about walking the cup
These questions address the points that most often confuse someone learning the technique for the first time.
Can the ceramic cup touch the workpiece while TIG welding?
Yes, walking the cup depends on light contact with the work or a nearby surface. The cup should not be forced into the metal, dragged through a sharp edge, or used to push the torch sideways. Keep the tungsten and arc aligned with the joint as the cup moves.
How far should the tungsten stick out when walking the cup?
Use the electrode extension recommended for the cup, gas lens, torch, and joint. A shorter extension is generally easier to shield and less likely to bend or touch the puddle. Extend it only when access or visibility requires it, and confirm that shielding remains effective.
Is a gas lens required for this TIG technique?
No. A standard collet body and suitable cup can work for practice. A gas lens may make shielding more forgiving and improve visibility, particularly with a larger cup or moderate electrode extension, but it cannot correct a dirty joint, a draft, or incorrect torch control.
Should I add filler while I am learning to walk the cup?
Begin with autogenous practice only when the joint and procedure allow it, so you can learn torch movement and puddle control. Then add filler in small, consistent dips. Structural or code-related work must follow its specified procedure; do not omit required filler simply to make the technique easier.
Why does the cup walking motion leave a rough or uneven bead?
The most common causes are excessive rocking, changing arc length, inconsistent travel speed, poor joint fit, or an unsupported welding position. Reduce the movement, stabilize your forearm, and practice on a flat coupon before attempting the same technique on a difficult joint.
Build a repeatable TIG cup-walking habit
Learning how to walk the cup TIG welding is mainly a matter of making light, repeatable contact while keeping the tungsten, arc, and puddle aligned. Clean metal, suitable shielding, a comfortable body position, and a small rocking motion matter more than dramatic cup movement.
Start with a flat practice joint, make a dry run, and change only one setting or movement at a time. Inspect every pass for fusion, porosity, undercut, contamination, and crater defects. When the technique feels controlled on simple coupons, carry it to more complex joints only when the cup can move freely and the required weld procedure permits it.