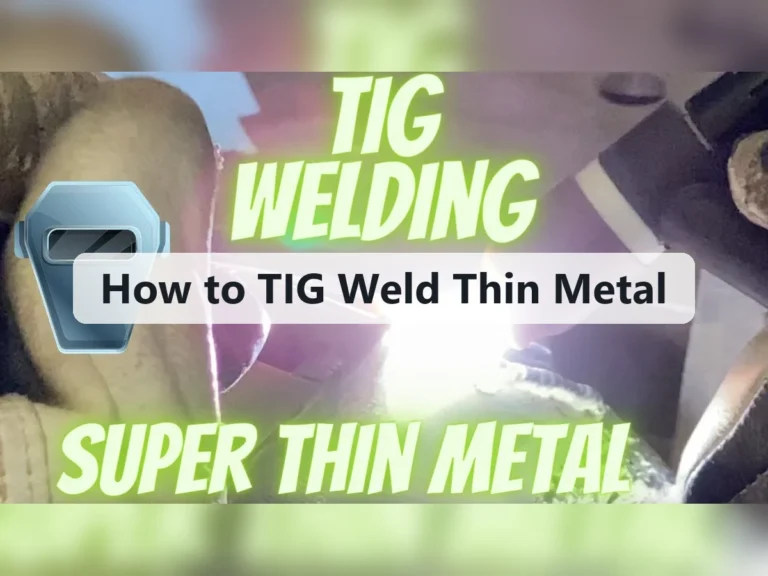
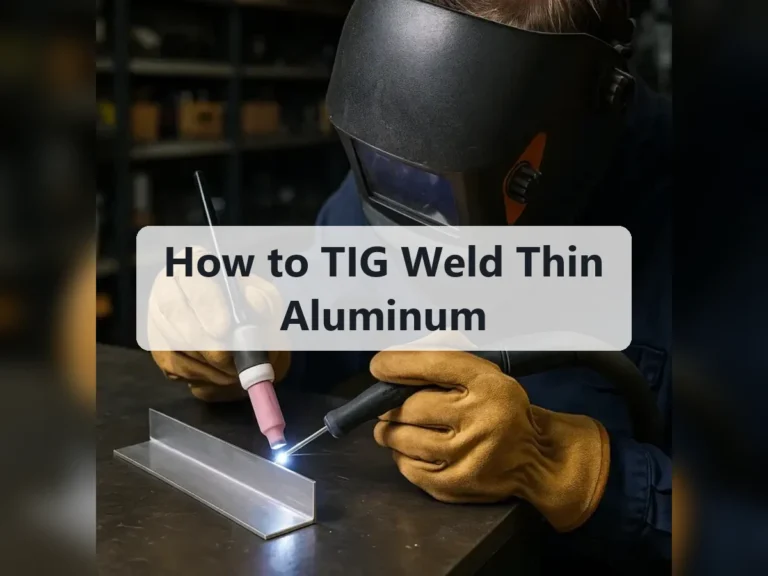
How to TIG Weld Inside Corners: A Practical Step-by-Step Guide
Inside corners are one of the first TIG joints that make a beginner question what the puddle is doing. The two surfaces reflect heat toward the joint, the torch can feel cramped, and a small change in angle may send the arc onto one wall instead of melting both sides evenly. If the fit-up is poor, the corner can also collect contamination or open up as the metal heats.
The good news is that how to TIG weld inside corners becomes much more manageable when the joint is clean, the torch is positioned before the arc starts, and the weld is built with a small, controlled puddle. You do not need to force the electrode into the corner or flood the joint with filler. You need consistent access, enough heat to fuse both sides, and deliberate movement.
This guide explains how to prepare the joint, choose a practical TIG setup, establish the puddle, add filler, and inspect the finished weld. It focuses on common mild-steel or stainless-steel sheet and small components; aluminum requires the additional AC settings and cleaning control noted later. Practice on scrap of the same thickness before welding anything that carries a load or affects safety.
At a glance
- Fit and clean both surfaces before trying to correct the weld with more heat.
- Keep a short arc, aim at the root, and angle the torch so both walls share the heat.
- Judge success by fusion at both sides, a steady bead profile, and the absence of contamination or pinholes.
How to TIG weld inside corners with controlled heat
An inside corner joint, sometimes called an internal fillet joint, is formed where two pieces meet on the inside of an angle. The objective is not merely to deposit metal in the corner. The base metal on both sides must melt enough to fuse with the filler, while the surrounding material stays intact.
The sequence below assumes a conventional TIG torch with a sharpened tungsten electrode, an appropriate shielding gas, and a joint that can be held securely. Start with a low-risk practice coupon. Exact amperage, tungsten size, gas flow, and filler diameter depend on the alloy, thickness, joint access, and machine, so use the material manufacturer’s guidance as the starting point rather than treating any single setting as universal.
Tools you will need
- TIG welder with a foot pedal or fingertip amperage control, for adjusting heat while welding
- TIG torch with a suitable collet, cup, back cap, and gas lens if available
- Correctly sized tungsten electrode, ground for the material and current type
- Shielding gas, normally pure argon for steel, stainless steel, and aluminum TIG work
- Compatible filler rod, such as ER70S-2 for many mild-steel jobs or the alloy-matched filler specified for stainless steel or aluminum
- Dedicated stainless-steel brush, solvent, lint-free cloth, and clean gloves for joint preparation
- Clamps, magnets, or a fixture that holds the two pieces without blocking torch access
- Auto-darkening welding helmet, TIG gloves, flame-resistant clothing, safety glasses, and adequate ventilation
- Optional: copper or aluminum backing material when the joint design permits it and extra heat support is useful
Step 1 Confirm the material and joint fit
Identify the base metal before selecting filler or machine settings. Mild steel, stainless steel, and aluminum do not use the same electrode polarity or exactly the same cleaning and heat-control approach. If the material is coated, galvanized, painted, oily, or unidentified, stop and determine whether it can be safely welded and how its coating must be removed.
Bring the two pieces together so the inside angle is consistent from one end to the other. A tight, even fit is usually easier for a beginner than a wide gap because the arc has less empty space to bridge. If the joint has a large or changing gap, repair the fit-up or use a joint design appropriate for that thickness rather than trying to fill the opening with excessive filler.
Clamp the pieces firmly, but leave enough room for the torch cup, electrode, filler rod, and your hands. Tack the assembly at intervals that hold the angle without pulling it out of alignment. After tacking, check that the corner is still accessible and that the tacks do not create abrupt bumps that will disturb the puddle.
Step 2 Clean the joint and prepare the tungsten
Remove oil, marker residue, oxide, rust, and loose scale from both sides of the corner. Wipe the area with a suitable solvent on a clean cloth, allow it to evaporate, and then use a brush reserved for that metal. Do not use a carbon-steel brush on stainless steel or aluminum if cross-contamination matters.
Grind the tungsten on a dedicated wheel so the grinding marks run lengthwise along the electrode. The point should be smooth and centered rather than jagged. A contaminated or poorly shaped tungsten can make the arc wander, which is especially troublesome when the corner already limits visibility.
Extend the tungsten only as far as needed for access. A long stickout makes it easier to touch the puddle or lose shielding. A gas lens may allow a little more extension in a confined joint, but it does not compensate for poor torch positioning or an obstructed gas path.
Important
Remove coatings and contaminants safely before welding. Galvanized metal, painted parts, degreaser residue, and unknown materials can produce hazardous fumes or unexpected reactions. If you cannot identify the coating or provide proper ventilation and respiratory controls, do not weld the part.
Step 3 Set the machine for the alloy and thickness
Choose the polarity and process mode required by the metal. DCEN, or direct current electrode negative, is common for mild steel and stainless steel. Aluminum generally requires AC TIG to help remove its tenacious oxide layer while welding.
Follow the machine and filler manufacturer’s recommendations when the alloy is unusual, thin, thick, or heat-treated.
Set a starting amperage appropriate for the thinner member of the joint and use a foot pedal or fingertip control if possible. An inside corner can absorb and reflect heat, so the current needed at the start may not be the current needed after the metal warms. Begin conservatively and increase heat only when the puddle will not form or fusion is incomplete.
Use clean, dry argon and set gas flow according to the torch, cup, gas lens, and work area. Too little flow can allow oxidation; too much can create turbulence that draws air into the shielding envelope. Position the gas cylinder securely and keep hoses away from hot metal and sharp edges.
Step 4 Practice the torch path before striking the arc
Put on the helmet and gloves, rest your forearm or hand so it can move smoothly, and rehearse the motion with the arc off. Keep the cup close enough to shield the puddle, but do not let it touch either wall. The torch should travel along the corner without forcing your wrist into an awkward bend.
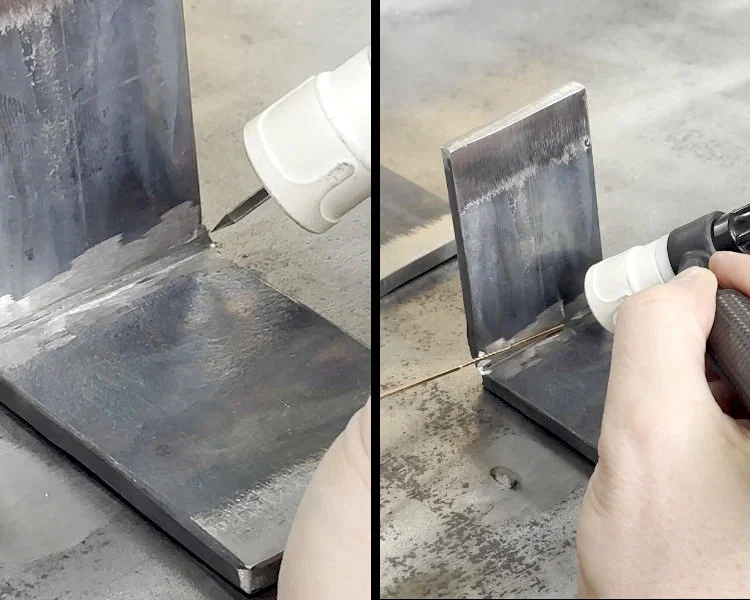
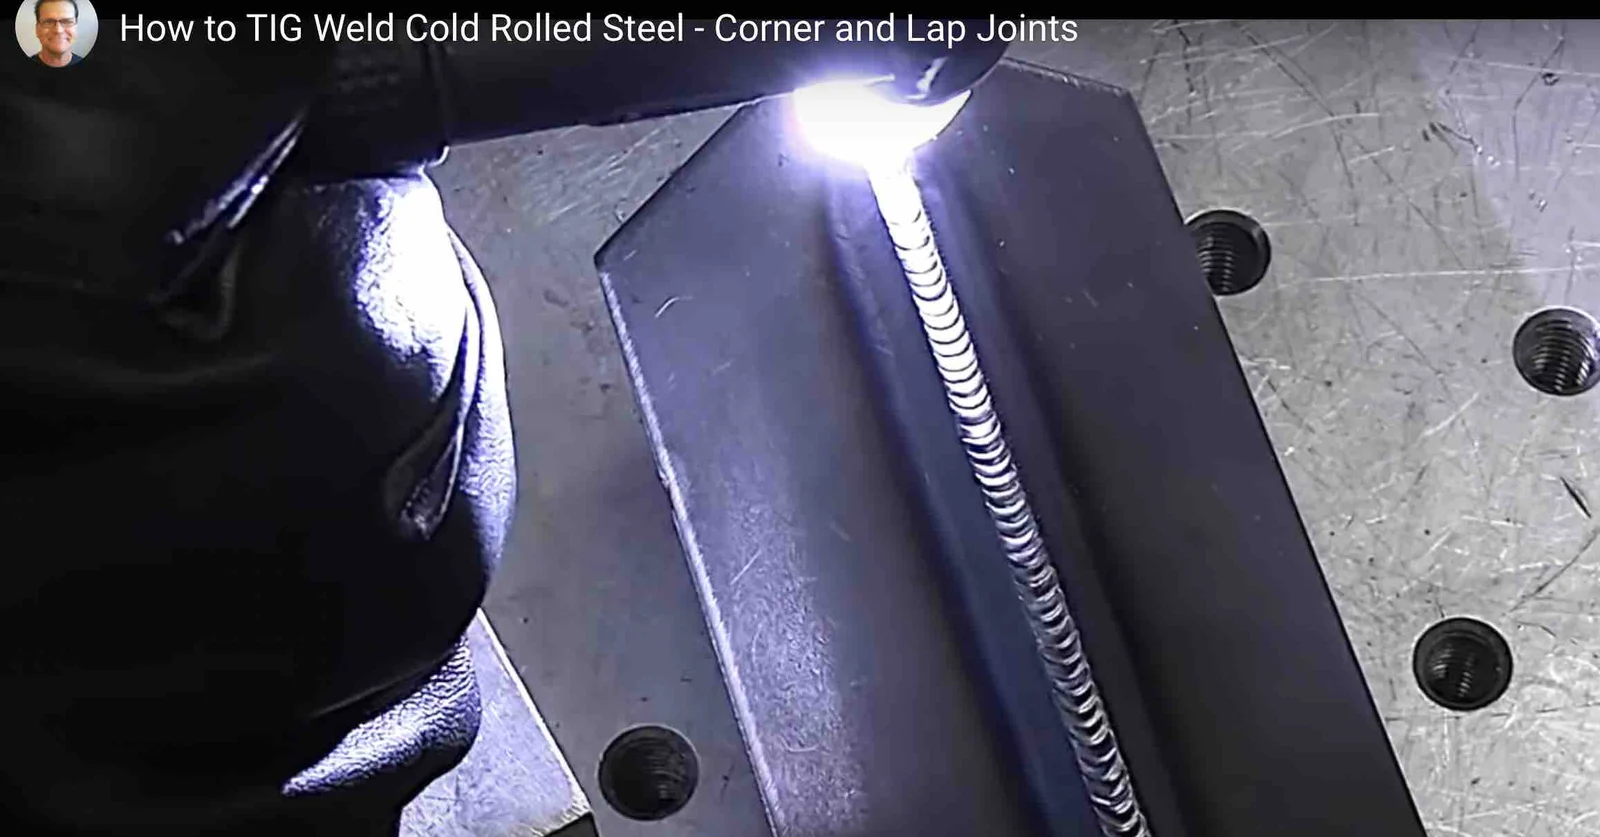
For a typical inside fillet, aim the electrode toward the root of the joint and keep the arc short. The torch is commonly held around 45 degrees between the two pieces, with a modest travel angle in the direction of movement. The exact angle changes with access and joint geometry; the important result is that the arc reaches both sides rather than favoring one wall.
Arrange the filler rod so it enters the leading edge of the puddle from the side that keeps your hand out of the shielding gas. Do not plan to reach across the tungsten. If the cup, electrode, or filler rod cannot reach the corner without scraping, reposition the work or change the torch setup before welding.
A useful way to approach how to tig weld inside corners is to check your progress after each stage.
Step 5 Start the arc and establish a small shared puddle
Place the torch over the starting tack or at the end of the joint, depending on the direction that gives you the clearest view. Start the arc without touching the tungsten to the work. Hold still long enough for a small puddle to form at the root and spread onto both walls.
Look for a shiny, fluid pool that visibly wets each side. The puddle should not be so large that it runs down the vertical wall, and it should not sit only on the surface of one piece. If one wall melts while the other remains dull, adjust the torch angle or pause slightly while directing the arc toward the colder wall.
On thin material, the puddle may appear suddenly. Use the pedal to reduce heat as soon as the joint begins to flow. A beginner mistake is to chase a cold-looking corner by holding maximum current; that often creates a hole before the operator can react.
Step 6 Add filler at the leading edge and move steadily
Once both sides are molten, dip a small amount of filler into the front edge of the puddle, then withdraw the rod while keeping the arc on the joint. Feed filler with a controlled tapping or dipping motion rather than leaving the rod continuously immersed. Keep the rod end inside the shielding area so it does not oxidize before it enters the puddle.
Move the torch at a pace that maintains a consistent bead width. A slight pause at each side can help the puddle wet both walls, but avoid exaggerated side-to-side weaving. Most small inside corners are better welded with a narrow path that keeps the heat concentrated at the root.
Watch the puddle, not only the finished bead behind it. A stable puddle, regular filler additions, and a consistent travel speed produce a more useful result than trying to match a decorative ripple pattern. If the bead grows tall and rounded without fusing, reduce filler or increase controlled heat.
If the edges undercut or the base metal starts to sag, reduce heat, increase travel speed, or stop to let the joint cool.
Step 7 Finish the weld without leaving a crater
As you approach the end, reduce current gradually while maintaining shielding over the hot metal. Add a small final amount of filler if needed to fill the termination area, then allow the arc to taper out according to the machine’s controls. Hold the torch in place for the post-flow period so the tungsten and cooling weld remain protected from air.
Do not lift the torch immediately or pull it away while the weld is still bright. That can oxidize the end of the bead and contaminate the tungsten. Let the piece cool naturally unless the material procedure calls for a controlled cooling method; sudden quenching can distort some metals or affect their properties.
Step 8 Clean and inspect the completed corner
After the part is cool enough to handle safely, remove loose residue without grinding away the toe of the weld. For stainless steel, discoloration may indicate excessive heat or inadequate shielding, though color alone does not prove whether the weld has adequate strength. For steel, remove slag-like surface debris if present, even though TIG normally produces no slag.
Use a bright light and inspect the weld from several angles. The bead should be continuous, reasonably uniform, and fused into both members. Look for visible holes, cracks, sharp undercut along either toe, excessive convexity, incomplete sections, tungsten particles, and areas where the filler appears to sit on top without blending into the base metal.
Check your result
A sound practice weld usually shows a continuous fillet with smooth transitions into both walls, no visible pinholes or crater cracks, and no section where the bead simply bridges an unfused gap. Visual inspection cannot prove internal strength, so use an approved test or qualified inspection method for safety-critical work.
Torch position, heat flow, and filler control
Inside corners behave differently from flat beads because both pieces influence the puddle. Heat reflects from the walls and accumulates near the joint, while the root may be difficult to see. Understanding those effects helps you correct the weld by changing one variable at a time instead of randomly adjusting the machine.
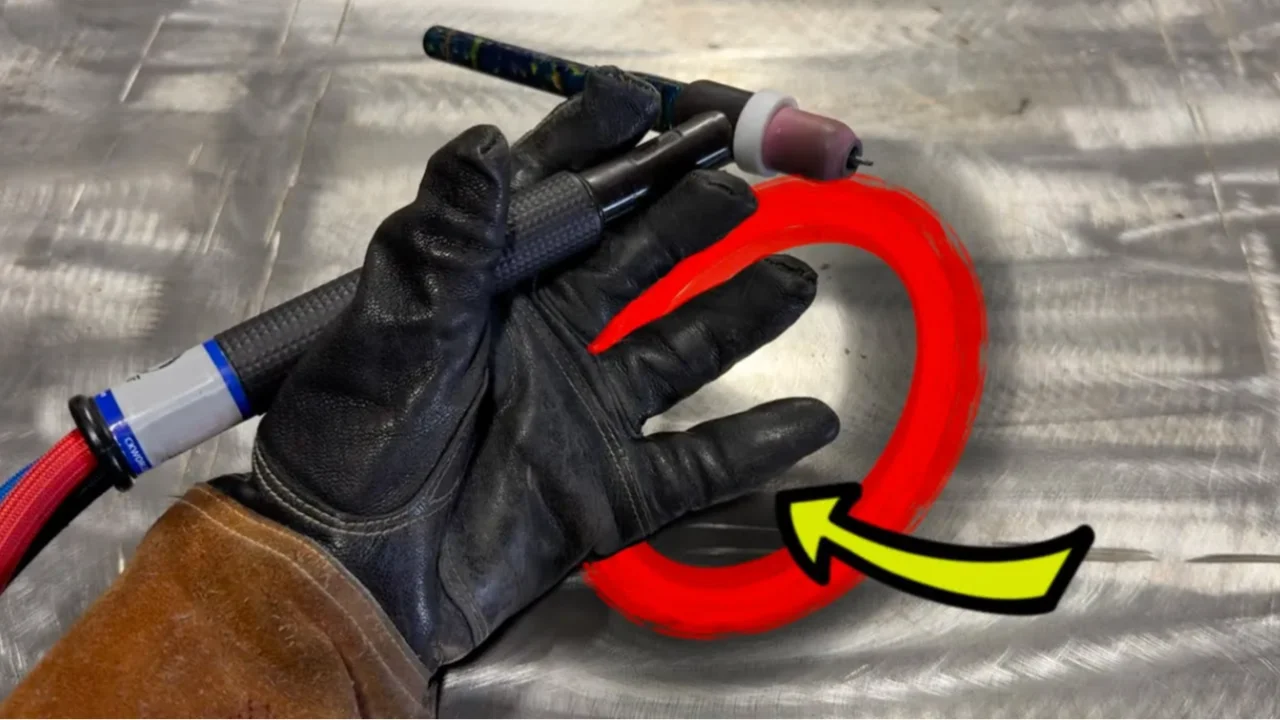
Why the root needs attention
The root is the deepest part of the joint where the two pieces meet. If the arc is held too far out on the faces, the bead can look attractive while leaving the root weak or unfused. Aim the arc at the root, but keep the tungsten centered enough that the arc can wash onto both sides.
For a fillet on unequal thicknesses, the thicker piece may need more heat or a slightly longer dwell. Do not automatically point the electrode at the thinner piece, because that can melt through it. Instead, use the pedal and torch angle to balance the puddle while keeping the arc short.
How arc length changes the result
Arc length is the distance between the tungsten tip and the puddle. A short, steady arc gives a narrow, concentrated heat pattern and better shielding. A long arc spreads heat, increases the chance of oxidation, and makes the puddle harder to control in the corner.
Understanding how to tig weld inside corners also means recognizing the limits of the method.
If the electrode touches the puddle, stop and allow the tungsten to cool before inspecting it. Regrind the contaminated section rather than continuing with metal stuck to the tip. A dirty tungsten can introduce dark inclusions and cause the arc to wander from one wall to the other.
When to use a small weave
A slight side-to-side movement can help bridge a modest corner width or distribute heat between unequal surfaces, but weaving is not a cure for a large gap. Excessive weaving makes the bead wide, increases heat input, and can leave shallow fusion at the toes. For a beginner, a narrow stringer bead is usually easier to evaluate.
Filler should be added only after the base metal is molten. Adding rod to a cold surface creates a raised bead that may look full but is not bonded properly. If the puddle is too small to accept filler, increase current gradually or slow the travel slightly while keeping the torch aimed at the root.
How to verify the weld and correct common defects
Inspection starts with the joint design and ends with the finished surface. A bead that looks smooth can still have incomplete fusion, and a rough bead can sometimes be sound but needlessly difficult to clean. Use the observations below to choose a focused correction on the next practice coupon.
| What you see | Likely causes | Useful correction |
|---|---|---|
| Bead sits on one wall | Torch angle favors one member, arc is off the root, or the other wall is dirty | Clean again, aim at the root, and adjust the torch so the arc reaches both surfaces |
| Undercut along a toe | Too much current, excessive travel speed, or a long arc | Reduce heat or slow slightly while keeping a short arc and controlled filler |
| Porosity or pinholes | Contamination, poor gas coverage, drafts, wet filler, or excessive gas turbulence | Clean the joint and filler, check leaks and cup condition, shield the area from drafts, and use stable gas flow |
| Burn-through | Too much heat for the thickness, a gap at the root, or too slow a travel speed | Improve fit-up, lower current, use pedal control, or move more consistently |
| Dark gray or sooty weld | Insufficient shielding, contaminated tungsten, or premature torch withdrawal | Check gas flow and post-flow, inspect the cup, remove drafts, and regrind the tungsten |
| Tall, rounded bead | Too much filler, too little base-metal melting, or travel that is too fast | Establish a shared puddle before dipping filler and keep the arc at the root |
Separate appearance from actual fusion
The toes are the lines where the weld transitions into the base metal. They should blend smoothly rather than form a sharp, unbonded shelf. A small practice weld can be cut through and examined, or tested according to an appropriate procedure, but a home visual check is not a substitute for engineering or certified inspection on a critical part.
If the weld will support a person, hold pressure, carry a lifting load, contain hazardous material, or affect a vehicle or structural assembly, stop at the point where you are uncertain. Use the applicable welding procedure and have the work evaluated by a qualified person instead of relying on appearance alone.
Adjust one variable at a time
When a weld goes wrong, note the current behavior, torch angle, travel speed, filler amount, and gas coverage. Change one factor on the next coupon so you can tell which adjustment helped. Replacing the tungsten, increasing amperage, changing gas flow, and altering travel speed all at once can hide the real cause.
For a corner that repeatedly burns through, first check the gap and material thickness before lowering current dramatically. For a corner that repeatedly lacks fusion, first check cleanliness and torch aim before adding more filler. Good fit-up and a stable arc often solve problems that excessive settings only disguise.
Material-specific considerations and alternatives
The basic hand motion is similar across metals, but the setup is not interchangeable. The following distinctions keep a beginner from applying a steel technique directly to aluminum or from contaminating stainless steel with the wrong preparation tools.
Mild steel
Mild steel is a practical material for learning because the puddle is visible and the surface preparation is straightforward. DCEN with argon and a compatible steel filler is common, but the correct settings still depend on thickness. Remove mill scale near the joint when it interferes with arc stability or fusion.
Stainless steel
Stainless steel retains heat and can distort or discolor quickly. Use clean tools reserved for stainless work, avoid overheating a long section, and maintain adequate post-flow. If appearance or corrosion resistance matters, the welding procedure may specify limits for heat input and post-weld cleaning that go beyond a simple visual inspection.
Aluminum
Aluminum oxide melts at a much higher temperature than the aluminum underneath, so the surface may look solid until the base suddenly collapses. AC TIG is commonly used, with machine balance and frequency set according to the alloy, thickness, and equipment. Clean aluminum with a dedicated stainless brush immediately before welding, keep filler and gloves clean, and expect more sensitivity to fit-up and heat buildup.
When a different process is more practical
TIG offers precise control and clean welds, but it is not always the best process for a particular corner. MIG, flux-cored welding, or a qualified brazing method may be more efficient for thicker production parts, outdoor work, long welds, or situations where wind makes shielding gas unreliable. The alternative still needs to match the alloy, thickness, joint design, and required strength.
Beginner questions about TIG-welding inside corners
These questions address common setup decisions that often appear after a first practice attempt. Use the answers as starting guidance, then confirm settings with the equipment and material instructions.
Should the tungsten point directly into the corner?
It should aim toward the root, but it should not be jammed into the corner or held so close that the cup cannot provide shielding. Keep a short, stable arc and angle the torch so the puddle wets both walls. The correct position is the one that gives balanced fusion without touching the tungsten.
Do I need filler rod for every inside corner?
No. A tightly fitted, thin joint may be fused autogenously, meaning without added filler, when the design and procedure allow it. Filler is often useful for controlling the fillet size, bridging a small planned gap, or providing the required alloy, but it should not be used to hide poor fit-up or contamination.
Why does my corner weld melt through even at a modest setting?
Check for a gap, thin material, excessive dwell, and heat buildup from starting too far ahead of the joint. Inside corners can concentrate heat, and a wide gap requires more time over unsupported metal. Improve the fit, use pedal control, and practice a shorter bead while watching the puddle rather than the amperage number alone.
Can I TIG-weld an inside corner without tacking first?
You can in some small, well-fixtured joints, but tacking usually keeps the angle and gap from changing as the metal heats. Use tacks that are small enough to blend into the weld and place them where they do not block torch access. Recheck alignment after tacking because the parts may have moved.
How do I know whether a smooth bead has enough penetration?
Visual appearance alone cannot confirm internal penetration or structural capacity. Look for fusion into both walls and a consistent profile, then use a suitable practice test, sectioning method, or qualified inspection procedure when the joint is important. Do not treat a shiny bead as proof that the weld is safe for a critical load.
Build reliable inside-corner TIG welds through controlled practice
Learning how to TIG weld inside corners is mainly a lesson in access, heat balance, and observation. Clean the joint, secure the fit, prepare the tungsten, aim a short arc at the root, and add filler only after both walls form a shared puddle. A steady torch path and gradual heat control matter more than trying to create a perfect-looking ripple.
Start with simple coupons of known material and thickness, inspect each weld carefully, and change one variable when the result is poor. Once you can consistently see fusion on both sides without burn-through, porosity, or crater defects, move to more complex corners. For any safety-critical assembly, use the required welding procedure and qualified inspection rather than relying on beginner practice alone.