Hands-on Welding Training: Clear Overview and Expert Insights
A welding class can look productive from the first spark, yet visible activity does not always mean useful training. The difference is usually found in the quality of instruction, the amount of supervised practice, and the connection between classroom exercises and real fabrication work.
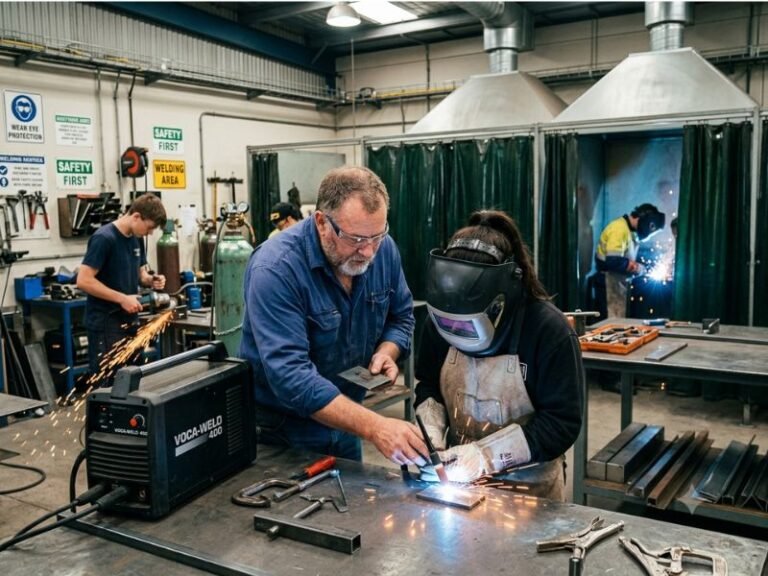
Hands-on welding training gives beginners and working tradespeople a structured way to develop those skills. Instead of learning only from diagrams or videos, students prepare metal, set equipment, make welds, inspect results, and correct technique under supervision.
I will explain what this type of training includes, how the main welding processes compare, what a strong program should provide, and how to choose an option that matches a career goal. The aim is to help a prospective student make a practical decision rather than select a course based only on length or advertising.
What Hands-on Welding Training Means
Hands-on welding training is instruction that places meaningful shop time at the center of learning. A student does not simply watch an instructor create welds. The student performs the work with welding machines, hand tools, protective equipment, practice materials, and inspection methods.
A complete program normally combines three elements:
- Technical instruction: Lessons cover welding principles, equipment settings, joint design, metals, symbols, and terminology.
- Demonstration: An instructor shows how to prepare a joint, position a torch or gun, control the arc, and evaluate the finished bead.
- Supervised practice: Students repeat the process, receive corrections, and build consistency across different positions and materials.
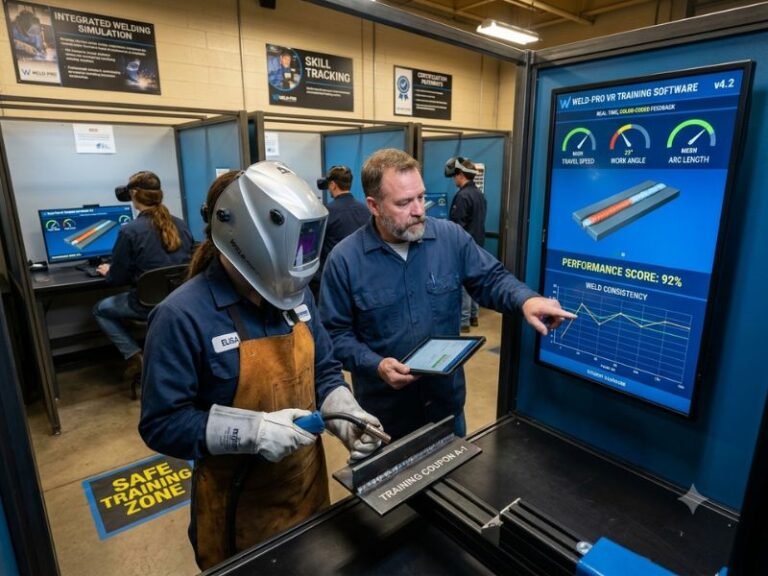
The practical portion matters because welding depends on coordinated movement and judgment. A student must control travel speed, arc length, work angle, heat input, and filler addition at the same time. Reading about those actions is useful, but it cannot replace repetition with an actual machine.
Good training also explains why a weld succeeds or fails. A porous bead, lack of fusion, undercut, excessive spatter, distortion, or an incorrect profile is not merely a cosmetic problem. Each defect can point to a specific issue with cleanliness, settings, technique, joint fit-up, shielding, or heat control.
Why Practical Welding Experience Matters
Welding is a process-based skill. The final result depends on what happens before the arc starts, during the weld, and after the part cools. Practical training connects those stages so a student can develop repeatable habits.
For example, a student may learn that a poor weld is not always caused by an unsteady hand. The base metal could be contaminated, the joint could have an unsuitable gap, the shielding gas could be disrupted, or the amperage could be wrong for the material thickness. Hands-on practice makes these relationships easier to recognize.
Supervised work also reduces the risk of practicing bad habits. A beginner who repeatedly holds the electrode at the wrong angle may still produce a bead that appears acceptable for a short exercise. Without feedback, that habit can become difficult to correct when the work becomes more demanding.
I look for training that treats mistakes as diagnostic information. The instructor should identify the cause, explain the correction, and give the student another opportunity to apply it. That cycle is more valuable than simply moving through a list of projects.
Core Skills Taught in a Welding Program
The exact curriculum varies by school and career focus, but most useful programs build skills in a logical sequence. Students should understand both the physical operation of equipment and the reasoning behind the procedure.
Shop safety and personal protection
Safety is the first practical skill, not a short orientation before the “real” work begins. Students should learn how to use a welding helmet with the correct shade, flame-resistant clothing, gloves, hearing protection, safety glasses, and appropriate footwear.
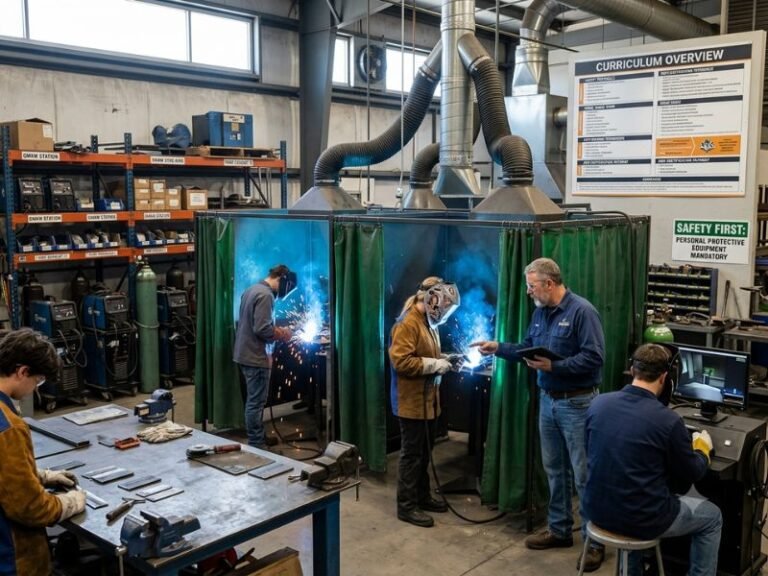
Instruction should also cover ventilation, fire prevention, compressed-gas cylinders, electrical hazards, hot metal, grinding, fumes, and nearby combustible materials. Welding areas need orderly work practices because sparks and heat can affect people or equipment beyond the immediate booth.
Students should know how to inspect leads, hoses, regulators, ground connections, torches, guns, and machines before use. A training environment that ignores damaged equipment or poor housekeeping teaches unsafe behavior regardless of how strong the technical lessons may be.
Metal preparation and joint fit-up
A weld starts with preparation. Students commonly learn to identify the base metal, remove rust or coatings when required, cut material, deburr edges, establish the intended joint gap, and align parts before tacking.
Joint types may include butt, lap, corner, and tee joints. The correct preparation depends on thickness, material, access, welding process, and the required strength or appearance. Fit-up affects penetration, distortion, weld size, and the amount of filler metal needed.
Machine setup and process control
Students learn how to select a process, connect the work lead, choose consumables, set polarity when applicable, adjust amperage or voltage, set wire-feed speed, and establish shielding gas flow for gas-shielded processes.
These settings are not universal. They depend on the process, electrode or wire, metal type, thickness, joint design, and welding position. A responsible instructor teaches students to follow qualified procedures, equipment guidance, and classroom specifications instead of memorizing one setting for every job.
Body position and torch or gun movement
Physical technique includes stance, hand position, travel angle, work angle, arc length, travel speed, and coordination between the operator and the joint. Comfort and visibility matter because awkward positioning can produce inconsistent results and unnecessary fatigue.
Beginners usually start with accessible flat-position exercises before progressing to horizontal, vertical, and overhead work. The progression should be demanding but controlled. Students need enough repetition in each position to understand how gravity changes the molten weld pool.
Inspection and correction
Visual inspection teaches students to look at bead width, profile, tie-in, undercut, overlap, craters, spatter, cracks, and surface contamination. Depending on the program, students may also learn basic destructive testing or an introduction to nondestructive testing methods.
Inspection is not separate from welding skill. The ability to identify a defect and connect it to a likely cause helps an operator adjust technique before producing a larger amount of unacceptable work.
Common Welding Processes in Hands-On Classes
A student does not need to master every process at once. The right starting point depends on the intended work, the local job market, and the training provider’s equipment.
SMAW or stick welding
Shielded metal arc welding (SMAW), commonly called stick welding, uses a flux-coated consumable electrode. It is valued for equipment portability and usefulness in construction, maintenance, field repair, and structural applications.
Stick welding teaches arc control, electrode angle, travel speed, slag removal, and the effect of changing rod types. It can be a demanding process for beginners because maintaining a short, consistent arc takes practice.
GMAW or MIG welding
Gas metal arc welding (GMAW), often called MIG welding, feeds a continuous wire electrode through a gun and typically uses shielding gas. It is widely used in fabrication, manufacturing, automotive work, and repair.
MIG can feel accessible because the wire feeds continuously, but good results still require proper settings, clean material, correct gun movement, suitable gas coverage, and careful attention to wire stickout. A beginner can create a bead quickly without yet understanding whether the weld has adequate fusion.
GTAW or TIG welding
Gas tungsten arc welding (GTAW), commonly called TIG welding, uses a nonconsumable tungsten electrode and may use separate filler metal. It provides precise control and is associated with stainless steel, aluminum, thin materials, piping, and work where appearance and heat control are important.
TIG usually demands more coordination than introductory MIG work. The operator controls the torch, maintains arc distance, adds filler when needed, and protects the weld with shielding gas. It is valuable training, but a student should understand that a short TIG class may introduce the process without creating job-ready mastery.
FCAW or flux-cored welding
Flux-cored arc welding (FCAW) uses tubular wire containing flux. Some versions use shielding gas, while others are designed to generate shielding from the flux itself. The process is common in fabrication and construction because it can offer useful deposition rates and penetration.
Students need to learn the differences between self-shielded and gas-shielded flux-cored work, including equipment setup, polarity, wind sensitivity, slag removal, and storage or handling requirements for consumables.
How a Typical Training Session Works
A well-organized session usually follows a repeatable pattern. First, the instructor explains the objective, safety controls, joint design, and expected result. Next, the instructor demonstrates the setup and weld while pointing out the important movements.
Students then prepare their workstations, inspect equipment, set the machine, and complete the exercise. The instructor circulates through the shop, observes technique, answers questions, and stops unsafe actions immediately.
After welding, students clean and inspect the work. They may compare the result with a sample, measure weld dimensions, section a practice piece, or receive a performance evaluation. The next exercise should build on the previous one rather than introduce unrelated tasks without explanation.
I consider the feedback stage essential. A student should leave a session knowing what went wrong, what worked, and what to change on the next attempt. “Practice more” is not enough direction unless the instructor identifies the specific behavior that needs improvement.
Choosing the Right Training Format
Programs differ substantially, so the best choice depends on the student’s schedule, previous experience, career objective, and access to equipment outside class.
Trade school or community college
A trade school or community college program may offer a broader curriculum, multiple processes, structured progression, classroom theory, and access to established shop facilities. It can suit beginners who want a foundation for employment or further credentials.
The tradeoff may be a longer schedule and a fixed class calendar. Before enrolling, I recommend asking how much booth time each student receives, how many students share a machine, and whether practice hours are included outside scheduled lectures.
Private welding school
Private schools often focus on accelerated instruction or a specific industry pathway. Some provide intensive practice in structural, pipe, fabrication, or production welding. The quality can vary, so prospective students should inspect the facility and ask for a written curriculum.
A short program can be useful when it has a narrow, realistic goal. It should not imply that a few days of practice equal broad professional competence unless the scope is clearly limited.
Apprenticeship or employer-based training
An apprenticeship or employer-based program combines supervised work with technical instruction. This format can connect training to actual production standards, workplace communication, tools, materials, and jobsite expectations.
Entry requirements, wages, classroom schedules, and progression rules vary. A candidate should confirm whether the program teaches multiple welding processes or concentrates on the employer’s immediate needs.
Online learning combined with shop practice
Online lessons can explain terminology, symbols, safety concepts, metallurgy, and process theory. They are convenient for review, but they cannot provide the physical repetition, machine setup, or instructor observation required for welding proficiency.
I view online content as a supplement rather than a replacement for supervised shop work. A hybrid program is credible only when its in-person hours are substantial and clearly described.
How to Evaluate a Hands-On Welding Program
Marketing language can make nearly any class sound practical. Specific questions reveal more about the learning experience.
- How many supervised practice hours are included?
- How many students share each welding booth or machine?
- Which processes are taught, and how much time is assigned to each?
- Are steel, stainless steel, and aluminum available when relevant to the curriculum?
- Does the program teach flat, horizontal, vertical, and overhead positions?
- Are safety equipment and consumables included in the tuition?
- Does an instructor evaluate individual welds and explain corrections?
- Are welding symbols, print reading, measurement, and fit-up part of the course?
- Does the program prepare students for a specific qualification test?
- What are the attendance, tool, age, and physical requirements?
Facility access also matters. A class with a modern machine list may still provide little value if students spend most of the session waiting for a booth. I would prioritize instructor availability, student practice time, clean work areas, maintained equipment, and a clear progression over impressive advertising language.
Preparing Before the First Class
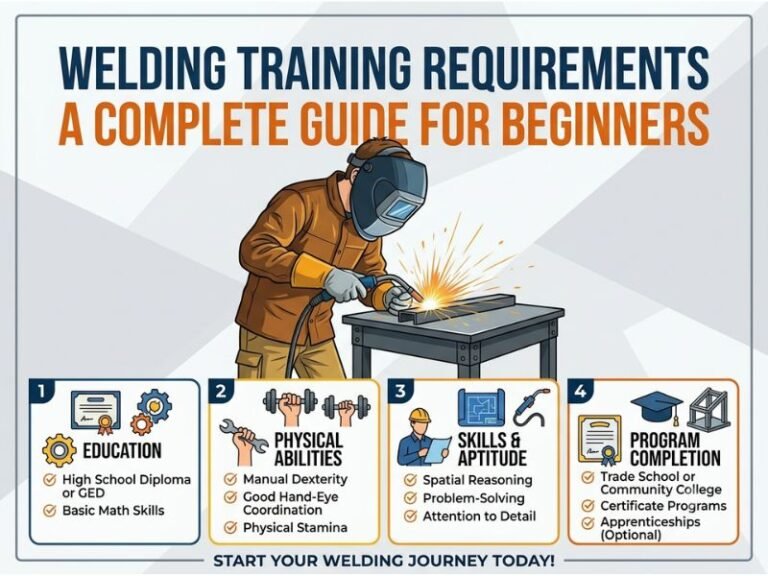
A student can gain more from training by arriving prepared. Review basic safety vocabulary, understand the difference between a work lead and an electrode lead, and become familiar with common joint types. No prior welding experience is usually needed for an introductory class, but curiosity and attention to detail help.
Ask the provider what to bring. Required items may include a welding helmet, safety glasses, gloves, flame-resistant clothing, work boots, hearing protection, and a welding jacket or sleeves. Requirements differ by facility, so purchasing equipment before receiving the list can create unnecessary expense.
Physical preparation is also practical. Welding may involve standing, bending, lifting manageable materials, wearing protective gear, and working in warm or noisy areas. Anyone with a medical limitation should discuss reasonable accommodations with the school before enrollment.
During class, take notes on machine settings, joint preparation, electrode or wire selection, and recurring defects. A simple practice log can show which variables changed and how those changes affected the weld. That record becomes useful when moving from one process or material to another.
Common Beginner Mistakes
Focusing on appearance alone
A smooth, shiny bead is not automatically a sound weld. Surface appearance should be considered with fusion, penetration, profile, joint preparation, and the requirements of the procedure. Students should avoid judging quality by color or neatness alone.
Moving too quickly
Excessive travel speed can reduce heat input and create poor fusion or an undersized weld. Moving too slowly can produce excessive heat, burn-through, distortion, or an overly large bead. The correct speed depends on the process, joint, material, and settings.
Ignoring cleanliness
Oil, paint, rust, mill scale, moisture, and other contaminants can interfere with arc stability and weld quality. Cleaning is not busywork. It is part of controlling the welding process.
Using settings without understanding them
Copying another student’s machine settings can be misleading because material thickness, joint position, wire or electrode type, and technique may differ. Students should learn what each control changes and adjust only within the procedure or instructor’s guidance.
Skipping inspection and cleanup
Removing slag, brushing the weld, checking the joint, and returning tools properly reinforce professional habits. Cleanup also exposes defects that may be hidden beneath residue or spatter.
Practicing without feedback
Repetition is useful only when the student knows what to repeat. A learner who produces the same defect twenty times is not necessarily progressing. Short, focused exercises followed by specific correction usually provide better learning than uncontrolled practice.
Credentials, Qualification, and Job Readiness
Completing a class and becoming qualified for a particular welding task are not always the same thing. A school certificate may confirm attendance or course completion. An employer or testing organization may require a separate performance qualification based on a defined procedure.
Qualification requirements can depend on the employer, industry, code, material, position, process, and type of work. Students should ask exactly what a program’s certificate means and whether it prepares them for a named test rather than assuming every certificate has equal value.
Employers may also evaluate print reading, measurement, fit-up, grinder use, safety, attendance, communication, and the ability to follow instructions. A student who can make one attractive bead but cannot prepare a joint or interpret a basic drawing may still need significant development.
For career planning, I recommend choosing the target work first. Structural fabrication, pipe welding, manufacturing, maintenance, automotive repair, and artistic metalwork may require different processes and practice priorities. Training becomes more efficient when the desired application guides the choice of classes.
Frequently Asked Questions
Is hands-on welding training suitable for a complete beginner?
Yes. An introductory program should teach safety, equipment identification, joint preparation, basic settings, and simple welds from the beginning. A beginner should confirm that the course includes direct supervision and does not assume previous shop experience.
How much shop practice is enough?
There is no single number that makes a student proficient. The useful measure is whether the student receives repeated practice across relevant materials, positions, joints, and processes, with individual feedback and inspection. A longer course is not automatically better if most time is spent watching or waiting.
Can online welding training replace hands-on classes?
No. Online instruction can support theory and review, but it cannot replace arc control, machine setup, body positioning, joint fit-up, or real-time correction. Practical welding ability requires supervised work with appropriate equipment and materials.
Which welding process should a beginner learn first?
There is no universal first process. MIG may offer an accessible introduction for some fabrication work, while stick welding may align better with field or construction goals. TIG can be the right choice for precision work but generally requires more coordination. The intended job should guide the decision.
Does a welding class guarantee a welding job?
No. Training can build foundational skills, but employment also depends on weld quality, qualifications, local demand, reliability, safety, physical readiness, and the employer’s requirements. A course should describe its career support and outcomes accurately rather than promise automatic placement.
Should a student buy a welding machine after class?
Not necessarily. Buying equipment makes sense only after the student understands the target process, available power, ventilation needs, consumables, protective equipment, and safe workspace. Renting shop time or continuing supervised practice may be a better first step.
What should a student do after introductory training?
Continue with structured practice, seek feedback, study print reading and measurement, and select a next course related to the intended work. If a job or contract requires a qualification test, ask the employer or testing facility about the exact procedure before choosing practice exercises.
Conclusion
Strong Hands-on welding training combines safety equipment setup joint preparation supervised repetition inspection and clear feedback I recommend comparing programs by actual booth time instructor attention process coverage.