How to Practice TIG Welding: Setup Steps and Troubleshooting Tips
TIG welding can look deceptively simple: a bright arc, a small puddle, and a thin filler rod added by hand. In practice, beginners are coordinating both hands, controlling heat with a pedal or fingertip control, keeping the tungsten clean, and watching a puddle that changes quickly. The good news is that you do not need a complicated project to build those skills.
A flat piece of clean mild steel can teach you a great deal.
The most productive way to practice TIG welding is to separate the job into small exercises. First learn to hold a stable arc without filler, then move a consistent bead, and only afterward add filler metal. Each exercise gives you visible evidence: bead width, spacing, color, penetration, and the absence of contamination or porosity.
This guide lays out a safe practice routine for a beginner using a properly equipped TIG machine. It covers equipment checks, machine setup, torch movement, filler technique, common defects, and a simple method for judging your results. The goal is not a perfect weld on the first attempt; it is a repeatable process you can observe and improve.
This guide explains how to practice tig welding, what to check first, and how to assess the result.
At a glance
- Practice on clean, flat coupons before attempting joints or thin tubing.
- Control arc length and torch movement before concentrating on filler rod.
- Judge progress by repeatability, puddle control, and clean weld appearance—not color alone.
How to practice tig welding with controlled exercises
A useful practice session moves from the least complicated skill to the most complicated one. Begin with a stable arc on flat metal, develop consistent travel speed, and then coordinate filler addition. This order prevents a common beginner problem: trying to fix poor torch control by adding more filler or changing machine settings.
Tools you will need
- A TIG welder with a suitable torch, work clamp, and high-frequency or lift-arc start
- Properly sized pure or ceriated/lanthanated tungsten recommended by the machine or torch instructions
- 100% argon shielding gas with a regulator and flowmeter
- Clean mild-steel practice coupons, preferably flat bar or sheet thick enough to resist immediate burn-through
- Matching mild-steel filler rod, such as ER70S-2, for practice beads
- Auto-darkening welding helmet, TIG-rated gloves, flame-resistant clothing, safety glasses, and hearing protection as needed
- Angle grinder or file, stainless wire brush reserved for welding use, acetone or an approved degreaser, and clean lint-free rags
- Optional: a foot pedal or fingertip amperage control, if your machine supports one
Step 1 Set up a safe, clean practice area
Choose a dry, well-ventilated welding area with a nonflammable work surface. Remove paper, solvents, sawdust, aerosol containers, and other combustible material from the arc area. TIG welding produces less visible smoke than many other processes, but it still creates ultraviolet radiation, hot metal, and potentially hazardous fumes, especially when coatings or contaminated metal are heated.
Wear a properly fitted welding helmet with the correct shade for your amperage, safety glasses under the helmet, welding gloves, long sleeves, long pants, and closed-toe leather footwear. Do not weld galvanized, painted, plated, or unknown metal for beginner practice. If the material has a coating or you cannot identify it, stop and choose known clean steel instead.
Inspect the torch lead, gas hose, power connections, and work lead. Clamp the work lead to clean metal, not to a rusty table or a painted edge. Keep the argon cylinder upright and secured, and check for leaks according to the equipment manufacturer’s instructions.
Important
Never weld in a poorly ventilated or enclosed space without a professional assessment and suitable ventilation controls. Do not use oxygen, compressed air, or an unidentified gas as TIG shielding gas; use the gas specified for the process and material.
Step 2 Prepare the tungsten and practice coupons
Use the tungsten type and diameter recommended for your machine settings. Grind the electrode lengthwise to a smooth point on a dedicated tungsten grinder or clean abrasive wheel. Grinding around the electrode can create ridges that make the arc wander.
Do not touch the prepared tip with oily fingers.
Prepare the coupons by removing mill scale, rust, paint, and oil from the area you will weld. A flap disc or file can remove scale, followed by a clean stainless-steel brush and an approved degreaser. Let the solvent evaporate fully before striking an arc.
Use a stainless brush only for clean welding work so that particles from other metals do not get embedded in the surface.
For the first exercises, use a flat coupon with enough thickness that normal beginner heat will not instantly burn through it. Square or rectangular pieces are easier to hold and observe than a narrow strip. Wipe the filler rod as well; dirty filler can contaminate the puddle even when the base metal is clean.
Step 3 Choose conservative machine settings and check the gas
Set the machine for DC electrode-negative operation when practicing on mild steel. Start with a moderate amperage appropriate for the coupon thickness and the tungsten diameter, using the welder’s manual or a reputable welding chart as the starting point. Set post-flow long enough to protect the hot tungsten after you release the torch trigger; the machine manual is the best reference for the available range.
Set argon flow within the range recommended for your torch, cup, and workspace. Excessive flow can create turbulence and draw air into the shielding area, while too little flow can leave the weld gray, dirty, or porous. Confirm that the gas cylinder is open, the regulator is functioning, and gas actually flows when the torch is activated.
If your machine has a foot pedal, begin with a low, controlled output rather than immediately pressing it fully down. If it does not, use the fixed amperage and concentrate on travel speed. Set the pre-flow and start features according to the machine instructions, especially if you use high-frequency start.
Step 4 Practice starting and holding a short arc
Place the coupon flat and rest the side of your torch hand on the table or on a clean support so the torch does not float. Hold the tungsten about one electrode diameter above the surface, keeping the electrode nearly perpendicular to the work for this first exercise. Use the machine’s intended start method; do not scratch the tungsten across the metal if the machine is set up for high-frequency start.
Start the arc and form a small puddle without adding filler. Watch the surface of the metal rather than staring at the electrode tip. The puddle should become a controlled, shiny molten area.
Keep the arc short and steady, and release the pedal or move away before the puddle grows so large that it runs through the coupon.
Repeat short starts until you can create a puddle without sticking or touching the tungsten. A successful attempt leaves a small, controlled melted spot with minimal spatter. If the tungsten touches the metal, stop, let everything cool, and regrind or replace the contaminated tip before continuing.
A useful way to approach how to practice tig welding is to check your progress after each stage.
Step 5 Move a puddle without filler metal
Once you can start cleanly, make a row of short puddle movements. Start the arc, establish the puddle, and move the torch in a straight line while keeping the same torch height and angle. Do not add filler yet.
Your first objective is to coordinate travel speed with heat so the melted area stays similar in size from one end of the coupon to the other.
Use the free hand to steady the torch or support the wrist, but avoid dragging the tungsten. Keep the torch pointed in the direction of travel with a slight forward angle. Moving too quickly produces a narrow, shallow mark; moving too slowly allows the puddle to spread, overheats the coupon, and may cause burn-through.
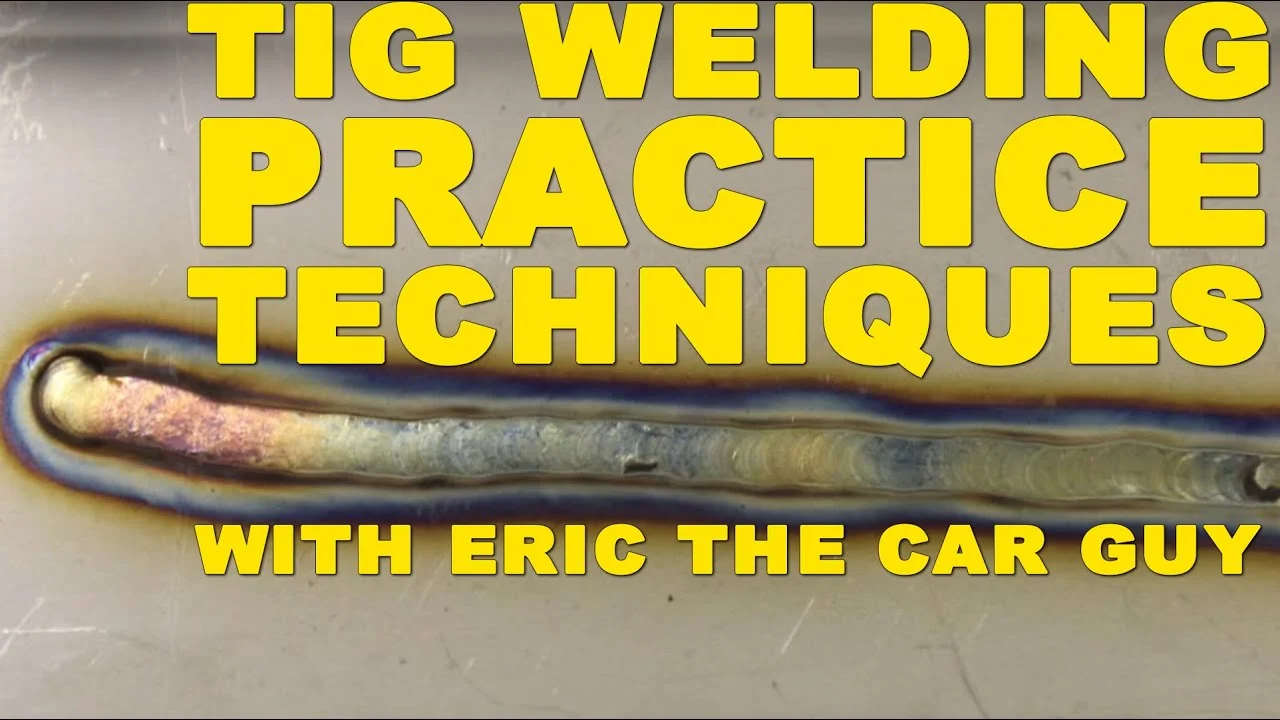
After the coupon cools, inspect the track. Look for a reasonably consistent width, a smooth surface, and a controlled end rather than a large crater. Some discoloration is normal on steel, but heavy soot, a rough gray surface, or scattered pinholes suggests inadequate shielding, contamination, or an arc that was too long.
Step 6 Add filler rod with a repeatable dipping motion
When the puddle can move consistently, hold a short length of filler rod in your non-torch hand. Keep the rod within the argon-covered area near the front edge of the puddle. Feed it by dipping the tip into the leading edge of the puddle, then withdrawing it slightly while continuing to move the torch.
Do not jab the rod into the tungsten or wave it through the arc. Add small, regular amounts instead of trying to fill the entire puddle at once. The rod should melt from the puddle’s heat; if you repeatedly melt the rod directly in the arc, the bead may become lumpy and the filler end can oxidize.
Practice three short beads with the same torch speed and different filler rhythms: widely spaced dips, moderate dips, and closely spaced dips. Compare the bead width and ripples after cooling. A useful beginning result is a bead that stays centered, has fairly even ripples, and does not show obvious gaps between filler additions.
Helpful tip
Keep the filler rod inside the shielding gas as much as practical. If you pull it completely away after every dip, the hot end can oxidize; if it enters from outside the gas coverage, it can carry dirt into the puddle.
Step 7 Repeat straight beads before attempting a joint
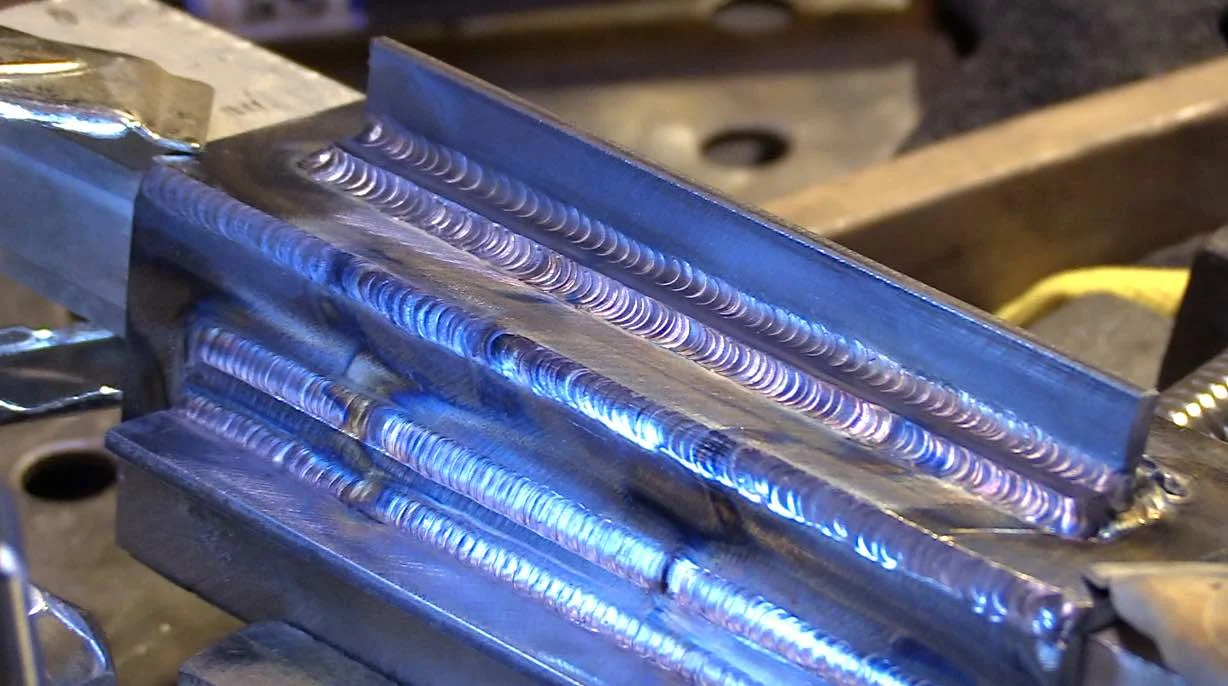
Mark several parallel lines on a clean coupon with a scribe or marker outside the weld area. Run beads along the lines, allowing the metal to cool between passes. This exercise builds travel consistency and shows whether heat is accumulating as you move across the coupon.
For each pass, aim for the same arc length, torch angle, travel speed, and filler rhythm. If you use a pedal, make only small amperage corrections: add heat when the puddle is too small, and reduce heat when the puddle spreads too far. Large pedal movements make it difficult to tell whether the problem came from speed, angle, or amperage.
Stop when the coupon becomes too hot to handle safely or when the bead starts widening noticeably. A practice session should produce information, not a damaged workpiece. Compare the first and last passes to see whether your consistency improves or heat buildup changes the result.
Step 8 Try a simple lap or fillet joint only after flat beads improve
A joint introduces fit-up, corner access, and heat-flow changes, so it should come after you can make repeatable beads on flat material. Begin with a simple lap joint or outside corner using clean, well-fitting coupons. Avoid thin sheet and tight inside corners until you can control heat reliably.
Tack the pieces only if you understand how the tacks affect fit-up and heat. Keep the torch aimed so the arc heats both pieces appropriately, and watch the puddle form across the joint rather than on only one edge. Add filler at the leading edge when the base metal has fused into a shared puddle.
After the joint cools, inspect both sides when possible. Look for continuous fusion along the intended joint, an even profile, and no visible undercut or burn-through. A visually attractive bead does not prove internal strength, so do not use an untested practice joint for a load-bearing, pressure-containing, safety-critical, or structural application.
Understanding how to practice tig welding also means recognizing the limits of the method.
What the TIG puddle and bead are telling you
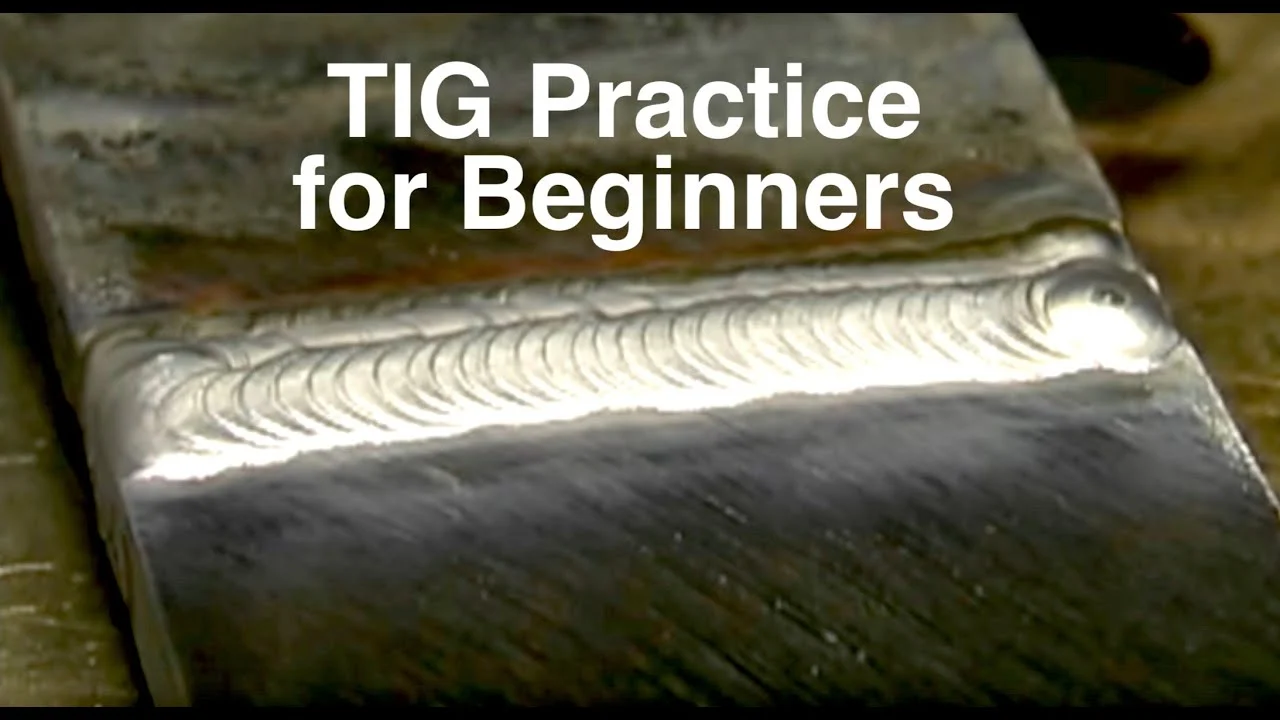
TIG welding gives you unusually direct control, but that control only helps when you interpret what you see. The puddle is the molten area where the arc has heated the base metal; the bead is the solidified metal left behind. Puddle size, shape, and movement reveal more than the color of the finished weld.
Arc length controls heat concentration
A short, stable arc concentrates heat and makes the puddle easier to control. A long arc spreads the arc energy, reduces precision, and can let shielding gas coverage become less effective. If the arc repeatedly lengthens as your hand moves, support your wrist more securely or reduce the distance you are trying to travel in one motion.
Travel speed changes bead width and penetration
Slow travel gives the metal more time to absorb heat, usually making the bead wider and increasing the chance of burn-through or excessive penetration. Fast travel can leave a narrow bead with incomplete fusion. Aim for a puddle that advances smoothly rather than chasing a particular ripple pattern.
Filler amount affects reinforcement
Too little filler can leave a bead that is narrow or slightly concave, while too much can create a tall, irregular bead that hides poor fusion at the edges. Filler should support the joint, not replace heat control. If the base metal edges are not melting into the puddle, adding more rod will not solve the underlying problem.
Color is a clue, not a complete test
On stainless steel and some other alloys, bright straw or light gold colors can indicate better shielding than dark gray or black discoloration. Mild steel can show different surface colors, and a clean-looking bead can still have weak fusion. Use appearance together with bead shape, edge tie-in, continuity, and a suitable destructive test when the application requires proof of strength.
How to check your practice welds
Verification should be simple enough that you will actually do it after every practice session. Let the coupon cool naturally, brush away loose residue, and examine it under good light. Do not handle freshly welded metal without confirming that it is safe to touch.
For a flat bead, check whether the width is reasonably consistent and whether the edges blend into the base metal without a sharp groove. Look for craters at the stops, visible pinholes, trapped dark spots, cracks, or places where the bead merely sits on top of the surface. Run a fingertip near—not across—a cooled edge only if there are no sharp projections, and use a file or grinder to remove hazardous burrs.
Cutting a practice coupon across the bead and examining the cross-section can reveal penetration and fusion more clearly than the surface. A bandsaw, abrasive cutoff wheel, or other suitable method may be used only with appropriate machine guarding and personal protection. Do not infer strength from a surface inspection alone, and do not perform an informal bend or break test on an unknown alloy without understanding the hazards.
Check your result
A useful beginner checkpoint is three consecutive beads that look similar in width, have continuous edges, and stop without a large crater. Repeatability matters more than one attractive pass.
Troubleshoot common beginner TIG problems
Change one variable at a time when correcting a defect. If you change amperage, travel speed, arc length, gas flow, and filler technique together, you may produce a better bead without learning why it improved.
| What you see | Likely causes and first checks |
|---|---|
| Gray, black, or porous bead | Check surface cleanliness, gas supply, leaks, flow setting, torch angle, and arc length. Confirm that the cup is not blocked and that the post-flow protects the tungsten. |
| Bead is wide and overheated | Increase travel speed slightly, reduce amperage, or pause to let the coupon cool. Check that the arc is not too long. |
| Bead is narrow or does not fuse at the edges | Reduce travel speed slightly or increase heat in small increments. Make sure the puddle reaches both sides of the joint before adding filler. |
| Tungsten becomes contaminated | Stop welding, allow the electrode to cool, and regrind it. Avoid dipping the electrode into the puddle or touching it with filler rod. |
| Arc wanders or starts poorly | Inspect the grind direction and point, check the ground connection, and verify polarity and start settings. A damaged or contaminated tungsten may need replacement. |
When the tungsten touches the work
A contact can happen while you are learning, especially when the torch hand is unsupported. The contaminated tip may make the arc unstable and add tungsten particles to the weld. Stop rather than continuing with a dirty electrode; clean or regrind it, then inspect the puddle and coupon before restarting.
When the weld looks clean but the joint is weak
Surface appearance cannot confirm complete fusion or adequate penetration. Poor fit-up, insufficient heat, excessive travel speed, or directing the arc at only one piece can leave an attractive cap over an unfused joint. For anything that carries a person, supports a critical load, contains pressure, or affects safety, use qualified welding procedures and appropriate inspection rather than relying on beginner practice results.
Beginner TIG welding practice questions
These questions address common choices that affect a first practice session. The safest answer depends on the machine, material, thickness, and workspace, so use the equipment manual when its instructions differ from a general starting point.
Can I practice TIG welding without filler rod?
Yes. Autogenous beads, made without added filler, are useful for learning arc length, puddle control, and travel speed. They are practice exercises, not automatically suitable production welds; some joints require filler for design, strength, chemistry, or crack resistance.
What metal is easiest for a beginner to practice on?
Clean, identifiable mild steel is a practical starting material because it is widely available and does not require the AC balance used for aluminum. Stainless steel can also be welded with DC, but it shows heat discoloration readily and requires careful heat control and cleanliness.
Why does my TIG weld have holes in it?
Small holes usually indicate porosity caused by contamination or inadequate shielding. Check the metal and filler for oil, paint, moisture, or dirt; inspect the gas hose and connections; verify flow; and keep the torch close enough for the cup to cover the puddle without touching the work.
Should I use a foot pedal while learning?
A foot pedal can help you compensate for heat buildup and fit-up changes, but it adds another coordination task. If you have one, start with a fixed, conservative setting and use small pedal movements. You can also practice with fixed amperage to isolate torch and travel control.
How do I know when I am ready to weld a real project?
You are better prepared when you can repeat clean beads and simple joints on the same material and thickness, recognize common defects, and explain how your settings produced the result. Do not move directly from practice coupons to structural, pressure, automotive safety, or other critical work without suitable procedure guidance and inspection.
Build skill by repeating what you can measure
The most reliable way to learn how to practice tig welding is to make each session narrow and observable. Clean the material, confirm shielding gas and polarity, stabilize the torch, and practice a single variable before combining arc control, travel, and filler rod.
Keep a few representative coupons and note the material, tungsten, approximate settings, and what changed between attempts. When you can produce several similar beads and simple joints without contamination or obvious defects, move gradually to new thicknesses and positions. Keep safety limits in view: practice welds are learning tools, not proof that a joint is suitable for critical service.