How to TIG weld stainless steel sheet metal: A Beginner’s Guide
Thin stainless steel sheet can produce a clean, precise weld, but it gives beginners very little room for excess heat. A weld that looks acceptable at first can still contain burn-through, distortion, contamination, or a weak joint hidden beneath a dark heat-affected area. The good news is that the process becomes much more predictable when the material is clean, tightly fitted, and welded with short, controlled puddles.
This guide explains how to tig weld stainless steel sheet metal using a gas tungsten arc welding setup, commonly called TIG or GTAW. The method is especially useful for visible seams, food or laboratory equipment, small enclosures, and repairs where appearance and control matter.
You will learn how to choose compatible materials, prepare the joint, set up the torch and shielding gas, make tacks and short welds, and inspect the finished seam. The instructions assume a basic TIG machine and beginner-level practice on thin sheet; if the part is structural, pressure-containing, or safety-critical, stop and have a qualified welder establish the procedure.
At a glance
- Clean stainless steel and a tight joint are more important than adding lots of filler.
- Low heat, short weld segments, and pauses help prevent burn-through and distortion.
- A sound weld should be continuous where required, firmly bonded, and free of heavy black contamination or pinholes.
How to TIG weld stainless steel sheet metal
The most beginner-friendly approach is to use direct-current electrode-negative TIG, an argon shield, a sharpened thoriated-free tungsten such as 2% lanthanated, and a filler rod matched to the stainless grade when filler is needed. Begin with clean practice coupons of the same thickness as the project, because the correct amperage and travel speed depend strongly on thickness, joint type, and fit-up.
Tools you will need
- TIG welding machine with high-frequency start, foot pedal or fingertip amperage control, and DC output
- Argon cylinder, regulator, flowmeter, and suitable gas hose for shielding the weld
- GTAW torch with a small gas lens or standard collet body, cup, collet, and back cap
- 2% lanthanated tungsten electrode, sized to suit the sheet and current range
- Stainless steel filler rod matched to the base metal, when the joint requires filler
- Stainless-only wire brush, acetone or another approved degreaser, lint-free wipes, and clean gloves
- Clamps, copper or aluminum backing, and noncontaminating fixturing for holding the sheet
- Auto-darkening welding helmet, welding gloves, flame-resistant clothing, safety glasses, and hearing protection as needed
- Optional: foot pedal, purge equipment, and a temperature crayon or infrared thermometer for heat control
Step 1 Identify the stainless grade and joint design
Confirm the base metal grade if possible, along with its thickness and whether the joint is a butt, lap, corner, or fillet joint. Common austenitic grades such as 304 and 316 are often welded with 308L and 316L filler respectively, but the material supplier’s recommendation takes priority. Do not assume that every silver-colored sheet is weldable stainless; galvanized steel, plated steel, and unknown alloys require different precautions and procedures.
For thin sheet, a close-fitting butt joint with square edges is usually easier to control than a wide gap. A gap makes it easier to add filler but also increases the chance of burn-through. If the joint is part of a pressure vessel, railing, vehicle component, lifting device, or other safety-related assembly, use an approved welding procedure rather than relying on a general beginner method.
Step 2 Prepare a safe, clean welding area
Remove flammable materials from the work area, provide ventilation that carries welding fumes away from your breathing zone, and inspect the torch leads, ground cable, gas hose, and regulator. Stainless welding can produce irritating fumes, especially when the metal has coatings or residues. Never weld material that has unknown paint, solvent, oil, or chemical contamination until it has been properly identified and cleaned.
Wear a welding helmet with the appropriate shade for the current, safety glasses under the helmet, gloves, long sleeves, and nonflammable clothing. Keep the work clamped to a stable table, and make sure the work clamp contacts bright, clean metal. A poor ground can cause an unstable arc and encourage the welder to compensate with excessive heat.
Important
Do not weld stainless in a poorly ventilated enclosed space, and never use chlorinated solvents near the arc. Heat can convert chlorinated residues into highly hazardous gases. If ventilation, material identity, or fire safety is uncertain, stop before striking an arc.
Step 3 Clean the sheet and fit the joint
Remove grease and fingerprints with a clean degreaser and lint-free wipe, then let the surface dry fully. Use a dedicated stainless steel brush or abrasive that has never touched carbon steel. Carbon-steel particles embedded in stainless can later rust and can contaminate the weld.
Fit the pieces together so the edges meet evenly without steps, twists, or a large gap. Clamp the sheet firmly but leave enough access for the torch. Copper or aluminum backing can support the molten edge and draw away some heat, but do not use a backing material that traps gas or interferes with shielding.
After cleaning, avoid touching the joint with bare fingers. A clean joint should show bright, uniform metal, and the pieces should remain aligned when lightly pressed or clamped.
Step 4 Set up the torch, tungsten, and shielding gas
Grind the tungsten lengthwise to a smooth point using a dedicated wheel. For thin stainless sheet, a small lanthanated tungsten is generally easier to control than an oversized electrode. Keep the tip sharp and centered in the collet, and set the electrode stick-out conservatively so the gas cup can protect the arc and puddle.
Connect the torch to DC electrode negative and connect the work lead to the machine’s positive terminal unless the equipment manufacturer specifies otherwise. Set the post-flow long enough to keep shielding the tungsten and cooling weld metal after the arc stops. Begin with the machine manufacturer’s argon flow recommendation; excessive flow can create turbulence and pull air into the shield.
Use high-frequency start if available so the tungsten does not touch the work. If you must scratch-start, keep the tungsten from dragging across the stainless, because tungsten inclusions and scratches can weaken or discolor the weld. A useful way to approach how to tig weld stainless steel sheet metal is to check your progress after each stage.
Step 5 Choose a conservative starting amperage
Use the machine’s amperage guidance for the actual sheet thickness, then practice on a scrap coupon before welding the project. Thin stainless generally needs less current than thicker material, and a foot pedal or fingertip control makes it easier to reduce heat as the sheet warms. The exact setting changes with joint type, backing, fit-up, tungsten size, and travel speed, so treat a chart value as a starting point rather than a guarantee.
Set the machine for a small, stable arc and prepare filler within easy reach. For an autogenous weld, the edges are fused without filler, but adding a compatible filler rod can reinforce the joint and help bridge a very small fit-up variation. Do not use filler to compensate for a large gap or poor alignment.
Step 6 Make evenly spaced tack welds
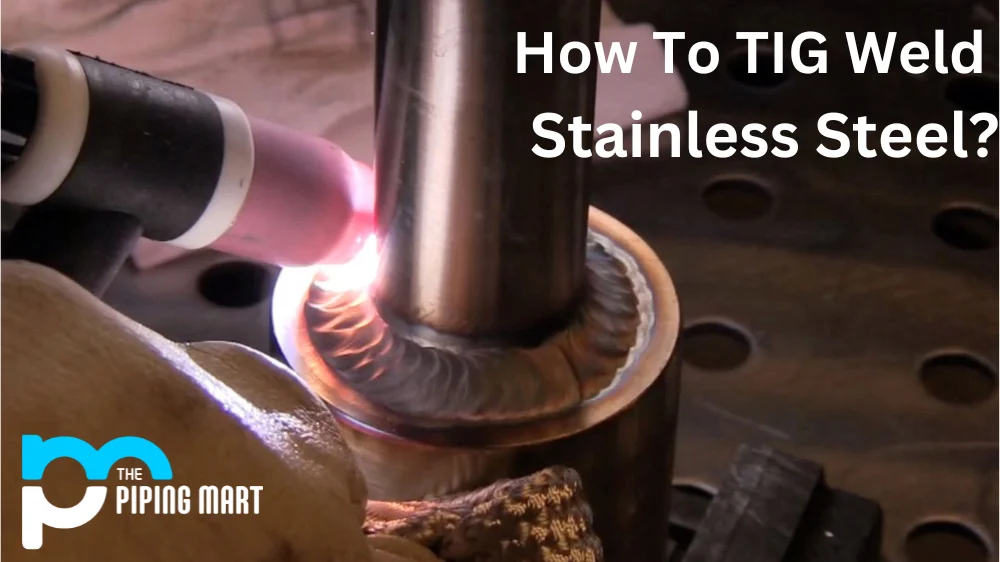
Hold the torch nearly perpendicular to the joint, with a short arc length and the gas cup close enough to shield the puddle without touching the sheet. Start the arc on the joint, form a small puddle, and release the heat promptly. Add a tiny amount of filler only if the joint design calls for it.
Place short tacks at the ends and then between them, alternating locations to distribute heat. Let each tack solidify before moving to the next area. The pieces should remain aligned, and the tacks should be small enough that they can be blended into the final pass rather than becoming large lumps.
If a tack immediately collapses the edge, the amperage is too high, the gap is too large, the travel is too slow, or the sheet is not adequately supported. Correct the fit or settings before continuing.
Step 7 Weld the seam in short, controlled sections
Start at a tack and move steadily along the joint, keeping the arc centered where the edges meet. Maintain a consistent torch angle and arc length; a long arc spreads heat and weakens shielding, while a wandering angle can pull the puddle to one side. If using filler, dip the rod into the front edge of the puddle without touching the tungsten.
For thin sheet, weld a short segment, release the pedal or lift the torch according to the machine’s controls, and allow the area to cool briefly while post-flow protects the tungsten. Continue from another tack or a cooler section rather than trying to force one uninterrupted pass across a long panel. This stitch-style approach reduces accumulated heat and distortion.
Watch the puddle rather than the bright arc alone. A controlled puddle should wet both edges and advance without suddenly enlarging. If the sheet turns dull red over a broad area, the panel is accumulating too much heat; reduce amperage, move faster, pause more often, or improve the backing and clamping.
Helpful tip
Keep a clean filler rod tip inside the shielding area whenever possible. If the rod touches the table, glove, or a dirty surface, cut off the contaminated end before feeding it into the puddle.
Step 8 Finish the last segment without leaving a crater
As the seam closes, reduce current gradually if your machine allows it rather than abruptly breaking the arc. A gradual taper fills the end crater and lowers the chance of a small shrinkage crack or pinhole. Keep the torch in place during post-flow until the tungsten and end of the weld are protected from air.
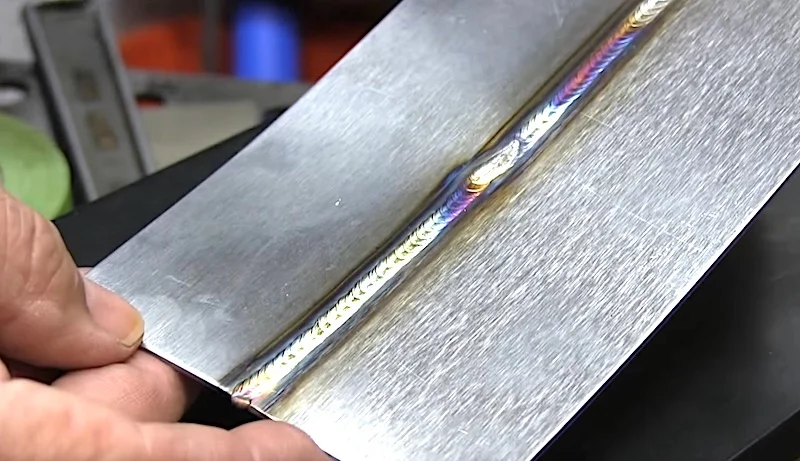
A finished bead should be relatively even, with smooth transitions at the ends and no obvious holes. Some light straw or pale gold color can occur from heat, but heavy gray, brown, blue, or black discoloration suggests inadequate shielding, excessive heat, contamination, or an overly long arc.
What makes stainless sheet different from mild steel?
Stainless steel retains heat differently from mild steel and can distort quickly because thin sheet has little mass to absorb the energy. Its corrosion resistance also depends on keeping the surface clean and limiting contamination. These characteristics explain why a weld that is mechanically connected can still be a poor stainless weld if it is overheated or covered with heavy oxide.
Understanding how to tig weld stainless steel sheet metal also means recognizing the limits of the method.
Shielding gas and back purging
Argon protects the visible weld pool and hot tungsten from oxygen in the air. For a one-sided joint where the back of the weld will be exposed to air, the back side can oxidize heavily while the front looks acceptable. A purge of argon behind the joint may be required for sanitary tubing, full-penetration butt joints, and corrosion-sensitive service.
Back purging is not automatically necessary for every lap or cosmetic sheet joint, but it becomes important when the reverse side must remain smooth, clean, and corrosion resistant. If you cannot determine whether the application requires it, consult the material or equipment specification before welding.
Filler metal and contamination control
Match filler to the base metal and service requirements. A filler rod that is convenient but chemically mismatched can reduce corrosion resistance or create an unsuitable joint. Store stainless filler separately, keep it dry and clean, and do not use a carbon-steel brush or grinding wheel on the weld area.
When the edges fit tightly, a small amount of filler is often enough. Excessive filler enlarges the bead, increases heat input, and can make a thin panel buckle. The goal is a fully fused joint with an appropriate profile, not the largest possible bead.
How to check the completed weld
Let the part cool naturally before judging its final shape. Do not quench a hot stainless sheet with water, because rapid cooling can increase distortion and may create an undesirable thermal shock. Once cool, clean loose residue without grinding away evidence of poor fusion.
Inspect the appearance and alignment
Look along the panel from several angles. The sheet should remain reasonably flat and the joint should not have pulled into a pronounced ridge, trough, or angle. A sound surface weld is generally continuous where specified, has a consistent width, and transitions smoothly into both pieces.
Small amounts of pale straw color may be acceptable for some applications, but dark, rough oxidation is a reason to investigate shielding and heat control. Look for undercut, which is a groove melted into the edge beside the bead, as well as overlap, crater cracks, pinholes, trapped tungsten, and areas where one edge was never fused.
Use a simple practice-coupon test
Before trusting a new setting on the actual part, weld a coupon with the same thickness and joint arrangement. After it cools, examine both sides and, when appropriate for noncritical practice material, cut or bend the coupon to reveal whether the weld penetrated and bonded the edges.
Do not treat a visual check or an informal bend test as proof that a pressure boundary or structural weld is safe. Critical work may require qualified procedures, certified personnel, dye penetrant inspection, radiography, or other testing selected by an engineer or applicable code.
Check your result
Success is more than a shiny bead: the edges should be fused, the back side should be suitable for the application, the sheet should remain aligned, and the weld should be free of visible cracks or pinholes.
Common TIG problems on thin stainless sheet
Most beginner defects have a small number of causes. Change one variable at a time when practicing so you can tell which adjustment improved the weld.
| What you see | Likely cause and correction |
|---|---|
| Burn-through or a sagging hole | Too much heat, a large gap, slow travel, or insufficient backing. Reduce current, tighten the fit, move steadily, and use backing where suitable. |
| Dark gray or black bead | Weak gas coverage, drafts, contaminated metal, excessive arc length, or poor post-flow. Check the hose and cup, clean again, shorten the arc, and shield the work area. |
| Porosity or tiny holes | Oil, moisture, dirty filler, gas turbulence, or a leak. Clean the joint and rod, inspect connections, and avoid excessive gas flow. |
| Weld sits on top without bonding | Travel is too fast, current is too low, or the torch is not aimed at both edges. Slow slightly or increase heat in small increments. |
| Sheet pulls out of alignment | Heat is concentrated in one area. Add more small tacks, alternate sections, clamp more effectively, and pause to let the panel cool. |
| Tungsten becomes contaminated | The electrode touched the puddle or filler, or shielding stopped too soon. Stop, regrind the tungsten lengthwise, and correct torch control or post-flow. |
Beginner FAQs about TIG welding stainless sheet
Can I TIG weld stainless steel without filler rod?
Yes, an autogenous weld can work when the edges fit tightly and the joint does not need added reinforcement. Filler is usually preferable when the joint has a small controlled gap, needs a specific weld composition, or must meet a documented procedure.
Should I use AC or DC for stainless steel?
Use DC electrode negative for most stainless steel TIG welding. AC is mainly selected for aluminum and magnesium because it helps break up their tenacious oxide layer; it is not the normal choice for stainless sheet.
Why does my stainless weld turn blue?
Blue color usually indicates significant heat tint or oxidation. It can result from excessive heat, slow travel, an overly long arc, poor gas coverage, drafts, or contamination. The acceptable color depends on the application, but heavy discoloration should not be ignored where corrosion resistance matters.
Do I need a gas lens for thin stainless?
No, a standard torch setup can work, but a gas lens often provides smoother shielding and makes it easier to protect a small puddle with a short arc. It is helpful rather than an absolute requirement.
Can I weld stainless sheet with a MIG welder instead?
Often, yes, if the machine, wire, shielding gas, and transfer mode are suitable for the thickness and joint. MIG can be faster, but TIG generally offers finer control and a cleaner appearance on thin visible sheet. Neither process removes the need for correct fit-up, cleaning, ventilation, and inspection.
Finish with a controlled, inspectable stainless weld
Learning how to tig weld stainless steel sheet metal is mainly an exercise in heat control and contamination control. Use a tight, clean joint; DC electrode-negative TIG; appropriate stainless filler; stable argon coverage; and small, well-spaced tacks. Short weld sections and cooling pauses help preserve the sheet’s shape while reducing burn-through.
Practice on matching coupons before committing to the finished part, then inspect both the weld and the surrounding metal. If the work is structural, pressure-containing, corrosion-critical, or beyond your ability to verify, stop and use a qualified welder or approved welding procedure rather than relying on appearance alone.