How to Pass a MIG Welding Test: A Practical Step-by-Step Guide
Pass a MIG welding test by following the procedure exactly, producing clean consistent welds, and meeting the test’s visual and bend or break requirements.
How to pass a mig welding test depends on more than making a weld that looks acceptable. You must demonstrate control over the machine, joint fit-up, gun movement, arc length, travel speed, and safety practices while working within the examiner’s instructions.
A simple rule has meaningful limits there is no universal amperage wire speed travel angle or bead shape that guarantees a passing result The material thickness joint position.
- ✓Read the test instructions and identify the material, position, joint design, acceptance criteria, and allowed cleaning methods before striking an arc.
- ✓Use clean metal, accurate fit-up, correct polarity, suitable shielding gas, and settings that produce controlled penetration without excessive heat.
- ✓Maintain a consistent work angle, travel angle, arc length, and travel speed; most visible defects come from inconsistency.
- ✓Inspect the weld for profile, fusion, starts and stops, undercut, porosity, cracks, overlap, and spatter before presenting it.
How to Pass a MIG Welding Test?
Before touching the machine determine what the examiner is evaluating A welding test may assess a single fillet weld a groove weld or several joints in a specified.
Ask for the test procedure rather than relying on assumptions Confirm the base metal type and thickness joint preparation root opening backing requirements welding position wire classification shielding.
- Joint requirements: Check bevel angle, land, root gap, backing, tack-weld rules, and the required weld size.
- Process limits: Verify wire diameter, polarity, transfer mode, shielding gas, and whether short-circuit, spray, or pulse transfer is specified.
- Inspection method: Know whether the weld will be judged visually, destructively, nondestructively, or by a combination of methods.
- Position and progression: Identify flat, horizontal, vertical-up, vertical-down, or overhead work and whether a particular progression is required.
Visual acceptance is not the whole test
Visual inspection commonly focuses on weld size, contour, uniformity, undercut, overlap, cracks, craters, excessive spatter, arc strikes, and incomplete filling. The exact limits vary by procedure, employer, code, or test administrator, so do not treat a general appearance rule as a substitute for the written requirements.
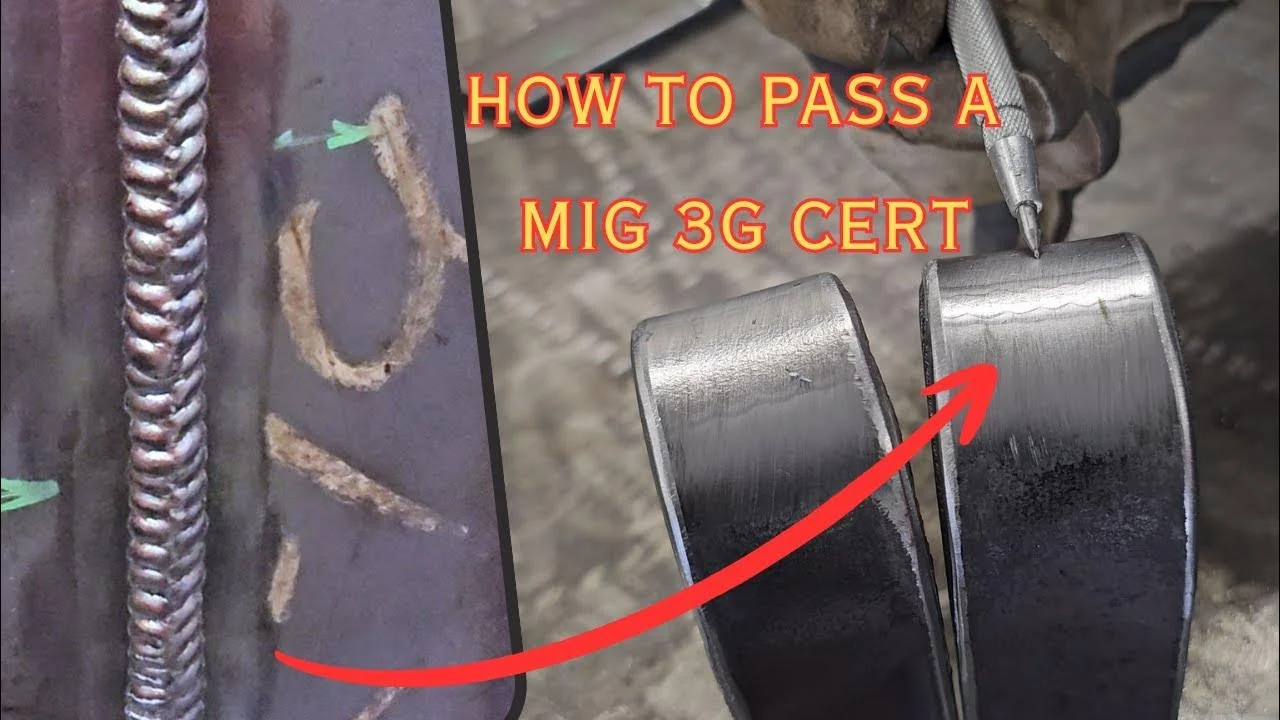
Destructive testing reveals problems that appearance can hide. A bend coupon can expose lack of fusion, slag-like inclusions from contamination, porosity, cracks, or inadequate penetration. The best preparation therefore combines a neat surface with sound welding fundamentals; cosmetic cleanup cannot repair a defective weld underneath.
Read the joint before choosing settings
A tight root opening and a wide root opening require different control. A narrow gap may make penetration difficult, while an excessive gap can cause burn-through, sagging, or a need for multiple passes. Thick material may require preheating, multiple layers, or a controlled interpass temperature if the procedure specifies them.
Joint position also changes the way gravity affects the puddle Flat welding allows a larger molten pool whereas vertical and overhead work demand a smaller more controlled puddle.
Prepare the Machine, Work Area, and Test Coupon
Good preparation removes variables before welding begins. Inspect the power source, gun, liner, contact tip, nozzle, ground lead, gas hose, regulator, and wire path. A partially blocked nozzle, worn tip, poor ground, or restricted liner can create unstable arc behavior that looks like a technique problem.
Clean the work area and secure the coupon so it cannot shift during tacking or welding Remove oil paint heavy mill scale rust moisture and cutting residue from.
- Electrical path: Clamp the work lead to clean metal close enough to the joint for a stable return path.
- Consumables: Confirm the wire classification, diameter, spool direction, contact-tip size, and wire condition.
- Shielding: Check gas type, flow, hose connections, regulator behavior, and nozzle cleanliness.
- Coupon condition: Remove contamination, verify dimensions, and mark the welding direction if that prevents confusion.
Choose the right wire and polarity
Solid MIG wire normally uses electrode positive with the shielding gas specified for that wire Flux-cored wire may require a different polarity depending on its classification Never guess.
Make sure the contact tip matches the wire diameter and is not badly worn A loose or oversized tip can cause inconsistent electrical contact while a tip that.
Set shielding gas and airflow correctly
Shielding gas protects the molten weld from atmospheric contamination. Too little gas can cause porosity and an unstable arc, but more gas is not automatically better. Excessive flow can create turbulence that draws surrounding air into the shielding zone, especially around drafts or an overly open nozzle.
Use the flow range specified for the equipment and gas combination, then protect the work from fans, open doors, and strong ventilation currents without compromising required shop ventilation. Do not weld in an enclosed area unless the facility provides appropriate controls for fumes, oxygen levels, and fire hazards.
Set the machine from a known starting point
Use the machine s chart or the approved procedure as your starting point Voltage affects arc length and bead shape while wire-feed speed is closely related to amperage.
Run a short bead on matching scrap when the test rules permit it. Listen to the arc, watch the puddle, and examine the bead. A steady sound and controlled puddle are useful clues, but the finished appearance and penetration matter more than trying to imitate a particular sound.
Build a Reliable MIG Welding Technique
Once the coupon and machine are ready concentrate on repeatable body mechanics Sit or stand so your hand can travel smoothly keep your wrist supported when possible and.
For anyone learning how to pass a mig welding test, consistency is more valuable than dramatic speed. The goal is to place the arc where it belongs, maintain a predictable molten pool, and move far enough to avoid excessive buildup without outrunning the fusion zone.
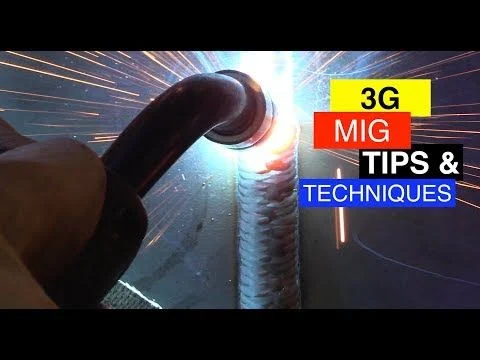
- Work angle: Keep the gun centered appropriately over the joint so both sides receive useful heat.
- Travel angle: Use a modest push or pull angle that matches the procedure and preserves shielding coverage.
- Stickout: Maintain a consistent electrode extension rather than allowing the wire to lengthen and shorten randomly.
- Puddle control: Watch the front edge of the puddle, not only the bright arc, and adjust speed before the pool becomes unmanageable.
Work angle, travel angle, and gun distance
The work angle describes how the gun is oriented across the joint while the travel angle describes its lean in the direction of movement On a fillet weld.
Keep the contact-tip-to-work distance within the range appropriate for the procedure and wire Excessive stickout preheats the wire before it reaches the arc and can reduce effective penetration.
Push versus pull
A slight push angle often gives a broader flatter bead and a clear view of the leading edge A pull angle can produce a narrower more penetrating profile.
Follow the required technique if one is specified. If it is not specified, choose the direction that gives stable shielding, adequate fusion, and good visibility, then keep it consistent across the test coupon. Changing direction halfway through can create an obvious profile difference.
Control travel speed and manipulation
If you travel too slowly the puddle grows the bead becomes wide and convex and heat accumulates This can cause burn-through on thin material excessive reinforcement undercut at.
Use the puddle as your guide A small controlled weave may be useful for covering a joint or pausing briefly at the toes but unnecessary side-to-side motion can.
Start, stop, and restart deliberately
Starts and stops are frequent failure points because the metal is cold at the beginning and the crater is vulnerable at the end Establish the arc smoothly pause.
If a restart is allowed or required, clean the stop area as instructed, overlap the previous bead enough to remelt the end, and avoid leaving a lump. Do not strike an arc outside the permitted weld area; an arc strike can damage the coupon and may itself be a rejection.
Manage Joint Fit-Up and Welding Position
Even excellent gun control cannot compensate for an inconsistent joint. Before tacking, measure or visually verify the root opening, alignment, bevel, and land. Tacks should hold the parts securely without creating large obstructions that the arc must jump over.
Fit-up affects heat flow A larger gap increases the amount of filler and control required while a tight or closed root may prevent the arc from reaching the. This distinction matters when answering “how to pass a mig welding test”.
- Alignment: Keep the plates flush or within the specified offset; excessive mismatch changes the effective joint angle.
- Root opening: Maintain the required gap along the test length instead of allowing it to close or widen between tacks.
- Tack placement: Use sound, appropriately sized tacks that do not contain cracks or interfere with the root pass.
- Access: Position the coupon so the gun, helmet, and body remain stable throughout the weld.
Flat and horizontal positions
Flat welding is usually the most forgiving because gravity helps keep the molten metal in the joint That does not mean it is effortless excessive heat or slow.
Horizontal fillets require attention to the upper toe, where molten metal can sag away from the joint or leave undercut beneath the top plate. A controlled puddle, suitable travel speed, and modest manipulation help distribute filler without letting gravity determine the bead shape.
Vertical welding
Vertical-up welding generally requires a smaller puddle and careful pauses at the toes so the weld does not slump The exact motion depends on the joint wire and.
Vertical-down travel can be faster and may be permitted on thinner material or specific procedures, but it is not interchangeable with vertical-up welding. It can reduce penetration if used where deeper fusion is required. Follow the designated progression, especially when the coupon will be destructively tested.
Overhead welding
Overhead work demands a small controlled puddle because gravity pulls molten metal away from the joint Excessive wire-feed speed a long arc or slow travel can cause drips.
Practice Before Welding the Test Coupon
Practice should reproduce the test rather than merely produce attractive beads on flat scrap. Use the same or similar material thickness, joint design, position, wire, gas, and settings. If the test is a vertical fillet, a flat bead on thick plate provides limited evidence that your technique is ready.
Make one change at a time If you alter voltage wire speed travel speed gun angle and stickout simultaneously you will not know which adjustment improved or harmed.
- Repeatability: Produce several beads with similar width, reinforcement, starts, stops, and toe appearance.
- Position control: Practice in the exact orientation and progression required for the test.
- Defect recognition: Learn to identify porosity, undercut, overlap, lack of fusion, excessive convexity, and burn-through.
- Recovery: Practice stopping safely, cleaning the joint, and restarting without creating a crater or cold lap.
Use bead appearance as a diagnostic tool
A bead that is tall and narrow may indicate insufficient voltage excessive travel speed poor wetting or an unfavorable angle A bead that is broad and flat can.
Undercut appears as a groove melted into the base metal beside the weld toe It can result from excessive heat high travel speed a long arc or inadequate.
Practice the test sequence, not just the arc
Rehearse how you will inspect the coupon set the ground arrange the gun cable position your body tack the parts clean between passes if required and present the.
Build in a pause before welding. Check helmet shade, gloves, sleeves, ventilation, gas flow, polarity, wire feed, joint cleanliness, and machine settings. This short routine is more reliable than depending on memory under pressure.
Inspect the Weld and Troubleshoot Defects
After welding, let the coupon cool according to the instructions and handle it safely. Do not grind, wire-wheel, or disguise a defect unless the procedure expressly allows that operation. Clean only as permitted, then inspect the entire weld under good lighting.
Look at the surface from several angles Check the weld size and profile both toes the root or exposed side where visible starts and stops arc strikes spatter.
- Porosity: Investigate gas flow, drafts, leaks, nozzle blockage, excessive stickout, contamination, and damp or dirty material.
- Undercut: Check excessive voltage, long arc length, fast travel, poor angle, and inadequate control at the toes.
- Lack of fusion: Review joint cleanliness, heat input, travel speed, arc placement, and whether the puddle reached both sides.
- Burn-through: Reduce excessive heat or slow wire delivery as appropriate, tighten control of the gap, and increase travel speed only when fusion remains sound.
Porosity and unstable shielding
Porosity can appear as small surface holes or remain hidden inside the weld Check that the gas cylinder contains the intended gas the regulator is functioning the hose connections are tight and the nozzle is not blocked by spatter Strong drafts can disperse shielding even when the flow meter appears.
Contamination is another common cause. Clean the base metal and keep the nozzle close enough for protection without dragging it through the puddle. Excessive stickout can also move the arc outside the most effective shielding zone and make the weld appear harsh or inconsistent.
Lack of fusion and incomplete penetration
Lack of fusion means the weld metal did not properly bond to the base metal or a previous pass It can result from low heat fast travel an.
Correct the underlying cause instead of simply adding another cosmetic layer. A wider weave may hide the joint while leaving unfused edges underneath. Often the better correction is to improve cleaning, center the arc, adjust the procedure-approved settings, and slow enough to let the puddle contact both sides.
Cracks, craters, and excessive reinforcement
Any crack is serious and normally requires rejection or removal according to the test rules Cracks may develop at a crater in a rigid joint or because of.
A deep crater at the termination can become a stress concentration and may crack as it cools Fill the crater with controlled wire movement before breaking the arc.
Work Safely Under Test Conditions
Safety is part of professional welding performance, not a separate concern. Wear the required welding helmet with the proper shade, flame-resistant clothing, gloves, sturdy footwear, and hearing or respiratory protection when the work environment calls for it. Keep exposed skin covered because arc radiation can burn skin and eyes.
Control fire hazards before starting Remove combustible materials shield nearby workers from arc flash keep a suitable extinguisher accessible and inspect the area for hot metal that could.
- Ventilation: Use effective local exhaust or approved ventilation and avoid breathing the plume directly.
- Hot work: Assume the coupon, table, slag-like spatter, and nearby tools remain hot after the arc stops.
- Electrical safety: Keep gloves, leads, and connections dry and inspect cables for damage.
- Instruction priority: Follow the test site’s safety rules and stop if conditions become unsafe or unclear.
Stay calm without rushing
Test pressure often changes otherwise reliable habits. Rushing tends to shorten stickout, increase travel speed, disturb the gun angle, and encourage skipped checks. Use a deliberate sequence: inspect, set, position, tack, verify, weld, finish, and inspect.
If the arc becomes unstable, stop safely and diagnose it rather than compensating with random hand movements. A feeding fault, loose ground, empty gas cylinder, or blocked nozzle cannot be solved by forcing the gun through the joint.
FAQ: How to Pass a MIG Welding Test
What is the most important skill in a MIG welding test?
Consistent control is usually the most important skill: stable arc length, correct gun angle, steady travel speed, and accurate puddle placement. A technically correct setting is not enough if the welder cannot maintain it along the full joint.
Should I push or pull the MIG gun during the test?
Use the direction required by the procedure. If no direction is specified, choose the method that provides stable shielding, adequate fusion, good visibility, and a consistent bead, then avoid switching techniques during the weld.
How do I know whether my MIG settings are correct?
Start with the approved procedure or machine chart and verify the result on matching scrap when permitted. Look for a stable arc, controlled puddle, suitable wetting, correct bead profile, and evidence of fusion; do not judge settings by sound alone.
Why did my test weld have holes or porosity?
Check for inadequate or turbulent shielding gas, drafts, leaks, a dirty nozzle, excessive stickout, contaminated base metal, or damp consumables. Also verify that the gas and polarity match the wire and procedure.
How can I prevent undercut on a test coupon?
Keep the arc directed correctly into the joint, maintain an appropriate arc length, avoid excessive voltage, and control travel speed. A brief, controlled pause at the toes may help, especially in a position where gravity pulls the puddle away.
Can I grind a bad area and weld over it?
Only if the test procedure permits repair, grinding, or removal of defective weld metal. Many qualification tests restrict those actions, and hiding a defect can cause rejection or violate the test rules. Ask before modifying the coupon.
Is a pretty weld guaranteed to pass?
No. Surface appearance cannot prove internal fusion, penetration, or freedom from hidden porosity and cracks. Visual quality matters, but the coupon must also satisfy whatever destructive or nondestructive examination the test specifies.
What should I do immediately before the test starts?
Review the procedure, inspect the equipment, confirm polarity and gas, clean and measure the joint, check your protective equipment, and take a stable welding position. If any requirement is unclear, ask the examiner before striking the arc.
Conclusion
Learning how to pass a mig welding test is mainly an exercise in preparation and repeatable control Understand the acceptance criteria match your practice to the actual joint.
The major limitation is that no general technique replaces the specific test procedure. Follow the examiner’s instructions, respect safety requirements, and never sacrifice ventilation, fire prevention, or protective equipment for speed.
Before test day, complete several practice welds on the same joint and position, record the approved settings, and inspect every start, stop, toe, and root area for defects.