How to MIG Weld Thin Metal: Setup Steps and Troubleshooting Tips
Use small-diameter solid wire, low heat, short welds, and a fast controlled travel speed to prevent burn-through on thin metal.
Most beginners trying to learn how to mig weld thin metal are not struggling with the arc itself; they are trying to keep a small amount of steel from becoming a hole. Thin sheet can look acceptable for several seconds and then suddenly warp, discolor, or melt away when heat accumulates.
Your goal is a sound joint with enough penetration not the largest or hottest bead A stable arc clean metal correct polarity tight fit-up and brief welds usually.
This guide explains how to choose wire and shielding gas set voltage and wire-feed speed prepare and clamp the joint control heat with stitch techniques and diagnose porosity.
- ✓Use the smallest practical solid wire and a shielding-gas setup designed for mild steel.
- ✓Start with conservative settings, then tune the arc on scrap of the same thickness.
- ✓Control heat through short welds, alternating locations, tight fit-up, and adequate cooling time.
- ✓Fix the cause of burn-through or poor fusion instead of compensating with random voltage changes.
How to MIG Weld Thin Metal Without Burning
Thin steel is commonly considered material around 18 gauge through 24 gauge, although the workable range depends on the machine, joint design, position, and welder control. Even a capable MIG machine can burn through sheet if the edges are rusty, separated, sharply pointed, or exposed to a continuous bead.
The process is a balance between arc energy and travel speed. More voltage and wire feed generally add heat and deposition, while a faster travel speed reduces heat per inch. The right result is a small, consistent bead that wets both sides of the joint without excessively flattening the surrounding sheet.
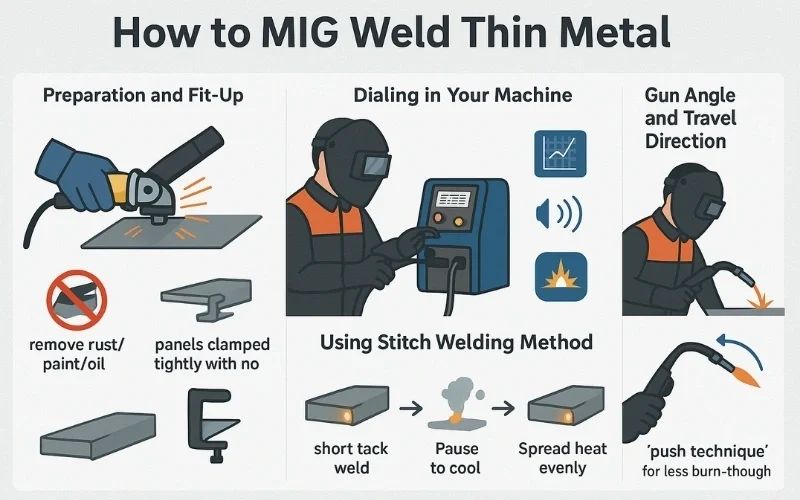
- Material thickness: Set up using a clean offcut that matches the actual work, not a much thicker test plate.
- Joint gap: Close-fitting edges need less filler and heat than a wide opening.
- Heat pattern: Several short welds usually protect thin sheet better than one uninterrupted pass.
- Bead shape: A narrow, even bead is generally preferable to a tall, wide mound.
Before striking an arc, remove paint, oil, mill scale, rust, and galvanizing from the weld area. Cleaning should extend slightly beyond the joint because contamination near the arc can create porosity or unstable shielding.
Choose the right wire and gas
For thin mild steel solid ER70S-6 wire is a common choice because it runs well on clean or lightly oxidized steel A small diameter such as 0 023.
A mixture of argon and carbon dioxide often a commonly available 75 percent argon and 25 percent carbon dioxide blend generally produces a smoother short-circuiting arc on mild.
Set polarity and consumables correctly
Solid MIG wire for mild steel normally runs with direct current electrode positive, meaning the gun is connected to positive and the work clamp to negative. Confirm the machine’s diagram before welding because incorrect polarity can cause an erratic arc, excessive spatter, and poor penetration.
Use the correct contact tip for the wire diameter and keep the gun liner drive rolls and cable in good condition A worn tip or slipping drive roll.
Machine Setup for Thin Sheet MIG Welding
Good settings are a starting range not a universal formula Machines differ in output calibration inductance and low-amperage behavior while a butt joint behaves differently from a lap.
For thin steel select short-circuit transfer if your machine offers process choices This low-energy transfer mode is suited to thinner material because the wire repeatedly contacts and breaks.
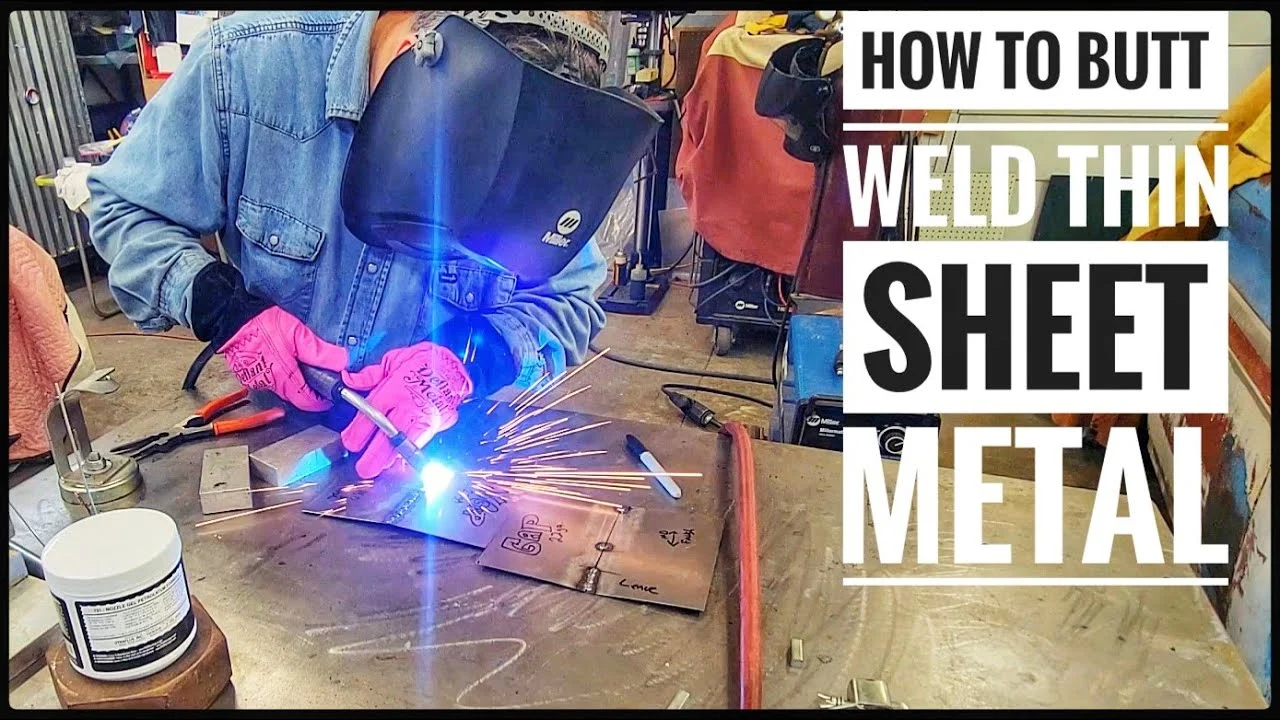
- Wire diameter: Prefer small solid wire when the machine can feed and stabilize it correctly.
- Gas flow: Use enough shielding for the gun and environment, but avoid excessive flow that can create turbulence.
- Voltage: Start at the lower end of the recommended range and raise it only when the arc or fusion requires it.
- Wire-feed speed: Adjust until the arc sounds consistent rather than relying on a dial number alone.
Use the machine chart, then tune by arc behavior
Voltage controls arc length and strongly influences bead shape Wire-feed speed controls how quickly filler enters the arc and on many machines also changes amperage If the wire-feed.
Make a short test weld and listen A stable short-circuiting arc often sounds like a consistent frying or sizzling noise although sound varies by machine and gas Do.
Starting ranges and test procedure
Exact settings must come from your equipment and consumables but thin mild steel commonly calls for the lower portion of a machine s chart For example a small-wire.
- Cut two pieces of matching scrap and prepare them exactly like the real joint.
- Clamp them so the fit-up and gap represent the work you intend to weld.
- Begin with the manufacturer’s thin-material setting for your wire, gas, and polarity.
- Make a short tack or bead, then inspect the front, rear, and edges.
- Change one control at a time and record what improved or worsened.
If the wire repeatedly stubs into the metal slightly increase voltage or reduce wire-feed speed If the arc is long and harsh with a thin undercut bead reduce.
Gas flow and wind protection
Shielding gas prevents atmospheric oxygen and nitrogen from entering the molten pool Too little gas can cause porosity while too much can draw air into the shield through.
Keep the nozzle clean and free of spatter, and check for leaks at the regulator, hose, fittings, and gun connection. Never use a fan across the weld zone. If outdoor welding is unavoidable, a proper wind screen may help, but a draft can still make gas-shielded MIG unreliable.
Joint Preparation, Fit-Up, and Heat Control
Many thin-metal failures begin before welding. A joint that is dirty, poorly supported, or separated by a large gap forces the arc to bridge empty space. The edges then absorb heat unevenly, and the unsupported molten metal drops through before a useful bead can form.
For a butt joint bring the edges together as evenly as practical A tiny consistent gap can help the arc reach both edges but a large or changing.
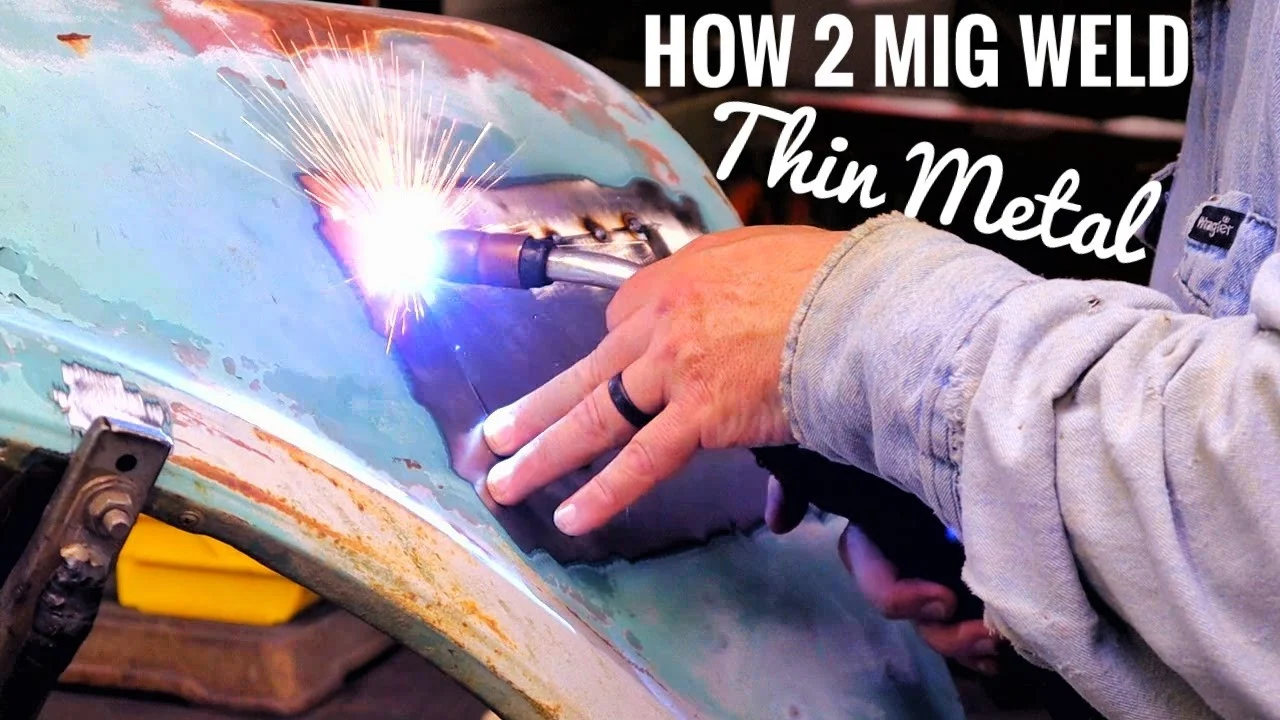
- Edge condition: Remove sharp burrs and grind away coatings near the weld zone.
- Clamping: Hold the pieces flush without creating a heavy heat sink that distorts the joint.
- Gap consistency: Correct wide openings before changing machine settings.
- Access: Position the joint so your hand, gun, and eyes can stay steady throughout the weld.
Use tacks to lock alignment
Place small tacks at the ends and then between them spacing the locations so the panels cannot pull apart as heat builds Allow each tack to cool enough.
Do not make oversized tacks that become difficult to blend. A tack should hold alignment while adding as little heat as practical. If a tack has a sharp crater or poor tie-in, clean or reshape it before welding across it.
Short welds, skip welding, and stitch patterns
A continuous bead is often the wrong technique for light sheet. Use short welds—sometimes called stitch welds—then move to a cool section. The exact length depends on thickness and joint design, but brief trigger pulls are safer than holding the trigger until the entire panel turns hot.
Skip welding means placing welds in separated locations then returning to fill the gaps after the panel cools On a long seam weld a short segment near one.
For a visible panel the best pattern may depend on appearance and distortion requirements Do not quench a hot weld with water unless the material design and procedure. This distinction matters when answering “how to mig weld thin metal”.
Gun angle, travel speed, and puddle size
Keep a consistent travel angle and move fast enough that the puddle remains small A slight work or travel angle can help you see the leading edge but.
Use the puddle as your guide If it grows wider turns excessively bright or begins to sag release the trigger and let the area cool If the wire.
- Watch the leading edge: Aim your attention where the arc is melting the base metal, not only at the finished bead.
- Keep moving: Dwelling at the end of a tack is a common cause of edge burn-through.
- Change locations: Alternating weld positions gives earlier sections time to cool.
How to MIG Weld Thin Metal With Different Joint Types
The joint changes how heat leaves the weld and how much filler is needed. A method that works on a supported lap joint may fail on a zero-gap butt joint because the edges have less mass and no backing beneath the puddle.
When deciding how to mig weld thin metal, first identify whether you need structural strength, an airtight seam, cosmetic continuity, or simply panel alignment. That objective affects bead length, backing, access, and how much finishing is acceptable.
- Butt joint: Clean, close, evenly aligned edges are essential; short tacks and careful heat control are usually necessary.
- Lap joint: The overlap supports the puddle, but excessive heat can burn the top sheet or leave an unsealed corner.
- Corner joint: Heat can concentrate at the edge, so brief welds and a controlled arc are important.
- Patch repair: A close-fitting patch usually succeeds more reliably than a large patch forced into a distorted opening.
Butt welding sheet metal
Trim both edges so they meet evenly and remove paint from both sides where possible Tack frequently enough to hold alignment then weld short alternating sections If the.
Backing is not a substitute for correct settings. Keep the backing tight against the underside and avoid trapping air or debris at the joint. After welding, inspect for a continuous connection and gently dress high spots rather than grinding deeply into the thin base metal.
Lap and corner joints
On a lap joint aim the arc so both sheets receive heat and the bead wets into the upper and lower edges If the bead sits only on the top sheet.
For outside corners, avoid pointing the arc directly into the sharpest edge for too long. Start slightly toward the heavier side when appropriate and keep the puddle moving across both faces. Corners can become hot quickly because the edge presents little metal to absorb energy.
Troubleshooting Thin-Metal MIG Welding Problems
Diagnosis is easier when you change one variable at a time. Randomly increasing voltage, wire speed, and travel speed can hide the original problem and make the next weld harder to interpret.
Inspect the surface, bead edges, underside, and sound of the arc. A defect may originate in preparation, gas coverage, machine setup, technique, or the material itself. The table below provides a practical first response, but always verify the result on scrap before returning to the finished part.
| Problem | Likely causes | First checks |
|---|---|---|
| Burn-through | Too much heat, wide gap, slow travel, long trigger pull | Shorten welds, lower energy, close the gap, move faster |
| Wire stubbing | Wire feed too high for voltage, poor contact, excessive stickout | Check tip and liner, shorten stickout, tune voltage and feed |
| Porosity | Wind, leaks, dirty metal, blocked nozzle, insufficient gas | Clean joint, inspect gas system, shield the work area |
| Poor fusion | Travel too fast, low heat, poor angle, surface contamination | Clean edges, slow slightly, improve aim, raise energy cautiously |
| Excessive spatter | Wrong polarity, unstable settings, poor gas, long arc | Verify polarity, tune controls, check nozzle and shielding |
| Warping | Continuous bead, uneven restraint, heat concentration | Use skip welding, alternate locations, improve clamping |
Burn-through and crater holes
Burn-through occurs when the molten pool becomes larger than the remaining sheet can support. Stop the arc immediately rather than trying to fill a growing hole with more heat. Let the area cool, clean the edges, and reassess the gap and settings.
A small hole can sometimes be repaired by bridging its perimeter with brief trigger taps, allowing cooling between taps. However, repeated repairs may leave brittle, overheated edges. For a panel or safety-related component, cutting back to sound metal and fitting a properly shaped patch is often more dependable.
Porosity, black soot, and pinholes
Porosity often appears as pinholes in the bead or as cavities revealed by grinding. Check for drafts first, then inspect gas flow, hose connections, nozzle blockage, and the condition of the work surface. Oil, moisture, paint, and rust can release gas into the weld.
Do not simply increase gas flow to a very high setting. Turbulent flow can pull surrounding air into the shielding envelope. Clean the joint again, keep the nozzle unobstructed, and make sure the gun is close enough and positioned consistently.
Cold lap and lack of fusion
A bead can look smooth while failing to fuse with one or both edges This may happen when travel speed is too fast the arc is aimed incorrectly.
Improve preparation and gun control before making a large power increase. On very thin metal, a small increase in energy combined with a shorter weld may provide better fusion than a slow continuous pass that overheats the panel.
Warping and panel distortion
Sheet metal expands when heated and contracts as it cools. Because the weld zone shrinks, a long bead can pull the panel toward the seam. Clamps may limit movement during welding, but excessive restraint can also concentrate stress or cause the sheet to buckle beside the clamps.
Reduce total heat, distribute welds, and allow cooling. If appearance matters, plan the weld sequence before starting and avoid chasing every slight low spot with additional metal. Grinding and rewelding can create more distortion than the original imperfection.
Safety and Quality Checks
MIG welding thin metal still produces intense ultraviolet light, hot spatter, fumes, and electrical hazards. Remove flammable materials, protect nearby people from arc flash, and wear a properly rated welding helmet, gloves, nonflammable clothing, and closed footwear. Ventilation must control fumes without creating a draft across the shielding gas.
Be especially cautious with painted, plated, galvanized, or previously coated metal. Heating coatings can release hazardous fumes, and cleaning them mechanically does not eliminate every risk. Identify the material and coating before welding; use appropriate respiratory and ventilation controls, and do not weld containers that may have held flammable substances.
- Inspect the work area: Keep sparks away from solvents, fuel, wood dust, insulation, and hidden combustible spaces.
- Protect the cylinder: Keep the gas cylinder upright, secured, and away from heat or impact.
- Check the ground: Clamp to clean metal close to the weld when practical, never to a questionable painted surface.
- Inspect after welding: Look for smoldering material or heat transfer on the opposite side of the panel.
Evaluate the finished weld
A useful visual inspection checks bead continuity, edge fusion, crater termination, spatter, undercut, and signs of porosity. Inspect the backside of a butt joint when accessible. Slight discoloration is not automatically a defect, but deep oxidation, melted edges, or a sagging underside deserves attention.
For a noncritical practice piece a destructive test can provide useful feedback cut or bend the sample and observe whether the weld tears away from the base metal.
FAQ: How to MIG Weld Thin Metal
What is the best wire size for thin sheet metal?
A small solid wire, commonly 0.023 or 0.025 inch for mild steel, usually offers better low-heat control than a larger wire. A 0.030-inch wire may work when the material is somewhat thicker or the machine does not feed very small wire reliably.
Should I push or pull the MIG gun on thin metal?
A slight push angle often gives a clearer view of the leading edge and can produce a flatter bead with a typical short-circuiting setup. The most important factors are consistent angle, short stickout, stable travel, and keeping the shielding gas over the puddle.
Why does my MIG weld keep burning holes in thin steel?
Common causes include excessive heat, a wide or uneven gap, slow travel, long trigger pulls, and stopping at the edge. Use smaller wire if appropriate, reduce energy within the machine’s usable range, make short alternating welds, and repair the fit-up before changing multiple settings.
Can I MIG weld thin metal without shielding gas?
Yes, but only with compatible flux-cored wire and the correct polarity and setup. Self-shielded flux-cored wire can be useful outdoors, yet it may produce more spatter and a less controlled arc on very thin sheet than solid wire with shielding gas.
How do I weld thin metal without warping it?
Use tight fit-up, frequent small tacks, short skip-welded sections, and pauses that allow the panel to cool naturally. Alternate sides or locations and avoid grinding away sound metal, because repeated heat and finishing passes can increase distortion.
Can I use a copper backing bar to prevent burn-through?
A clean, tightly fitted copper backing bar can support the puddle and absorb some heat without normally fusing to the weld. It cannot correct dirty metal, a large gap, or an overly hot setting, and it must be positioned so it does not create an inaccessible or contaminated joint.
How do I know whether a thin-metal weld has enough penetration?
Look for smooth fusion into both edges rather than a bead sitting on top. On a test coupon, inspect the backside or perform a suitable destructive check. The required result depends on the joint’s purpose, so appearance alone is not proof of structural adequacy.
Conclusion
Successful thin-sheet welding comes from managing heat rather than overpowering the joint. Choose compatible small wire and shielding gas, verify polarity, clean the metal, close unnecessary gaps, and tune the machine on matching scrap. Then use brief welds, controlled travel, and a sequence that spreads heat across the panel.
If you are learning how to mig weld thin metal, remember that the safest adjustment is usually small and deliberate. Stop when the puddle grows too large, investigate the cause of defects, and treat coated or safety-critical material as a job requiring additional precautions and possibly a qualified welding procedure.
Clean and clamp two matching scraps, set the machine to its recommended low-end thin-steel range, and practice short alternating welds before touching the finished panel.