What Is a Tack Weld? Purpose, Placement, and Best Shop Practices
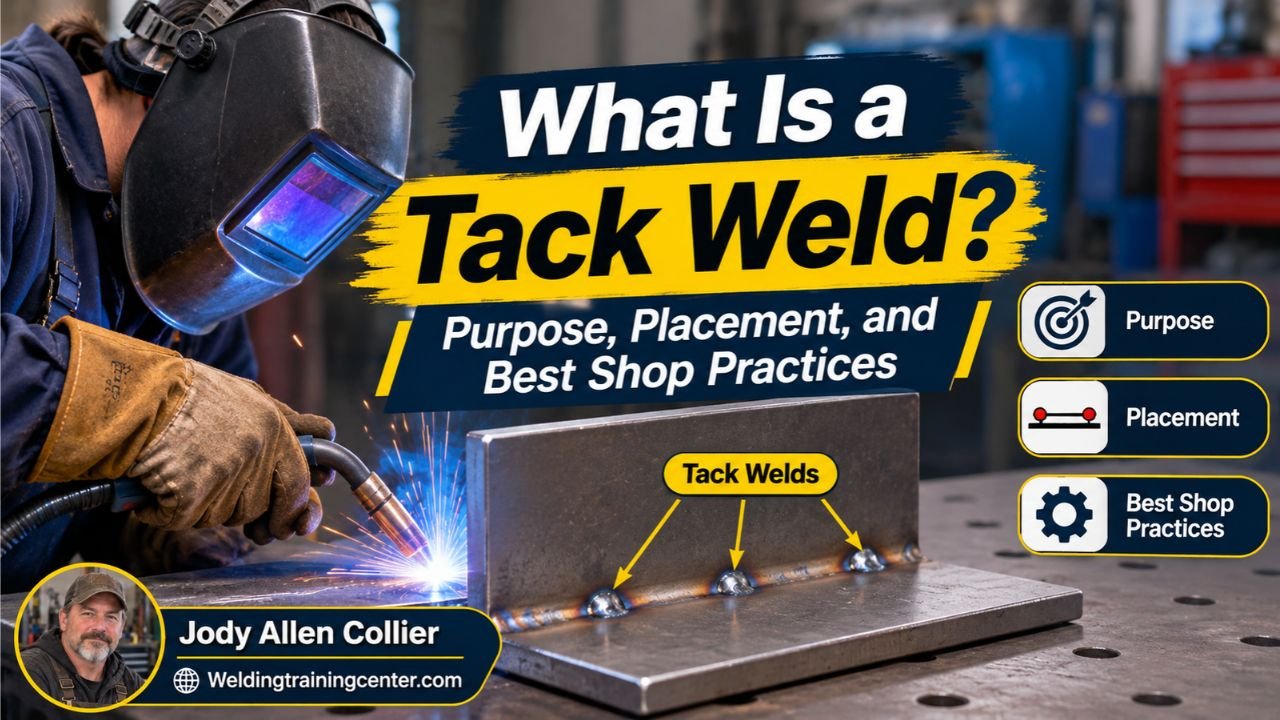
A tack weld is a short, temporary weld that holds metal parts in position before the final weld. It helps keep a joint aligned as you move, clamp, or weld the pieces, and it may become part of the finished weld if it’s sound and suitable for the job.
Have parts that keep sliding out of alignment just as you’re ready to weld? Or are you unsure whether a small tack is strong enough to hold the joint without getting in the way later?
I once rushed a tack on a small assembly and didn’t check the fit again before welding the rest of the joint. The parts shifted just enough to leave an annoying step at the edge, and I had to stop and correct it; that’s a common mistake, not a dumb one.
I wrote this for anyone who wants a clear picture of what tacks do, how to place them, and what can go wrong if they’re too small, too large, or poorly positioned. You don’t need fancy gear to get the basics right, but a little patience at the setup stage goes a long way.
If you get the tacks right, you’re more likely to keep the joint square, avoid gaps, and finish with less cleanup. Skip the fit checks, and a piece can twist, pull apart, or leave you grinding away a weld you’d rather have kept.
This takes about 9 minutes to read. By the end, you’ll know how to:
- Choose tack locations that hold the joint without blocking the final weld.
- Set a tack length and sequence that suit the parts and joint.
- Spot weak tacks and correct common fit-up problems before they grow.
What Is a Tack Weld, and What Does It Do?
A tack weld is a short weld used to hold two or more metal pieces in position before the main weld is completed. Tacks keep a joint from shifting during handling and help maintain the intended fit, angle, and gap.
A weld joint is the place where metal parts meet, while fit-up means how those parts sit together before welding. A tack can be a few small welds spaced along a joint, or a short weld at a corner or edge. The right arrangement depends on the part’s shape, material thickness, joint type, and welding procedure.
Tacks can hold work for a few minutes or stay in place as part of the finished weld. A tack that remains must be sound, compatible with the final weld, and fully incorporated when the joint is completed. A temporary tack that’s cracked, contaminated, or in the wrong spot should be removed rather than buried under a longer weld.
The distinction matters: “temporary” describes the tack’s job during setup, not necessarily whether it stays in the finished work. If you’re welding a bracket onto a plate, a few well-placed tacks can hold the bracket at the right angle while you confirm the position and complete the weld.
Tacks also help manage weld distortion, the bending or movement caused by heat and cooling. They don’t eliminate distortion, but they can hold parts in place while you control the weld sequence. For a broader explanation of how heat, the arc, and filler metal join workpieces, read how welding works.
A tack weld isn’t a substitute for a completed structural weld. Don’t treat a few short tacks as finished support for a load-bearing part unless the approved design or welding procedure specifically says they’re adequate.
Where to Place Tack Welds for Better Fit-Up
Place tack welds where they hold the parts securely, preserve access for the final weld, and limit movement as the metal heats and cools. Check the drawing or welding procedure first if the job has specified tack locations, sizes, or sequence.
A simple setup often uses tacks near the ends of a joint and additional tacks between them. Long joints or parts prone to movement may need closer spacing, while a small, rigid assembly may need fewer. There isn’t one spacing rule that fits every joint, so use the procedure, part geometry, and material thickness to guide you.
Before striking an arc, make sure the parts are clean, aligned, and supported. Joint preparation means getting the surfaces and edges ready for welding, including removing contaminants or preparing edges as the job requires. Careful preparation gives tacks a sound place to hold; welding joint preparation covers the steps and common fit-up errors in more detail.
Here’s a practical sequence for a basic tack-up:
- Clean and inspect the joint. Remove oil, paint, rust, or other contamination as the material and welding procedure require.
- Set the parts in position. Use clamps, a fixture, or a square to hold the intended angle and alignment.
- Check the gap and edge match. Fix a poor fit before welding, rather than trying to bridge a gap with a larger tack.
- Place the first tack. Put it where it holds the joint without blocking the final weld path.
- Add tacks in a balanced order. Alternate sides or locations on assemblies that could pull in one direction.
- Recheck the fit. Look for movement, gaps, and changes in alignment before making more tacks or starting the final weld.
Do you need a tack at every corner? Not always. Use enough to keep the part from moving, but don’t add extra tacks just because more welds feel safer; too many can restrict access, add heat, and create extra cleanup.
For a long seam, tacking from one end straight to the other can pull the parts along the joint. A balanced sequence, such as working between spaced locations, can help reduce that pull. The exact pattern should suit the joint and any stated procedure.
I learned that lesson on a thin panel when I put several tacks in a row without checking how the edge was moving. The panel started to draw in, and I had to stop and reset the fit; now I check the opposite edge as I tack rather than focusing only on the spot under the torch.
| Part or joint situation | Tack placement approach | What to check |
|---|---|---|
| Short, rigid joint | Tack near each end when practical | Alignment and access for the final weld |
| Long seam | Space tacks along the joint and balance the sequence | Pull, bowing, or changing gaps |
| Corner or bracket | Tack to hold the intended angle | Square, contact at the joint, and fit |
| Thin or flexible sheet | Use controlled tacks and frequent fit checks | Heat movement and distortion |
| Part with a specified procedure | Follow the stated locations and sequence | Required tack size, inspection, and acceptance |
Pro Tip: Before tacking a part that must sit square, check it from more than one side. A joint can look straight from above and still be tilted when you look along the edge.
How to Size and Make a Tack Weld
A tack weld should be large enough to hold the parts during the next step, but small enough to avoid blocking the final weld or adding needless heat. Tack length, weld size, and settings depend on the base metal, joint, welding process, and job requirements.
There’s no universal tack size. A short tack on thin sheet can distort or burn through the material if it’s too hot, while a tiny tack on a heavier part may not hold the joint during handling. Follow the welding procedure specification, often called a WPS, when one applies; it sets out the approved process and requirements for the job.
Use the right settings and technique for the metal and welding process rather than copying a setting from an unrelated project. Keep the torch or electrode steady, make a clean tack, and avoid leaving a tall lump that the final weld can’t properly cover. If the tack is too high or oddly shaped, remove or dress it as permitted before continuing.
Ask yourself: can the final weld reach and fuse into the tack? If the tack blocks the joint or leaves a sharp step, reposition or rework it before completing the weld. When a tack stays in the joint, it needs to fuse properly with the final pass, not sit there like a little speed bump.
The tack should also suit the metal. Different materials and thicknesses call for different preparation and welding methods, so check the job instructions and material guidance instead of assuming one process fits all. For a small repair on mild steel, a tack may be straightforward; thin sheet, coated material, or specialty alloys call for more care.
Before you tack, check that the workpiece and ground connection are secure and that the parts can’t move unexpectedly. Wear the protective gear required for the process, including eye and face protection, gloves, and suitable clothing. Keep the work area clear of flammable material, and make sure ventilation is appropriate for the material and process.
Important Tip: Don’t tack over a crack or a defect to make it disappear. Stop and assess the joint, since a tack can hide a problem without fixing it.
Common Tack Weld Problems and How to Fix Them
A weak, cracked, or poorly placed tack usually points to a setup, surface, technique, or fit-up problem. Find the cause before adding more weld, or you may make the same defect harder to repair.
| What you notice | Likely cause | Practical response |
|---|---|---|
| Tack breaks when parts are moved | Tack is too small, poorly fused, or the joint is under strain | Recheck fit and settings, then remake the tack as allowed |
| Tack has visible cracks | Contamination, unsuitable procedure, or a material-related issue | Stop and follow the job’s repair guidance |
| Parts shift during tacking | Clamping or tack sequence isn’t holding the assembly | Reset alignment and support, then tack in a balanced order |
| Final weld won’t reach the joint | Tack is too large or blocks access | Remove or reshape it as permitted before welding |
| Thin part pulls or bows | Heat input or sequence is moving the material | Pause, check alignment, and adjust the approved sequence |
| Tack looks clean but won’t fuse into the next pass | Surface condition, placement, or technique may be wrong | Clean and inspect the joint, then correct the cause |
A cracked tack shouldn’t be covered with the final weld. Remove it using a method suited to the work, inspect the area, and follow the repair procedure before starting again. If the crack’s cause isn’t clear, ask a qualified welding professional or supervisor rather than guessing.
What if the tack looks fine but the parts are out of square? Stop before completing the joint. Break or remove the tack as the job allows, reset the parts, and confirm the fit again; pushing ahead can lock the error in place.
Tacks can also make warping worse if the assembly is forced into position or heated unevenly. Keep the parts supported without over-tightening clamps, and use a balanced weld sequence that suits the work. If distortion is a recurring issue, ways to prevent welding warping can help you think through the shop setup before welding.
A few habits prevent a lot of rework:
- Don’t use a tack to pull a badly fitting joint together.
- Don’t leave spatter or debris where the final weld needs to fuse.
- Don’t assume a tack is sound just because it holds during a quick check.
- Don’t grind away a tack that the approved procedure requires to remain.
- Do inspect tack locations before completing the final weld.
- Tacks hold parts in position; they don’t automatically count as a finished weld.
- Placement, sequence, surface condition, and fit all affect how well tacks work.
- A defective or obstructive tack needs attention before the final weld covers it.
FAQs About What Is a Tack Weld
Is a tack weld permanent?
A tack weld can be temporary or remain as part of the finished joint. If the tack stays, it must be sound and compatible with the final weld, and the completed weld must properly incorporate it. Follow the drawing or welding procedure when the job specifies whether tacks should remain.
How many tack welds should I use?
The number depends on the joint length, part stiffness, material thickness, fit, and welding procedure. Use enough tacks to keep the parts from moving, then check alignment before adding more. A short rigid joint may need fewer than a long seam or a flexible sheet-metal assembly.
Can I weld over a tack weld?
Yes, when the tack is sound, correctly placed, and allowed by the welding procedure. The final weld needs to fuse into the tack and the surrounding base metal. Remove a cracked, contaminated, or obstructive tack as directed rather than covering the defect.
How long should a tack weld be?
There isn’t one length that works for every job. Tack length depends on the material, joint, process, and amount of support needed. Follow the approved procedure when one is provided, and avoid making a tack larger than needed to hold the parts.
Should I remove tack welds after welding?
Remove tacks only when the drawing, procedure, or finished design calls for removal. A tack that remains may be part of the completed weld, while a temporary tack may need to come off and leave a clean surface. Don’t grind or cut one out without checking the job requirements.
Make the Fit Right Before You Finish
A good tack weld is small, placed with a purpose, and checked before the final weld begins. The goal isn’t to cover the joint in little blobs; it’s to hold the parts steady while leaving room for a sound, complete weld.
In my view, careful fit-up beats trying to rescue a joint with extra tacks. A clamp, a square, and a pause to recheck alignment can save you from grinding and starting over. If you’re working to a drawing or formal procedure, follow its tack size, location, and sequence rather than relying on a general rule.
For your next weld, clean and align the parts, place only the tacks needed to hold them, then inspect the joint again. That small check is the easiest way to catch movement while it’s still easy to fix.