How to Change MIG Wire: Instructions, Tips, and Useful Advice
Turn off and unplug the welder, release the old spool, install the correct MIG wire, thread it through the drive system, and set tension before testing.
Changing welding wire is a small maintenance job but the way it is done affects arc stability bead appearance liner life and safety A spool that is installed.
The cause chain begins with the wire and spool fit That choice determines which drive roll and contact tip are appropriate while those parts determine how much pressure. This guide examines “how to change mig wire” and explains the details that matter in practice.
- ✓Match wire diameter, alloy, spool size, drive roll groove, and contact tip before loading the machine.
- ✓Keep the wire under control during spool removal so it does not unravel or form dangerous loops.
- ✓Use only enough drive-roll pressure to feed consistently; too much pressure can deform the wire and contaminate the liner.
- ✓Test feeding with the gun straight, then verify polarity, shielding gas, voltage, and wire speed on scrap metal.
How to Change MIG Wire Without Creating Feed
Most MIG welders use a spool mounted inside the machine a drive motor and rolls a liner inside the gun cable and a contact tip at the gun.
Before opening the side panel identify the wire currently installed and the wire you plan to use Solid mild-steel wire stainless wire aluminum wire and flux-cored wire have.
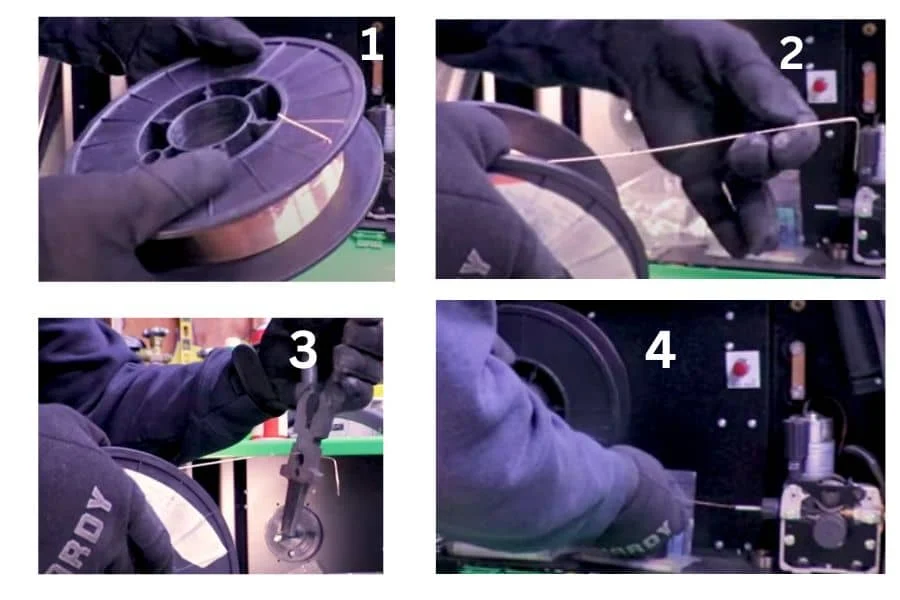
- Wire diameter: Confirm the new wire matches the drive-roll groove and contact-tip marking, such as.023,.030, or.035 inch.
- Wire type: Solid wire generally uses shielding gas, while self-shielded flux-cored wire usually does not and often requires reversed polarity.
- Spool direction: The spool must pay off in the direction shown by the welder’s diagram, with the wire entering the feeder without crossing over itself.
- Gun condition: A damaged tip, blocked liner, or worn drive roll can make a correct installation look faulty.
Choose the right replacement wire
Wire diameter affects current capacity feeding resistance and the settings needed to maintain a stable arc A small hobby machine may be designed around 023-inch or 030-inch solid.
For ordinary carbon-steel work, copper-coated solid wire is commonly paired with an argon-carbon-dioxide shielding-gas blend. Stainless wire requires compatible base-metal preparation and gas selection, and aluminum wire often needs a spool gun or a specialized push-pull arrangement because soft aluminum can buckle in a long standard gun liner.
Flux-cored wire is not interchangeable with every solid-wire setup. It may need a knurled drive roll rather than a smooth V-groove roll, and its polarity can differ by product. Always use the wire manufacturer’s label and the welder’s manual as the final authority when the two options seem uncertain.
Gather simple tools and protect the wire
In most cases, the job requires only the replacement spool, a wrench or pliers for the retaining hardware, side cutters, and the correct contact tip. A small wire brush or clean, dry cloth can help remove debris around the feeder, but avoid introducing oil or solvent onto the wire path.
Wear safety glasses when cutting wire The loose end can spring sideways and a sharp wire tip can puncture skin or damage an eye Keep the spool under.
Preparation and Safe Removal of the Old Spool
Start with the welder in a safe de-energized condition Turn the power switch off and unplug the machine when practical especially if the controls or drive rolls could.
The most important removal principle is to keep tension on the wire until it is secured If you simply cut the wire and let go the spool can.
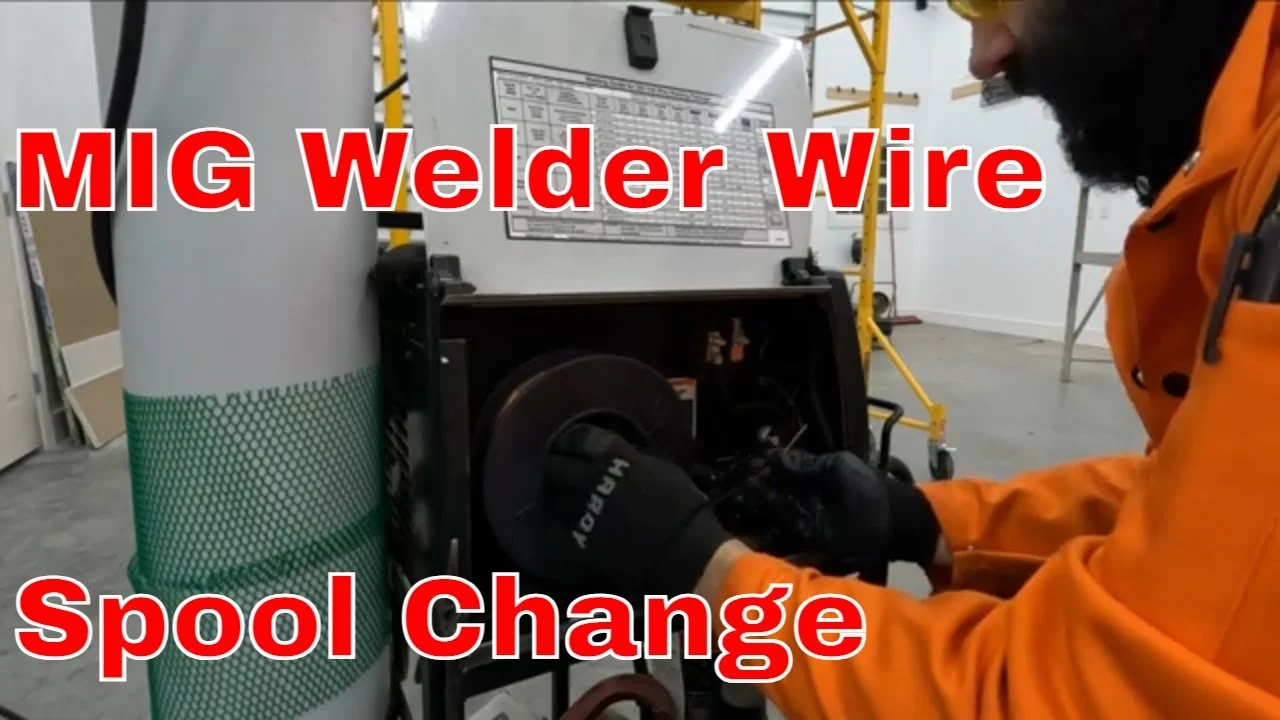
- Deactivate the feeder: Do not press the gun trigger while your fingers are near the drive rolls or wire inlet.
- Control the spool: Hold the wire end firmly or use the spool’s retaining hole if it has one.
- Cut cleanly: Cut the wire close to the inlet or spool, then bend or secure the remaining end so it cannot spring loose.
- Inspect before reloading: Look for metal dust, rust, flattened wire, and sharp burrs around the rolls and guide.
Remove the gun’s remaining wire
After securing the spool release the drive-roll tension according to the machine design Some feeders use a hinged pressure arm while others use a threaded tension knob Pull.
For a minor spool change many operators cut the old wire near the spool and use the feeder to push the short remainder through the gun This can.
Remove the spool retaining nut, spring, and any adapter carefully, noting their order. Slide off the old spool and set it aside. Check that the hub spins freely and that the brake or friction mechanism is present; without controlled resistance, the new spool may coast after the motor stops.
Inspect the feeder before inserting new wire
Use the access you now have to inspect the drive rolls The groove should be clean and sized for the new wire A groove that is too large.
Check the inlet guide and the short outlet guide near the drive rolls. They should align with the groove rather than forcing the wire upward or sideways. Misalignment increases drag and can make the wire rub against the roll edges.
Examine the contact tip as well A tip worn oversize by electrical arcing may allow inconsistent current transfer while a tip that is too small can grip the. This distinction matters when answering “how to change mig wire”.
Loading the New Spool and Threading the Wire
Place the new spool on the hub in the direction marked by the welder The wire should leave from the bottom or top as specified by the machine.
Tighten the retaining nut enough to hold the spool securely while allowing it to turn smoothly. It should not wobble, but it also should not require excessive motor force to rotate. The hub brake controls overrun; it should resist free spinning without dragging the spool during normal feeding.
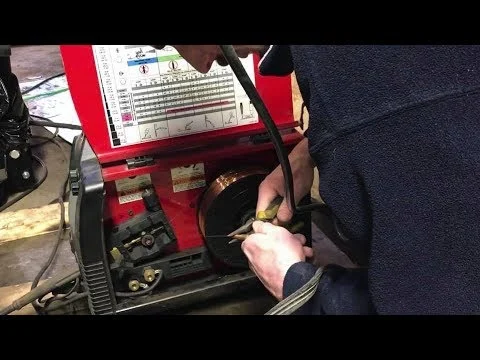
- Keep the end captured: Do not release the wire until it has entered the feeder and the spool brake is controlling rotation.
- Straighten the first section: Cut off a bent or rusty end and make a clean, slightly pointed tip.
- Use the correct groove: Match the drive roll to the new diameter and wire construction.
- Open the pressure arm: Thread the wire through the inlet guide and into the drive-roll groove before applying tension.
Thread the wire through the drive system
With the pressure arm released, guide the wire through the inlet guide and into the groove. Push it only far enough to reach the outlet guide. Align the guides and rolls, then close the pressure arm without immediately tightening the tension to its maximum.
On machines with a manual inch or jog button, straighten the gun cable and hold the gun away from your body. Remove the contact tip if the manufacturer recommends doing so for threading. Jog the wire in short bursts until it emerges from the gun neck, then release the control.
Do not use your fingers to guide the wire directly in front of an energized contact tip. Keep the nozzle pointed toward a clear area and cut the protruding wire to a manageable length. Once the wire reaches the front, install a matching contact tip and nozzle if they were removed.
Set drive-roll tension correctly
Drive-roll tension should be high enough to push the wire through the gun without slipping but low enough that a blockage causes the wire to stop rather than.
If the rolls continue turning and the wire slips, add a small amount of tension. If the wire buckles into a bird nest, reduce tension immediately and clear the feeder before continuing. Excessive pressure can flatten solid wire, scrape off its coating, and fill the liner with debris.
Different feeders use different tension scales, so a numbered setting is not universal. The correct setting depends on wire type, diameter, gun length, liner condition, and the amount of drag created by the cable position.
- Start low: Increase tension gradually rather than beginning at the highest setting.
- Keep the cable straight: Tight bends make the feeder appear weaker than it is.
- Watch the wire: A steady feed and round cross-section indicate better adjustment than a high knob setting.
Settings That Must Match the New Wire
Installing a spool does not automatically configure the welding process. Wire type and diameter influence voltage, wire-feed speed, amperage, polarity, shielding gas, and the contact-tip relationship. Start with the machine’s chart or the wire label, then fine-tune on clean scrap of similar thickness.
For solid steel wire with shielding gas the machine is commonly set for electrode-positive operation but the exact setup must follow the wire and welder documentation Self-shielded flux-cored.
- Polarity: Confirm the cable connections inside or at the front of the machine before striking an arc.
- Gas flow: Verify the regulator, hose, and cylinder contents when using gas-shielded wire.
- Wire speed: Set it for the selected diameter and material thickness instead of copying a setting from a different wire.
- Voltage: Adjust it with wire speed to obtain a controlled arc rather than correcting every issue with one knob.
Match the contact tip and liner
The contact tip should be marked for the wire diameter being used. A tip designed for.030-inch wire may not perform well with.035-inch wire, even if the difference seems minor. The tip must transfer current while allowing the wire to move freely; heat, spatter, and wear gradually change that balance.
The liner also matters Steel liners are suitable for many steel wires while aluminum often needs a liner designed to reduce drag and prevent soft wire from buckling If the.
A liner that is kinked, packed with dust, or worn at the ends can cause intermittent feeding. Replacing a liner requires following the gun manufacturer’s procedure, because the liner must be cut to the correct length and seated properly at the neck and feeder end.
Confirm gas and workpiece preparation
When using solid wire inadequate shielding gas can look like a wire-feed problem Check that the cylinder valve is open the regulator shows flow the hose is connected.
Clean paint, rust, oil, and mill scale from the joint area. Contamination can cause porosity and spatter even when the spool and feeder are working correctly. Attach the work clamp to clean metal, not to a loose or heavily coated surface.
Keep these limitations in mind when considering “how to change mig wire”.
Testing the Feed and Adjusting the First Weld
Before welding a finished part test the wire on scrap Hold the gun at a consistent angle and distance listen to the arc and inspect the bead The.
A stable short-circuit arc often sounds like a consistent crackle, although sound varies with process, machine, wire, and settings. A harsh, irregular sound can point to incorrect voltage, wire speed, contact-tip wear, poor grounding, or shielding problems. Make one adjustment at a time so you can identify what changed the result.
| Observed result | Likely causes | Useful first check |
|---|---|---|
| Wire stops or pulses | Low drive tension, blocked liner, tight bend, wrong groove | Straighten the gun cable and inspect the feeder path |
| Bird nest at the rolls | Too much tension, blocked outlet, wire slipping at the tip | Release tension and clear the jam before rethreading |
| Wire burns back to the tip | Wire speed too low, voltage too high, contact tip restriction | Check tip size and compare settings with the wire label |
| Excessive spatter | Wrong polarity, poor gas coverage, incorrect voltage or speed | Verify polarity and shielding before changing multiple settings |
| Porous bead | Gas interruption, dirty metal, drafts, contaminated wire | Check gas flow and clean the joint |
Recognize a bird nest early
A bird nest is a tangled cluster of wire between the drive rolls and the gun liner. It usually forms because the wire cannot move forward but the rolls continue pushing it. The longer the motor runs, the tighter and more damaging the tangle becomes.
Stop the trigger immediately, turn off the machine, and release drive tension. Cut away the tangled section and inspect the wire end, outlet guide, roll groove, and liner entrance. Do not simply pull the cluster through the gun; that can dislodge the liner or leave metal fragments inside the cable.
Use the test bead as a diagnosis
If the wire feeds smoothly in the air but the bead is poor the issue may not be the spool change A narrow tall bead can indicate insufficient.
For a practical adjustment sequence, confirm the wire and polarity first, then set gas and work clamp connections. Adjust wire speed and voltage in small steps, maintaining a consistent gun position and travel speed during each test.
Common Mistakes After Changing MIG Wire
Many feed failures come from small oversights rather than a defective welder. The wrong roll groove may look acceptable until the wire is placed under load. A spool may rotate in the wrong direction, or the retaining hardware may be installed without the brake spring that prevents overrun.
Another frequent mistake is changing several variables at once. Replacing the tip, changing polarity, increasing wire speed, and altering voltage simultaneously makes the result difficult to interpret. Work methodically and record a useful setting for each wire type used in the shop.
- Mixing wire sizes: A new spool with a different diameter requires checking the rolls, tip, liner, and machine range.
- Over-tightening rolls: High pressure can damage wire and create more debris rather than improving traction.
- Ignoring spool brake drag: Excessive friction overloads the feeder and can produce irregular wire speed.
- Leaving the wire unsecured: An unrestrained end can unravel the spool and create hidden crossovers.
When the problem is not the wire
If a correctly installed spool still feeds poorly, inspect the gun cable for sharp bends or crushing. Then check the contact tip, liner, guides, drive-roll alignment, and motor response. A clogged liner may need replacement rather than repeated tension adjustments.
Electrical problems can also imitate mechanical feed issues. Loose connections, a damaged trigger lead, a failing motor, or a control-board fault may require qualified service. Stop troubleshooting internally if the machine shows burning insulation, unusual electrical odor, overheating, or damage near energized components.
Maintenance After the Spool Change
Protect the remaining wire from moisture, dust, and workshop chemicals. Replace the spool cover or close the machine door when possible. Flux-cored and steel wires can develop surface contamination that increases friction and introduces impurities into the weld.
At the end of a session cut the wire cleanly and secure it in the spool s retaining hole or with the machine s wire-holding feature Do not.
- Clean contact surfaces: Remove spatter from the nozzle and replace tips that are worn, damaged, or repeatedly sticking.
- Inspect drive rolls: Brush away debris without changing the groove profile or contaminating it with oil.
- Protect the gun: Avoid tight cable loops that permanently bend the liner.
- Track consumables: Keep compatible tips, rolls, liners, and wire diameters identified so the next change is predictable.
Store partially used spools carefully
A partially used spool is worth protecting because exposed wire can deteriorate before the next job. Keep it dry and covered, and mark the wire type and diameter if the original packaging is no longer available. Do not combine loose lengths from different alloys or classifications on the same spool.
Before reinstalling an older spool, inspect the first several wraps for rust, discoloration, flattened sections, or tangled crossings. Removing a questionable section is often easier than diagnosing an intermittent feed problem after it reaches the gun.
FAQ: Changing MIG Wire
How often should MIG wire be changed?
Change it when the spool is empty, when switching wire type or diameter, or when the wire has become rusty, contaminated, or tangled. There is no universal time interval because storage conditions and usage vary.
Can I change wire without replacing the contact tip?
Yes, if the new wire has the same diameter and the existing tip is clean and undamaged. Replace the tip when its bore is worn, clogged, burned back, or sized for a different diameter.
Why does the wire bird nest after I install a new spool?
The usual causes are excessive drive-roll tension, a blocked liner or outlet guide, a wrong roll groove, or a spool that cannot rotate freely. Turn off the machine, release pressure, remove the tangle, and check the entire feed path before trying again.
Should the drive roll be smooth or knurled?
Use the roll specified for the wire. Smooth V-grooves are commonly used for many solid wires, while knurled rolls are often used for flux-cored wire. The wire label or welder manual should settle the choice for a particular setup.
Do I need to change polarity when changing MIG wire?
Sometimes. Solid gas-shielded wire and self-shielded flux-cored wire may use different polarity, but the correct setting depends on the specific product. Confirm it on the spool label or technical documentation before welding.
Why will the new wire not come out of the gun?
Check whether the drive rolls are turning, whether the wire is in the correct groove, and whether the spool brake is too tight. If the rolls turn but the wire stops, inspect drive tension, the liner, the contact tip, and sharp bends in the gun cable.
Can I use aluminum wire in a standard MIG gun?
It depends on the equipment and wire diameter, but soft aluminum commonly feeds poorly through a conventional long steel liner. A spool gun, push-pull gun, or aluminum-compatible liner and setup may be needed for reliable feeding.
Conclusion
Changing a spool successfully means matching the wire to the feeder, controlling the spool, threading the gun without kinks, and setting just enough drive pressure for consistent movement. After that, verify polarity, gas, contact tip, and process settings on scrap before welding the finished joint.
If feeding remains unreliable after these checks the limitation may be a worn liner drive roll contact tip hub brake or electrical component rather than the installation itself.
Before your next spool change, write down the wire diameter, roll type, contact-tip size, polarity, and a proven starting setting for that wire.
The answer to “how to change mig wire” should be applied with these conditions and limitations in mind.