Welding Training for Beginners: Complete Guide and Practical Tips
A poor start in welding can lead to weak joints, damaged equipment, painful burns, or dangerous exposure to fumes and ultraviolet light. Learning by trial and error is especially risky because a weld can look acceptable while hiding porosity, lack of fusion, or inadequate penetration.
Welding training for beginners should therefore cover more than striking an arc. A useful foundation explains how welding processes work, how to select safe equipment, how to prepare metal, and how to judge weld quality before a project fails.
I’ll help you compare the main welding methods, build a practical learning sequence, avoid common mistakes, choose training options, and understand what a beginner can realistically accomplish. The goal is not to rush into advanced fabrication; it is to develop safe, repeatable habits.
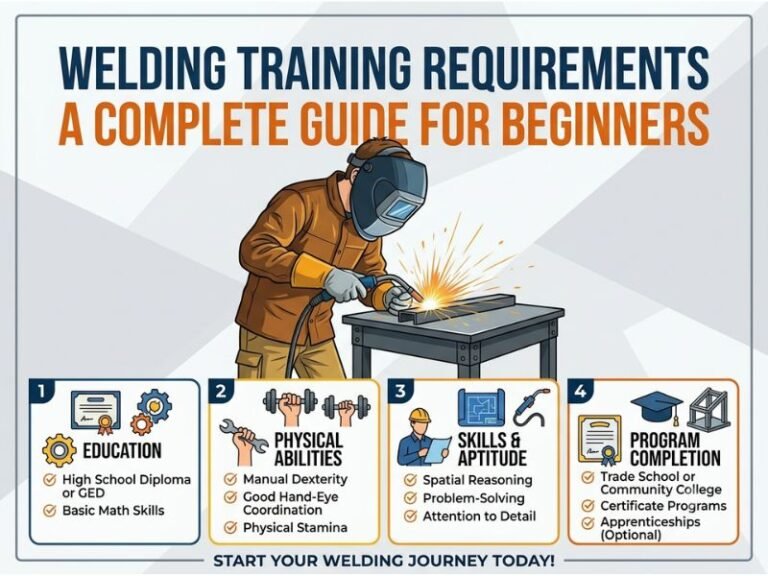
What beginners should learn first
Welding is the process of joining metals by applying heat, pressure, or both. Most beginner welding uses heat to melt the base metal and, when needed, a separate filler metal. As the molten pool cools, it forms a permanent joint.
A beginner needs five foundational skills:
- Recognizing how the selected process works
- Setting voltage, amperage, wire speed, gas flow, or electrode choice correctly
- Preparing and positioning the workpiece
- Controlling arc length, travel speed, and torch or electrode angle
- Inspecting the finished weld for visible defects and weakness
These skills are connected. Incorrect joint preparation can make a good machine setting ineffective. Poor travel speed can create undercut or excessive buildup even when the amperage is appropriate. I recommend treating every weld as a combination of preparation, machine setup, technique, and inspection rather than focusing only on the bead’s appearance.
Choosing a welding process
The best beginner process depends on the materials, location, project type, budget, and available instruction. No single method is ideal for every new welder.
MIG welding
MIG welding, formally called gas metal arc welding or GMAW, feeds a continuous wire electrode through a gun. A shielding gas protects the molten weld pool from contamination. Many machines can also use flux-cored wire, which may not require an external shielding gas.
MIG is often the easiest process for beginners to learn because the wire feeds continuously and the operator does not need to maintain a separate stick electrode. It is practical for mild steel, automotive repairs, brackets, small fabrication projects, and clean indoor work.
The limitations matter. MIG equipment can be less convenient outdoors because wind may disturb the shielding gas. The metal usually needs to be reasonably clean, and incorrect wire speed or voltage can produce spatter, burn-through, or an irregular bead.
Flux-cored arc welding
Flux-cored arc welding uses a tubular wire filled with flux. Self-shielded flux-cored wire creates its own protective shielding and is more tolerant of outdoor conditions than gas-shielded MIG. It can also provide useful penetration on thicker steel.
Beginners should expect more smoke, spatter, and slag. After welding, the slag must be removed before the joint can be inspected or another pass can be applied. A common mistake is treating flux-cored wire exactly like solid MIG wire; polarity, gun angle, and travel direction may differ according to the wire manufacturer’s instructions.
Stick welding
Stick welding, or shielded metal arc welding, uses a flux-coated electrode held in an electrode holder. The coating produces shielding gas and slag as the electrode melts. Stick equipment is relatively portable and works well outdoors, on heavier steel, and on surfaces that are not perfectly clean.
It is less forgiving for a new operator because the electrode becomes shorter during the weld. The arc length must be controlled continuously, and restarting an electrode requires practice. Slag removal and correct electrode storage also affect results.
TIG welding
TIG welding, or gas tungsten arc welding, uses a nonconsumable tungsten electrode and a separate filler rod when filler is needed. It provides excellent control and clean-looking welds on materials such as steel, stainless steel, and aluminum.
TIG is usually the most demanding common process for beginners because both hands may be occupied while the foot pedal or hand control adjusts current. It is a strong long-term skill, but I suggest learning basic arc control and joint preparation before making TIG the only training method.
How to choose
| Process | Beginner strengths | Typical limitations |
|---|---|---|
| MIG | Fast learning curve and continuous wire feed | Needs clean metal and shielding gas for standard solid wire |
| Flux-cored | Useful outdoors and on thicker steel | More smoke, spatter, and slag |
| Stick | Portable and suitable for outdoor work | Harder arc control and frequent electrode changes |
| TIG | Precise, clean, and versatile | Slower and more coordination-intensive |
For general home fabrication, MIG is often a sensible starting point. For farm, field, or outdoor repairs, stick or self-shielded flux-cored welding may be more practical. A local class can be a better deciding factor than the machine’s advertised features because supervised practice on one process often teaches more than owning several unused machines.
Essential safety before striking an arc
Welding creates intense light, heat, sparks, fumes, electric hazards, and fire risks. Safety is not a separate advanced subject; it is part of every setup and every weld.
Personal protective equipment
- Use a properly rated welding helmet with the correct shade for the process and current.
- Wear safety glasses under the helmet to protect against grinding particles and flying slag.
- Choose flame-resistant clothing that covers the skin. Avoid synthetic fabrics that can melt.
- Use welding gloves suited to the process while preserving enough dexterity for control.
- Wear sturdy leather footwear that covers the feet and ankles.
- Use hearing protection during grinding, cutting, and other loud operations.
A welding helmet protects the eyes and face from arc radiation, but it does not replace ventilation or protective clothing. Exposed skin can receive an arc-burn-like injury from ultraviolet radiation even when the weld is brief.
Ventilation and fumes
Welding fumes can contain hazardous metal and coating contaminants. Use local exhaust ventilation or an appropriate fume-extraction system that captures contaminants near the arc. General airflow alone may not adequately remove fumes from the breathing zone.
Never weld containers, tanks, drums, or pipes that may have held flammable or hazardous substances unless a qualified professional has made them safe. Paint, plating, galvanized coatings, solvents, and unknown residues can create dangerous fumes or fire conditions. I would rather delay a project for proper cleaning and evaluation than guess about the material’s history.
Fire and electrical precautions
Clear combustible materials from the work area, keep a suitable fire extinguisher accessible, and inspect the area for sparks that can travel through gaps or fall to a lower level. Hot metal can remain capable of starting a fire after the arc stops.
Inspect cables, electrode holders, guns, work clamps, and power cords before use. Keep connections tight and insulation intact. Do not weld in wet conditions or while standing in water. The work clamp should connect directly to clean metal whenever practical, rather than relying on questionable structural paths.
Basic welding equipment and setup
A beginner’s setup typically includes the welding machine, process-specific consumables, a work clamp, a welding gun or electrode holder, a helmet, gloves, protective clothing, ventilation, and tools for cleaning and preparation.
Useful preparation tools include an angle grinder, wire brush, chipping hammer for slag, clamps, a steel rule, square, pliers, and a light hammer. A dedicated welding table or noncombustible work surface makes positioning safer and more consistent.
Read the machine manual before connecting power, gas, wire, or electrodes. The manual identifies duty cycle, polarity, compatible consumables, recommended settings, and connection requirements. A machine’s duty cycle describes how long it can weld within a specified period before cooling is required; exceeding it can activate thermal protection or damage equipment.
Machine settings
Use the consumable manufacturer’s chart and the machine manual as the starting point. Settings depend on material thickness, joint type, wire or electrode size, shielding gas, and welding position.
- Amperage controls the amount of welding current and strongly affects penetration.
- Voltage influences arc length and bead shape in processes such as MIG.
- Wire feed speed affects deposition and is closely related to current in MIG welding.
- Gas flow must protect the weld without creating turbulence or wasting gas.
- Polarity must match the process and consumable instructions.
Change one variable at a time when troubleshooting. If several settings change together, it becomes difficult to identify the cause of improvement or failure. Record successful settings with the material thickness and joint position so they can be repeated.
A practical learning sequence
Structured practice is safer and more efficient than randomly welding scrap. I recommend the following progression.
1. Learn the machine and materials
Start by identifying the machine controls, power requirements, consumable type, polarity, and material thickness. Practice clamping and positioning before turning on the arc. Learn to recognize clean bare steel versus paint, rust, mill scale, oil, and coatings that require removal or special precautions.
2. Practice beads on flat plate
Run straight beads on clean scrap without trying to make a joint immediately. Focus on a stable body position, consistent arc length, controlled travel speed, and a relaxed grip. Examine bead width, ripples, spatter, and edges after each attempt.
An excessively fast travel speed may create a narrow bead with poor tie-in. A slow speed can produce excessive buildup or burn-through. An unstable arc length often causes inconsistent bead shape and spatter.
3. Make simple joints
Progress to lap joints, butt joints, and fillet welds. A lap joint overlaps two pieces, a butt joint places edges together, and a fillet weld joins surfaces at an angle, commonly in a T-joint or corner joint.
Fit-up matters. Keep gaps, alignment, and joint dimensions consistent. Use small tack welds to hold parts in position, then check for movement or distortion before completing the joint.
4. Add positions gradually
Flat-position welding is usually the simplest because gravity helps retain the molten pool. Horizontal, vertical, and overhead positions require more control and introduce greater safety and quality challenges. Practice them only after basic control is consistent and under suitable instruction.
5. Inspect and test
Visual inspection can identify undercut, overlap, cracks, porosity, excessive spatter, poor bead profile, and incomplete coverage. It cannot prove that every weld is structurally sound. For load-bearing work, critical repairs, pressure systems, trailers, structural components, or code-regulated work, follow applicable requirements and obtain qualified evaluation.
Destructive testing on scrap can help demonstrate whether a joint has fused properly. Bending, breaking, or cutting a practice sample may reveal internal problems, but the test method must suit the joint and material. Never assume a decorative bead is strong enough for a safety-critical application.
Beginner projects that build useful skills
Choose projects that are simple, noncritical, and easy to inspect. Suitable practice may include small brackets, tool stands, simple frames, welding coupons, and nonstructural shelves. These projects reinforce measurement, fit-up, tack welding, and distortion control.
A good first project has accessible joints, predictable mild steel, and no consequence if the weld fails. Avoid beginning with vehicle frames, lifting points, pressure vessels, load-bearing stairs, or repairs involving unknown steel. A failure in those applications can cause property damage or serious injury.
Keep a practice log. Record material thickness, joint type, process, consumable, polarity, machine settings, position, and observations. Photographing welds beside the notes can make progress easier to evaluate. I find that written records reduce repeated mistakes and reveal whether a problem comes from technique or setup.
Classes, online learning, and certification
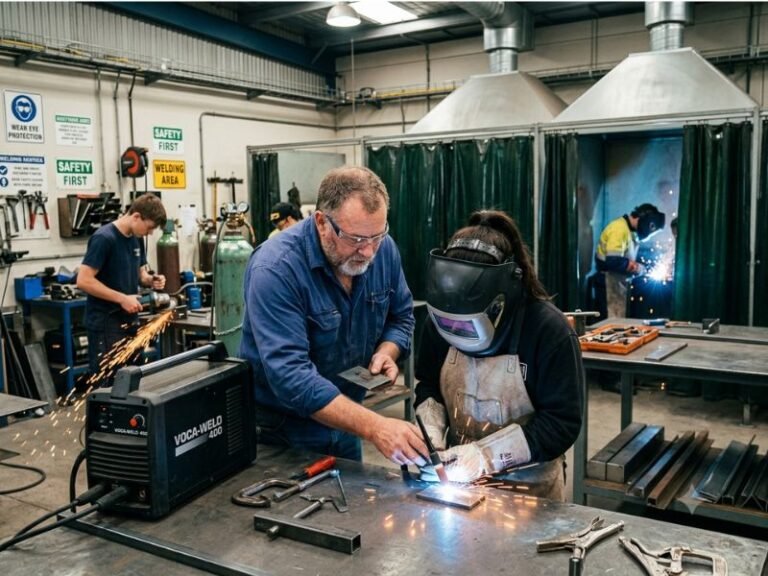
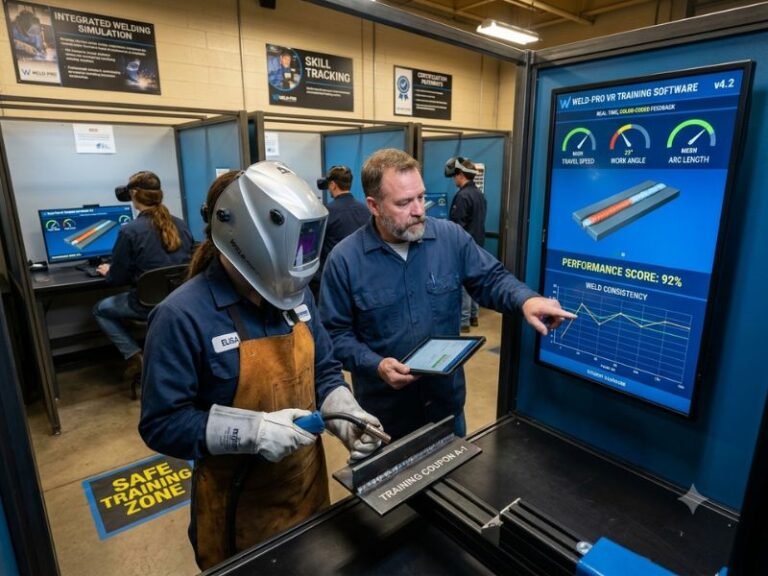
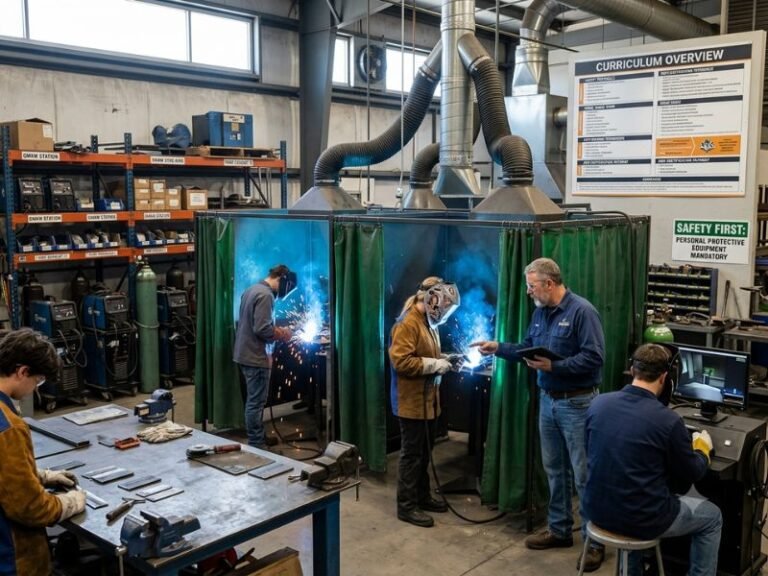
Community colleges, trade schools, workforce programs, private welding schools, and maker spaces may offer beginner instruction. A good class provides functioning equipment, ventilation, protective gear guidance, supervised practice, and feedback from an instructor who can correct body position and arc control.
Online videos can explain terminology and demonstrate machine controls, but they cannot replace supervised practice for safety-sensitive skills. Use them to prepare questions and review techniques, not as permission to ignore local rules or manufacturer instructions.
Certification is different from basic training. Training teaches skills; certification generally demonstrates that a welder passed a test under specified conditions. Employers, customers, codes, and inspectors may require particular qualifications, procedures, or performance tests. A general beginner certificate does not automatically qualify someone for every type of welding work.
Ask a school or employer:
- Which welding processes and materials are covered?
- How much time is spent actually welding?
- Are ventilation and personal protective equipment adequate?
- Does an instructor supervise each student’s setup and practice?
- Does the program prepare students for a recognized performance test?
- Are additional safety, blueprint, or fabrication courses included?
Common beginner mistakes
Welding dirty or coated metal
Rust, oil, paint, mill scale, and coatings can contaminate the weld and increase fumes. Clean the joint area appropriately, identify coatings before heating, and never treat unknown material as harmless.
Moving too quickly
Fast travel may leave inadequate fusion or an undersized bead. Slow down enough to observe the puddle, but do not linger without purpose. The correct speed produces a controlled pool and consistent tie-in.
Using the wrong angle or arc length
Gun, torch, and electrode angles depend on the process and joint. Excessive angle can push the shielding gas away or distort the pool. Excessive arc length increases spatter and weakens control. Follow process-specific instruction rather than copying one angle for every joint.
Skipping tacks and fit-up checks
Parts can move as heat enters the joint. Adequate tacks, clamps, sequence planning, and occasional measurement help control distortion. Welding a poorly aligned assembly usually makes the original problem harder to correct.
Judging quality by appearance alone
A shiny or uniform bead may still lack penetration or contain internal defects. Surface appearance is useful, but it is only one part of inspection. Critical applications require appropriate procedures, testing, and qualified personnel.
When a beginner is ready for paid work
A beginner may be ready for simple noncritical work after demonstrating consistent setup, safe behavior, repeatable beads, basic joint fit-up, and the ability to recognize defective welds. Practical readiness also includes knowing when to refuse a job.
Do not accept work involving structural integrity, lifting, pressure, fuel systems, safety restraints, or unknown materials until the necessary training, qualifications, procedures, and supervision are in place. Local building codes, workplace rules, and customer specifications may impose additional requirements.
Employers often value measurement, blueprint reading, grinding, cutting, material identification, housekeeping, and safety as much as raw arc time. A beginner who arrives prepared, follows procedures, asks precise questions, and records settings can progress faster than someone who focuses only on producing attractive beads.
Welding training for beginners FAQ
What is the easiest welding process for a beginner?
MIG welding is often the easiest common process for beginners because it uses a continuously fed wire and does not require frequent electrode replacement. It still requires correct settings, clean material, shielding gas management, and practice. A supervised class may make stick or flux-cored welding a better starting point if outdoor or heavy-steel work is the goal.
How long does it take to learn basic welding?
Many learners can produce basic practice beads after initial instruction, but consistent, reliable welding takes continued practice. Progress depends on practice frequency, process, material, instruction quality, and the type of joints being attempted. Learning to make a bead is much faster than learning to produce qualified welds for critical applications.
Can I learn welding at home?
You can practice some basic welding at home if the workspace has suitable power, ventilation, fire control, protective equipment, and adequate clearance from combustible materials. Begin with noncritical scrap and obtain instruction before attempting repairs. A home setup should never substitute for professional evaluation when fumes, fire, electrical, or structural risks are uncertain.
What metal should a beginner weld first?
Clean, uncoated mild steel is usually the most practical first material. It is widely available and works with several welding processes. Avoid galvanized, painted, plated, oily, or unidentified metal until you understand the hazards and proper preparation. Aluminum and stainless steel can be learned later with process-specific settings and technique.
Is welding certification required for beginner projects?
Certification is not required for every personal project, but requirements can apply to employment, construction, structural work, pressure equipment, pipelines, vehicles, and other regulated applications. Ask the employer, inspector, customer, or authority having jurisdiction which qualifications apply. Never assume that a short class or online course equals certification.
What should I look for in a beginner welding class?
Look for hands-on practice, qualified supervision, effective ventilation, clear safety instruction, equipment matched to the process, and feedback on technique. The class should explain consumables, polarity, machine settings, joint preparation, and inspection rather than focusing only on making beads. A small class with meaningful instructor access is often more useful than a crowded session with limited arc time.
Conclusion
Successful welding training for beginners starts with safety, process selection, clean preparation, controlled practice, and honest inspection. I recommend beginning with supervised instruction and noncritical mild-steel projects, then expanding into more difficult positions, materials, and qualifications as your consistency improves. Careful habits will take you farther than expensive equipment or rushed confidence.