Corner Joint Welding: Open vs Closed Corner Welds and Best Uses
A corner joint connects two pieces at an angle, usually 90 degrees, to form an L shape; an open corner leaves a gap between the edges, while a closed corner brings them together. The right setup depends on material thickness, strength needs, fit-up, and how much weld access you have.
Are you trying to stop a thin sheet-metal corner from burning through, or wondering why a thicker corner weld looks sound outside but has poor fusion inside? Those problems often start with the joint setup, not the welding machine.
I once rushed a corner fit-up on a small fabricated panel and tacked it before checking the gap along the full edge. One corner pulled out of square as I welded, so I had to grind and straighten it; that’s a common mistake, not a dumb one.
I wrote this for anyone choosing between open and closed corners, from a first-time DIY welder to someone laying out a small shop project. You’ll get a plain explanation of the joint, how to prepare it, and what to watch for while welding.
A good setup can save you from burn-through, weak fusion, and a box that rocks on the bench. Skip the fit-up check, and even a tidy-looking bead can leave you with rework.
This takes about 9 minutes to read. By the end, you’ll be able to:
- Choose an open or closed corner for the job.
- Match weld type and joint prep to the material.
- Tack and weld the corner with less distortion.
- Spot common defects and decide when repair is needed.
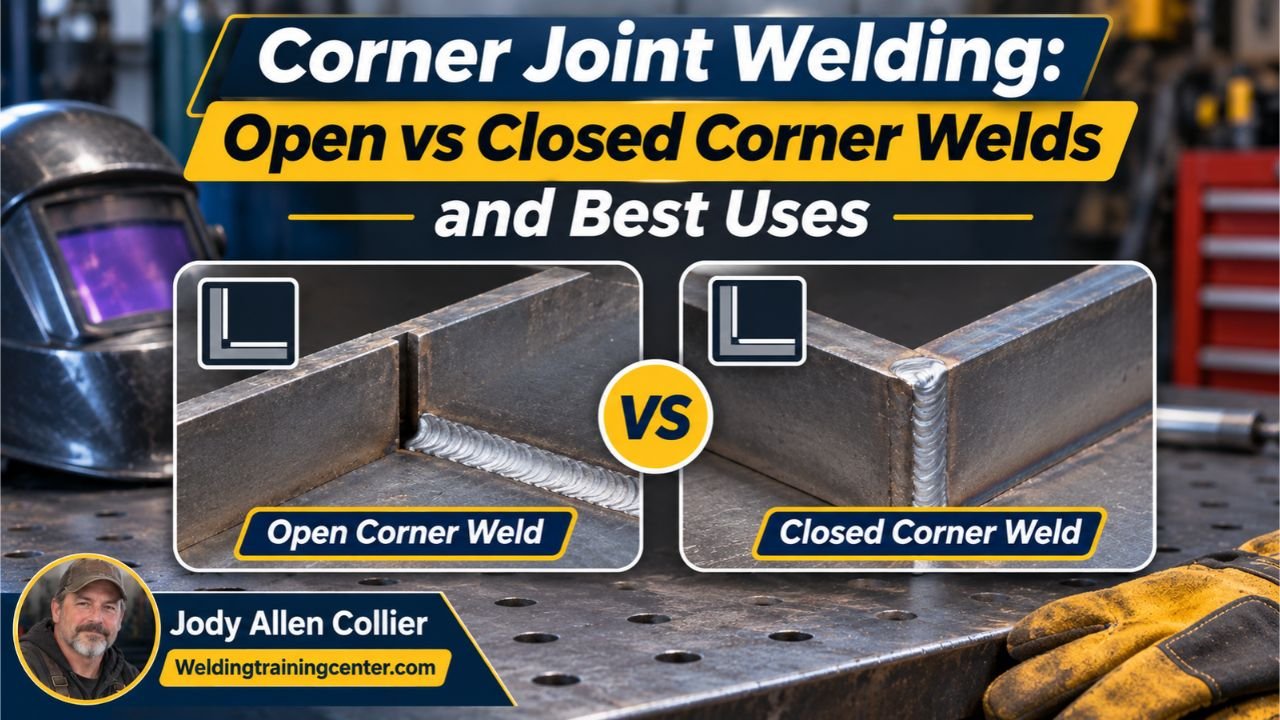
Corner Joint Welding: How to Choose Open or Closed
An open corner has a deliberate gap where two pieces meet; a closed corner has edges placed together with little or no gap. Use a closed corner for many light-duty sheet-metal boxes and frames, and consider an open corner when thicker material or a specified groove weld calls for access to the root.
A corner joint describes the arrangement of the parts, not the exact weld you’ll deposit. The weld might be a fillet along the inside or outside, or a groove weld that fills a prepared space; the drawing, load, thickness, and welding procedure guide that choice.
| Setup | What the edges do | Common use | Main watch-out |
|---|---|---|---|
| Closed corner | Edges touch or sit very close | Thin sheet, enclosures, light frames | Tight fit can make root fusion harder to judge |
| Open corner | Edges leave a planned gap | Thicker parts or groove-weld preparation | Too much gap can cause burn-through or excess filler |
| Partly open corner | A small, controlled gap remains | Fit-up variation or specified weld prep | Gap must stay consistent along the joint |
Treat the table as a starting point, not a weld procedure. A print or approved procedure can set the required gap, weld size, and preparation, and those instructions take priority over a general rule.
For thin sheet, a closed corner can reduce the chance of dropping molten metal through a large opening. For thicker plate, forcing the edges tight may block access to the root, the deepest part of the joint, so a prepared opening can help the weld fuse through the required section.
A fillet weld is a roughly triangular weld that joins two surfaces meeting at an angle. A groove weld fills a space between prepared edges, and may call for a bevel or another edge preparation when the material and design require deeper weld penetration.
Don’t confuse joint shape with weld position or weld type. If you’re comparing the larger family of welding joint types, remember that a corner joint is one arrangement among several, while a fillet or groove weld names the weld itself.
If your parts form a T rather than an L, you’re dealing with a different setup. A T-joint welding setup joins one member to the face of another, so access, weld placement, and distortion control can differ.
Pro Tip: Cut and fit a short practice piece from the same material before welding a visible corner. It lets you check machine settings and bead control without sacrificing the finished part.
How to Fit, Tack, and Weld a Corner Joint
Good corner welds start with clean, steady fit-up and short, balanced weld passes. A little time spent clamping and tacking usually pays off by keeping the corner square and the gap consistent.
Start with the drawing or project requirements. Check the material type and thickness, the required weld size, and whether the joint needs a specific edge prep; if there’s no drawing, choose a sound setup for the intended load and avoid treating appearance as proof of strength.
Use this sequence:
- Clean the joint area. Remove oil, paint, rust, scale, and other contamination from the surfaces that must fuse. The right cleaning method depends on the metal and coating.
- Cut and check the edges. Make the ends square and remove burrs. A jagged edge creates uneven gaps that are hard to fill consistently.
- Dry-fit the parts. Put them together without welding and check the angle, alignment, and gap along the full seam. A short square or a reliable fixture helps.
- Clamp the pieces. Hold the parts firmly enough to prevent movement, but don’t use so much force that you bend thin material out of shape.
- Place small tacks. Tack near the ends and at useful points along a longer seam, then recheck the angle. If a tack pulls the parts out of position, correct it before adding more weld.
- Weld in a controlled sequence. Use short sections or alternate locations when heat could pull the assembly out of square. Let the part cool as needed rather than racing through a long seam.
- Inspect the finished joint. Look for visible gaps, cracks, undercut, missed areas, and signs of poor fusion. Check dimensions and angle before grinding or coating the part.
What should you do if the gap varies from one end to the other? Stop and correct the fit-up before welding, especially if the opening is large enough to change how the weld behaves. Adding filler to hide a bad fit can make the bead lumpy without fixing the root problem.
My most useful lesson on corners came from a small frame that kept shifting as I welded around it. I started alternating short welds on opposite sides, and the frame held its shape much better; the practical point is to manage heat, not just chase a continuous bead.
The exact welding technique depends on the process and material. With GMAW, often called MIG welding, wire feeds continuously through a gun; GTAW, commonly called TIG, uses a nonconsumable tungsten electrode and gives the welder more control, while SMAW, or stick welding, uses a flux-coated electrode.
Thin metal generally needs careful heat control and a steady hand. A large gap, slow travel, or too much heat can burn through sheet, while moving too fast or setting the process poorly can leave the joint cold and unfused.
Thicker material may need a bevel or another edge prep so the weld can reach the required depth. Don’t add a bevel or choose a weld size by guesswork when the project has a drawing, code requirement, or procedure to follow.
A corner made from folded sheet can have different needs from two separate pieces welded edge to edge. If the edge arrangement is the main feature rather than two members meeting at a corner, an edge joint weld may be the closer comparison.
Important Tip: Before welding metal with paint, plating, galvanized coating, or an unknown finish, identify the material and coating and follow safe removal and ventilation practices. Fumes can be hazardous, so don’t weld through an unknown coating or rely on an ordinary dust mask for protection.
Welding also brings fire, eye, burn, and electric-shock risks. Wear the correct welding helmet, gloves, protective clothing, and footwear; keep flammable materials away; use suitable ventilation; and follow the machine manual and shop safety rules.
Common Corner Weld Problems and Better Choices
Most corner-joint problems trace back to poor fit-up, excess heat, weak fusion, or a weld size that doesn’t match the job. A bead can look smooth and still fail to fuse properly, so inspect the joint rather than judging it by shine alone.
| What you notice | Likely cause | What to check |
|---|---|---|
| Hole or sag in thin material | Too much heat, too large a gap, or slow travel | Fit-up, settings, and travel speed |
| Weld sits on top with a sharp edge | Poor fusion or incorrect technique | Cleaning, torch or electrode angle, and heat input |
| Corner pulls out of square | Uneven heat or too few effective tacks | Tack placement and weld sequence |
| Cracks at the end of a weld | Poor termination, restraint, or a material issue | End technique, fit-up, and procedure |
| Excess buildup on the outside | Too much filler or poor bead placement | Required weld size and travel technique |
These clues aren’t a substitute for inspection standards or a qualified weld inspector when the part is safety-critical. If a crack appears, don’t simply cover it with another bead; remove the defect and identify the cause before making a repair that meets the job requirements.
A root opening is the gap at the deepest part of a prepared joint. A controlled root opening can help a groove weld reach the intended depth, while a gap that wanders along the seam can make penetration and bead shape inconsistent.
Corner joints are common in cabinets, bins, frames, ductwork, and small brackets, but the loads vary widely. A decorative enclosure doesn’t call for the same design checks as a lifting fixture or a vehicle component, and a visually neat weld doesn’t establish that a joint is safe for a critical load.
If strength matters, follow the drawing and applicable procedure instead of selecting a weld by looks. Weld size, material grade, loading direction, and access all affect the choice, and a qualified welding professional can help when the part carries people, equipment, or serious weight.
- Open corners leave a planned gap; closed corners bring the edges together.
- The joint setup and weld type are separate decisions.
- Consistent fit-up, balanced tacks, and controlled heat help prevent defects and distortion.
- Follow the drawing or welding procedure when the joint has a structural or safety role.
FAQs About Corner Joint
Is a corner joint always a 90-degree joint?
No, a corner joint often joins members at 90 degrees, but the angle can vary with the design. The joint is defined by the way the parts meet at an outside corner, so check the drawing rather than assuming every corner has a right angle.
Should a corner joint be open or closed?
Neither setup is right for every job. A closed corner often suits thin sheet and close-fitting parts, while an open corner can suit a specified groove weld or thicker material that needs root access. The required weld and fit-up should decide the choice.
Is a fillet weld strong enough for a corner joint?
A fillet weld can be suitable when its size, length, material, and loading meet the design needs. A corner joint’s shape alone doesn’t tell you whether a fillet is strong enough, so follow the drawing or have a qualified person assess a safety-critical part.
Why does my corner joint keep pulling out of square?
Corner joints can distort because uneven heat makes the metal expand and contract across the assembly. Check the fit-up and clamps, use appropriate tacks, and consider alternating short welds across the part; the right sequence depends on its size and design.
Can I weld a corner joint with MIG?
Yes, MIG welding can join many corner joints when the material, thickness, joint prep, and settings suit the job. Thin material needs careful heat control, while thicker material may need edge preparation. Follow the machine guidance and any job-specific welding procedure.
Make the Fit-Up Your First Priority
A corner joint is easier to weld well when you choose the open or closed setup for the material and job, then keep the parts steady as you work. That sounds simple, but inconsistent gaps and a rushed tack-up cause plenty of frustrating repairs.
I’d put fit-up ahead of trying to make a perfect-looking bead. If the joint is a light-duty box or frame, test your setup on matching scrap and check the finished angle; if the part carries a serious load, follow its drawing or ask a qualified welding professional to confirm the joint design.
Your next step is straightforward: clean a practice piece, clamp it, tack it, and inspect the gap before laying down a full weld. That small pause can save you from grinding, reworking, or guessing about what went wrong.