What Is Duty Cycle in Welding? Ratings, Run Time, and Limits
Duty cycle in welding is the percentage of a 10-minute period that a welding machine can run at its rated output without overheating. For example, a 40% duty cycle at 200 amps means you can weld for four minutes, then allow six minutes for cooling at that output. Amps measure the electrical current flowing through the welding circuit.
The tricky part is that the largest amperage number printed on a welder doesn’t tell you how long it can hold that output. You might start a long joint, settle into a steady welding rhythm, and suddenly lose your arc when the machine gets too hot.
I’ve found that the duty-cycle rating tells you more about a machine’s working limits than its advertised peak power. A welder can handle short tack welds, which temporarily hold pieces together, yet struggle with a long, continuous joint. Ever had a welding machine stop while its cooling fan kept running?
Say you’re repairing a trailer gate with MIG welding, a wire-feed process that uses an electric arc to join metal. Short welds between fitting and clamping may never push the machine hard. Move to a long seam on thick steel, and the same welder may need more downtime than you expected.
I’ll explain how duty cycle works, how to calculate your available welding time, and what makes one rating better than another. Once you know what to look for, choosing the right welder becomes much easier.
What Is Duty Cycle in Welding, and What Does It Measure?
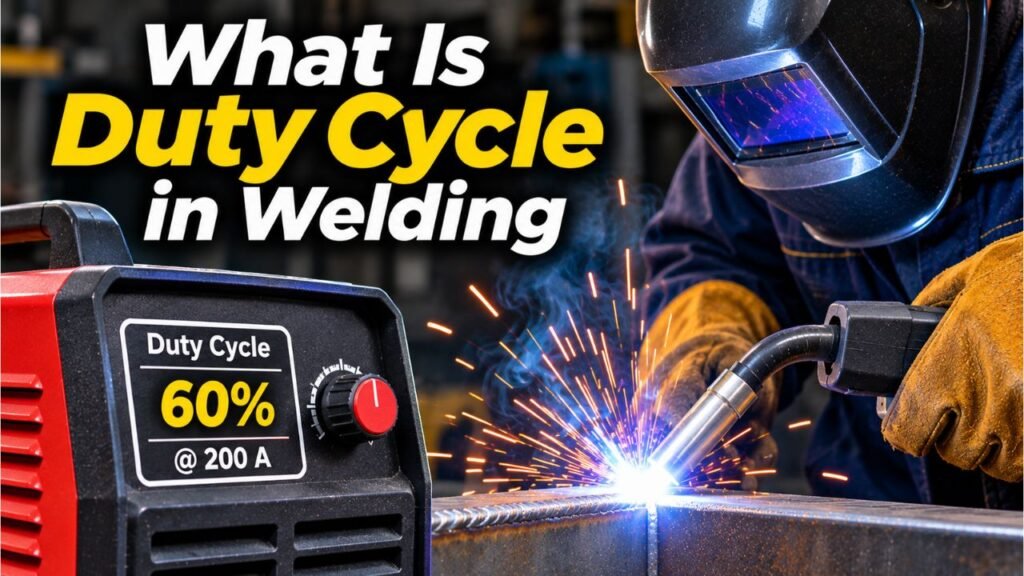
Duty cycle measures the thermal working limit of a welding power source, the machine that supplies electrical current to the welding circuit. It tells you how long the equipment can produce a stated output before it needs time to release heat.
The term rated output refers to the amperage and voltage conditions specified by the manufacturer for a particular duty-cycle rating.
The key is to read the amperage and duty-cycle percentage together. A machine rated for 60% duty cycle at 150 amps isn’t necessarily stronger than one rated for 40% at 250 amps.
Why welding machines need a duty cycle
Welding machines generate heat while converting electrical power into the current needed for welding. Some heat builds up in the internal electronic parts, transformer, cables, and electrical connections.
An inverter welder, which uses electronic circuits to control welding power, also produces internal heat even though its design may be smaller and lighter than a traditional transformer machine.
Cooling fans and heat sinks, which move heat away from electrical components, help manage that temperature. But every machine has limits.
Duty-cycle ratings exist so you know how hard the equipment can work without exceeding its designed temperature range.
Duty cycle is different from welding strength
A higher duty cycle doesn’t automatically create a stronger weld.
Weld strength depends on proper joint preparation, suitable settings, sound technique, and adequate fusion. Fusion means the base metals melt and join properly with the deposited weld metal.
Duty cycle affects how long your equipment can maintain the required output, not the quality of the joint by itself.
For example, a low-duty-cycle machine can produce a sound short weld when used within its limits. A high-duty-cycle industrial welder can still produce a poor joint if the operator uses the wrong settings.
That distinction matters when you’re comparing machines.
How to Calculate Welding Duty Cycle
Calculating duty cycle is straightforward. Convert the percentage into minutes using the standard 10-minute rating period.
The basic formula is:
Welding time = (Duty cycle ÷ 100) × 10 minutes
To calculate the cooling period:
Cooling time = 10 minutes − Welding time
Welding duty cycle chart
| Duty cycle | Welding time | Cooling time |
| 20% | 2 minutes | 8 minutes |
| 30% | 3 minutes | 7 minutes |
| 40% | 4 minutes | 6 minutes |
| 50% | 5 minutes | 5 minutes |
| 60% | 6 minutes | 4 minutes |
| 80% | 8 minutes | 2 minutes |
| 100% | Continuous at rated output | No scheduled duty-cycle break |
These figures apply to the stated output and rating conditions. They aren’t universal operating limits for every amperage setting.
Example: A welder rated at 35% duty cycle
Suppose your machine has the following specification:
- Rated welding current: 160 amps
- Duty cycle: 35%
- Rating period: 10 minutes
The calculation is:
35 ÷ 100 × 10 = 3.5 minutes
That gives you approximately three minutes and 30 seconds of continuous welding at 160 amps, followed by six minutes and 30 seconds of cooling under the rated conditions.
You can check the same calculation against this manufacturer’s duty-cycle guide, which explains how output settings and operating time relate.
How to read the duty-cycle rating on your machine
Most welding machines include a rating plate, specification sheet, or operating manual showing the duty cycle.
I always favor the detailed rating chart over the biggest amperage figure on the machine’s front panel. That small difference in how you read the specifications can save you from buying an undersized welder.
Look for:
- Rated welding current: The output amperage associated with the stated duty cycle.
- Output voltage: The voltage the welder supplies at the stated operating point.
- Duty-cycle percentage: The allowable welding time within the rating period.
- Input power: The electrical supply required to achieve the published performance.
If you’re unfamiliar with how current affects welding, my guide to welding current and amperage explains the basics.
Pro Tip: Some manufacturers publish several duty-cycle ratings at different amperages. Use that chart to check the current you actually plan to weld at, rather than relying only on the maximum-output specification.
Key Takeaways:
- A percentage alone doesn’t tell the full story.
- Compare machines at similar working currents.
- The detailed output chart is more useful than a peak-power claim.
How Amperage and Voltage Affect Welding Duty Cycle
Duty cycle generally decreases as welding amperage increases because the machine must handle more electrical load and internal heat.
Higher current means more work for the power source. Lower current usually allows longer welding periods, although the exact relationship depends on the machine’s design.
Higher amperage means more heat inside the welder
Suppose a welder has these hypothetical ratings:
- 200 amps at 30% duty cycle
- 150 amps at 60% duty cycle
- 100 amps at 100% duty cycle
At its lower setting, the machine can operate for a much longer period without a scheduled cooling break.
But why not simply turn down the current whenever the welder gets hot?
Because the metal still needs enough welding current to achieve proper fusion.
I’ve found that using an amperage setting that’s too low just to extend run time is a poor trade. A joint with inadequate penetration can create a bigger problem than a short cooling break.
The correct setting comes first. Duty cycle tells you whether your machine can sustain it.
Welding voltage and electrical input matter too
Welding voltage affects the arc’s electrical characteristics, including arc length and behavior. Higher output voltage at a given current can increase the electrical power the machine must deliver.
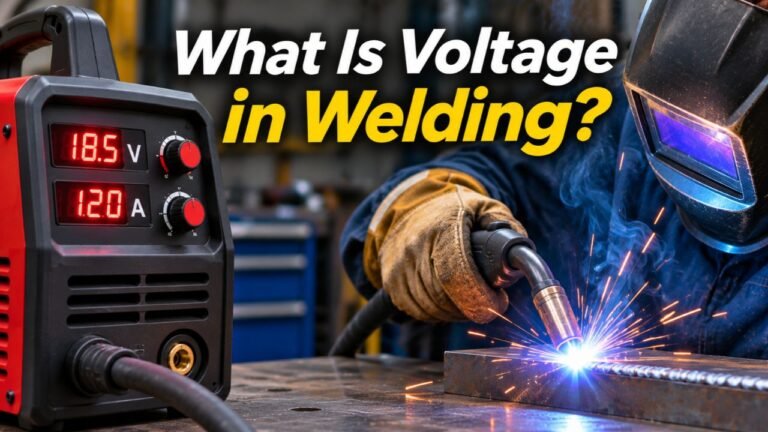
If you want the basic relationship between current and voltage explained, read about voltage in welding.
The electrical supply feeding the machine also matters.
Some dual-voltage welders operate from either a 120-volt or 240-volt outlet. Their available output and duty-cycle specifications may differ between those input options.
Don’t assume every dual-voltage machine has identical performance on both supplies.
Check the operating manual, and use only an outlet, circuit, plug, and breaker that meet the manufacturer’s requirements.
MIG, TIG, and stick welding can have different ratings
A multiprocess welder may have separate duty-cycle figures for each welding mode.
Here’s how the common processes differ:
- MIG welding: Uses a continuously fed wire electrode. The operator can often produce long welds without stopping to replace filler material.
- TIG welding: Uses a tungsten electrode that doesn’t melt into the joint. The process gives precise control and may require sustained arc time.
- Stick welding: Uses a coated metal electrode that gradually burns away. Replacing rods creates natural interruptions.
Because the machines control welding output differently in each process, don’t assume one duty-cycle percentage applies to every mode.
What Changes Welding Duty Cycle in Real Working Conditions?
Ambient temperature, machine ventilation, electrical loading, and cooling-system condition all affect how easily a welder manages heat.
The published rating gives you a useful reference, but actual shop conditions can make the equipment reach its temperature limit sooner.
Ambient temperature
Hot surroundings reduce the temperature difference between the machine and the surrounding air, making cooling less effective.
The arc-welding power-source standard IEC 60974-1 specifies performance and safety requirements. Its heating tests generally use an ambient temperature of 104°F (40°C) for covered electric welding power sources.
Not every consumer machine is rated under the same conditions, so check the manufacturer’s test basis.
Say you’re welding outdoors on a hot summer afternoon with your machine sitting in direct sunlight. Even if the settings haven’t changed, heat may build up faster than it would in a cooler, well-ventilated shop.
Does a cold garage mean you can ignore the published duty cycle? No. Cooler air may improve heat removal, but it doesn’t establish a new certified rating.
Cooling fan performance and airflow
A welding machine needs open air passages to remove heat.
Common problems include:
- Blocked ventilation openings
- Heavy dust buildup around cooling passages
- A cooling fan that isn’t operating as intended
- Equipment placed too close to walls or other objects
Grinding dust is particularly troublesome around welding equipment because metal particles can accumulate inside electrical machinery.
Important Tip: Turn off and disconnect the welder before performing user-approved cleaning. Never open an energized machine or blow debris into internal components without following the manufacturer’s service instructions.
Welding gun and cable ratings
Your welding machine isn’t the only component with a temperature limit.
A MIG gun can have its own duty-cycle rating, based on the current it can carry without overheating.
A power source rated for continuous operation doesn’t automatically mean its connected gun, electrode holder, or cables can handle the same load.
For example, an undersized MIG gun may become uncomfortably hot even while the machine itself operates within its published limits.
Always use accessories rated for the actual welding current and process.
Key Takeaways:
- Published ratings rely on stated test conditions.
- Cooling-system condition affects usable working time.
- The torch and cables must match the welding load.
What Happens If You Exceed the Duty Cycle?
Exceeding the rated duty cycle can make the machine overheat and trigger its thermal protection system. Repeatedly pushing beyond the stated limit can shorten equipment life.
Most modern welders include some form of thermal overload protection, a system that stops welding output when internal temperatures rise too high.
Signs your welder has reached its thermal limit
Depending on the model, you may notice:
- The welding arc suddenly stops.
- A temperature warning light appears.
- The machine displays an overload or fault code.
- The cooling fan continues operating while welding output remains disabled.
These symptoms can also result from other faults, so check the machine’s manual before assuming duty cycle is the cause.
An unexpected shutdown may interrupt the finished weld bead, leaving a stop point that needs proper cleaning and preparation before welding resumes.
What to do when thermal protection activates
Stop welding and allow the machine to cool according to its operating manual. Don’t repeatedly pull the trigger to force another arc.
Follow this order:
- Release the welding trigger or stop using the electrode.
- Check the warning light or fault code.
- Leave the machine powered as directed by the manufacturer so its cooling system can operate.
- Allow the specified cooling period.
- Resume only after the machine indicates that it’s ready and you’ve corrected the operating condition.
Some machines require a longer cooldown after a thermal trip than the normal rest period shown in the duty-cycle chart.
I’ve learned to treat a thermal shutdown as a reason to review the setup rather than something to push through. Ignoring that warning can turn a manageable interruption into an equipment problem.
Never bypass a thermal switch or modify the cooling system to defeat overheating protection.
How Much Duty Cycle Do You Need for Your Welding Projects?
The right duty cycle depends on the current your work requires and how long you need to maintain an arc.
A home repair project with short welds has different demands from production fabrication, where operators may run extended passes throughout a shift.
Light home repairs and occasional welding
A machine with a modest duty cycle can work well for occasional tasks.
Examples include repairing a small bracket, working on thin sheet metal, or joining pieces of a light steel frame.
These jobs often involve measuring, fitting, clamping, and repositioning between welds.
A lower duty-cycle rating may be perfectly reasonable if the machine provides sufficient output for the material.
Garage fabrication and regular welding
For frequent projects involving longer joints, a machine offering around 40% to 60% duty cycle at the required current can be a practical target.
The specific output matters more than hitting one percentage.
For instance, a 60% duty cycle at 100 amps won’t necessarily suit a job that requires welding at 200 amps.
I lean toward having some extra duty-cycle capacity when choosing a machine for regular fabrication. It gives you more freedom to finish a pass without planning every weld around a cooling break.
Heavy fabrication and production welding
Long seams, high-current work, and repeated welding operations call for equipment designed to manage sustained heat.
Industrial machines with high duty-cycle ratings are often a better fit for this work.
A 100% duty cycle means the machine is rated to weld continuously at the stated output under its specified operating conditions.
It doesn’t mean the welder can operate at any amperage without limitations.
Want an apples-to-apples comparison between two welding machines? Compare their duty-cycle figures at the same or similar output currents, using the stated input supply and test conditions.
Key Takeaways:
- Occasional repair work may not justify industrial capacity.
- Long welding passes demand more thermal headroom.
- Buy for the current your projects require, not the largest advertised number.
Common Mistakes When Using Welding Duty-Cycle Ratings
Most duty-cycle mistakes come from confusing maximum output with sustained output, overlooking test conditions, or expecting the cooling system to compensate for unsuitable settings.
Avoiding these problems makes your welding sessions more predictable.
Mistake 1: Buying a welder based only on maximum amps
A machine advertised as a 250-amp welder may offer that output at a relatively short duty cycle.
Another welder with a lower maximum amperage may run much longer at the current you normally use.
Look at the full performance curve before making your choice.
Mistake 2: Treating duty cycle as a stopwatch that resets instantly
Duty cycle describes a thermal operating limit over a specified rating period.
It doesn’t mean the machine becomes completely cool every time you stop welding or that starting a new 10-minute count immediately restores its full capacity.
Internal heat continues to build and dissipate according to how hard the machine has been working.
Mistake 3: Reducing amperage below what the joint requires
It’s tempting to lower the heat setting when your machine keeps stopping.
But using too little current can cause lack of fusion, where weld metal fails to bond properly with the joint surfaces.
Don’t cut corners on required welding parameters to gain more arc time.
Mistake 4: Comparing percentages from different test conditions
Some manufacturers provide ratings under different ambient temperatures or supply conditions.
A specification based on cooler test air may look more impressive than one established at 104°F.
Check the temperature, input voltage, amperage, and welding mode used for the rating.
Mistake 5: Assuming an overheating machine is always defective
Frequent shutdowns can indicate an undersized welder, poor airflow, excessive loading, or a real equipment fault.
I recommend checking the operating conditions first, then having the machine inspected by a qualified technician if it still trips while working within its published limits.
How to Get More Welding Time Without Overheating
You can make better use of your available duty cycle by preparing the job properly, maintaining cooling airflow, and choosing equipment that matches the work.
The goal isn’t to defeat the rating. It’s to use the machine efficiently within its designed limits.
Prepare your metal before striking an arc
Clean the joint, establish the required fit-up, and position your clamps before welding.
Fit-up means how the metal pieces align and how much gap exists between them before you start.
Good preparation reduces wasted arc time caused by poor access, repeated corrections, and unnecessary restarts.
Use natural pauses productively
Manual welding already includes small breaks for inspecting work, changing position, and preparing the next joint.
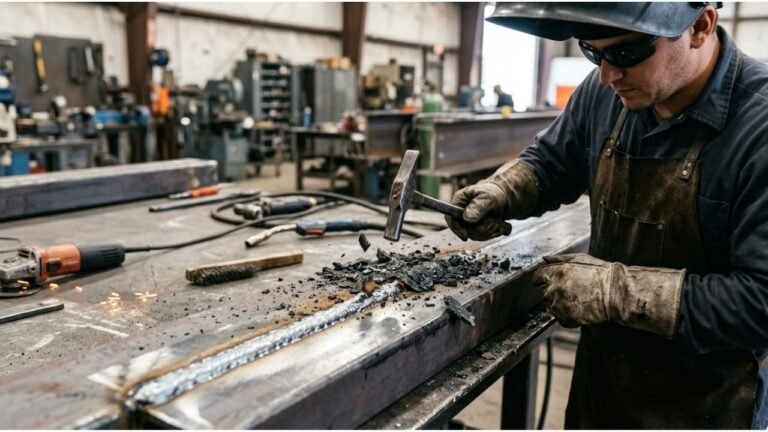
Stick welding also involves removing slag from welds, the hardened protective material left by the electrode’s flux coating.
These activities can fit naturally into the machine’s cooling periods.
Choose the correct settings and equipment
Set the machine according to the material, joint design, electrode or wire, and welding procedure.
Don’t use higher current than the job requires, but don’t sacrifice sound fusion to extend welding time.
If your normal work repeatedly exceeds the machine’s rating, moving to a higher-duty-cycle power source is generally more effective than trying to squeeze extra output from an undersized unit.
The best improvement is often choosing the correct machine capacity before the project starts.
FAQs about What Is Duty Cycle in Welding
Does a 100% duty cycle mean a welder can run all day?
A 100% rating means the machine can sustain its specified output without scheduled duty-cycle cooling breaks under the stated conditions. Actual operation still depends on ventilation, correct input power, accessory ratings, and normal equipment condition. It isn’t a promise of unlimited output or protection against every possible overheating fault.
Is duty cycle the same for inverter and transformer welders?
Both inverter and transformer welders use duty-cycle ratings, but their cooling designs and electrical losses differ. An inverter isn’t automatically better simply because it uses newer electronics. Compare the published amperage, voltage, test conditions, and duty-cycle figures rather than judging performance by the machine’s internal technology.
Can I increase a welder’s duty cycle by adding an external fan?
Extra air movement around a machine may help remove surrounding heat, but it doesn’t change the manufacturer’s published duty-cycle rating. Don’t modify internal fans, wiring, or protective components. If the machine regularly needs extra cooling to complete normal jobs, check its operating conditions and suitability for the work.
Is welding duty cycle the same as arc-on time?
Not exactly. Arc-on time is the actual time an operator spends welding with an active arc. A machine’s duty-cycle rating describes its allowable thermal loading at a stated output. In production work, operators also track the percentage of a shift spent welding, sometimes called the operating factor.
Does duty cycle affect weld penetration?
Duty cycle doesn’t directly determine penetration. Penetration depends on the welding process, current, voltage, travel speed, joint preparation, and other variables. Duty cycle matters indirectly because it determines how long the machine can maintain the required output without a thermal interruption.
Choose a Welding Machine That Matches Your Actual Workload
A welder’s duty-cycle rating is most useful when you compare it with the type of work you actually do. The machine with the highest amperage isn’t automatically the smartest purchase.
For small repairs and occasional garage jobs, a modest machine with adequate output may be all you need. For repeated long passes, I’d favor a welder that can hold the required current with room to spare.
The same thinking applies if you already own a welder. Work within its rated operating conditions, maintain its cooling system, and follow the correct welding procedure rather than reducing heat below what the joint requires.
Your next step is simple: Find the duty-cycle chart in your welder’s manual and identify the rating at your normal welding amperage. That one check tells you far more about the machine’s practical capacity than its maximum amperage alone.