What Is Spatter in Welding? Causes, Prevention, and Safe Cleanup
If you’re asking what is spatter, spatter is the tiny droplets of molten metal thrown out of a welding arc or weld pool that cool into hard specks around the joint. Some spatter is normal during welding, but excessive amounts can point to poor settings, dirty metal, or problems with your welding technique.
You finish a weld, lift your helmet, and notice dozens of little metal balls stuck to the surrounding steel. The weld itself might look decent, but now you’ve got extra scraping and grinding to do. Sound familiar?
Say you’re welding a small bracket in your garage. The arc starts popping, hot droplets scatter across the workbench, and a simple repair turns into a messy cleanup job. You might blame the machine, even though the real problem could be something as simple as wire feed speed or dirty metal.
Here’s the catch: spatter doesn’t automatically mean your weld is weak. Some welding processes naturally throw more droplets than others, and different causes call for different fixes. Changing the wrong setting can make matters worse.
In this guide, I’ll explain why spatter forms, how to reduce it without guessing at machine settings, and how to remove it safely. Once you know what to look for, those little metal dots become useful clues instead of another headache.
What Is Spatter in Welding and How Does It Form?
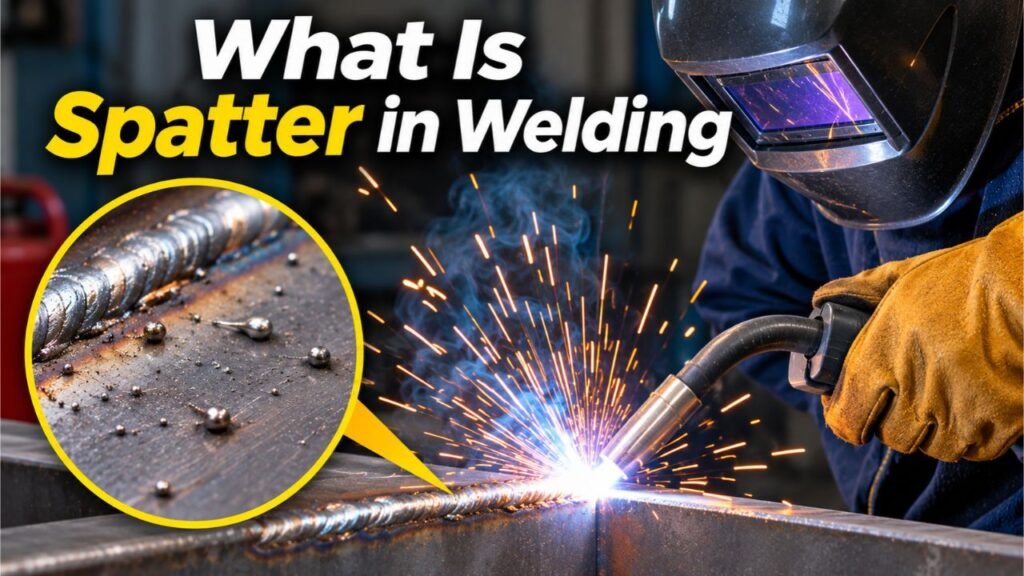
Welding spatter forms when small amounts of molten metal escape from the welding arc or weld pool instead of becoming part of the finished weld. The droplets travel through the air and harden wherever they land.
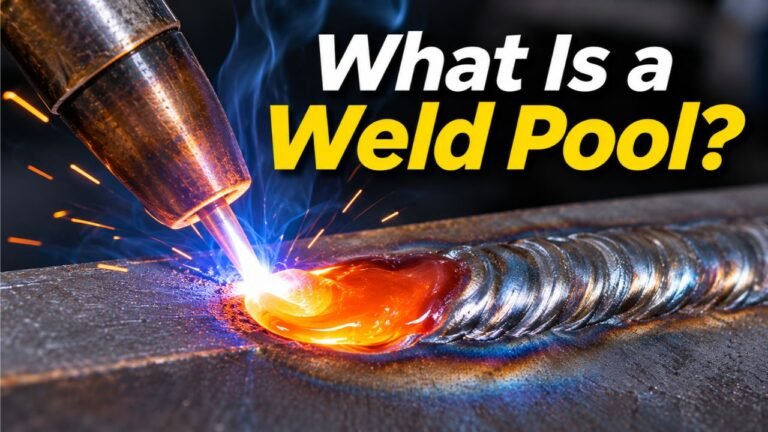
During arc welding, electrical energy creates enough heat to melt metal. The molten filler metal and base metal form a liquid area called the weld pool. As the torch or electrode moves along the joint, that liquid metal cools and forms the weld.
Ideally, most of the molten filler metal transfers smoothly into the pool. In practice, the transfer isn’t always perfectly stable.
Some droplets break away and scatter onto nearby surfaces. These droplets might come from the electrode, welding wire, or molten pool itself.
What Welding Spatter Looks Like
Spatter usually appears as small, round metal particles scattered around the weld. Some particles sit loosely on the surface, while others become firmly attached.
You might notice:
- Tiny metal balls surrounding the weld bead.
- Rough metal spots stuck to the workpiece.
- Small particles collecting inside a MIG welding nozzle.
- Scattered metal deposits on nearby fixtures or equipment.
- More popping sounds and flying droplets than expected during welding.
The particles vary in size depending on the welding process, settings, and metal transfer behavior.
For example, a MIG weld made with unstable settings might leave many small metal balls around the joint. A smoother arc under suitable conditions usually produces less cleanup.
Spatter vs. Slag vs. Welding Sparks
Spatter, slag, and sparks are related to welding, but they aren’t the same thing.
Spatter consists mainly of expelled molten metal droplets that solidify outside the intended weld.
Slag is a nonmetallic layer produced by flux during processes such as stick welding and certain flux-core welding methods. It can cover the weld bead and must be removed when required before inspection or another welding pass. You can learn more about welding slag and how it forms.
Welding sparks are the bright, flying particles you notice during welding. Some may be molten metal droplets that later become spatter, but the terms describe different things: sparks describe the visible hot particles, while spatter refers to the expelled material and its deposits.
The distinction matters because cleaning slag doesn’t fix the same problems that cause excessive spatter.
What Causes Excessive Welding Spatter?
Excessive welding spatter usually comes from unstable metal transfer, incorrect welding settings, contaminated surfaces, or poor welding technique. Several factors can contribute at the same time.
The most useful approach is to identify the likely cause before adjusting the machine.
1. Incorrect Voltage and Amperage Settings
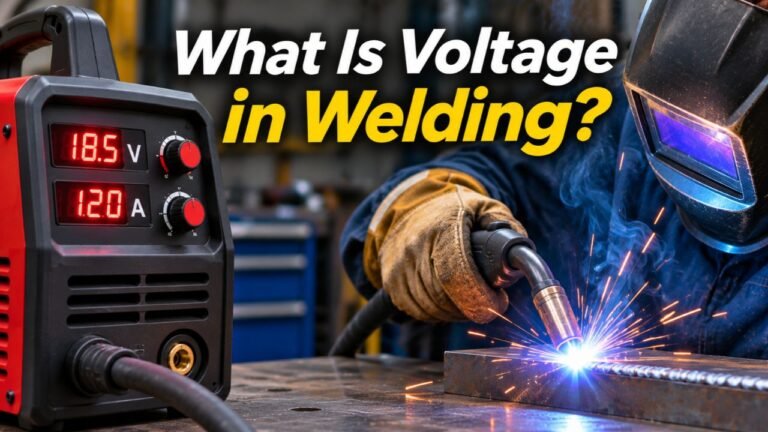
Voltage and amperage affect how the welding arc behaves and how molten metal transfers into the weld pool.
Voltage influences arc length and behavior. In MIG welding, voltage that is too low for the selected wire feed speed can cause the wire to repeatedly stub into the molten pool. Excessively high voltage can also create an unstable arc under certain conditions.
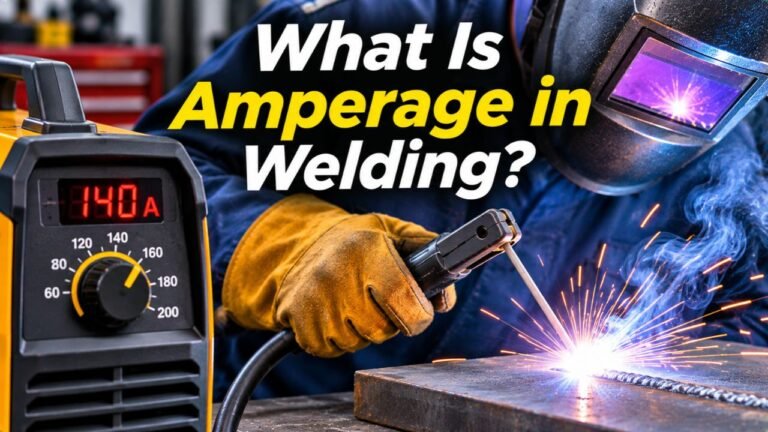
Amperage measures electrical current. In conventional constant-voltage MIG welding, increasing wire feed speed generally increases welding current.
If the settings don’t match, the arc may pop, sputter, or throw additional droplets.
For example, pushing wire into the weld pool faster than the arc can melt it often creates an irregular welding sound and more spatter.
The correct settings depend on material thickness, wire diameter, shielding gas, and welding position.
You can learn how welding amperage affects the process and how welding voltage changes arc behavior.
For practical starting settings, the MIG welding parameter guidance explains how wire feed speed, voltage, and material thickness work together.
2. Dirty or Contaminated Base Metal
Rust, oil, paint, moisture, and other surface contaminants can interrupt the welding arc and disturb the molten pool.
When contamination heats rapidly, it can produce gases and disrupt normal metal transfer.
Consider a steel bracket covered with light rust and oily residue. Welding directly over the surface might create an erratic arc and scattered metal particles. Cleaning the joint before welding removes one possible cause.
Clean, dry metal provides a more consistent starting point and helps reduce several other weld problems, including porosity.
Be careful with painted, galvanized, or otherwise coated metal. Removing coatings and welding these materials can create hazardous dust or fumes, so use the correct material-specific safety procedure.
3. Excessive Electrode Stickout
Stickout is the length of welding wire extending beyond the contact tip in a MIG gun.
When the wire extends too far, it can affect electrical resistance, current, gas coverage, and arc stability. The result may be increased spatter and poor weld consistency.
For example, holding the MIG gun too far from the workpiece can create excessive wire extension and make the arc harder to control.
The correct stickout depends on wire type, diameter, welding process, and manufacturer recommendations. Avoid applying one fixed distance to every setup.
4. Poor Shielding Gas Coverage or Incorrect Gas Selection
Shielding gas protects molten weld metal from the surrounding atmosphere. Problems with gas coverage can affect arc behavior and weld quality.
Common issues include:
- Incorrect shielding gas for the wire or welding process.
- Gas flow that is too low or excessively high.
- Drafts that blow shielding gas away from the joint.
- Leaking gas connections or blocked nozzles.
- Spatter buildup that restricts gas flow.
Gas composition also changes metal transfer.
For example, solid-wire MIG welding on mild steel with pure carbon dioxide often produces more spatter than welding with a suitable argon-carbon dioxide mixture.
That doesn’t make pure carbon dioxide the wrong choice. It can be useful for certain applications, and the correct gas depends on the welding procedure.
5. Poor Torch Angle, Travel Speed, or Wire Feeding
An incorrect torch angle or inconsistent movement can disturb the molten pool.
Moving too quickly might produce a narrow bead with inadequate fusion. Traveling too slowly can add too much heat and change the pool’s behavior.
A damaged contact tip, worn drive rolls, or a dirty wire liner can also interrupt wire delivery, making the arc unstable.
Incorrect polarity is another possible cause. Different wires and welding processes require different electrical connections, so check the consumable instructions rather than guessing.
Key Takeaways:
- Excessive spatter often comes from mismatched voltage and wire feed speed.
- Dirty metal, incorrect stickout, and poor shielding gas coverage can increase spatter.
- Wire feeding problems and incorrect polarity can make the arc unstable.
- Diagnose the cause before changing several settings at once.
How to Reduce Welding Spatter and Get Cleaner Welds
Reducing welding spatter starts with proper machine setup, clean materials, and steady technique. You don’t need to eliminate every droplet, but you should aim for a stable arc and consistent weld bead.
I recommend following these steps in order, especially when troubleshooting MIG welding.
1. Start With the Correct Machine Settings
Check your welder’s settings chart or the wire manufacturer’s recommendations.
Match the setup to your material thickness, wire size, shielding gas, and welding position. Confirm that the wire or electrode requires the polarity you’ve selected.
Don’t simply turn down the amperage or increase the voltage whenever spatter appears. Either adjustment can help or hurt, depending on the original problem.
For a MIG welder, begin with the recommended voltage and wire feed speed combination.
2. Prepare the Metal Before Welding
Remove rust, dirt, oil, moisture, and other contaminants from the joint using an appropriate cleaning method.
Clean the area where the work clamp connects to the metal, too. A poor electrical connection can contribute to inconsistent welding.
If you’re working on coated or unknown metal, identify the material and follow appropriate coating-removal and exposure-control procedures before welding.
Skipping preparation can put you right back to square one when the arc starts acting up.
3. Check Shielding Gas and Gun Condition
If your welding process uses external shielding gas, confirm that you’re using the correct gas and flow setting.
Inspect the nozzle for spatter buildup and check for damaged gas hoses or loose connections.
Keep drafts away from gas-shielded welding. A strong breeze can disrupt the protective gas around the weld pool.
Increasing gas flow without checking the cause isn’t always the answer. Excessive flow can create turbulence and draw surrounding air into the shielding area.
4. Maintain the Correct Stickout and Torch Angle
Hold the welding gun at a consistent distance and angle throughout the weld.
Use the wire manufacturer’s recommended stickout. Keep your travel speed steady and watch the leading edge of the weld pool.
A consistent technique helps maintain stable heat and metal transfer.
5. Inspect Welding Wire and Consumables
Check the wire for rust, dirt, and damage. Make sure the contact tip matches the wire diameter and isn’t badly worn.
Inspect the drive rolls and liner if the wire feeds unevenly.
A smooth wire feed makes it easier to maintain a stable arc.
6. Make a Test Weld and Adjust One Setting at a Time
Use scrap metal that matches the material and thickness of your actual workpiece.
Start with the recommended settings, then make a short test weld. Observe the arc, listen to the sound, and examine both the bead and the amount of spatter.
Ever wondered why one small adjustment sometimes changes the entire welding sound? Voltage and wire feed speed work together, so correcting their balance can make the arc noticeably steadier.
If the wire repeatedly stubs into the pool, review the voltage-to-wire-feed relationship. If the arc burns back toward the contact tip, check the settings and feeding system before continuing.
Make small changes within the manufacturer’s recommended range.
Pro Tip: Write down the settings that produce a stable arc on your test piece. This gives you a useful starting point the next time you weld similar material.
Spatter Control for Different Welding Processes
Different welding methods need slightly different approaches.
MIG welding: Focus on voltage, wire feed speed, shielding gas, wire condition, polarity, and stickout. Transfer mode and gas composition can have a major effect on spatter.
Flux-core welding: Use the correct wire, polarity, and parameters. Some flux-core wires produce more visible sparks and spatter than solid-wire MIG welding. Check whether the wire is self-shielded or requires external gas.
Stick welding: Select the correct electrode and current range. Maintain a consistent arc length and appropriate travel angle. An overly long arc can increase spatter.
TIG welding: TIG usually creates very little spatter when performed correctly. Keep the tungsten and filler metal clean, maintain suitable gas coverage, and avoid dipping the tungsten into the molten pool.
Key Takeaways:
- Start with the machine and consumable manufacturer’s recommended settings.
- Clean the metal and inspect the wire, gun, and gas system.
- Keep stickout, torch angle, and travel speed consistent.
- Use test welds and make one adjustment at a time instead of chasing several problems together.
Does Welding Spatter Mean the Weld Is Bad?
Welding spatter doesn’t automatically mean a weld is defective. It can occur during normal welding, particularly with processes that involve less stable or more forceful metal transfer.
Still, excessive spatter can be a warning sign of poor arc control or incorrect welding conditions.
Say you finish a small repair and notice metal droplets all around a smooth, evenly shaped bead. The spatter may be mostly a cleanup issue.
Now consider the same joint with a rough bead, visible pinholes, and poor bonding along the edges. Those conditions deserve closer inspection because they may indicate weld quality problems beyond spatter.
Signs That Need More Attention
Look for these problems when evaluating a weld:
- Porosity: Small holes or cavities caused by trapped gas.
- Undercut: A groove melted along the edge of the weld that remains unfilled.
- Poor tie-in: Weld metal that doesn’t blend properly into the edges of the joint.
- Irregular bead shape: Uneven width, excessive buildup, or inconsistent appearance.
- Visible cracks: Fractures in or near the weld that require proper evaluation.
A good-looking weld bead should have a shape suited to the joint and welding procedure.
Appearance alone cannot prove that the weld has adequate fusion, penetration, or strength. For structural, load-bearing, or other safety-related welds, follow the required procedure and inspection standards. Have a qualified welding professional assess questionable work.
How Much Spatter Is Normal?
There isn’t one universal amount of acceptable spatter.
It depends on the welding process, transfer mode, wire or electrode, shielding gas, material, and job requirements.
For example, conventional short-circuit MIG welding typically produces some spatter, while properly adjusted TIG welding often produces very little.
If your setup suddenly starts producing much more spatter than before, treat that change as a reason to investigate.
Key Takeaways:
- Spatter alone doesn’t prove a weld is weak or defective.
- A sudden increase can indicate unstable welding conditions.
- Inspect the bead for signs of separate weld problems.
- Critical welds require appropriate inspection, not a judgment based on spatter alone.
How to Remove Welding Spatter Safely
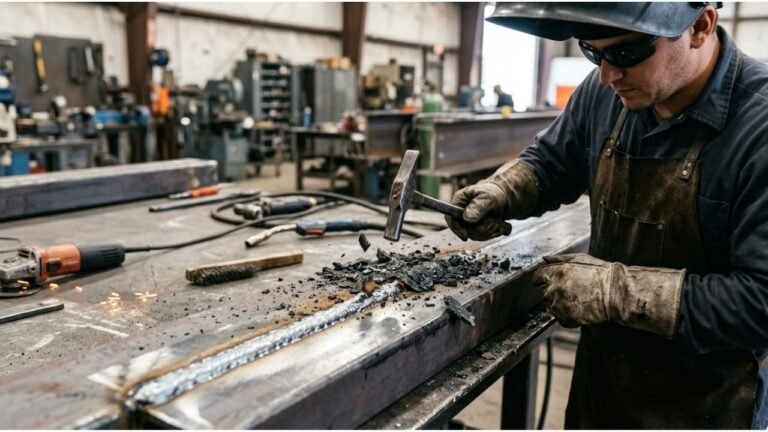
You can remove most welding spatter with a scraper, wire brush, chipping tool, or suitable grinding equipment after the metal has cooled. The best method depends on how firmly the particles are attached and the finish you need.
Before starting, turn off the welding equipment, let the workpiece cool, and wear suitable eye protection and gloves. Follow your equipment’s safe shutdown instructions and secure the workpiece.
Hot spatter can burn skin, damage equipment, and ignite nearby combustible materials. Welding also involves fumes, ultraviolet radiation, and electrical hazards.
Follow established welding safety precautions, including appropriate protective clothing, ventilation, and fire prevention.
Step 1: Remove Loose Spatter
After the metal cools, start with a wire brush or suitable scraping tool.
Small, loosely attached particles may come away without much effort.
Use a brush that’s compatible with the workpiece material. For stainless steel, use suitable dedicated cleaning tools to avoid transferring contamination from carbon steel.
Step 2: Remove Stubborn Metal Deposits
Use a scraper or chipping tool to loosen firmly attached particles.
Work carefully around the weld bead to avoid gouging the base metal.
If the particles are strongly fused to the surface, gentle grinding may be necessary.
Step 3: Grind Only When Necessary
A flap disc or suitable grinding wheel can remove stubborn deposits and smooth the surrounding surface.
Choose the correct abrasive for the material, follow grinder safety instructions, and wear the required face and eye protection.
Avoid removing weld metal or thinning the base metal. Grinding can change the joint’s shape and may hide problems that should be inspected.
For example, if you’ve welded a visible decorative bracket, light surface finishing might improve its appearance. A structural weld has different limits, so don’t grind it beyond the approved procedure.
Step 4: Consider Anti-Spatter Products
Anti-spatter spray helps reduce how firmly molten droplets stick to nearby metal surfaces. It doesn’t prevent the welding arc from producing spatter.
These products can make cleanup easier, especially during repeated welds.
Apply them according to the product label and keep them away from areas where they could contaminate the weld. Never spray an unsuitable product onto hot metal or near an active arc.
Some products contain flammable ingredients, so check their safety instructions before use.
I recommend fixing excessive spatter at the source rather than relying on spray to hide a poor setup.
Key Takeaways:
- Let welded metal cool before attempting cleanup.
- Start with gentle tools before moving to grinding.
- Avoid damaging the finished weld or surrounding metal.
- Anti-spatter products help with adhesion and cleanup, but they don’t correct arc problems.
FAQs about what is spatter
Is Spatter Normal in Welding?
Yes, some spatter is normal during many arc-welding processes. The amount depends on the welding method, transfer mode, consumables, and machine settings. MIG, stick, and flux-core welding can produce noticeable spatter. Excessive or sudden increases are worth investigating because they may indicate unstable arc conditions or setup problems.
Is Spatter the Same as Slag?
No. Spatter consists mainly of molten metal droplets expelled during welding, while slag is a nonmetallic material formed from flux. Slag can cover the weld bead during stick and certain flux-core welding processes. Spatter typically appears as scattered metal particles stuck to surrounding surfaces.
Why Does My MIG Welder Produce So Much Spatter?
Excessive MIG spatter can result from mismatched voltage and wire feed speed, dirty metal, excessive stickout, incorrect shielding gas, or unstable wire feeding. Incorrect polarity and worn contact tips can also contribute. Start by checking your machine’s recommended settings and inspecting the welding gun, wire, and workpiece.
Can Anti-Spatter Spray Completely Prevent Welding Spatter?
No. Anti-spatter spray mainly reduces how firmly molten particles stick to the workpiece or welding equipment. It doesn’t eliminate the droplets produced by the arc. Correct settings, clean materials, and consistent welding technique are better ways to reduce spatter generation. Always follow the product’s application and safety instructions.
Does TIG Welding Produce Spatter?
TIG welding normally produces very little spatter because it uses a nonconsumable tungsten electrode and controlled filler metal addition. Spatter can still occur under poor conditions, such as contaminated material, improper technique, or an unstable weld pool. Keeping the tungsten, filler metal, and workpiece clean helps maintain a smooth arc.
Conclusion
If you’ve been asking what is spatter, the answer is simple: it’s molten material expelled during welding that hardens into small particles around the joint. A little is common, but excessive spatter can waste filler metal, increase cleanup time, and signal unstable welding conditions.
The good news is that many common causes are straightforward to address. Start with the correct machine settings, clean your workpiece, check shielding gas where required, and maintain a steady torch position. If the arc still behaves poorly, inspect the wire-feeding system and make small adjustments on matching scrap metal.
I recommend treating spatter as a clue rather than just a mess. Don’t assume every scattered droplet means the weld has failed, and don’t overlook other signs of poor weld quality.
Your next step is to make a controlled test weld, inspect the results, and correct the likely cause before starting the actual joint. A cleaner, steadier arc makes welding easier and cuts down on unnecessary finishing work.