How to Remove Stuck Wire From MIG Welder: Key Facts and Guidance
Unplug the welder, release drive-roll tension, cut the wire, and pull it out from the gun side; never force a jammed spool.
The first sign is often subtle the drive rolls keep turning the motor strains and the wire stops moving at the contact tip A sharp clicking sound a.
Learning how to remove stuck wire from mig welder equipment starts with separating the wire path into sections spool inlet guide drive rolls gun liner contact tip and.
- ✓Disconnect power and release drive-roll pressure before pulling on jammed welding wire.
- ✓Check the contact tip, gun liner, drive rolls, and spool separately because each creates different symptoms.
- ✓Cut away damaged or kinked wire instead of feeding it back through the machine.
- ✓Use the correct roll groove, tension, liner, tip size, and spool alignment for the wire diameter.
How to Remove Stuck Wire From MIG Welder
Before touching the wire stop welding and switch the machine off Disconnect the welder from its power source when practical close the shielding-gas valve if the machine uses.
Put on safety glasses and gloves but do not rely on gloves to protect against an unexpected arc Keep the gun pointed away from your body remove loose.
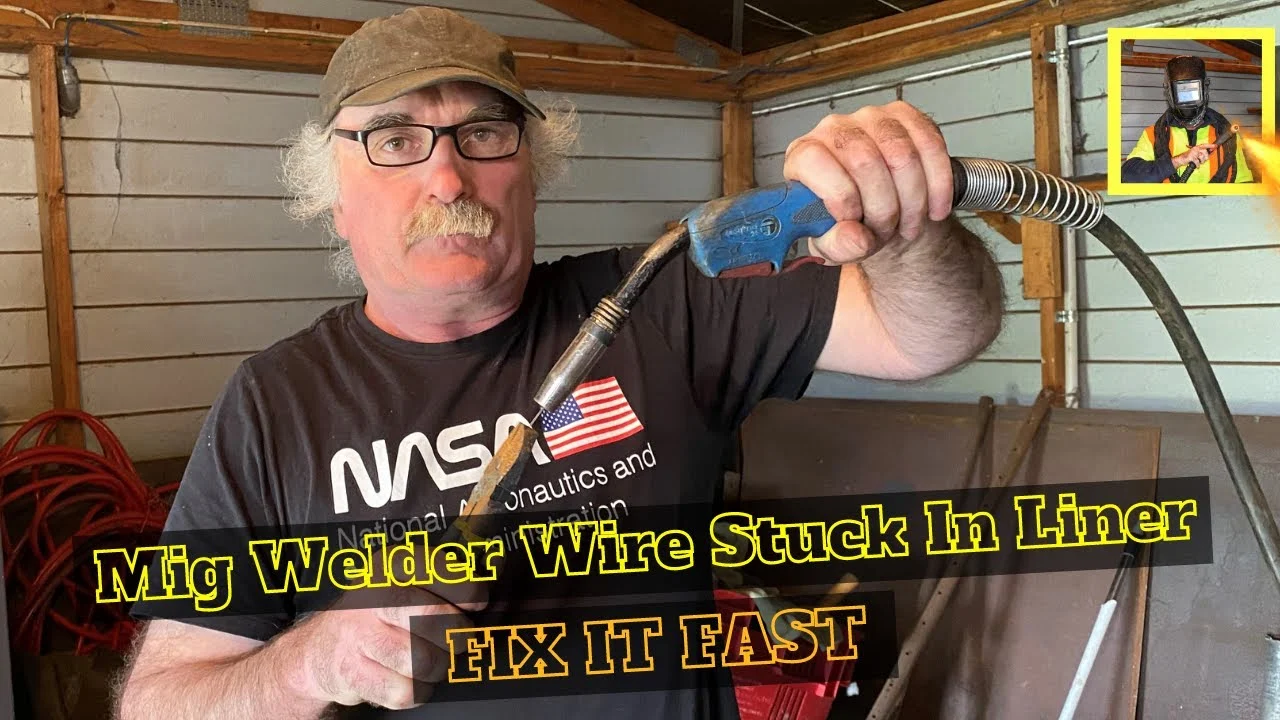
- Power first: Turn off and unplug the welder before opening the feeder or cutting wire near the drive mechanism.
- Cool parts: Treat the contact tip, nozzle, and recently welded wire as hot until they have cooled completely.
- No force: Do not yank the gun cable, twist the machine connector, or use pliers aggressively against the liner.
Basic removal sequence
- Turn off the welder and disconnect its power.
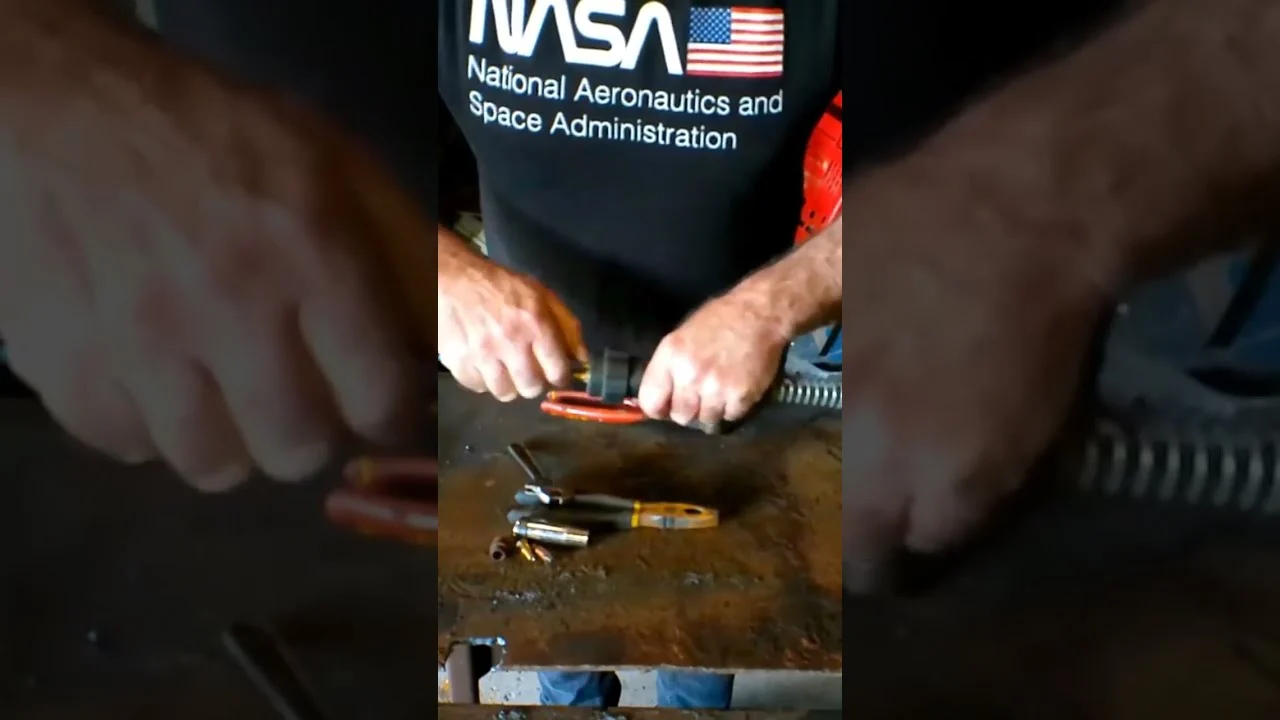
- Remove the nozzle and unscrew the contact tip. If the tip is fused to the wire, cut the wire close to the tip and replace the tip rather than forcing it.
- Open the wire-feed compartment and release the drive-roll tension arm or pressure lever.
- Cut the welding wire between the spool and the drive rolls. Leave the spool end secured so it cannot unwind into a tangled coil.
- Pull the short wire section out through the gun side, using steady hand pressure. If it will not move, disconnect the gun from the feeder and remove the liner according to the machine’s design.
- Inspect and clean the feed path before installing fresh wire.
Most wire can be withdrawn from the gun end after the drive rolls are released If the wire has formed a bird s nest around the rolls cut.
When the wire will not pull out
A wire that stops completely usually has a mechanical obstruction rather than a lack of motor power. The wire may be mushroomed at the contact tip, kinked inside the liner, crushed by excessive roll tension, or rusted into the liner after exposure to moisture.
Disconnect the gun from the feeder if the connection allows it then try to identify which end of the wire moves If the wire moves from the feeder.
Find Where the MIG Wire Is Jammed
A MIG welder feeds a continuous wire through several components so the visible symptom does not always show the true location of the jam A tight spool misaligned.
Divide the feed path into three zones The spool and feeder zone includes the hub brake inlet guide drive rolls and pressure arm The gun-cable zone includes the liner and.
- Spool side: Look for wire crossed over itself, a spool that will not rotate, or wire pulled underneath the spool edge.
- Drive side: Check for a bird’s nest, flattened wire, metal dust, and the correct groove size.
- Gun side: Remove the tip and test whether the wire exits freely through the liner.
- Front end: Inspect for a blocked or fused contact tip before blaming the motor.
Contact tip blockage
The contact tip is one of the most common and easiest restrictions to check Heat spatter an incorrect tip size or wire that has been bent at the.
Remove the tip with the proper wrench after it cools Do not use a drill bit to enlarge the bore an oversized or damaged bore can create inconsistent.
Drive-roll and inlet-guide problems
Drive rolls should grip the wire without crushing it. Excessive pressure creates flat spots and metal filings, while insufficient pressure allows slipping. Both conditions can prevent the wire from advancing and can make the feeder appear defective.
The inlet guide should line up with the drive-roll groove If the wire enters at an angle it may scrape the guide buckle before the rolls or curl.
Gun liner restriction
The liner supports the wire through the gun cable. A dirty, kinked, worn, or incorrect liner adds friction until the drive rolls can no longer push the wire. Long gun cables, tight bends, and repeated dragging across a work surface make this problem more likely.
With the tip removed and the drive-roll pressure released the wire should normally slide through the gun with modest hand pressure If it binds at one point do.
Remove the Jam Without Damaging the Welder
Once the jam location is known, remove the wire in short, controlled sections. The correct method depends on whether the wire is loose, crushed, fused to the tip, or wrapped around the drive rolls. A sharp cut is generally safer than pulling a long damaged section through a liner.
Keep the wire under control as soon as it is cut Welding wire is spring-like especially when it has been pulled from a spool and it can unwind. This distinction matters when answering “how to remove stuck wire from mig welder”.
- Cut damaged sections: Remove kinks, flattened areas, rust, and bird’s-nest wire rather than feeding them back into the gun.
- Release pressure: Separate the drive rolls before pulling so they do not keep the wire clamped.
- Pull straight: Keep the gun cable as straight as possible to reduce friction and prevent a liner kink.
- Replace fused parts: A contact tip welded to the wire is usually cheaper and safer to replace than to salvage.
Loose wire in the gun
For a loose jam, remove the nozzle and contact tip, release the rolls, and pull the wire from the front of the gun. If the wire is too long or has a bent end, cut it close to the feeder and pull the remaining section out from the gun side.
Do not pull the wire backward through the feeder while the drive rolls are closed. The rolls can shave the wire, leaving fragments that later obstruct the liner or contaminate the groove.
Bird’s nest at the feeder
A bird s nest occurs when the wire exits the drive rolls but cannot enter the gun liner It forms a loose tangled coil around the feeder This.
Turn off power, release the pressure arm, and cut the wire on both sides of the nest. Remove the coil with cutters rather than trying to unwind it. Inspect the liner entrance and gun connector before threading new wire; otherwise, the same nest can form immediately after restart.
Wire fused to the contact tip
If the arc stopped while the wire was extended from the tip the electrode may have welded itself inside the contact tip Do not pull on the gun.
Fusing can result from a tip that is worn, too tight, the wrong size, or overheated by holding the gun too close to the work. It can also occur when wire-feed speed and voltage are poorly matched, causing the wire to stub into the workpiece.
Inspect the Parts That Usually Cause Repeated Jams
Clearing the wire solves the immediate blockage, but it does not correct the condition that caused it. Before loading a new spool, inspect each part that controls alignment, pressure, friction, and electrical contact. Replacing only the visible damaged wire can lead to another jam within minutes.
Compare the wire diameter printed on the spool with the markings on the contact tip and drive roll. Solid steel, stainless steel, aluminum, and flux-cored wire may require different liner materials, groove profiles, or feed arrangements. The same feeder setting is not automatically suitable for every electrode.
- Contact tip: Replace it when the bore is enlarged, obstructed, burned, or visibly worn.
- Liner: Replace it when cleaning does not restore smooth movement or when the cable has sharp bends or damage.
- Drive rolls: Check for the correct groove, buildup, sharp wear, and wire dust.
- Spool hub: Confirm that the spool turns smoothly without excessive drag or side-to-side movement.
Contact tip size and condition
The tip must provide electrical contact while allowing the wire to pass A tip bore that is too tight can bind as the tip heats a bore that.
Keep spare tips matched to the wire used most often. They are consumable parts, not permanent components, and changing one during troubleshooting is often more productive than repeatedly cleaning a questionable tip.
Liner fit and cleanliness
A liner should seat correctly at both ends. A gap at the gun connector or neck can let the wire catch, while a liner that is too long may buckle. Follow the welder or gun manufacturer’s installation method for trimming and seating because liner designs vary.
Compressed air may remove loose dust from some liners, but it cannot repair a kink or remove every embedded fragment. Avoid coating the liner with oil. Lubricants can attract abrasive dust and may contaminate the weld area.
Drive-roll pressure and groove
Set the pressure high enough to feed the wire without slipping then stop increasing it A practical check is to hold the gun so the wire can feed.
Use V-groove rolls for many solid wires and knurled or toothed rolls where appropriate for flux-cored wire, while following the feeder’s instructions. Aluminum often needs specialized feeding components because its softer wire is more likely to buckle in a standard steel-wire setup.
Reload and Test the MIG Welder After Clearing the Wire
After removing the jam and inspecting the path install a clean undamaged spool Confirm that the wire pays off from the correct direction and that the spool brake. Keep these limitations in mind when considering “how to remove stuck wire from mig welder”.
Thread the wire through the inlet guide, the selected drive-roll groove, and the gun liner. Keep the gun cable reasonably straight during initial feeding. Cut the wire end square and remove any sharp hook or kink before inserting it into the guide.
- Prepare the end: Cut off the first damaged portion of wire and straighten only the short end being threaded.
- Seat the guide: Make sure the wire enters the liner opening rather than pushing against the connector.
- Set pressure gradually: Begin light, then increase only until the wire feeds consistently.
- Test without an arc: Use the machine’s jog or trigger function with the gun pointed safely and the tip removed when appropriate.
Threading sequence
- Place the spool on the hub and secure the retainer.
- Verify the spool brake is not locked and the wire cannot freely unwind.
- Release the drive-roll pressure arm.
- Guide the wire through the inlet guide and into the selected groove.
- Feed the wire into the gun liner by hand until it reaches the front of the gun.
- Close the pressure arm and set moderate tension.
- Install the correct contact tip and nozzle after the wire reaches the gun front.
- Trim the wire to the desired stick-out and perform a controlled feed test.
During the test, listen for smooth motor operation. Grinding, pulsing, or repeated clicking suggests slippage or obstruction. If the motor runs but the wire barely advances, stop and inspect pressure, groove alignment, and liner friction instead of raising the setting repeatedly.
What a successful test looks like
The wire should feed at a steady rate without sudden surges. The drive rolls should turn smoothly, the spool should rotate without jerking, and the wire should exit the contact tip without curling sharply or scraping the nozzle.
Make a short test weld on suitable material using settings appropriate for the wire, thickness, and shielding arrangement. An unstable arc after a jam can indicate a damaged tip, contaminated wire, poor grounding, incorrect polarity, or a feed problem that has not been fully corrected.
Why MIG Wire Gets Stuck and How to Prevent It
Most jams are preventable because they begin with friction, misalignment, contamination, or incorrect setup. The wire may feed normally for several minutes before heat, vibration, or a bend in the gun cable exposes the weakness. Prevention therefore requires more than simply keeping the nozzle clean.
Store wire in a dry location and protect opened spools from moisture and shop dust. Rust increases friction and can shed abrasive material into the liner. Do not use wire that has visible corrosion, deep scratches, or repeated kinks from a previous bird’s nest.
- Overtightening rolls: More pressure does not fix a blocked liner and can deform the wire.
- Ignoring cable position: Tight bends increase resistance and can make a marginal liner jam.
- Mixing sizes: A wire diameter mismatch between spool, roll, tip, and liner creates unreliable feeding.
- Reusing damaged wire: Kinks and flattened sections often become the next obstruction.
Choose the correct setup
Match the liner, drive roll, contact tip, and machine polarity to the wire and welding process. Solid steel wire and flux-cored wire can differ in recommended roll style and polarity. Aluminum wire typically needs a short, well-supported feed path or a spool gun to reduce buckling.
Keep the gun cable in broad curves while welding. Dragging it around corners or laying it under heavy objects can deform the liner. When a long cable is necessary, pay closer attention to liner condition and feeding resistance.
Keep the feed path clean
Wire dust commonly comes from drive-roll wear, excessive pressure, or a rough liner. Clean the rolls and inlet area during routine maintenance, especially when changing wire types or diameters. Replace components that have grooves worn sharp or surfaces packed with residue.
Clean the nozzle separately from the wire path. Excessive spatter can restrict the nozzle and force the operator to hold the gun at an awkward angle, but nozzle blockage is not the same as a liner jam. Identifying the distinction saves time.
Use appropriate operating technique
Repeatedly stubbing the wire into the work can fuse it to the tip. Maintain the recommended electrical stick-out and use settings that support a stable arc. If the wire burns back into the tip, check voltage, wire-feed speed, contact-tip condition, and work connection before simply installing another tip.
When to Stop Troubleshooting and Get Service
Some problems are beyond routine wire removal. Stop if the feeder emits a burning smell, the motor overheats, wiring appears damaged, the gun connector is loose or burned, or the machine feeds wire unpredictably with the gun disconnected. Continued operation can damage electronics or create an electrical hazard.
A replacement liner is a reasonable repair when the liner is clearly blocked or worn and the gun design allows it Service is more appropriate when the drive.
- Electrical symptoms: Stop for smoke, arcing inside the feeder, damaged insulation, or repeated breaker trips.
- Mechanical symptoms: Stop if the drive rolls wobble, bind, or fail to rotate despite a normal feed command.
- Persistent jams: Seek help if a new liner, tip, and correctly adjusted roll still do not restore feeding.
Do not bypass safety covers or operate with exposed moving parts unless the manufacturer’s service procedure specifically requires a controlled test. Keep hands, clothing, and tools away from energized or rotating components.
FAQ: Removing Stuck Wire From a MIG Welder
Should I pull the wire from the gun or the spool side?
After releasing drive-roll pressure, pull from the gun side when the wire is loose and the liner is clear. Cut away tangled or crushed wire first; never drag a bird’s nest through the liner.
Why is my MIG wire stuck in the contact tip?
The wire may be fused because of burnback, excessive heat, a worn tip, an incorrect tip size, or unstable welding settings. Cut the wire, remove the tip when cool, and replace the tip if the wire does not slide out easily.
Can I use pliers to remove jammed welding wire?
Use cutters or pliers only for controlled gripping after power is disconnected and pressure is released. Do not twist the gun cable or pull so hard that the liner, connector, or feeder is damaged.
What causes a bird’s nest in a MIG welder?
A bird’s nest usually forms when wire leaves the drive rolls but cannot enter the liner. Common causes include low roll pressure, a disconnected gun, poor guide alignment, a blocked liner, or wire that is too soft for the setup.
How do I know whether the liner is blocked?
Remove the contact tip, release the drive rolls, and try moving the wire through the gun with the cable reasonably straight. If it binds despite a clean tip and undamaged wire, the liner may be dirty, kinked, worn, or incorrectly installed.
Can I feed the same wire back after removing a jam?
Do not reuse wire that is kinked, flattened, rusty, scratched, or contaminated. Cut back to clean, straight wire, and discard the damaged section so it does not create another restriction.
Why does the wire jam again immediately after I clear it?
The underlying cause may still be present: incorrect groove size, excessive roll tension, a blocked liner, a tight cable bend, a damaged tip, or a spool brake that is too tight. Inspect the entire path instead of replacing only the visible wire.
Conclusion
Removing stuck wire safely means isolating the feed path cutting away damaged sections releasing drive-roll pressure and checking the tip liner guides spool and rolls before rethreading The.
Always disconnect power before opening the feeder, let hot parts cool, and stop when electrical or mechanical damage is suspected. Once the path is clean, use matched consumables and moderate roll pressure to prevent the next blockage.
Unplug the welder, remove the contact tip, release the drive rolls, and inspect each section of the wire path before installing fresh wire.
The answer to “how to remove stuck wire from mig welder” should be applied with these conditions and limitations in mind.