How to Get Good Penetration MIG Welding: Overview and Key Facts
Use clean, tightly fitted joints, enough amperage and wire feed speed, correct stickout, steady travel, and a controlled work angle. Confirm penetration with a test weld before welding the final part.
Good MIG penetration is not created by turning one knob higher It comes from a working combination of heat input arc length shielding gas joint design material thickness.
The signs separate a harmless cosmetic issue from a real structural problem Slight unevenness may only affect appearance but a bead sitting high on the surface cold toes. This guide examines “how to get good penetration mig welding” and explains the details that matter in practice.
You will learn how voltage wire feed speed travel speed polarity shielding gas and gun angle interact when a groove root opening or multipass weld is appropriate and.
- ✓Clean metal, correct joint fit-up, and a short, consistent stickout are foundations of penetration.
- ✓Wire feed speed primarily controls amperage, while voltage controls arc length and bead profile.
- ✓Travel too fast and the bead becomes narrow and cold; travel too slowly can cause burn-through and excessive buildup.
- ✓Use test coupons and inspect the weld cross-section when appearance alone cannot prove fusion.
How to Get Good Penetration MIG Welding
Penetration is the depth to which the arc melts the base metal and fuses it with the filler metal It depends on the energy reaching the joint and.
A MIG setup is a system. The power source, wire diameter, polarity, shielding gas, contact tip, liner, ground connection, joint, and operator technique all influence the arc. Changing wire feed speed without considering voltage or travel speed can make the weld louder and hotter without producing a sound joint.
- Base metal: Identify the alloy, thickness, coating, and whether heat-sensitive material requires a controlled procedure.
- Power source: Verify the machine is rated for the wire size, output, duty cycle, and available input power.
- Consumables: Match wire type, diameter, contact tip, liner, polarity, and shielding gas to the process.
- Joint condition: Remove rust, paint, oil, mill scale, and moisture from the weld zone and return path.
Know what the controls actually change
On a conventional constant-voltage MIG machine, wire feed speed is closely related to welding amperage. Increasing it generally adds filler metal and raises current, provided the arc remains stable. Voltage largely changes arc length and affects bead width, wetting, and the sound of the arc.
These controls interact. Too much wire for the selected voltage can produce a stubby, harsh arc and push the gun away from the work. Too much voltage can create a long, unstable arc, excessive spatter, undercut, and a broad bead that does not necessarily have deeper fusion.
Inductance, arc control, trim, or dynamic settings vary by machine. They can influence puddle fluidity and short-circuit behavior, but they cannot compensate for contaminated metal, an incorrect joint, or a travel speed that is fundamentally wrong.
Select wire, gas, and polarity as a matched set
Solid steel MIG wire commonly uses a shielding gas containing argon and carbon dioxide while flux-cored wires may require different polarity and may or may not use external.
Always follow the wire and machine instructions for polarity Reversed polarity can produce poor arc behavior excessive spatter and weak fusion even when the displayed settings appear reasonable.
Gas flow must shield the puddle without creating turbulence. Excessive flow can draw surrounding air into the arc, while insufficient flow allows porosity. Keep the nozzle clean, protect the weld from drafts, and position the cylinder upright and secured.
Prepare the Joint for Real Penetration
Many apparent machine problems are actually fit-up problems. The arc can only fuse what it reaches. A thick coating, a tight corner, an inconsistent gap, or a root that is inaccessible to the arc may prevent penetration regardless of how attractive the cap bead looks.
Begin by removing contaminants from both sides of the joint where practical Grind or wire-brush coatings away from the weld path degrease with a suitable cleaner and allow.
- Root opening: Use a consistent gap appropriate for the material thickness, joint type, and welding procedure.
- Edge preparation: Use a bevel or groove when thickness prevents the arc from reaching the root in a single pass.
- Alignment: Minimize excessive mismatch, which can shift heat toward one edge and create an unfused side.
- Tack welds: Make sound, properly spaced tacks and clean them if they contain cracks, porosity, or heavy slag.
Joint design determines the heat path
A fillet weld in a corner a lap joint and a butt joint do not absorb heat in the same way In a fillet the gun angle and.
For thicker material, a single large bead is not always the best answer. A prepared groove with a root pass and one or more fill passes may provide more reliable fusion and better control than trying to force all the required metal into one slow pass.
Backer bars, run-on tabs, and run-off tabs can help manage the start and finish of a joint. Their use depends on the material and the application. A temporary backer must not create an unacceptable inclusion or remain where the design requires complete fusion.
Thin material needs controlled heat, not maximum heat
On thin sheet, deeper penetration can quickly become burn-through. Use a smaller wire where appropriate, a lower heat input, shorter weld segments, and pauses between sections when the design permits. Stitching can reduce distortion, but stopping and restarting carelessly may create cold starts, craters, and unfused overlaps.
Clamping can improve alignment, yet heavy clamps may pull heat away from the joint and change the puddle. Leave enough access for the gun and ground clamp, and place tacks so the joint does not open or close as it heats.
Set Amperage, Voltage, Stickout, and Travel Speed
Once the joint is prepared establish a starting range from the machine or wire manufacturer s guidance for the wire gas polarity and thickness Treat that range as.
For how to get good penetration MIG welding the most useful adjustment is often a balanced combination of wire feed speed and voltage rather than an extreme setting.
- Arc length: Keep it stable and appropriate for the transfer mode; a long arc can spread heat and increase spatter.
- Stickout: Maintain a consistent distance from the contact tip to the work, following the wire guidance for the process.
- Travel speed: Move fast enough to avoid excess buildup but slowly enough for the puddle to wet both edges.
- Work angle: Aim the arc into the joint, not ahead of it or excessively toward one wall.
Use the puddle as a feedback signal
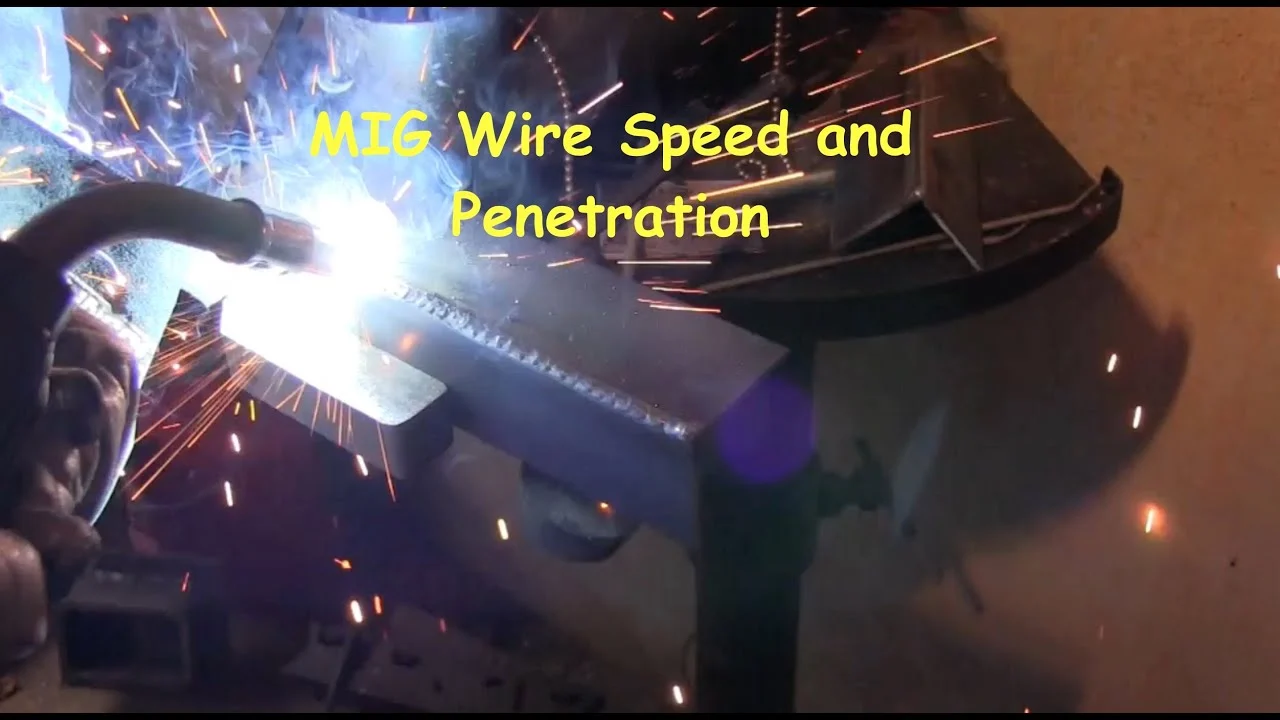
A healthy puddle should remain manageable and should visibly wash into the toes of the joint If the wire repeatedly dives into the work the voltage may be.
Travel speed changes heat per unit length. Moving too quickly leaves a narrow, convex bead with poor edge wetting and possible lack of fusion. Moving too slowly can produce a wide, sagging bead, excessive penetration, burn-through, or trapped gas as the puddle becomes too deep and fluid.
Do not judge only by color or sound. A quiet, smooth arc can still produce inadequate fusion if the gun angle directs the heat away from the root. Conversely, some transfer modes are naturally more forceful and noisy while still making an acceptable weld when properly controlled.
Push, pull, and gun angle
With solid-wire MIG a modest push angle often gives a flatter bead and a clear view of the leading edge of the puddle A slight drag angle may.
For a fillet divide attention between both pieces Pointing the arc too much at the thicker member may leave the thin member undercut or overheated pointing it too.
Understand transfer modes and their limits
Short-circuit transfer is useful across many common steel applications and can work well in positions where a fluid high-current puddle would be difficult to control. Its penetration depends strongly on settings, inductance, wire size, travel, and joint access.
Globular transfer can produce larger droplets, more spatter, and less predictable control. It may occur when settings and gas composition place the arc between short circuit and spray conditions. It is not automatically a sign of failure, but it can make consistent penetration and bead shape harder to achieve.
This distinction matters when answering “how to get good penetration mig welding”.
Spray transfer can deliver high deposition and a fluid arc with strong fusion, but it generally requires suitable equipment, shielding gas, current, material thickness, and a position that can support the puddle. It is not a universal solution for thin sheet or overhead work.
Pulse MIG can control heat and transfer while maintaining useful deposition. It is valuable for some aluminum, stainless, and steel applications, but the program still needs correct wire, gas, material, contact-tip condition, and travel technique.
Control the Torch and Puddle in Real Time
Good settings can be defeated by inconsistent movement. Hold the gun so the contact tip, nozzle, and wire remain at a repeatable distance from the work. Keep the cable arranged to avoid pulling the gun sideways, and support your wrist or forearm when that improves control without restricting movement.
Watch the leading edge of the puddle where the arc transfers energy into the base metal The bead behind the arc shows what happened but the leading edge.
- Maintain visibility: Keep the nozzle clean and position your helmet so the arc and puddle remain visible throughout the pass.
- Use a steady rhythm: Small, deliberate movements are easier to repeat than a wide weave intended to create penetration.
- Control starts and stops: Pause briefly at the start if needed, fill the crater, and overlap restarts onto sound metal.
- Match the position: Reduce puddle size and heat when welding out of position instead of trying to outrun a fluid pool.
Weaving is not a substitute for fusion
A weave can help bridge a wider joint or distribute metal across a groove, but excessive side-to-side motion increases the time the arc spends away from the root. It may create tall toes and a broad cap while leaving the center or sidewall poorly fused.
For many joints, a narrow stringer bead is easier to control and inspect. If a weave is required, pause briefly at each sidewall only as much as needed for fusion, keep the arc directed into the joint, and avoid lingering at the edges on thin material.
Position changes the practical setting
Flat welding allows a larger, more fluid puddle. Horizontal, vertical, and overhead positions require greater control because gravity changes how the molten metal behaves. A setting that works flat may cause sagging or poor tie-in when used vertically.
Vertical-up welding can support deeper fusion on thicker joints because the puddle is managed progressively but it requires suitable joint preparation and a controlled arc Vertical-down travel is.
Diagnose Shallow Penetration and Other Weld Problems
When a weld looks wrong, change one likely cause at a time and make another test. Randomly increasing voltage, wire feed speed, and travel changes can hide the actual problem and may create a second defect while correcting the first.
Some defects are visible on the surface; others are not. A smooth cap does not prove root fusion, especially on a lap or fillet joint. For critical work, use the inspection method required for the application, which may include a cut-and-etch examination, bend test, or qualified nondestructive examination.
- High bead, shallow fusion: Reduce excessive travel speed only after checking that the arc is aimed into the joint and the surfaces are clean.
- Burn-through: Reduce heat input, shorten the weld segment, improve fit-up, or use a joint design suited to the thickness.
- Porosity: Check gas flow, drafts, nozzle blockage, leaks, moisture, contaminated metal, and excessive stickout.
- Undercut: Correct excessive voltage or travel speed, reduce sidewall dwelling, and keep the work angle controlled.
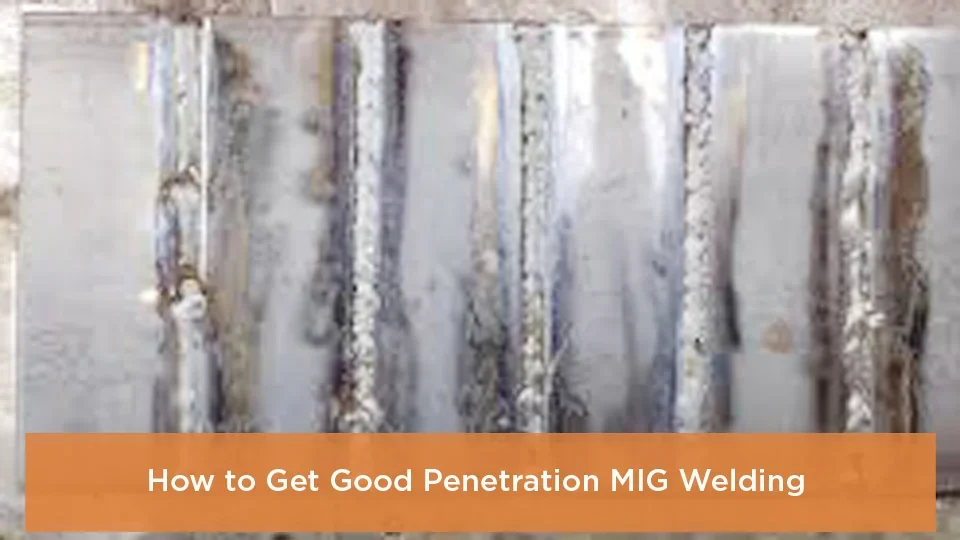
What shallow penetration usually looks like
Insufficient penetration may appear as a bead sitting on top of the joint a sharp or poorly blended toe lack of fusion at one side or a joint.
Start with the basics clean the metal confirm polarity inspect the ground clamp verify wire feed shorten inconsistent stickout and ensure the gun is aimed at the root Then adjust current and voltage together within the usable range while maintaining.
Separate machine faults from technique faults
A worn contact tip, damaged liner, slipping drive roll, restricted gas path, poor ground, or unstable power supply can cause an erratic arc. Wire may burn back to the tip, bird-nest at the feeder, or feed unevenly. These symptoms should be corrected before judging settings.
If the arc is stable but the weld changes when you alter your hand position, travel speed, or angle, technique is likely a major factor. If settings work on one coupon but not on another, compare thickness, surface condition, joint fit-up, and heat sinking before blaming the machine.
Test the weld instead of relying on appearance
For a noncritical practice weld cut through the joint and examine the cross-section after appropriate preparation The profile can reveal whether the weld reached the root whether both.
Testing a representative coupon is especially important when welding coated, thick, dissimilar, or unfamiliar material. A destructive test cannot certify every production weld, but it can expose a flawed setup before that setup is used on the final component.
Safety, Material Limits, and Quality Control
Increasing penetration usually means increasing heat, current, exposure time, or all three. That can increase distortion, residual stress, burn-through, fume generation, and the chance of damaging a coating or heat-sensitive material. The strongest-looking weld is not automatically the best weld if it exceeds the design or material limits.
Wear the correct helmet shade, fire-resistant clothing, gloves, eye protection, and footwear. Provide ventilation suited to the fumes, protect nearby people from arc radiation, keep combustibles away, and inspect the work area after welding for smoldering material. Compressed gas cylinders must be secured and handled correctly.
- Unknown coatings: Stop and identify hazardous paint, plating, galvanizing, or residue before heating the material.
- Confined spaces: Do not weld in a confined area without a suitable safety plan, atmospheric controls, and trained supervision.
- Hot work: Control sparks, spatter, and hot metal on both sides of the joint, not only where you are standing.
- Critical structures: Follow the applicable qualified procedure and inspection requirements rather than improvising settings.
When deeper is not better
Penetration must be sufficient for the joint design and load, but excessive penetration can create burn-through, root reinforcement that interferes with fit, or an unwanted change in material properties. Thin sheet may need a controlled, smaller weld rather than maximum fusion.
Stainless steel and aluminum also require special attention to cleanliness, heat control, and shielding. Aluminum rapidly conducts heat and can appear cold until the surface suddenly breaks into a fluid puddle. Stainless steel can discolor or lose corrosion resistance when heat and shielding are poorly controlled.
Keep a repeatable weld record
For repeat work, record material, thickness, wire diameter, wire classification, gas, polarity, voltage, wire feed speed, transfer mode, contact-tip distance, position, and travel approach. Note joint preparation and preheat or interpass controls when relevant.
A record turns a successful test into a usable process. If the result changes later, compare the new setup with the last known-good combination instead of rebuilding the settings from memory.
FAQ: How to Get Good Penetration MIG Welding
Does increasing wire feed speed always improve MIG penetration?
No. Increasing wire feed speed generally increases current and deposition, but the voltage, travel speed, stickout, joint design, and material condition must support that change. Too much wire for the voltage can create an unstable arc and a piled-up bead.
Should I push or pull the MIG gun for deeper penetration?
Neither direction guarantees deeper penetration. A modest push commonly improves puddle visibility and bead control with solid-wire MIG, while a slight drag may change bead shape and fusion in some setups. Keep the arc aimed into the joint and follow the wire and procedure guidance.
Why does my MIG weld look good but have poor penetration?
The arc may be melting filler metal faster than it melts the base metal Common causes include excessive travel speed a long arc incorrect gun angle poor fit-up.
What voltage and wire speed should I use?
Use the machine or wire manufacturer’s recommended starting range for the material, thickness, wire, gas, and transfer mode. Then make a test weld and adjust in small increments. There is no single voltage and wire speed that provides good penetration for every MIG joint.
Can a larger wire produce deeper penetration?
A larger wire can carry more current and deposit more metal, but it also demands an appropriate machine output, joint thickness, gas, and transfer mode. On thin material, it may increase burn-through risk and reduce control. Choose wire diameter for the application rather than selecting the largest available wire.
How does stickout affect penetration?
Longer stickout increases electrical resistance in the wire before it reaches the arc, which can alter current, deposition, and arc behavior. It also moves the arc farther from the joint. An inconsistent or excessive stickout commonly reduces control and can contribute to shallow or uneven fusion.
Can I weld over rust, paint, or mill scale?
Do not rely on the arc to burn through contamination. Rust, paint, oil, mill scale, moisture, and coatings can cause porosity, inclusions, unstable penetration, and hazardous fumes. Clean the joint and identify potentially hazardous coatings before welding.
Conclusion
Learning how to get good penetration MIG welding means balancing heat filler deposition joint access and movement Start with clean correctly fitted metal match wire gas and polarity.
Good penetration has limits. Do not chase maximum heat on thin, coated, heat-sensitive, or safety-critical work, and use the applicable qualified procedure when the weld carries serious consequences. A controlled test coupon is usually the fastest way to turn a promising setup into a repeatable one.
Clean and fit a test joint from the same material, set the machine within the wire manufacturer’s range, make one controlled pass, and inspect the cross-section before welding the final part.