How to Set Wire Tension on MIG Welder: Step-by-Step Instructions
Set MIG wire tension just tight enough to feed smoothly, then verify it with a controlled slipping test at the drive rolls.
Wire tension usually needs attention when the problem appears the wire slips bird-nests burns back to the contact tip or feeds in uneven bursts The correct setting is.
Before adjusting identify the wire size and type confirm that the drive-roll groove matches it and make sure the spool can unwind without unusual drag This guide explains. This guide examines “how to set wire tension on mig welder” and explains the details that matter in practice.
- ✓Use the lowest tension that feeds wire consistently without slipping during the drive-roll test.
- ✓Wire tension is different from voltage, wire-feed speed, and spool-brake tension.
- ✓Excessive pressure can damage wire and components; insufficient pressure causes stalls and erratic arcs.
- ✓Aluminum and other soft wires need special setup, often including different rolls, liners, and a shorter feeding path.
What wire tension does in a MIG welder
Wire tension is the pressure applied by the drive-roll assembly to the welding wire A tension arm or adjustment knob moves one roll toward the powered roll creating.
That distinction matters because the tension knob is not an arc-setting control It does not directly change amperage voltage penetration bead width or shielding gas Those results may.
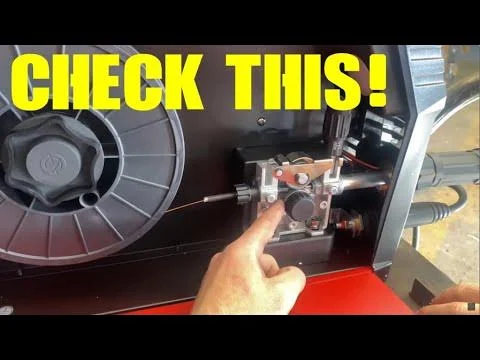
- Correct goal: Maintain a steady feed while protecting the wire from crushing and avoiding unnecessary pressure.
- Different adjustment: Spool-brake tension controls spool rotation; drive-roll tension controls grip on the wire.
- System-dependent: A setting that works with short, straight gun leads may fail when the lead is sharply bent or obstructed.
Drive-roll tension versus spool tension
The spool hub normally has a brake or drag adjustment It should prevent the spool from continuing to spin after the motor stops but it must not make.
With the gun trigger released, gently turn the spool by hand. It should rotate with controlled resistance. If it freewheels dramatically, the spool may overrun and create loose loops.
If it requires excessive force, correct the hub drag before diagnosing drive-roll pressure.
Why the lowest effective pressure is best
Too much pressure can create a wire-shaped groove in solid wire flatten the wire or force metal particles into the rolls Flattened wire may drag in the liner.
Too little pressure produces a different pattern. The rolls turn, but the wire stops or hesitates when resistance rises. The motor may make a clicking or chattering sound, and the arc may repeatedly extinguish because the electrode is no longer arriving at a consistent rate.
Safety and setup before adjusting tension
Adjustment is simple but the wire is driven by a motor and can move unexpectedly Keep the gun pointed away from your hands face clothing and other people.
For a basic tension adjustment turn off the welder and disconnect input power when opening the side cover or changing rolls If you need to test feeding with.
- Protective equipment: Wear safety glasses or a welding helmet as appropriate, gloves, and clothing that covers exposed skin.
- Safe direction: Point the gun toward a clear, nonflammable area and keep the tip away from metal that could start an arc.
- Power isolation: Disconnect power before servicing rolls, guides, liners, or internal drive components.
- Unexpected motion: Do not hold the wire or touch the rolls while the feeder can run.
Check the feeding system first
Before touching the adjustment knob inspect the wire path Confirm that the spool is installed in the correct direction the retaining hardware is secure and the wire is.
Cut off any bent or rusty section at the spool entrance. A kink can pass through the rolls and become a bird’s nest near the inlet guide. Make sure the gun cable is not tightly coiled, sharply folded, or crushed beneath the machine.
| Check | What a problem can cause | Correction |
|---|---|---|
| Drive-roll groove | Slipping, flattening, or erratic feeding | Install the correct roll or groove |
| Inlet guide | Wire scraping or catching before the rolls | Align, clean, or replace it |
| Contact tip | Burnback, drag, or intermittent feed | Replace a worn, blocked, or incorrect tip |
| Gun lead | Feed changes when the cable bends | Straighten the lead and inspect the liner |
| Spool brake | Overrun or excessive motor load | Set moderate drag, not maximum resistance |
How to set wire tension on mig welder equipment
The exact hardware varies among compact hobby machines industrial feeders and spool-gun systems but the adjustment principle is consistent Start with low pressure increase it gradually and test.
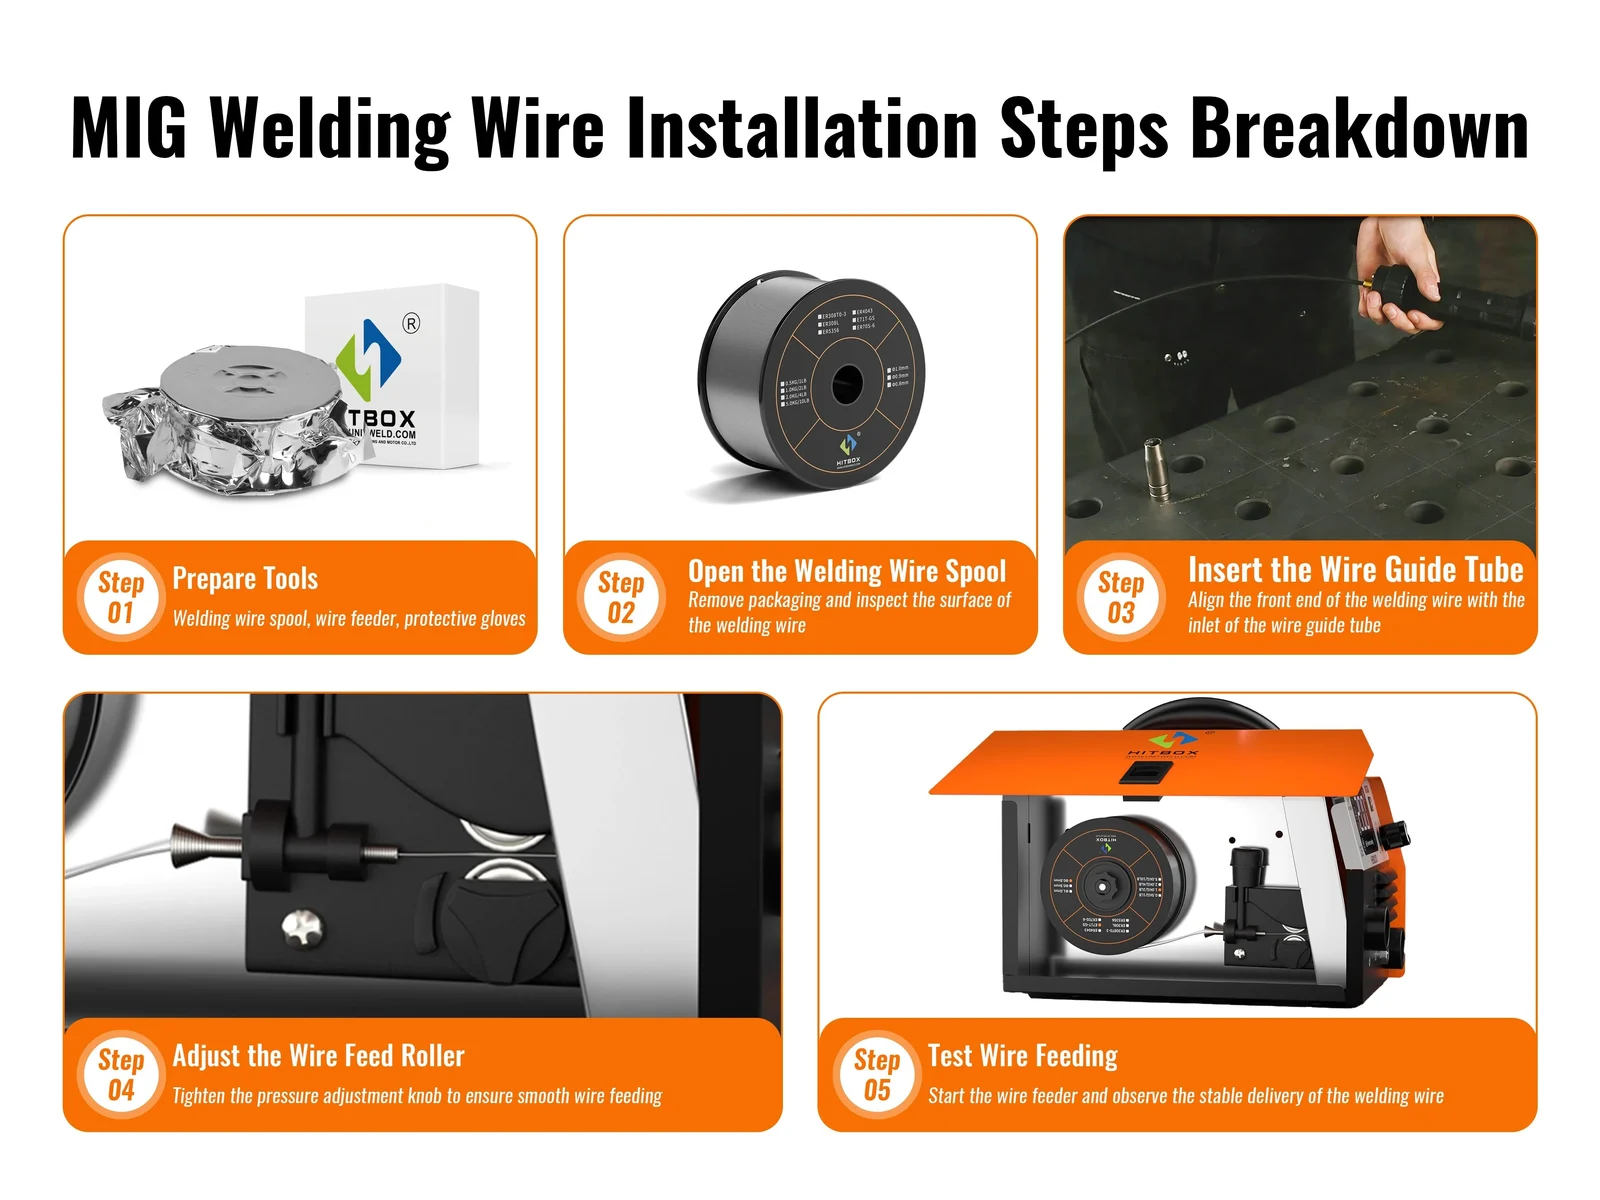
Remove the contact tip for the first check when the machine design allows it This removes tip friction from the test and makes it easier to determine whether.
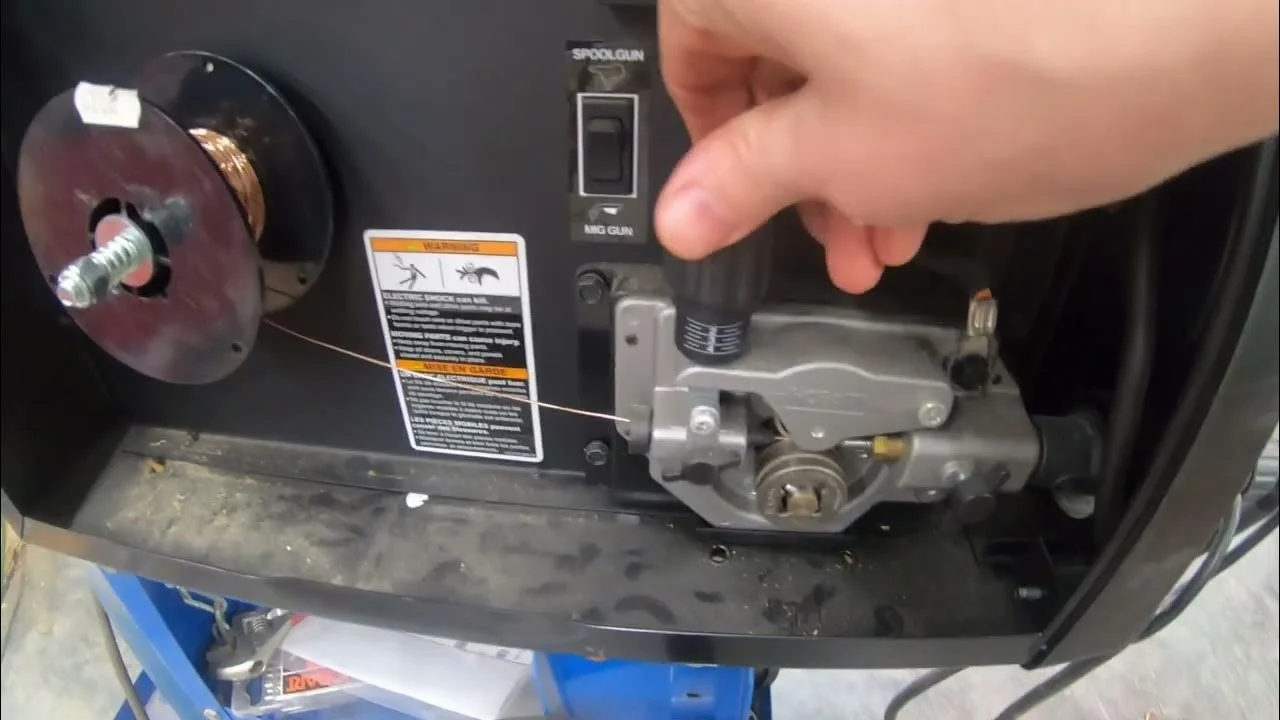
- Start low: Back off the tension until the upper roll barely grips or the wire can slip easily.
- Increase gradually: Add small adjustments while using the machine’s jog or inch control.
- Test deliberately: Use a controlled resistance test rather than judging the knob by its position.
- Recheck everything: Reinstall the tip, straighten the gun lead, and verify feeding under normal conditions.
Step 1: Prepare the machine and wire
- Turn off the welder before opening the feeder compartment or changing the drive-roll setup.
- Install the correct spool and confirm that the wire feeds from the top or bottom as shown by the machine’s wire path.
- Cut the wire cleanly, remove sharp bends, and guide it through the inlet guide and drive-roll groove.
- Release the pressure arm if necessary, then feed the wire into the gun liner until it reaches the contact-tip area.
- Keep the gun lead as straight as practical during the initial setup.
Do not force wire through a liner that feels blocked. A sharp bend, contamination, or a damaged liner can create enough resistance to mimic low tension. If the wire will not pass with modest pressure, stop and inspect the path instead of tightening the rolls.
Step 2: Set a light starting pressure
Close the pressure arm and turn the tension knob until the upper roll contacts the wire. Add a small amount of pressure beyond contact. The wire should be held firmly enough that the rolls can begin feeding it, but the adjustment should still feel relatively light.
The knob’s number, scale, or position is not a universal measurement. Some feeders use a spring-loaded arm, while others use a hinged pressure lever with a numbered dial. The same number can produce different results with different wire diameters, roll shapes, and spring conditions.
Step 3: Perform the controlled slip test
Set the machine for a low-risk feed test and remove the contact tip if recommended by the manufacturer Hold the gun so the wire path remains straight Start. This distinction matters when answering “how to set wire tension on mig welder”.
Increase tension in small increments until the wire feeds without stopping during normal resistance A useful target is for the drive rolls to slip before the wire becomes.
- Too loose: The rolls spin while the wire pauses, and increasing resistance stops feeding immediately.
- Near correct: The wire advances steadily and the rolls grip it without visible deformation.
- Too tight: The wire is flattened, deeply marked, or difficult to remove, or the motor strains without slipping.
Step 4: Confirm feeding with the gun assembled
Install a clean correctly sized contact tip and nozzle Feed a short length of wire through the complete gun assembly Then place the cable in the position you.
Trim the wire at the tip and check that it exits smoothly If the wire scrapes pulses or stops at the contact tip inspect the tip for spatter.
Step 5: Make a test weld
Set voltage and wire-feed speed for the wire diameter, material, shielding gas, and thickness. Make a short test weld on clean scrap. Listen for a stable arc and watch whether the wire feeds consistently when the gun moves through the same positions used on the workpiece.
Do not compensate for a poor weld by immediately changing tension Porosity excessive spatter poor penetration and an unstable arc can result from incorrect electrical settings contamination stickout.
Choosing tension for different MIG and flux-cored wires
Wire material and diameter strongly influence the best pressure Harder solid steel wire generally tolerates more drive-roll pressure than soft aluminum wire but the correct setting still depends.
Flux-cored wire may be self-shielded or gas-shielded, and the required polarity and drive-roll style depend on the specific wire. Follow the wire and machine instructions for polarity, roll type, and groove selection. Tension alone cannot correct a wrong roll or polarity setting.
- Solid steel: Use the designated V-groove or compatible roll and enough pressure to prevent slip without flattening the wire.
- Flux-cored wire: Use a roll designed for the wire and avoid crushing the tubular electrode.
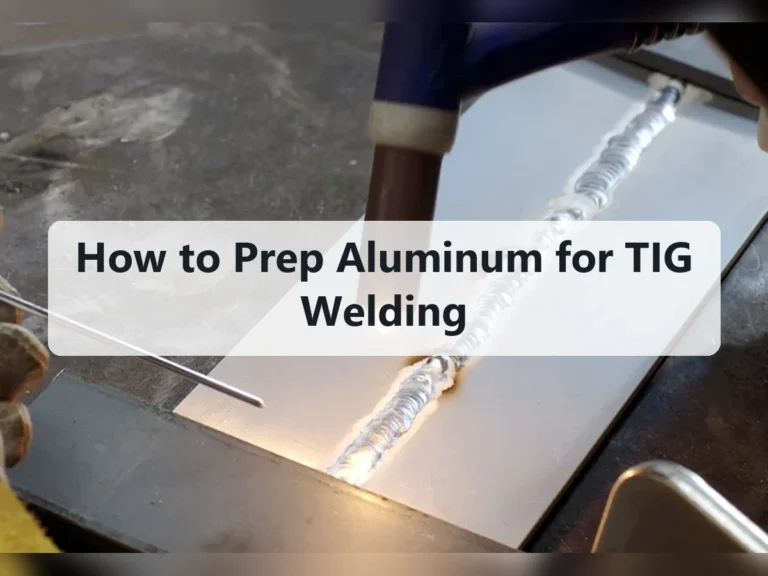
- Aluminum: Use low pressure, a suitable U-groove, and the shortest practical, smoothest feed path.
- Small diameters: Inspect guides and tip fit carefully because minor restrictions can create major feeding problems.
Aluminum wire needs a gentler setup
Aluminum is soft and can buckle between the drive rolls and the gun liner if pressure is excessive A spool gun or push-pull system often reduces the distance.
If aluminum wire bird-nests immediately after the drive rolls do not simply tighten the knob Excess pressure may make the wire deform faster Look for a gap between.
Flux-cored wire and roll selection
Some flux-cored wires are more tolerant of drive pressure than others but tubular wire can still be damaged by a wrong groove or excessive force A knurled roll.
Clean loose particles from knurled rolls periodically. They can improve grip, but they may also shed debris into the wire path. If the wire becomes deeply marked, reduce pressure and verify that the roll is correct before continuing.
Diagnosing feeding problems after adjustment
When adjusting wire tension does not solve the problem, treat the welder as a complete feeding system. The wire must travel from the spool through the rolls, guides, liner, contact tip, and nozzle. Resistance at any point can look like insufficient roll pressure.
The location of the failure provides a useful clue A bird s nest near the drive rolls usually points to a restriction or poor alignment after the rolls.
- Bird-nesting: Stop immediately, cut the wire, and remove the tangled section before resetting tension.
- Wire flattening: Reduce pressure and inspect groove size, roll wear, and wire condition.
- Motor clicking: Check for excessive drag, a blocked tip, a bent liner, or insufficient grip.
- Feed changes with cable position: Straighten the lead and inspect or replace the liner.
Bird-nesting near the feeder
Bird-nesting occurs when the wire stops after the drive rolls while the rolls continue pushing Common causes include a blocked contact tip a sharp gun-lead bend a liner.
Turn off the machine before clearing the nest. Remove damaged wire, inspect the inlet guide, and check the liner entrance. After rethreading, perform the slip test again with moderate pressure rather than returning to the previous knob position.
Wire slips but the rolls look tight
Look for contamination, a worn roll, the wrong groove, or a pressure arm that is not closing fully. A roll can appear tight while its groove is too large for the wire. Oil, anti-spatter residue, and metal dust can also reduce grip.
Keep these limitations in mind when considering “how to set wire tension on mig welder”.
Clean the rolls according to the equipment instructions. Do not use a file to reshape a precision groove. Replace a roll that is worn, cracked, or damaged, and confirm that the tension spring and arm move freely.
Wire feeds, but the arc remains unstable
If the wire advances smoothly yet the arc is erratic, inspect the contact tip, ground connection, polarity, electrical settings, stickout, and shielding gas. A loose tip or poor work connection can create symptoms that resemble inconsistent feeding.
For gas-shielded welding, check the regulator, hose, nozzle, and gas flow for leaks or obstruction. Wind can disturb shielding even when the wire-feed system is working correctly. For self-shielded flux-cored wire, verify polarity and technique according to the wire instructions.
Common mistakes when setting drive-roll pressure
Most tension problems come from using the knob as a universal fix A user sees burnback porosity or a rough bead and increases pressure even though the real.
Another mistake is copying a setting from a different machine. Tension scales are not standardized, and machines differ in spring force, roll diameter, motor torque, and wire path length. Use the slip test and the wire’s physical condition rather than a number alone.
- Maximum by default: Full tension is not a reliable starting point and may crush the wire.
- Ignoring the groove: Correct pressure cannot compensate for a roll made for another diameter or wire type.
- Testing only straight: A feed path may fail when the gun lead is bent during actual welding.
- Changing many controls: Adjusting tension, voltage, speed, and gas together makes the original problem difficult to identify.
Confusing wire tension with wire-feed speed
Wire-feed speed determines how quickly electrode enters the arc and strongly affects welding current in many MIG processes Drive-roll tension only determines whether the selected speed can be.
A feeder can deliver wire smoothly at the wrong speed, and it can fail to deliver the correct speed when tension or mechanical resistance is poor. Diagnose mechanical feeding first, then tune the welding settings.
Overlooking contact-tip fit
The contact tip must match the wire diameter and should not be excessively worn. A tip that is too tight can drag the wire; one that is badly worn can allow unstable electrical contact. Spatter inside the tip can create intermittent stops, especially after a burnback.
Replacing a low-cost consumable is often more effective than increasing drive pressure. Install the tip correctly, maintain appropriate stickout, and check that the nozzle is clear enough for stable gas coverage.
Maintenance that keeps tension settings reliable
A good setting can become unreliable as consumables wear and debris builds up Inspect the drive rolls guides liner tip and spool hub at regular intervals based on.
Keep the wire covered when it is not in use. Rust or surface contamination increases liner drag and can damage the contact tip. Store wire in a dry location and discard sections that are heavily corroded, kinked, or contaminated.
- Before a new spool: Verify the wire diameter, roll groove, polarity, and hub direction.
- During troubleshooting: Inspect the tip and liner before adding substantial tension.
- After clearing a nest: Check alignment and replace wire that has been sharply bent.
- After servicing: Repeat the slip test and make a short weld on scrap.
When to replace the liner
Replace or service the liner when wire drag remains after the cable is straightened and the tip is known to be correct A liner may be kinked contaminated.
Install the liner according to the gun and feeder instructions. Poor seating can leave a gap where the wire catches between the liner and guide. After installation, trim and secure the liner properly, then verify smooth manual wire passage before applying drive pressure.
When professional service is appropriate
Stop using the machine if the drive motor runs continuously, the pressure arm is damaged, wiring becomes hot, or the feeder behaves unpredictably after basic checks. Internal electrical faults and motor problems require service beyond a tension adjustment.
Also seek qualified repair when a machine repeatedly burns back, trips protection, or feeds inconsistently with a clean path, correct rolls, a new tip, and moderate tension. Continuing to weld through a mechanical or electrical fault can damage the feeder and compromise weld quality.
FAQ: how to set wire tension on mig welder
How tight should MIG wire tension be?
Set it just tight enough for steady feeding under normal resistance. During a controlled slip test, the rolls should grip the wire reliably without flattening it, deeply marking it, or forcing the motor against a blocked path.
Should the drive rolls slip during a tension test?
They should slip if resistance becomes excessive, because that provides a safety margin for a blocked tip or liner. They should not slip during normal feeding with a correctly assembled, reasonably straight gun lead.
Why does my MIG wire bird-nest even when tension is tight?
A bird’s nest can result from a blocked contact tip, incorrect roll groove, poor guide alignment, a damaged liner, excessive cable bending, or wire that is buckling after the rolls. Increasing tension may worsen the tangle, so inspect the complete path first.
Can too much tension cause burnback?
Excessive tension does not directly set burnback, but it can deform the wire or overload feeding. If the wire stops or feeds inconsistently, the arc may continue briefly and melt the electrode back into the tip. Check feed stability, tip condition, wire-feed speed, and stickout.
How do I set tension for aluminum MIG wire?
Use the lowest effective pressure and the correct soft-wire roll, liner, and guide setup. Keep the gun lead straight, avoid sharp bends, and consider a spool gun or push-pull arrangement when the standard feed path allows the wire to buckle.
Does wire diameter change the tension setting?
Yes. Different diameters and materials need different roll grooves and may respond differently to pressure. The correct setting depends on the wire, roll, spring mechanism, and feeding path, so use a controlled slip test rather than a universal knob position.
Why does wire feed correctly with the gun straight but stop when it bends?
The bend increases liner friction or exposes a restriction in the gun cable. Straighten the lead, inspect the liner and contact tip, and check for crushed or sharply kinked sections. Do not solve a position-sensitive restriction by simply applying more roll pressure.
Conclusion
The best way to set wire tension on mig welder equipment is to begin with light pressure confirm the correct wire path and drive-roll groove and increase tension.
Remember that tension cannot correct a blocked tip, damaged liner, wrong polarity, incorrect roll, excessive spool drag, or unsuitable welding settings. Work safely, test on scrap, and stop to inspect the system whenever wire deforms or bird-nesting returns.
Back off the tension, inspect the complete wire path, then raise pressure gradually until steady feeding is achieved without flattening the wire.
The answer to “how to set wire tension on mig welder” should be applied with these conditions and limitations in mind.