Welding Basics: Complete A to Z Guide of Beginners
Welding joins metal by using heat, pressure, or both, and beginners can learn the basics with the right process, safe equipment, clean metal, and steady practice. For a first project, many people start with MIG welding because feeding wire is straightforward, but stick and TIG may suit your metal, workspace, and goals better.
Are you staring at a welder’s knobs and wondering which one matters, or trying to figure out why your first bead looks more like a row of cold gravel? Those are normal starting points, and neither means you’re bad at this.
I once rushed into a repair without cleaning the metal well enough, then spent far too long chasing a bead that kept spitting and sitting on top. A wire brush would’ve saved me a frustrating afternoon; that’s a common mistake, not a dumb one.
I wrote this for anyone starting from scratch, whether you’re learning in a garage, taking a class, or trying to make a simple repair without guessing your way through it. The aim is to help you choose a process, prepare safely, and understand what a weld is telling you.
Getting the basics right can mean cleaner joints, less wasted filler, and fewer frustrating restarts. Skip preparation or safety, and you can end up with weak welds, damaged equipment, or a serious burn.
Plan on about 14 minutes, then you’ll have a practical starting point for your next practice session. You’ll come away knowing how to:
- Pick a welding process for your project and work area.
- Set up basic gear and prepare metal before striking an arc.
- Read common weld problems and make sensible adjustments.
- Build a safe, repeatable practice routine.
Welding Basics: How to Start Safely and Make a Sound Weld
Welding Basics comes down to choosing a suitable process, preparing the joint, setting up the machine for the metal, and controlling the heat and filler. For a small steel project, that might mean clamping clean pieces together, using a MIG welder with suitable wire and shielding gas, and practicing short beads on scrap of the same thickness.
A weld forms when the edges of metal melt together, sometimes with added filler metal, which is material fed into the joint to strengthen or fill it. The heat source can be an electrical arc or a flame, depending on the process. In common shop welding, the arc creates intense heat between the electrode and workpiece.
People use “weld” to mean both the joining process and the finished joint. A bead that looks neat isn’t automatically strong; the metal underneath must fuse properly, and the joint must suit the load it’ll carry.
If you want the underlying picture of the arc, electrode, and settings before touching a machine, how welding works is a useful next step. The short version is that a welder controls an energy source, while your travel speed, angle, and fit-up affect how that energy enters the metal.
Choose the process that fits your work
The three processes most beginners run into are MIG, stick, and TIG. Each can make sound welds, but they ask for different equipment, technique, and working conditions.
- MIG welding, formally gas metal arc welding (GMAW), feeds a wire electrode through a gun while shielding gas protects the hot weld area. It’s a common choice for garage work and thin-to-medium steel because feeding wire is relatively easy to learn.
- Stick welding, also called shielded metal arc welding (SMAW), uses a flux-coated electrode held in a stinger. The coating forms protective gas and slag as the rod melts, so stick welding can work outdoors where a breeze would disturb shielding gas.
- TIG welding, or gas tungsten arc welding (GTAW), uses a nonconsumable tungsten electrode and usually a separate filler rod. TIG offers careful control and clean-looking work, but it takes coordination and patience.
- Flux-cored arc welding (FCAW) feeds tubular wire containing flux. Some flux-cored wire uses shielding gas, while self-shielded wire doesn’t need a gas cylinder.
The best starter machine depends on what you’ll weld, where you’ll weld it, and what your power supply can support. A small MIG setup can be friendly for clean, thin steel in a sheltered shop; a stick machine may make more sense for outdoor repair work.
| Process | Common strengths | Trade-offs | Good starting use |
|---|---|---|---|
| MIG (GMAW) | Easy wire feeding and steady production | Gas can be disturbed by wind; machine setup matters | Garage projects and clean steel |
| Stick (SMAW) | Portable setup and useful outdoors | More cleanup; starting and holding an arc takes practice | Repairs and heavier steel |
| TIG (GTAW) | Precise control and a clean finished bead | Slower, more coordination, often higher setup demands | Thin material and careful finish work |
| Flux-cored (FCAW) | Useful wire process; some wire works without gas | More smoke and slag; wire type must match the machine | Outdoor or general fabrication |
That table is a starting point, not a promise that one process always wins. Read the welder’s manual and the wire or electrode packaging, since machine capabilities and material recommendations vary.
Learn what controls the weld
A welding machine setting isn’t a magic quality dial. Your result comes from the match between the process, material thickness, filler, joint design, and technique.
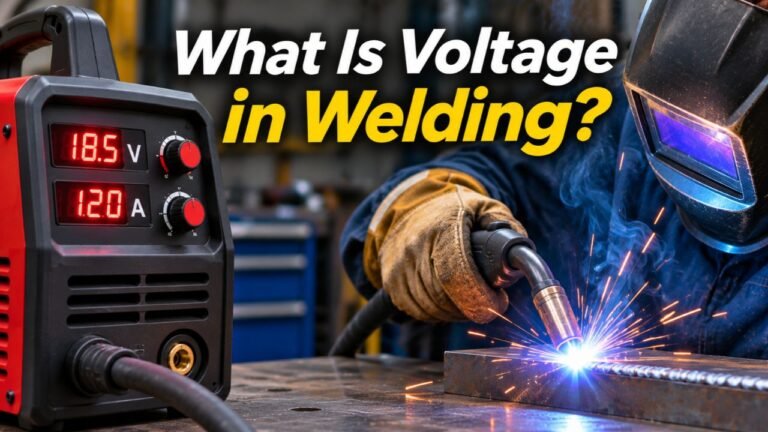
With MIG, voltage affects arc length and heat characteristics, while wire feed speed controls how quickly electrode wire enters the arc and is closely tied to current. Many machines provide a chart for the wire type, gas, and material thickness. Use it as a starting point, then test on scrap that matches the real work.
Stick welding uses a current setting, usually measured in amps. The suitable range depends on the electrode diameter, type, position, and workpiece. The electrode package and machine manual are better guides than a number copied from a random project.
TIG settings can involve current, polarity, gas flow, and sometimes pulse controls. Because the setup changes with metal type and thickness, a beginner should follow the machine and tungsten guidance rather than turning knobs at random.
Before making a weld, check that:
- The machine supports the process and material you’re using.
- Filler type and size match the job.
- Polarity matches the process and consumable instructions.
- The work clamp contacts clean metal.
- Your settings begin within the machine maker’s recommended range.
Want to know why a fillet weld needs different setup choices than a groove weld? The answer starts with the joint shape and the way the parts meet, not with a favorite machine setting.
Prepare the joint before striking an arc
Joint preparation means getting the metal and fit-up ready so the weld can fuse the intended area. Remove paint, rust, oil, moisture, and coatings near the joint, then clamp the parts so they can’t shift as they heat.
A work clamp, often casually called a ground clamp, completes the welding circuit through the workpiece. Attach it to clean, bare metal close enough to the joint for a reliable electrical path. A loose clamp or rusty contact can cause an unstable arc and confusing symptoms.
Set a small gap only when the joint design or welding procedure calls for one. Pieces that don’t fit well can lead to excessive filler use, burn-through, or a joint that’s hard to weld consistently. For a simple beginner project, accurate cuts and tight, even contact save a lot of trouble.
Surface coatings deserve extra caution. Galvanized metal can release harmful fumes when heated, and painted or contaminated material can produce hazardous smoke. Don’t weld unknown coatings; identify them, remove them safely when appropriate, or ask a qualified professional.
Your work area matters just as much as your settings. Secure the workpiece, clear away flammable clutter, arrange cables so you won’t trip, and make sure you can reach the machine controls without leaning over the weld.
Match the joint to the load
A welding joint describes how two or more pieces meet; a weld type describes how the weld metal joins those pieces. Common joints include butt, lap, tee, corner, and edge joints. Common weld types include fillet and groove welds.
A butt joint joins pieces edge to edge, while a lap joint places one piece over another. A tee joint meets at roughly a right angle, and a fillet weld often joins parts at inside corners. Groove welds fill a prepared space between edges and can be used where deeper fusion is needed.
The design must suit the load, material, and application. A light bracket holding a garden hose isn’t the same job as a trailer hitch or structural support. Don’t guess at a safety-critical joint; use a qualified welding professional or an approved design for the application.
Weld position describes how the joint sits while you weld. Flat welding is generally the easiest position for a beginner because the molten pool is easier to control. Horizontal, vertical, and overhead work each add difficulty and may need different settings and technique.
A clear overview of types of welding joints can help you tell joint shape, weld type, and position apart. If a drawing uses a reference line, arrow, or small triangle, the welding symbols chart topic can help decode what the print is asking for.
Make practice time count
Short, deliberate practice beats a long session spent changing everything at once. Use scrap that matches the project’s material and thickness, and change one variable at a time so you can tell what helped.
- Clamp scrap flat on a stable surface.
- Put on your protective gear and confirm the machine setup.
- Make several short beads at a steady pace.
- Let the metal cool, then inspect the bead and the back side when accessible.
- Adjust one setting or one movement habit, then try again.
For MIG, practice keeping a consistent stickout, the length of wire extending from the contact tip to the work, and a steady travel speed. Follow the machine maker’s advice on gun angle and distance, since the right technique varies by setup.
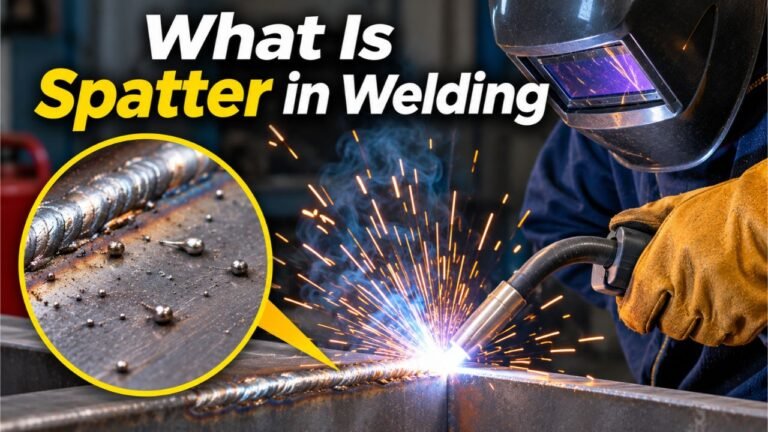
For stick, practice striking the arc and keeping a steady arc length. A long, wandering arc can create spatter and a poor bead. For TIG, practice moving the torch smoothly before adding filler; trying to coordinate everything at once can make the first attempts feel like patting your head while rubbing your stomach.
Don’t judge a practice bead by looks alone. Look for a consistent shape, even tie-in at the edges, and signs of fusion rather than a tall rope of metal sitting on the surface. A destructive bend or break test can teach you about fusion on scrap, but it doesn’t certify a real repair.
Pro Tip: Mark the settings and consumables used on each practice coupon. A note like “wire type, gas, material thickness, voltage, feed speed” gives you a useful baseline instead of a mystery pile of metal.
Set Up Your Gear, Work Area, and Safety Routine
A safe welding setup controls sparks, hot metal, fumes, ultraviolet light, and electrical hazards before the arc starts. Welding gear protects you, but it can’t make a bad work area safe, so clear and inspect the space first.
Welding produces intense visible light and ultraviolet and infrared radiation. The arc can injure eyes and skin, and sparks can ignite nearby materials. Personal protective equipment (PPE) includes a welding helmet with a suitable shade, safety glasses, flame-resistant clothing, welding gloves, and sturdy footwear.
A helmet protects the face and eyes during welding, but wear safety glasses underneath for grinding and chipping. Choose lens shade and helmet use according to the process, current, and manufacturer guidance. Never look at an active arc through ordinary sunglasses or a basic clear face shield.
Before you weld, remove combustible items from the spark area and protect anything that can’t be moved. Keep a suitable fire extinguisher accessible, and check the work area after welding for smoldering material. Sparks can travel farther than they seem to, especially through gaps or under benches.
Control fumes, fire, and electrical hazards
Welding fumes come from the base metal, filler, coatings, and process. Work with effective ventilation, and use fume extraction or respiratory protection when the hazard assessment calls for it. A fan that pushes smoke across your face isn’t a ventilation plan.
Don’t weld near flammable liquids, pressurized containers, or materials that can release toxic fumes. If the job involves a tank, drum, pipe, or vessel that held something, stop and get qualified guidance; residue can make the work deadly. Never weld a sealed or unknown container.
Dry gloves and clothing matter because welding uses electrical current. Inspect leads, the electrode holder or gun, torch, and connectors for damaged insulation or loose fittings. Keep the machine dry, avoid standing in water, and follow the manual for grounding, power, and maintenance.
Welding safety depends on the exact process, worksite, and materials, so a focused welding safety guide can help you build a more complete hazard check. If there’s a fire, fume, electrical, or confined-space concern you can’t control, don’t start the job.
Important Tip: If someone nearby might walk into the arc, use a welding screen or move the work. Other people can suffer arc-eye or skin exposure even when they aren’t holding the torch.
Gather the basic equipment
Your gear list depends on the process, but a beginner’s setup usually includes the machine, suitable consumables, PPE, and tools for holding and cleaning the work. Buy consumables that match the machine and job, rather than assuming every wire spool or electrode will work.
- Welding machine with the correct power supply and process capability.
- Correct wire, electrode, tungsten, filler rod, or shielding gas for the process.
- Helmet, safety glasses, gloves, and flame-resistant clothing.
- Clamps, pliers, wire brush, and a chipping hammer for processes that produce slag.
- Angle grinder with the correct wheel and guard, if grinding is needed.
- Fire extinguisher and a clear, stable work area.
An angle grinder can throw sparks and fragments, so keep its guard installed and use eye and face protection suited to the task. Unplug or isolate equipment before changing a wheel, and follow the grinder maker’s instructions. A grinder is handy for joint prep, but it doesn’t replace careful measuring and fitting.
Cylinder safety also matters if your process uses shielding gas. Keep cylinders secured upright, protect valves from impact, and use the correct regulator and fittings. Follow supplier and equipment instructions for moving, storing, and connecting cylinders.
Understand the drawing and the job
Plans may use welding symbols to show weld location, type, size, length, and other details. The symbol’s placement and the drawing conventions matter, so don’t read one shape in isolation. If you’re making a decorative garden stand, a simple sketch may be enough; a load-bearing assembly needs a clear design.
Some jobs use welding calculations to estimate weld size, material, quantities, or heat input. The correct calculation depends on the design code, material, joint, and loading, so a formula from a general beginner guide can’t replace an engineered design.
When the drawing or repair instructions aren’t clear, ask the designer, inspector, or qualified welder responsible for the work. It’s far cheaper to pause than to cut out a completed weld because the joint was in the wrong place.
Keep the work area comfortable
Welding can get tiring, and fatigue shows up as shaky hand movement, sloppy fit-up, or a forgotten safety check. Set the part at a height that lets you hold a stable position, and keep your cable and hose out of the path of your feet.
Take breaks before your posture falls apart. If you can’t see the joint clearly through the helmet, improve the lighting before welding and clean the lens. A comfortable position won’t fix a poor setup, but it makes steady travel much easier.
Read the Bead, Fix Common Problems, and Keep Improving
A weld bead is a record of the heat, filler, travel speed, and surface condition used to make it. If a weld looks wrong, inspect the work and setup before changing several machine settings at once.
Here are common symptoms and likely places to start:
| Symptom | Possible cause | First check |
|---|---|---|
| Excessive spatter | Poor settings, wrong wire or polarity, contamination, or poor technique | Confirm consumables, polarity, and machine guidance |
| Tall bead with weak edge tie-in | Travel too fast, poor angle, or insufficient heat for the setup | Check travel, angle, and settings against the machine chart |
| Burn-through on thin metal | Too much heat, slow travel, large gap, or thin material | Improve fit-up and adjust within the recommended range |
| Porosity, small holes in the weld | Contamination, poor gas coverage, drafts, or gas-flow issue | Clean the metal and check gas delivery and wind protection |
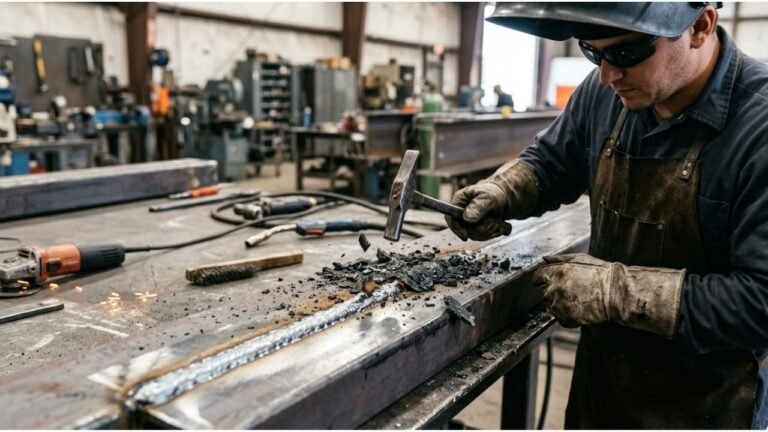
| Slag trapped in the weld | Poor cleaning between passes or technique | Remove slag fully before another pass |
| Cracks | Material, restraint, filler, procedure, or cooling issue | Stop and get qualified advice for structural or critical work |
These are clues, not a diagnosis. A bad gas connection, dirty surface, damaged liner, unsuitable consumable, and poor technique can create symptoms that look similar.
Porosity means gas pockets formed in the weld metal. Cleaning the joint and checking shielding coverage are sensible first checks for gas-shielded processes, but don’t assume that increasing gas flow always fixes the issue. Too much flow can create turbulence that draws air into the shielding area.
Lack of fusion happens when weld metal doesn’t properly bond to the base metal or previous pass. It can be hidden under a bead that looks tidy from above, which is why a pretty surface isn’t proof of a strong joint.
Undercut is a groove melted into the base metal beside the weld that wasn’t filled with enough weld metal. Poor travel or an unsuitable setup can contribute. If you find undercut or cracking in a load-bearing part, don’t simply cover it with another bead and hope for the best.
For a more complete explanation of causes and repair choices, common welding defects is the right topic to study. A repair plan depends on the metal, defect, and use of the part, so stop before grinding or rewelding a safety-critical assembly.
Adjust technique without chasing every knob
When a bead looks off, check the simple things first: clean metal, correct consumable, good connection, steady movement, and correct machine setup. Compare your setup with the maker’s chart, then change only one factor and test again on scrap.
If the arc sounds harsh, sputters, or keeps stopping, inspect wire feeding, contact tips, connections, and consumable compatibility. Don’t push through a machine problem; a worn tip or tangled wire can make good hand technique feel impossible.
For MIG, inconsistent wire feed can produce an erratic arc. Check for a kinked liner, a spool that doesn’t feed freely, or a contact tip that’s worn or plugged, following the manual before servicing anything.
For stick, a rod that sticks often means the arc is too short, the starting motion needs practice, or the setup needs review. Don’t keep striking against the work until you’ve checked the electrode condition and machine instructions.
If a machine is overheating, making unusual sounds, or showing an error, stop and follow its manual. Don’t open electrical equipment unless you’re qualified and the maker’s instructions permit the work.
I once blamed my hand movement for a lumpy practice bead, then found the work clamp sitting on a rusty patch. Cleaning a small contact area settled the arc right down, which reminded me to check the circuit before blaming the person holding the gun.
Know when the job needs a qualified welder
Practice projects and safety-critical repairs aren’t the same kind of work. A cracked lawn ornament is one thing; a vehicle frame, trailer hitch, lifting point, pressure vessel, or structural component can fail in a way that injures someone.
A qualified professional can evaluate material, joint design, process, inspection needs, and any rules that apply to the job. If you don’t know what alloy you’re working with, can’t verify the design, or can’t inspect the finished joint properly, bring in help.
Welding certifications and required procedures vary by job and jurisdiction. Don’t assume a personal practice weld is approved for commercial, structural, or code-governed work. Ask the project owner or relevant authority what qualifications and inspection steps are required.
Build a useful learning routine
Pick a single process and a few common joint shapes instead of jumping between every machine in the shop. Use consistent scrap, record your settings, and keep samples so you can compare what changed from one attempt to the next.
A simple practice routine can include:
- Read the machine and consumable instructions.
- Prep several pieces of similar scrap.
- Practice beads in the flat position.
- Make a basic lap or tee joint.
- Inspect the weld, note the result, and repeat with one adjustment.
When the flat position feels steady, move to another position with proper instruction and suitable scrap. Don’t treat vertical or overhead practice as a shortcut to proving skill; those positions change puddle control and can increase the chance of hot metal falling.
Write down what worked in plain language. “Arc stable, bead flat, edges joined” is more helpful to your future self than “looked fine.” Small notes turn practice from guesswork into learning.
Pro Tip: Keep one practice coupon from a successful setup. When a new attempt goes sideways, compare the machine settings, joint prep, and movement with that known-good sample.
FAQs About Welding Basics
What is the easiest type of welding for a beginner?
MIG welding is often the easiest process to start with because the machine feeds wire continuously, letting you focus on gun movement and travel speed. Stick welding can be a better fit outdoors, while TIG is usually harder at first because it takes more coordination. Your material and workspace still matter.
Can I weld at home in my garage?
Yes, if your garage has a safe work area, suitable electrical supply, ventilation, fire controls, and room to manage sparks and fumes. Keep people and pets away from the arc, clear flammable materials, and follow the welder’s instructions. Don’t weld unknown coatings, containers, or anything tied to a safety-critical repair.
Do I need gas for every welding process?
No. MIG welding usually uses shielding gas, while self-shielded flux-cored wire and stick electrodes provide their own shielding through flux. TIG commonly uses shielding gas.
Check the machine and consumable instructions, because gas type and setup depend on the exact wire, electrode, and material.
Why does my weld bead look like a stack of coins?
A stack-of-coins pattern often points to short, repeated movements rather than a smooth, steady travel path, especially with stick or TIG. It may be intentional in some techniques, but the appearance alone doesn’t prove strength. Check edge fusion and practice a controlled bead on matching scrap.
How can I tell if a weld is strong?
You can’t confirm a weld’s strength from appearance alone. A visual check can catch obvious cracks, missed areas, porosity, or poor tie-in, but hidden defects may remain. Structural and safety-critical welds need the right design, procedure, and inspection for their use.
Can I weld aluminum with a basic MIG welder?
Sometimes, but the machine must support the needed wire, drive setup, and shielding gas, and thin aluminum can be tricky because it heats and distorts quickly. Check the manufacturer’s specifications and consumable guidance. If your machine can’t feed aluminum wire reliably, another process or setup may be needed.
Make Your First Welds with a Plan
Good welding starts before the arc: choose a process that suits the work, read the machine instructions, clean and clamp the joint, and protect yourself and the work area. Then practice on scrap that matches the project instead of using a real repair as your first test piece.
In my view, steady preparation beats fancy gear for most beginners. A well-matched, basic setup and a careful routine teach more than a pile of accessories bought before you know what problem they solve.
Your clearest next step is to pick one small, noncritical project, gather the right material and consumables, and practice the same joint on scrap first. If the finished work will carry a serious load or protect someone, have a qualified welder handle it. Start slow, make notes, and let each bead tell you what to adjust next.